

The onboarding setup helps you configure essential settings for using the Delivery Date & Pickup Stellar app, allowing you to quickly prepare your store for accepting scheduled delivery and pickup orders. During onboarding, you can select fulfillment methods, set working days, establish a minimum delivery interval, and decide if customers can choose a delivery time, all while previewing how the scheduling widget will appear. You can skip onboarding if needed, as the app will apply default settings, but you can customize these later.
Ensure you select at least one fulfillment method to proceed, and remember that the minimum delivery interval determines how many days are needed for order preparation, while the cut-off time sets the daily deadline for orders. If you cannot guarantee specific delivery times, consider disabling that option to avoid overpromising on fulfillment capabilities.
These basic settings are designed to help you get your store ready as quickly as possible. During onboarding, you can select your fulfillment methods, configure your working days, set the minimum delivery interval and cut-off time, decide whether customers can choose a delivery time, and preview how the scheduling widget will appear.
Once you complete the onboarding, your store will be ready with the recommended basic configuration so you can start accepting scheduled delivery and pickup orders by enabling the app. If your business has additional requirements, you can customize these settings at any time from the Settings.
When onboarding comes
The onboarding screen opens automatically right after you install the app.
Configure each section based on your business requirements. The settings you configure during onboarding are automatically applied to your enabled fulfillment methods, including Shipping, Store Pickup, and Local Delivery, giving you a basic setup to start accepting scheduled orders quickly. Later, you can open the individual fulfillment method settings and customize them to match your business requirements.
If you choose to skip the onboarding setup, the app applies a basic configuration using the default onboarding settings, so you can still start using the app immediately. You can update or customize these settings anytime from the Settings page.
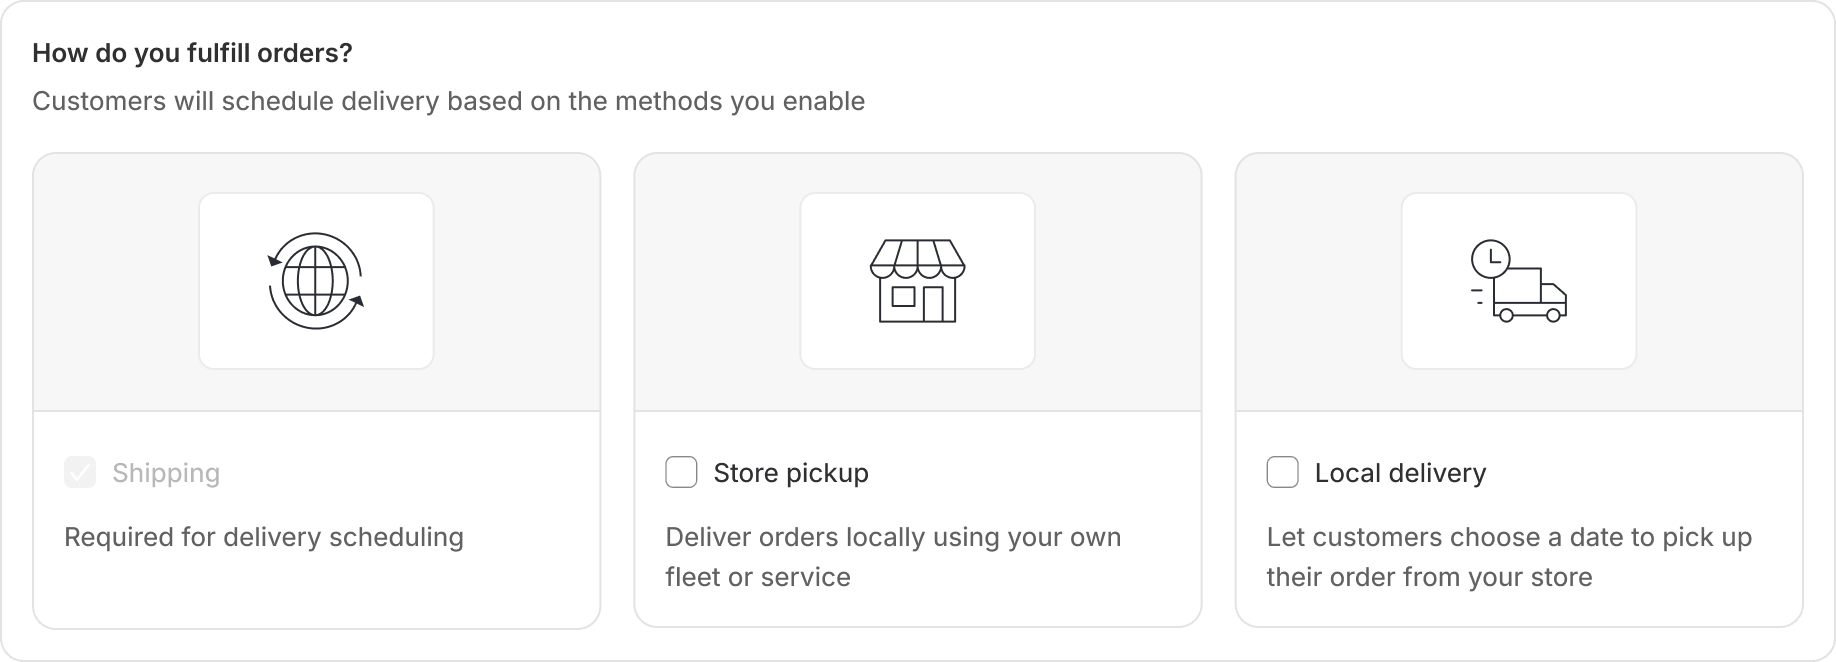
Fulfillment methods
Select the fulfillment method(s) based on how your business handles orders. You can choose one or multiple fulfillment methods, and only the selected options will be available for customers to choose from on the cart page.
During the process, the app uses the default placement (cart page) to help you get started quickly. After completing the setup, you can choose where to display these fulfillment methods. They can be shown on the product page, cart page, or checkout page, depending on your store’s requirements.
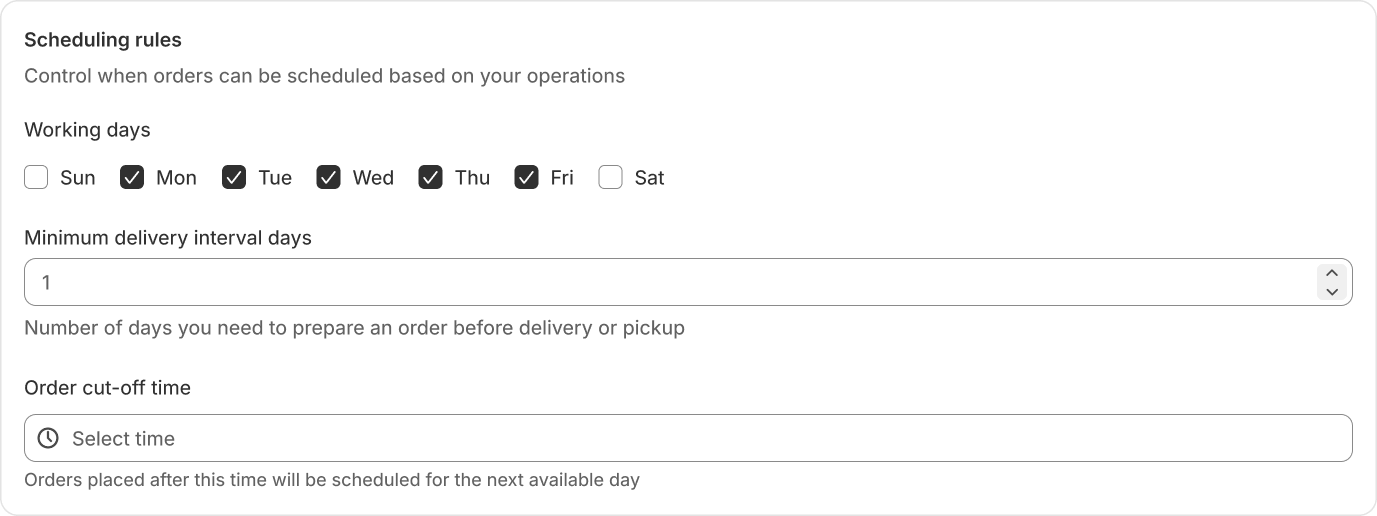
Scheduling rules
Configure the basic scheduling rules that control when customers can book a delivery or pickup. These settings help match your store’s daily operations so customers only see dates that you can fulfill. You can of course configure additional scheduling options later from the individual fulfillment method settings, as these are only the basic settings provided during onboarding.
Select the days of the week your store can fulfill orders. For example, if you are closed on Sunday and Saturday, leave those two days unchecked. Customers can only pick a date that falls on one of your selected working days.
Minimum delivery interval days Number
Set the minimum number of days required to prepare an order before it can be delivered or picked up. For example, if your store needs full day for order preparation, set 1 value there. Similarly, if you required 3 days to prepare an order, set the value to 3. Customers will then see delivery or pickup dates starting from 3 days after the order date, ensuring you have enough time to prepare the order.
Order cut-off time Dropdown
Set the daily cut-off time for receiving orders. If a customer places an order before the cut-off time, they can select the same-day delivery or pickup date (if available) or the earliest available date based on your schedule. If the order is placed after the cut-off time, the app automatically moves the available selection to the next day or the next available delivery or pickup date.
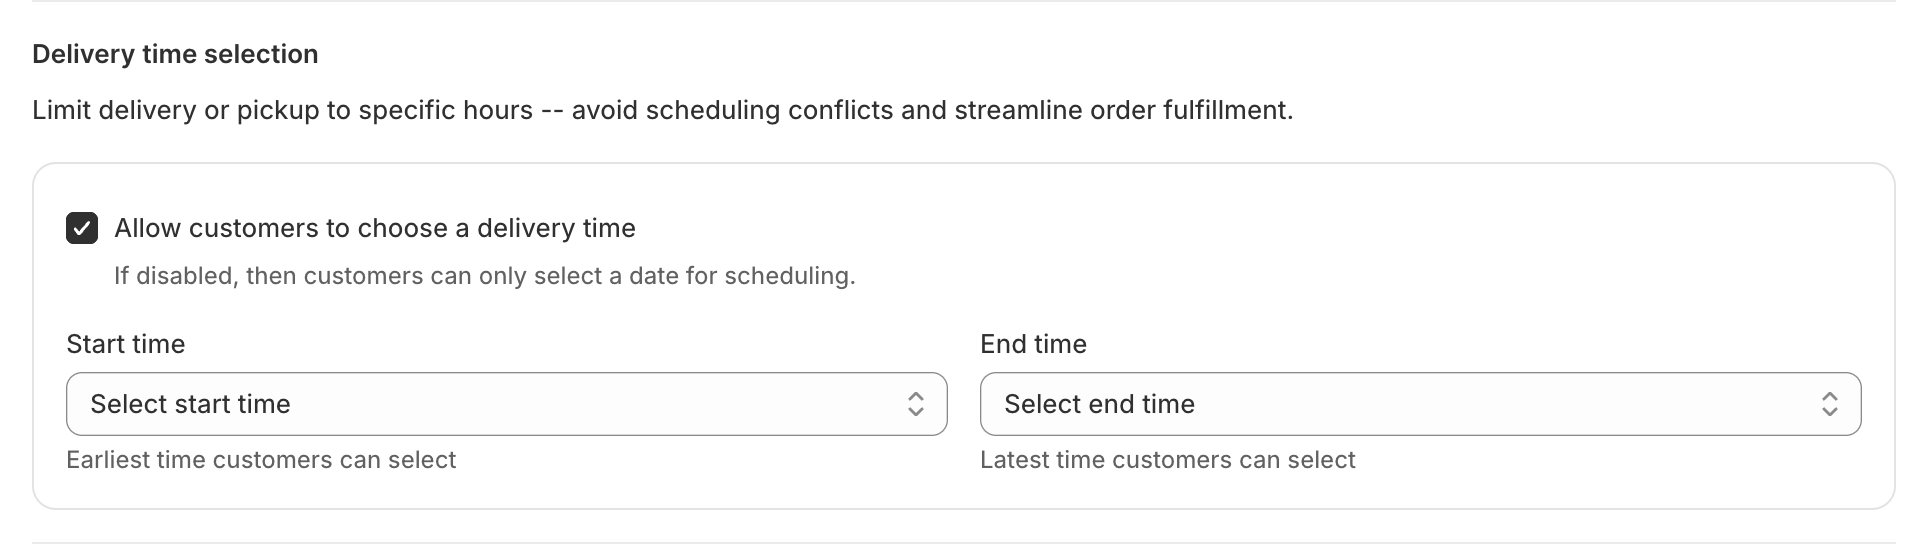
Delivery time selection
Allow customers to choose a preferred delivery or pickup time along with their selected date. Offering time selection helps customers receive or collect their orders at a time that best fits their schedule, resulting in a more convenient ordering experience.
During onboarding, the app uses the default time format to keep the setup simple. If your business requires additional time slot options or different time formats, you can configure them later from the individual fulfillment method settings.
Time window
Allow customers to select their preferred delivery or pickup time when placing an order. This gives customers more flexibility and helps schedule orders based on your business operations.
Start time
Set the time from which customers can start selecting delivery or pickup time slots. Choose a start time that matches the beginning of your business’s delivery or pickup hours.
End time
Set the last available time customers can choose for delivery or pickup. Choose an end time that matches the end of your business’s delivery or pickup hours.
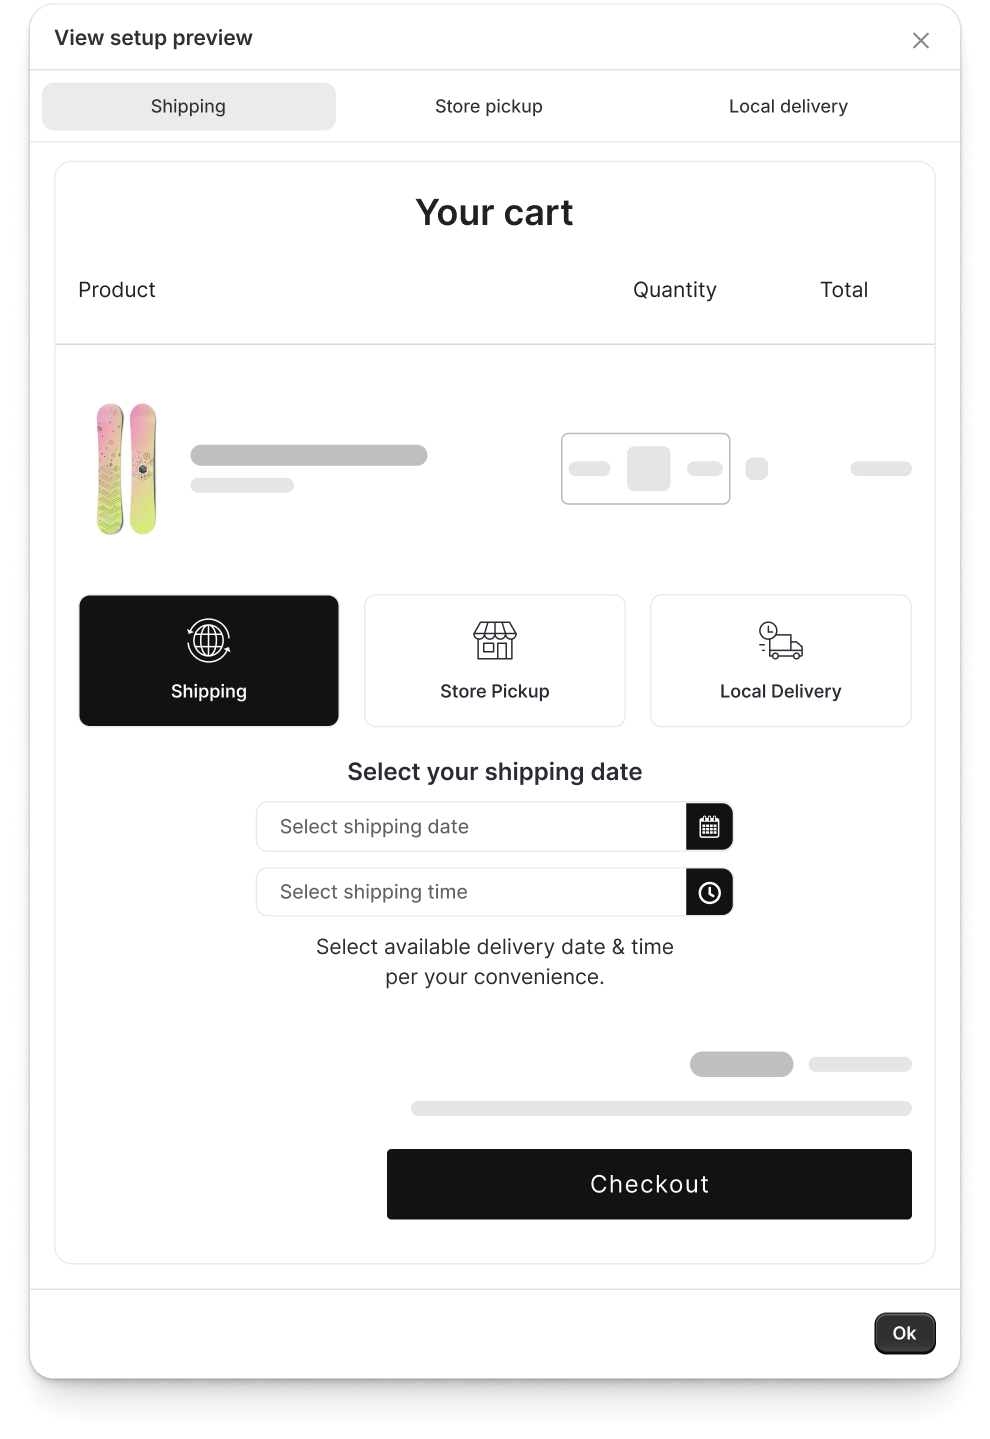
Preview scheduling
The preview displays a visual representation of how the delivery scheduling section may appear on the cart page based on the settings you configured during onboarding. It provides a glimpse of how the saved settings will appear on the cart page.
The preview is for visualization purposes only and may not exactly match how the scheduling section appears on your store. The final appearance maybe different what it’s showing here in the preview.
Finishing onboarding
Once you have reviewed everything, you get two options at the bottom of the screen.
Explore app
Click Explore app to open the app dashboard, where you can explore additional settings and features.
The app will start using the configuration you completed during onboarding. If you skipped any option or did not make changes, the app will use its default settings. You can update any of these settings later in the app.
Enable delivery scheduling
Clicking Enable delivery scheduling will redirect you to the Theme editor, where you need to enable the app embed to activate delivery scheduling on your storefront.
Once the app embed is enabled, the app starts using the settings you configured during onboarding (or the default settings if no changes were made). Place a test order to review how the delivery scheduling section appears on your storefront. If the scheduling behavior or available options do not match your business requirements, update the settings from the Settings page and test again.


