Set up time slots for Shipping, Pickup, and Local Delivery to let your customers choose a convenient time for receiving their orders. Time slots help you manage order flow efficiently and avoid delivery overlaps, especially during peak hours.
Using time slots provides flexibility to your customers while giving you better control over delivery planning.
The app offers four types of time slot settings:
1 Default
2 All Days
3 Day wise
4 Slot wise
Configure the time slots based on your business hours and operational needs directly from the app settings.
Default
In this time format, you can enable the predefined time slots without any time interval. Take a look at the below screenshot for a view of the Default time slot layout.
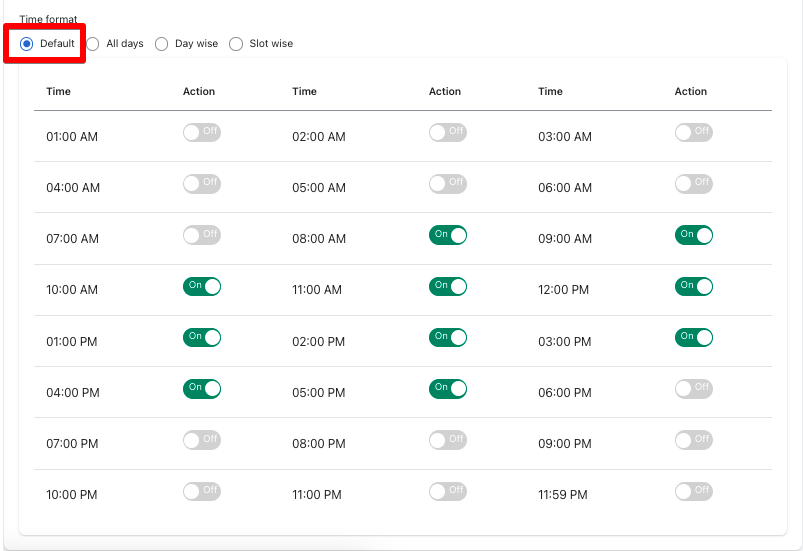
You can also edit the default time slots by turning them ON/OFF. Thus, you can set it as per your working time.
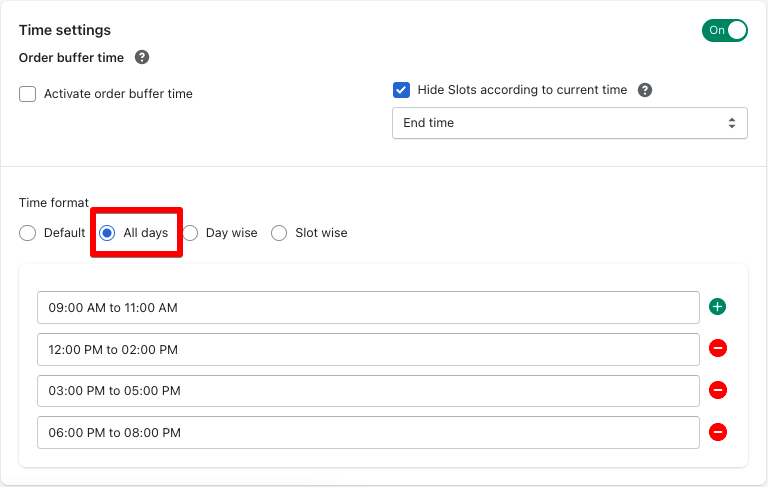
All Days
In this time format, you can set common time slots for each and every weekday. So time slots that have been added in this option will show the same on all weekdays selected from the delivery date calendar.
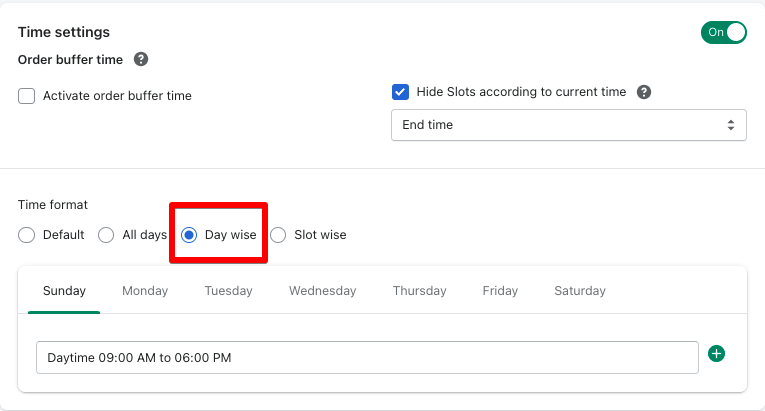
Day wise
In this time format, you can add your own time slots corresponding to the weekdays. So each weekday has its own delivery slots added by you.
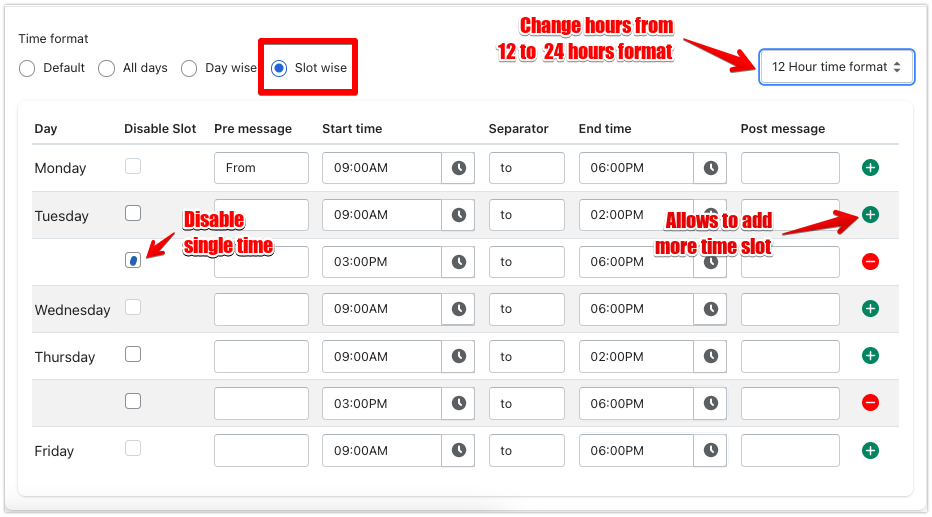
Slot wise
In that time format, you will have a start time and end time for each time interval and can add many as you want slots for a day. There are Day, Pre message, Start Time, Separator, End Time, and Post Message have their own definitions. You can also have 24 hours format.
- Day: Show a list of all weekdays
- Disable Slot: Check the checkbox to disable the particular time slot for that day. It will be clickable if you have more than one time slot for a day.
- Pre Message: This is an input field that allows entering a text that can be shown before the start time.
- Start Time: Add the start time of the time slot
- Separator: Would be a text or special character which can show a difference in between the time. Separators are like From, To, Space ( ), etc. whatever you like to add.
- End Time: This would be the end time of the time slot.
- Post Message Will be the same as Pre Message
- 24 hours: If you are looking to have 24 hours format then please select 24 hours from the dropdown.
- Order limit: You can also set the order limit based on time slots. This means you can define different order limits for different time slots.
For example, if you want to allow only 2 orders between 8:00 AM and 9:00 AM, then once 2 orders are received for that time slot, no more orders will be accepted for that period.
If you are looking to disable time settings for Shipping, Store Pickup, and Local Delivery, please read this guide.
→ All days and Day wise time slots are not compatible with the Order Buffer Time option. Because these time formats allow entering delivery time manually.
→ Each time formats are compatible with the Cut-off time option.
Please check the steps below to learn how to enable the time picker for shipping.
Step 1: Go to the Shopify admin and open the app.
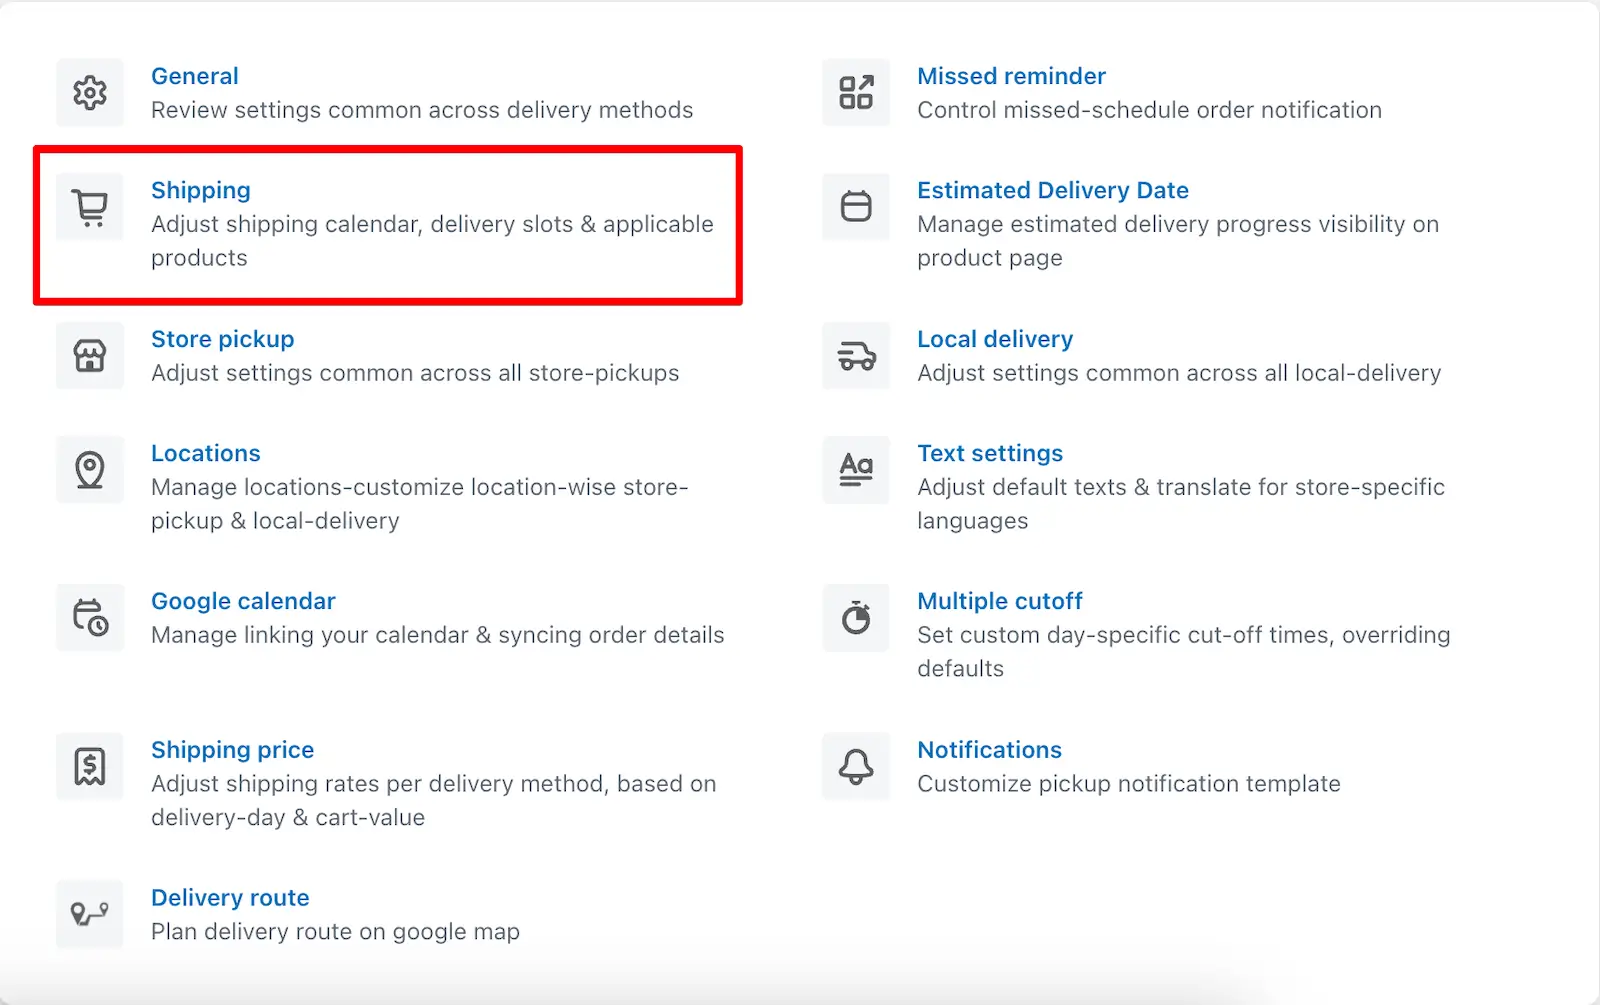
Step 2: Go to the app settings and open the Shipping feature.
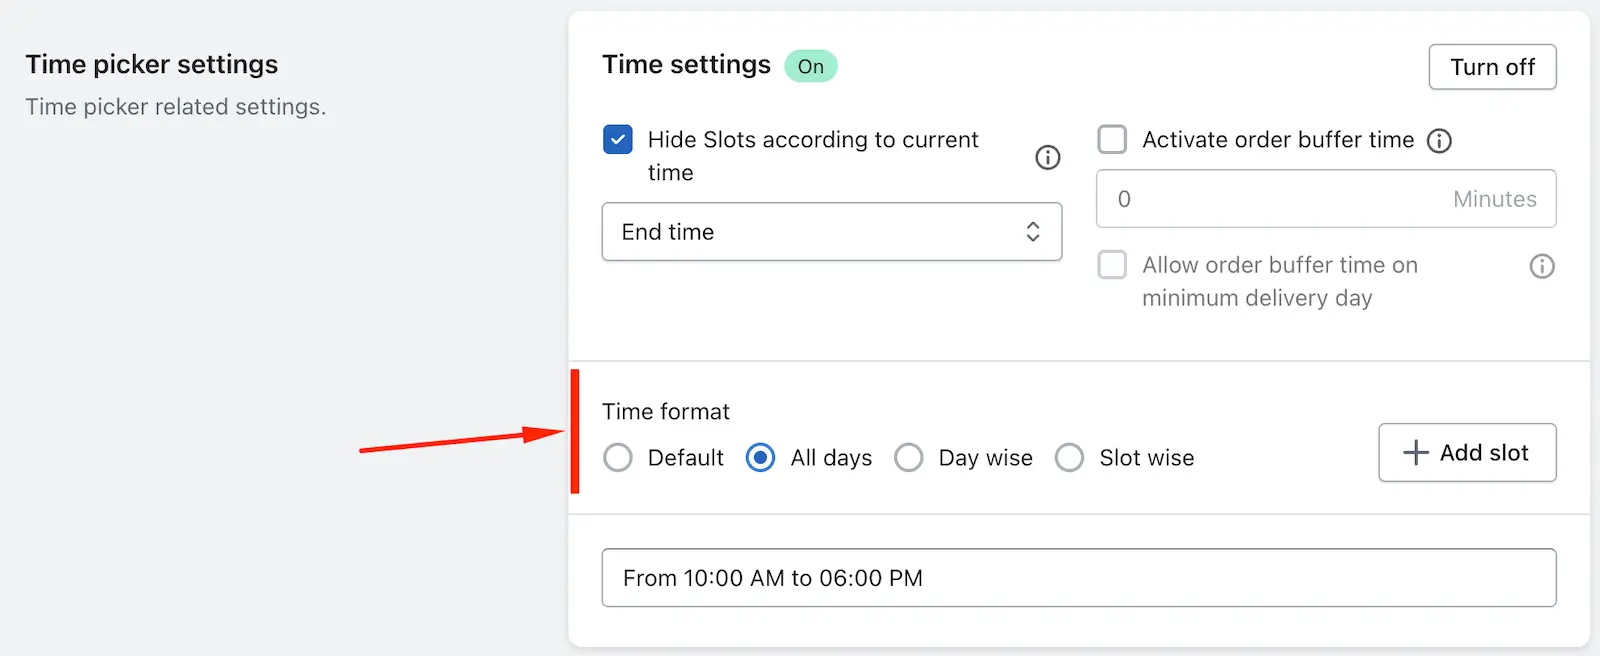
Step 3: Go to the Time Picker settings and turn on the option.
Step 4: Choose your preferred time format and set the time slots as per your choice, then save it.
Please check the steps below to learn how to enable the time picker for Store pickup & Local Delivery.
Step 1: Go to the Shopify admin and open the app.
Step 2: Go to the app settings and open the Location settings.
Step 3: Edit the location, then edit the Store Pickup or Local Delivery option.
Step 4: Go to the Time Picker settings and turn on the feature.
Step 5: Choose your preferred time format and set the time slots as per your choice, then save it.
For store pickup
For local delivery
Please check the steps below to learn how to enable the time picker for Product calendar.
Step 1: Go to the Shopify admin and open the app.
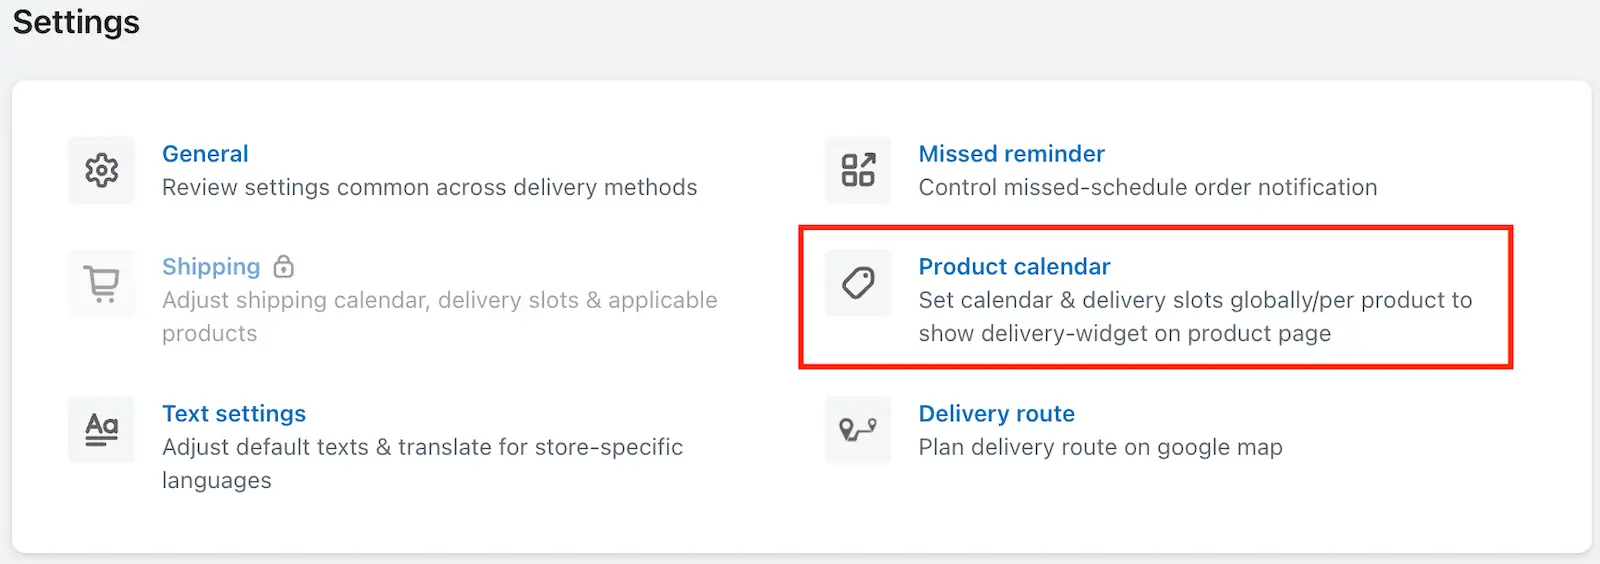
Step 2: Go to the app settings and open the Product Calendar feature.
Step 3: Go to the Time Picker settings and turn on that option.
Step 4: Choose your preferred time format and set the time slots as per your choice, then save it.
➞ You can also set different time slots for different products as per your choice. To do that, open the product in the Product Calendar, turn on the Time Picker option, and set the time slots as per your choice.
To read the complete guide on Stellar Delivery Date & Pickup click here.