AI Overview
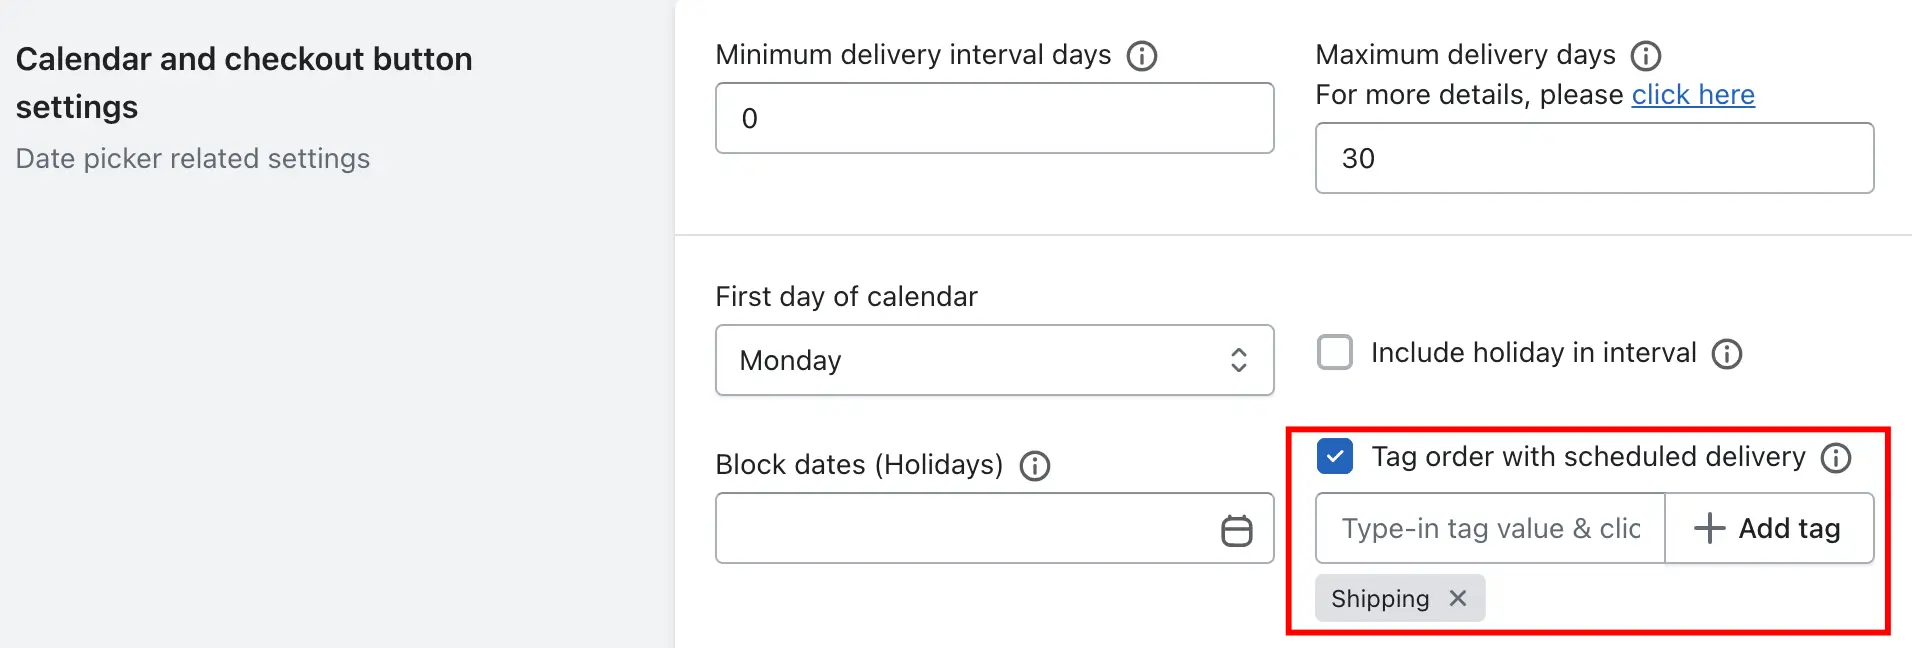
Enable date and time order tag – Shipping
Follow the steps below:
- Go to your Shopify admin.
- Open the app and navigate to the Settings section.
- Go to the Shipping tab.
- Enable the "Tag order with scheduled delivery" option.
- Add an extra tag name if you wish to include one.
- Click Save to apply the settings.
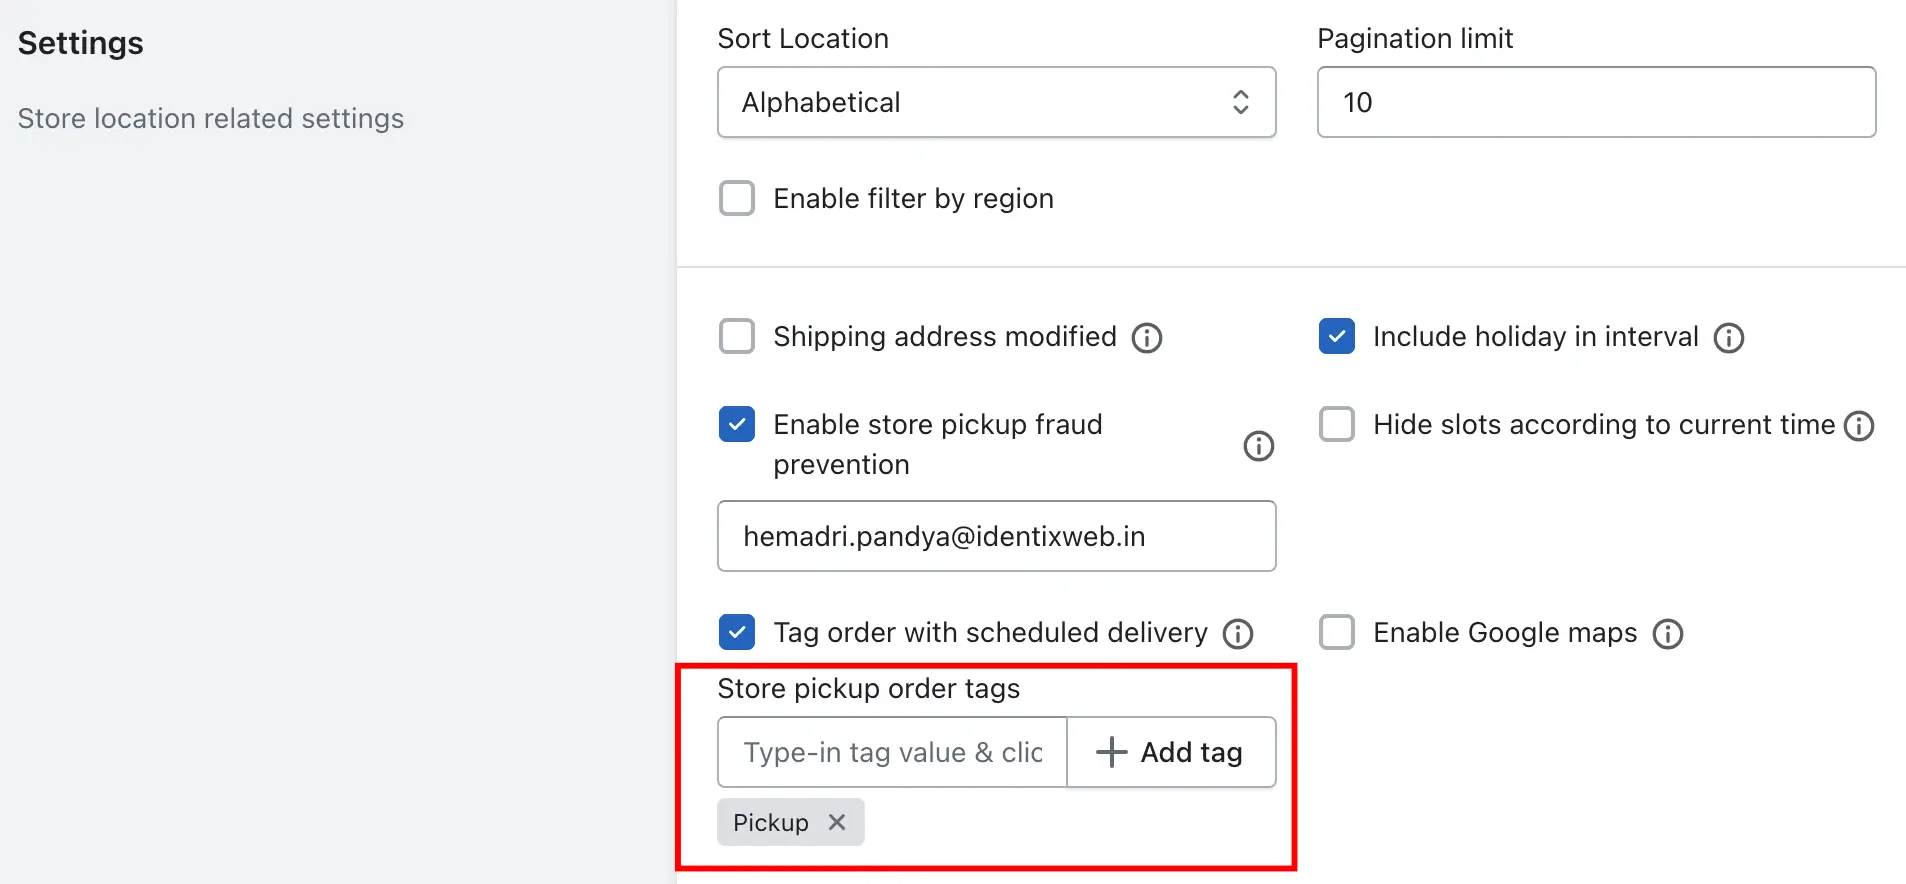
Enable date and time order tag – Store Pickup
- Go to your Shopify admin.
- Open the app settings.
- Click on Store Pickup.
- Go to the Store Pickup Settings section.
- Enable the "Tag order with scheduled delivery" option.
- You can also add extra local delivery order tags.
- Click Save to apply the settings.
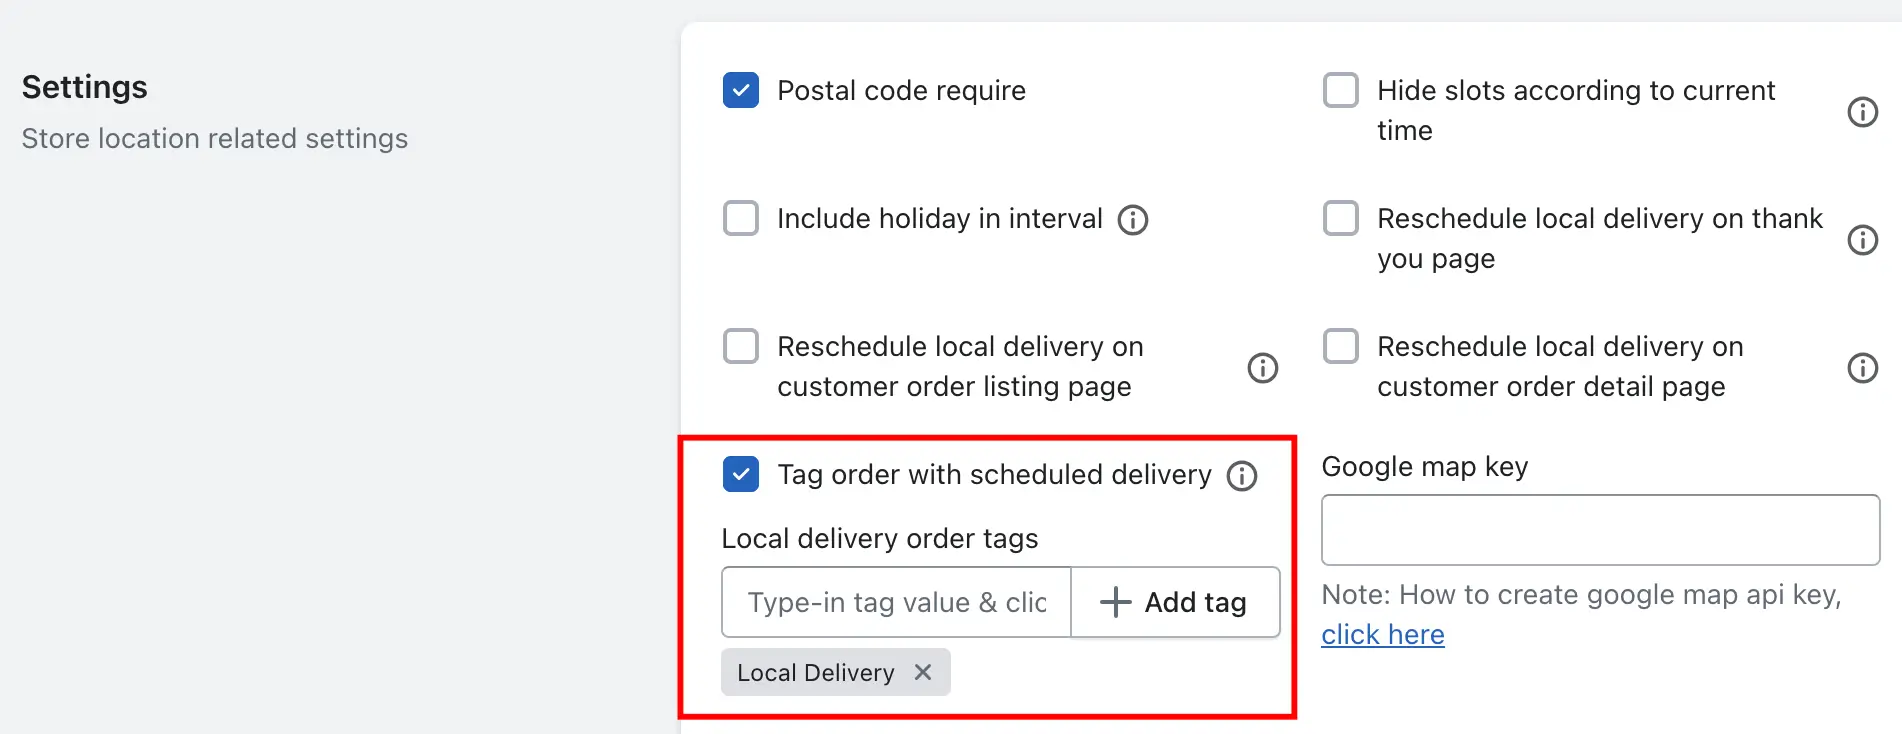
Enable delivery date and time in order tag – Local Delivery
- Go to your Shopify admin.
- Open the app settings.
- Click on Local Delivery.
- Go to the Local Delivery Settings section.
- Enable the "Tag order with scheduled delivery" option.
- You can also add extra local delivery order tags.
- Click Save to apply the settings.
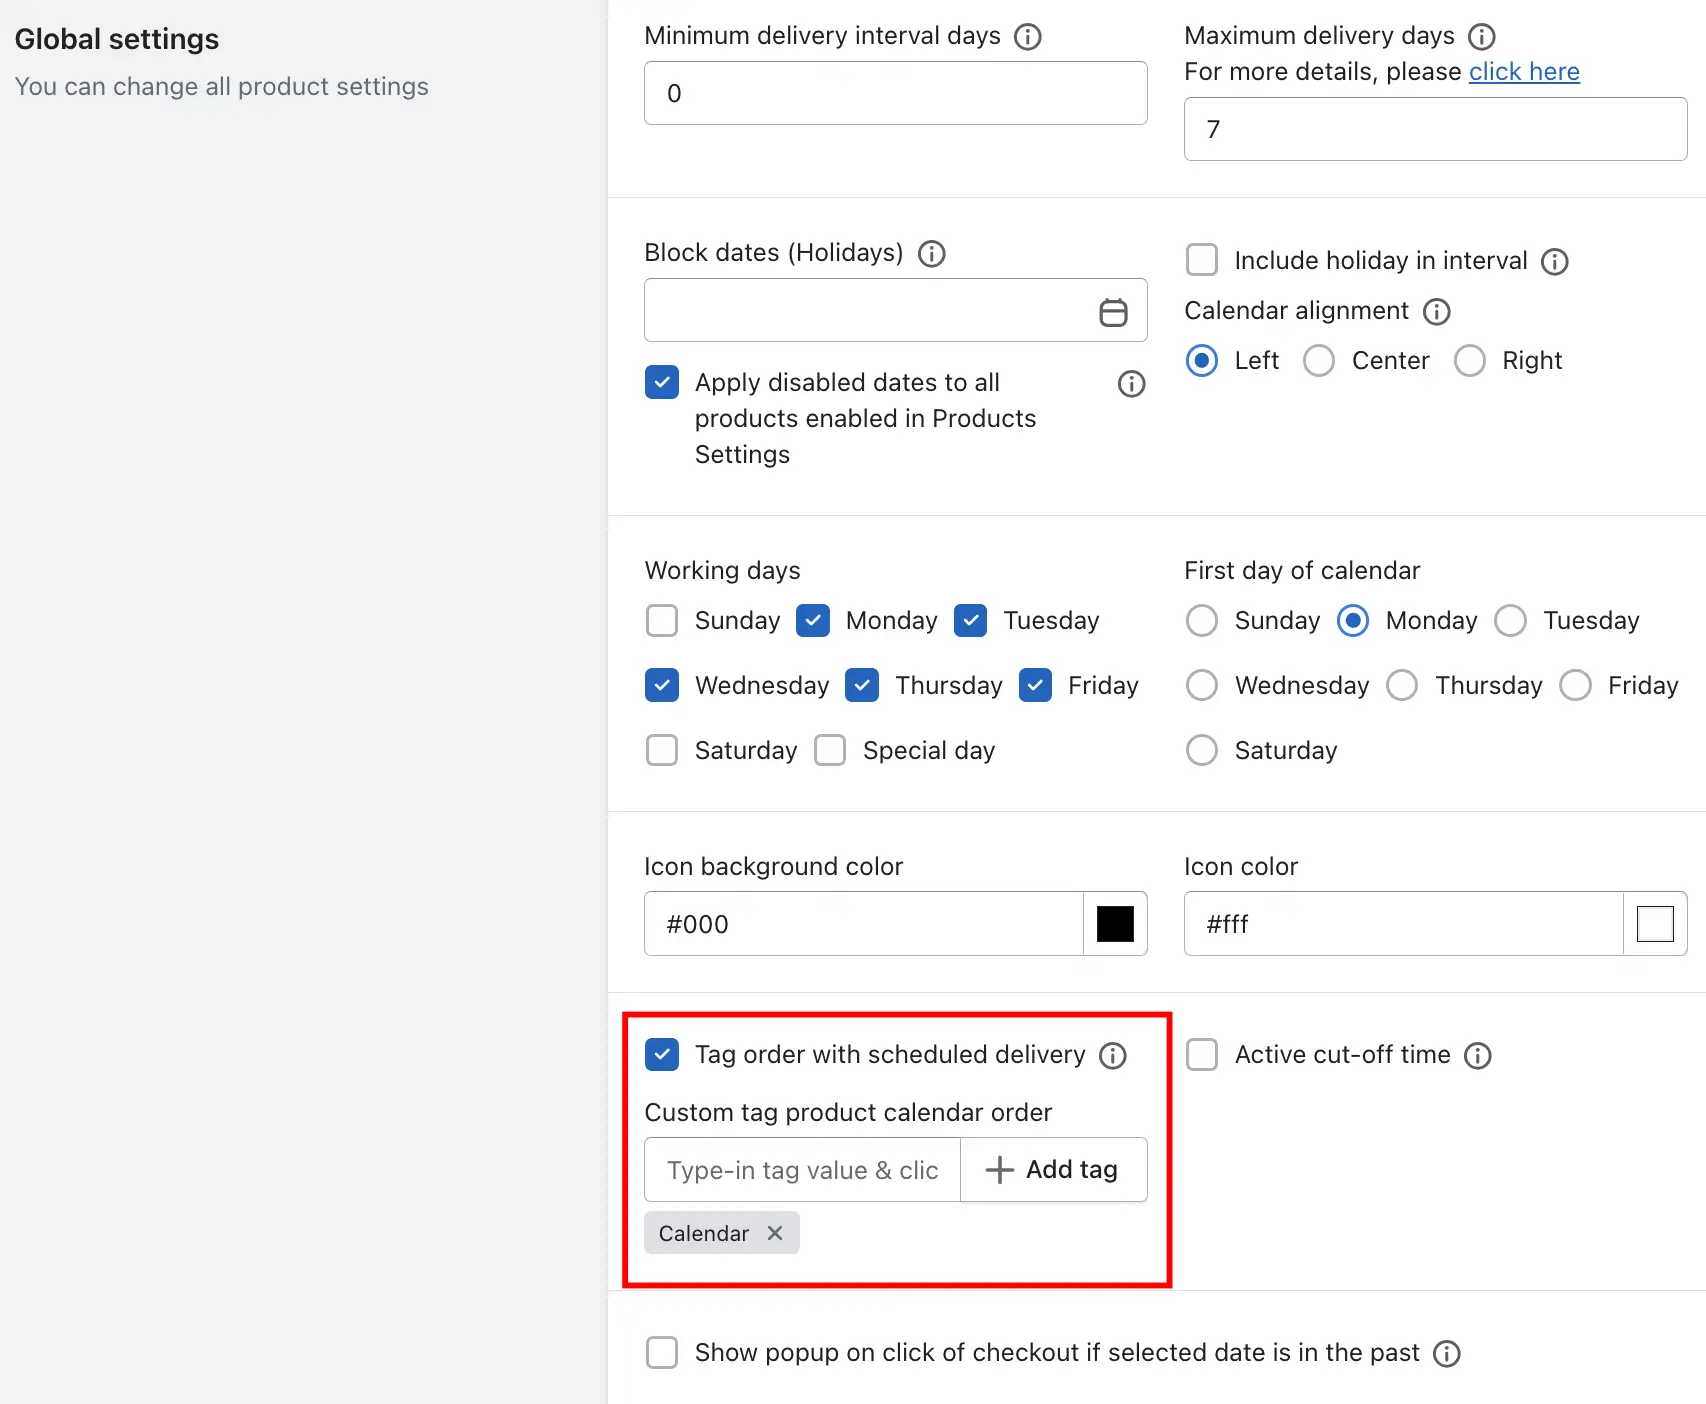
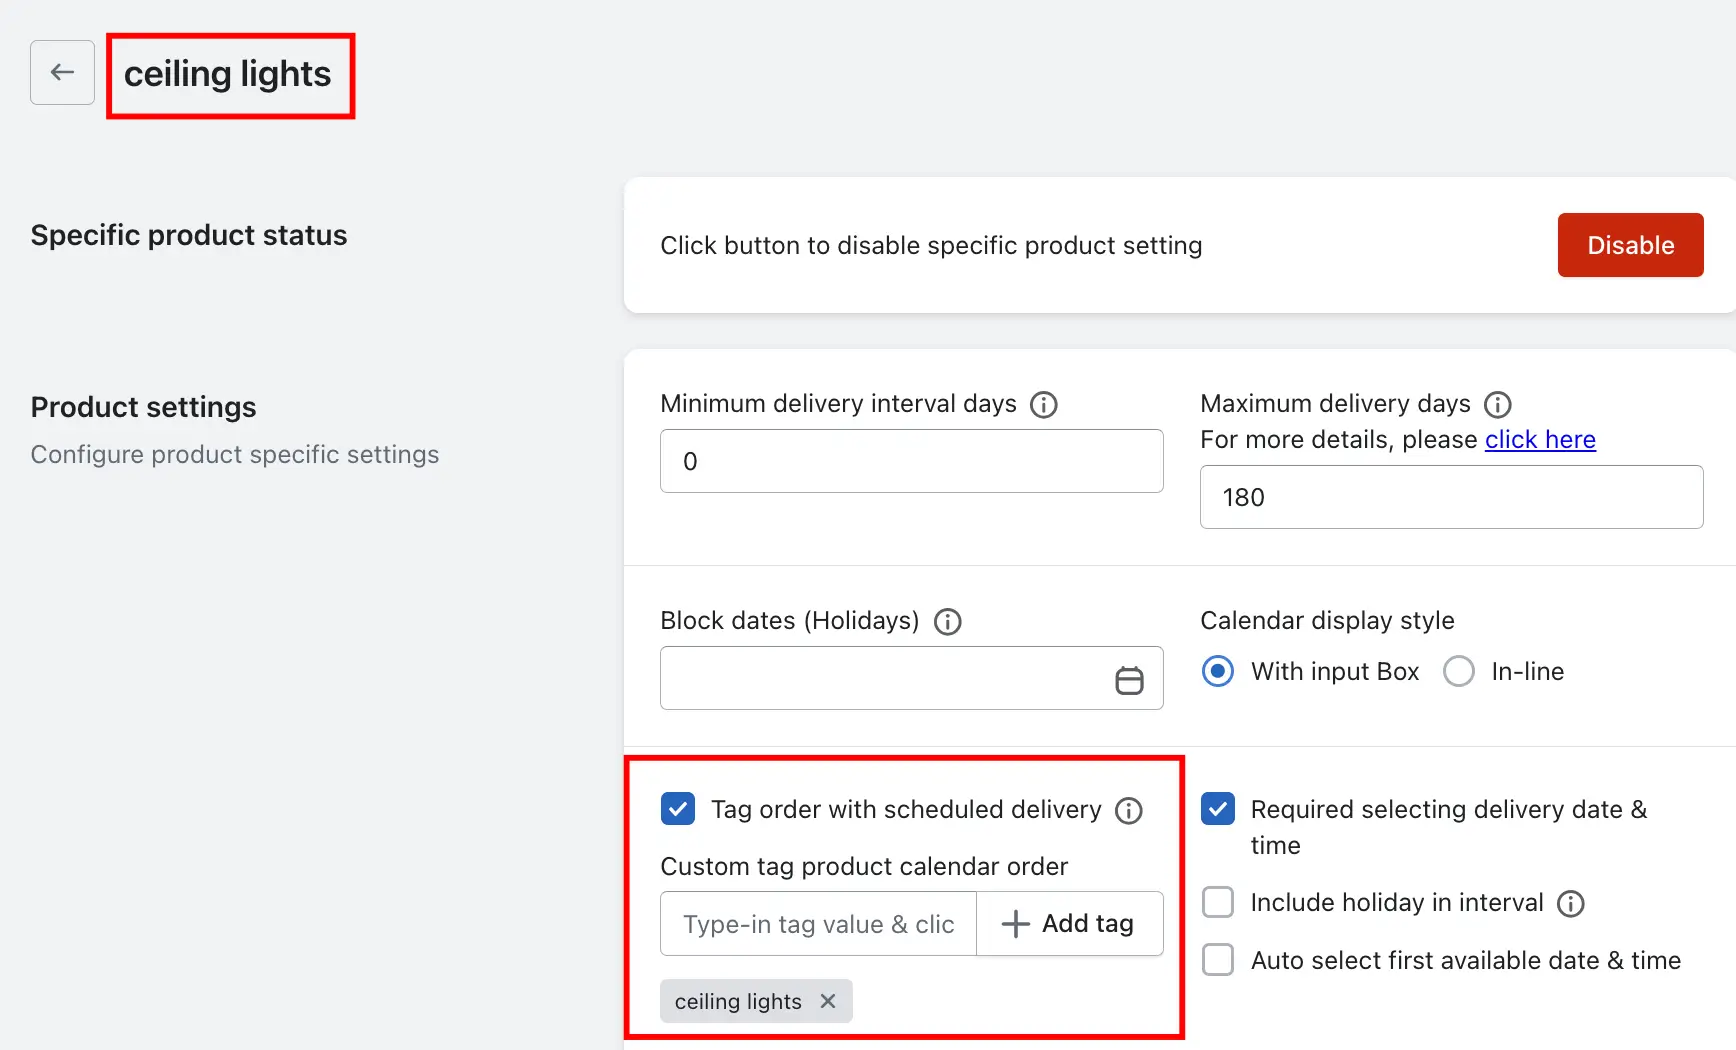
Enable date and time in order tag – Product Calendar
- Go to your Shopify admin.
- Open the app settings.
- Navigate to the Product Calendar section.
- Open the Global Settings.
- Enable the "Tag order with scheduled delivery" feature.
- If you want to add a custom tag, use the "Custom tag for Product Calendar orders" option.
- Click Save to apply the settings.
Option for setting the delivery order tag for an individual product.
- Go to your Shopify admin.
- Open the app settings.
- Navigate to the Product Calendar section.
- Edit the specific product.
- Open the Product Settings for that product.
- Enable the "Tag order with scheduled delivery" option.
- Add a custom tag using the "Custom tag for Product Calendar orders" feature.
- Click Save to apply the settings.
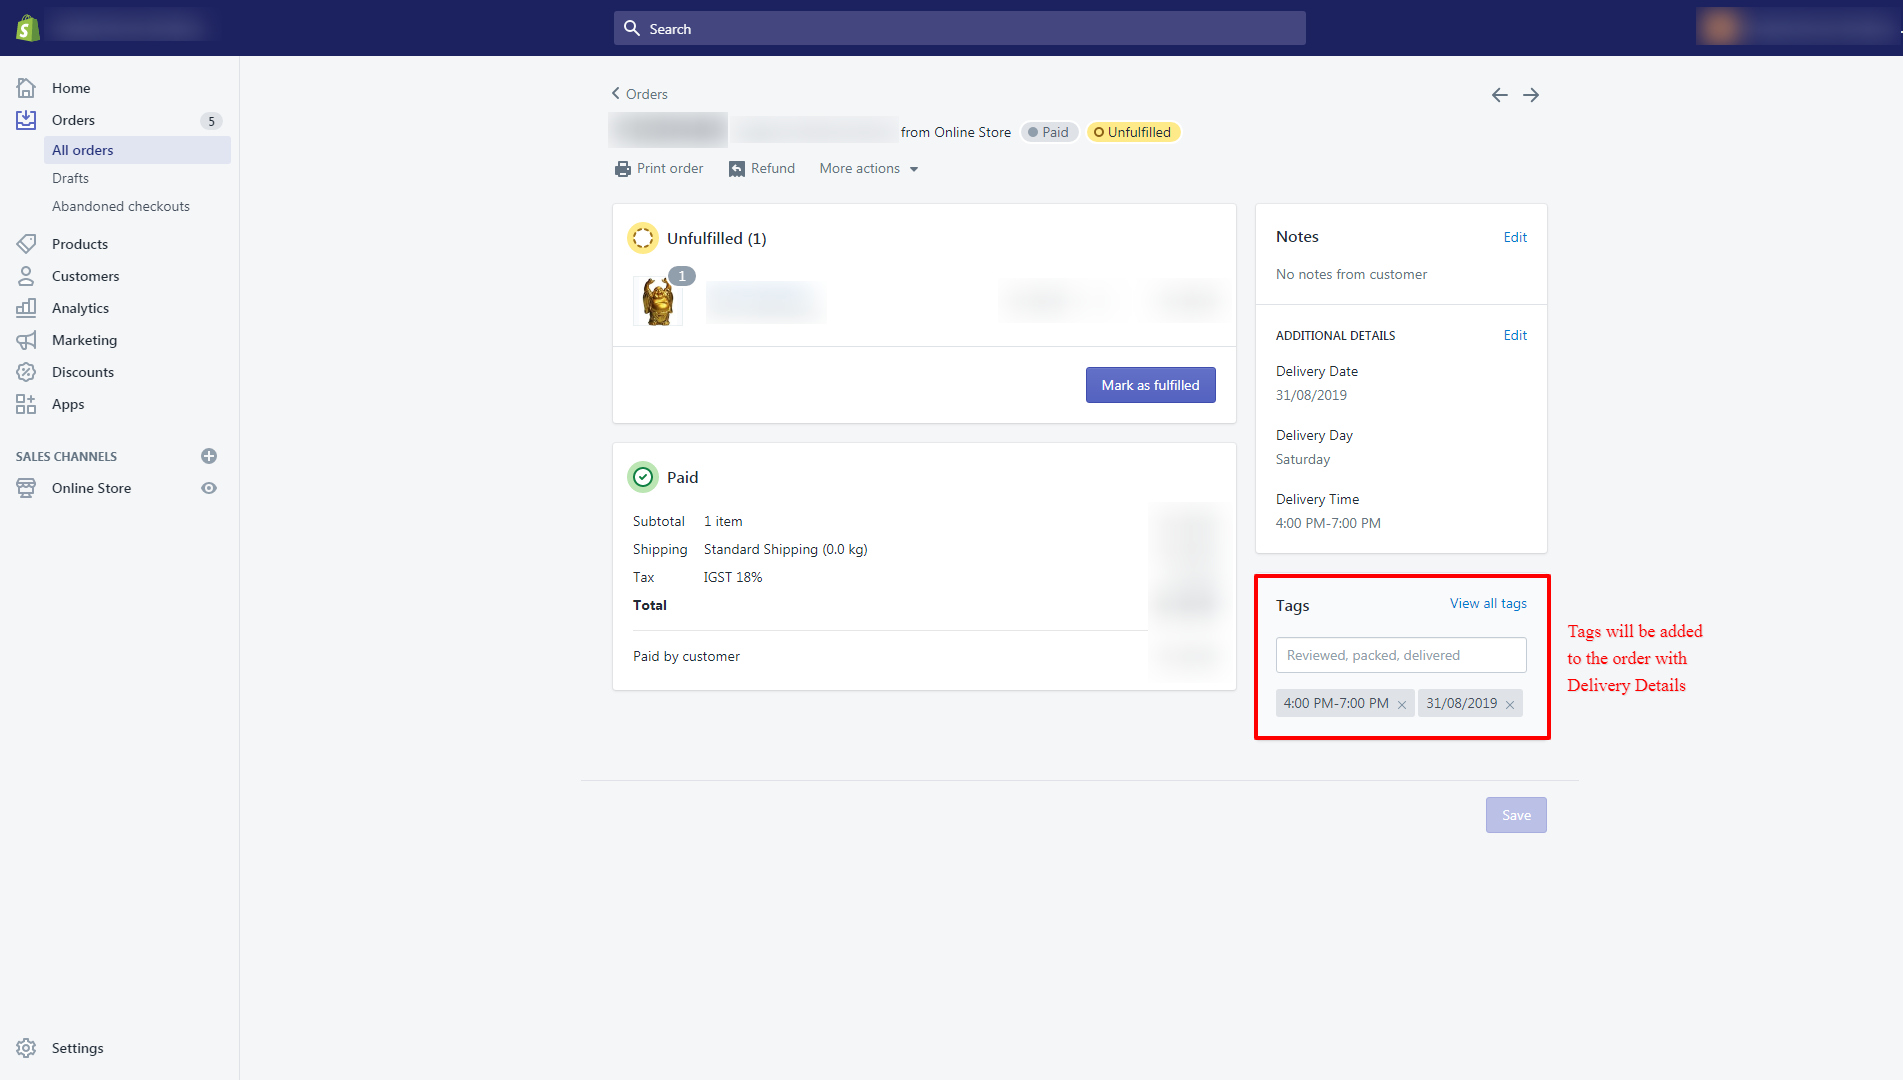
Here is one example screenshot of how the options look on the order details page
 To read the complete guide on Stellar Delivery Date & Pickup click here.