Blog
Gather knowledge about the latest insights, updates, tips, and tricks in the Ecommerce industry.

5 Min • 20 March 2026
How Anua Unlocked 5X AOV Growth with iCart’s Smart Cart Features
delivery customization Challenges Solutions drive results Scale business delivery customization Challenges Solutions drive results Scale business delivery customization Challenges Solutions drive results Scale business delivery customization Challenges Solutions drive results Scale business Anua is a globally recognized Korean skincare brand known for its minimalist philosophy and focus on gentle yet effective formulations. Built on the idea of simplifying skincare routines, Anua develops products that deliver visible results while avoiding harsh or irritating components, making them suitable for sensitive skin types. Initially using a traditional full cart experience, Anua transitioned to iCart’s side cart solution in August 2025, to create a more seamless and engaging shopping journey. This shift allowed customers to easily explore complementary skincare products without disrupting their browsing flow, making it more intuitive to discover items that fit into a complete routine. By surfacing relevant recommendations directly within the cart, the brand enhanced product visibility across its range. Challenges Before implementing iCart’s side cart solution, Anua faced limitations with their existing full cart experience, which created friction in the customer journey. The traditional cart setup redirected users away from product pages, interrupting their browsing flow and reducing opportunities to explore additional products. As a skincare brand built around routines rather than single-item purchases, this made it difficult to effectively showcase complementary products and encourage customers to build complete regimens. Additionally, the lack of in-cart personalization and strategic upsell opportunities meant that customers were often unaware of related products that could enhance their skincare results. This limited the brand’s ability to increase average order value (AOV) and fully leverage its diverse product range. Anua needed a more dynamic and intuitive cart experience that could seamlessly introduce relevant recommendations while maintaining a smooth and engaging shopping journey. ❌ Cart Value Barriers Low average order value (AOV) due to single-item focus Most customers completed purchases with one primary product instead of building multi-step routines. Cart abandonment near shipping thresholds Customers were not clearly informed or motivated to reach free shipping or discount thresholds. Missed savings opportunities Customers were unaware of potential value in purchasing bundled routines or multiple complementary products. ❌ Absence of Progress-Based Incentives No free shipping or discount progress bar Customers were not motivated to increase their cart value due to lack of visible incentives. Missing tiered rewards system There were no structured milestones (e.g., “Spend more to unlock offers”), reducing upsell opportunities. ❌ Ineffective Cart UI/UX (Pre-Side Cart) Full-page cart disrupted shopping flowCustomers had to leave their browsing journey, increasing friction and drop-offs. No quick add/remove functionality Users couldn’t easily modify their cart or add suggested products without navigating away. Solution To overcome these challenges, Anua implemented iCart’s side cart solution to transform their traditional cart into a high-converting, interactive experience. By replacing the full-page cart with a seamless side cart, the brand ensured that customers could continue browsing while viewing their cart, significantly reducing friction in the shopping journey. Additionally, features like product recommendations & progress bars for free shipping and discounts motivated customers to increase their cart value. By combining personalization, incentive-driven messaging, and a user-friendly interface, Anua successfully turned their cart into a powerful revenue-driving touchpoint rather than just a checkout step. To maximize their cart effectiveness, they implemented two powerful features: ✅ Progress Bar with Multi-Reward Incentives Implemented a tiered progress bar to encourage higher cart value Customers are guided with a clear message like “Add $3.10 to unlock secret offer,” motivating them to continue adding products. Generated over $5M+ in revenue through incentive-driven cart progression Used product-based rewards to align with customer intent Instead of generic discounts, Anua incentivized purchases with relevant skincare items like Dark Spot Pads and mini serums. Built visual motivation for routine expansion As customers add products, they can clearly track progress toward unlocking multiple rewards, encouraging them to build a complete skincare routine. ✅ Product Recommendations Implemented “Frequently Bought Together” recommendations Customers adding a single product (e.g., toner) are shown complementary items like serums, moisturizers, or pads to complete their routine. Generated over 275K revenue through in-cart recommendations Encouraged full skincare regimen building Instead of isolated purchases, the cart suggests step-by-step product combinations aligned with common skincare routines. Increased product discovery at the final stage By surfacing relevant items directly in the cart, Anua ensured customers explore more of their catalog without leaving the checkout flow. Results Achieved in Last 180 Days 22932 Total Store Orders 45101 Total iCart Orders 5X iCart Generated AOV 65.70% Upsell Affected Conversion Rate These improvements reflect a clear shift in customer behavior on Anua’s store. Cart abandonment reduced as shoppers discovered complementary skincare products and felt encouraged to build complete routines. Engagement also increased, with customers interacting more with in-cart recommendations and exploring relevant product pairings. Results & Impact And...Results is Our Main Clarification By implementing iCart’s cart drawer, product recommendations, and progress bar, Anua transformed its cart into a high-performing conversion touchpoint. Shopping Experience Enhancement The improved cart experience encouraged customers to discover complementary products and understand the value of sustainable beauty routines. For instance, the clear presentation of subscription savings alongside one-time purchase options helped customers make more informed decisions about their long-term hair care needs. As Anua continues to optimize its cart experience, the brand is closely monitoring: Routine-based purchasing behavior - tracking how customers move from single items to multi-step regimens Engagement with in-cart recommendations - measuring interaction with suggested products Cart value progression - analyzing how incentives influence higher spending [related_cases_slider] Ready to Write Your Success Story? Try icart App Join successful businesses like Anua and Master your delivery scheduling Delight customers with precise timing Grow your special occasion orders Expand your delivery reach
Read Blog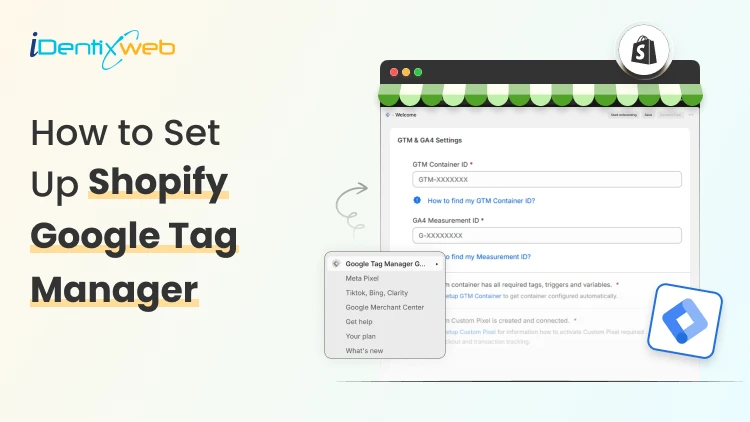
9 Min • 5 June 2026
How to Add Google Tag Manager to Shopify in Just 4 Steps (Track Everything in 2026)
You pasted your GTM snippet into Shopify, saw it fire on your homepage, and assumed you were done. Then you checked your purchase data and found nothing. Sales were happening, but your conversion tags were silent. That gap is the single most common mistake I see when installing Google Tag Manager in Shopify, and it got worse in 2026. The old method of dropping one GTM code block into your theme still loads the container on storefront pages. It no longer fires on checkout or the thank-you page. So you can add Google Tag Manager in Shopify in five minutes and still miss the only event that pays your bills: the purchase Here is the short answer. To connect Google Tag Manager to Shopify correctly today, you need two installs working together. GTM goes in your theme code for storefront tracking, and a separate Custom Pixel handles checkout and purchase events inside Shopify's sandboxed environment. Custom Pixels are available on all Shopify plans, including Basic, Shopify, Advanced, and Plus. You do not need Shopify Plus. I'll walk you through the full setup, show you exactly where to add the Google Tag Manager code in Shopify, and help you verify nothing is double-counting before you trust the numbers. What Changed in 2026 With Google Tag Manager in Shopify For years, the standard approach was simple. Paste your GTM container into theme.liquid, and Plus merchants paste a second copy into checkout.liquid. In February 2023, Shopify announced that checkout.liquid is deprecated, moving to a new foundation for checkout and accounts that is more secure, upgrade-safe, and customized using apps. The replacement is Checkout Extensibility, and tracking now runs through Custom Pixels instead of injected scripts. The deadline matters. Shopify Plus merchants had until August 28, 2025, to migrate, and non-Plus merchants had until August 26, 2026. If your checkout pages have not been upgraded, your Custom Pixel will not fire on checkout or thank-you pages, and your purchase data will stay incomplete. Why the change? Checkout used to allow arbitrary scripts, which created security and performance risks. The new model runs your tracking code in a sandboxed iframe. It is safer, but it means your old single-snippet setup no longer covers the full customer journey. GTM vs GA: Know the difference People mix these two up constantly, and it leads to broken setups. Google Analytics is the tool that provides reports about activity in your store. Google Tag Manager is a tool that triggers your tracking codes based on defined rules. GTM is the container. It holds and fires your tags. GA4 is one of the things it can fire. Adding Google Analytics to Google Tag Manager in addition to using Shopify's built-in integration can result in duplicate tracking. If you have already connected GA4 through Shopify's native integration and then also fire GA4 through GTM, you will double-count everything. Pick one path per tag. I'll come back to this when we verify the setup. If you are optimizing your store beyond just tracking, you should check out my Ultimate Shopify SEO Guide for 2026. The above breakdown will help you measure your content and conversion strategy. Don't Want to Touch Code? We'll Handle the Whole Setup Our Shopify development team installs and configures GTM correctly across your storefront and checkout, no guesswork on your end. Your Store Is Leaking Data. We'll Fix That Schedule a Free Strategy Call How to add Google Tag Manager code in Shopify: Step-by-step Step 1: Create Your GTM Container Go to tagmanager.google.com and sign in with your Google account. Create an account, name your container after your store, and set the target platform to Web. Accept the terms, and GTM hands you two code snippets: One for the <head> and one right after the opening <body> tag. Copy your container ID too. It looks like GTM-XXXXXXX. If you already have a container, skip ahead to Step 2. Step 2: Add the GTM code to your theme This covers your storefront: product pages, collections, cart, blog posts, everything before checkout. In your Shopify admin, go to Online Store > Themes > Edit code. Open the theme.liquid file in the Layout folder. Paste the first GTM snippet immediately after the opening <head> tag, and paste the second snippet immediately after the opening <body> tag. Save. That answers the "where to add Google Tag Manager code in Shopify" question for the storefront half. But you are only halfway done. Step 3: Add a custom pixel for checkout and purchases The theme code stops at checkout. To track checkout and purchase events, you create a Custom Pixel. Go to Settings > Customer events in your admin and click Add custom pixel. Name it something clear, like "GTM Checkout." Inside the pixel, you load GTM and subscribe to Shopify's standard customer events, pushing them to the data layer. Shopify gives you the event subscription pattern directly. You subscribe to standard events like product_viewed, and when the event triggers, it pushes the event to the dataLayer. Here is the shape of that code: analytics.subscribe("checkout_completed", (event) => {window.dataLayer = window.dataLayer || [];window.dataLayer.push({event: "purchase",transaction_id: event.data.checkout.order.id,value: event.data.checkout.totalPrice.amount,currency: event.data.checkout.currencyCode});}); Step 4: Consider the Google & YouTube App If your priority is Google Ads conversion tracking rather than full custom GTM control, Shopify and Google recommend a managed route. Shopify is deprecating mechanisms like checkout.liquid and additional scripts, and recommends migrating your tags to the Google-developed Google & YouTube app on Shopify. The app handles the migration for you and preserves your measurement through the checkout upgrade. For merchants who want granular control over every tag and trigger, the manual GTM-plus-Custom-Pixel route above gives you more flexibility. For merchants who mostly run Google Ads, the app is less to maintain. Where to add Google Tag Manager code in Shopify GTM in Shopify lives in two places. The theme.liquid install covers storefront pages. The Custom Pixel covers checkout and the thank-you page. Storefront code does not reach checkout, and the Custom Pixel does not reach your storefront. One critical caution. Do not fire the same conversion from both locations. Some merchants add GTM to their theme.liquid file and also install it as a Custom Pixel, which is a common configuration error. If your purchase tag exists in both, every sale counts twice. Keep storefront events in the theme container and checkout events in the pixel. How to verify your GTM setup fires correctly? Open GTM's Preview mode and connect it to your store URL. Browse a few product pages and confirm your storefront tags fire. The harder test is checkout. Because the pixel runs sandboxed, you verify it differently. Place a real test order. Open GA4 DebugView and your browser's DevTools Network tab, filtered for the collect request. You want to see exactly one purchase event with a stable transaction ID. Two purchase events mean you have a duplicate firing somewhere, usually from running both Shopify's native GA4 integration and a GTM-based GA4 tag at once. Check the transaction ID specifically. If it changes on page refresh, your deduplication will fail, and you will inflate conversions. A stable order ID is what keeps your reporting honest. If you are testing checkout behavior, here’s a complete breakdown of Shopify checkout upsell strategies for merchants. Also, read these breakdowns GTM is one tool in a larger SEO and conversion measurement ecosystem. You might also find these topics relevant: How to Improve SEO on Shopify: Once you have GTM firing correctly, use the data to identify which pages and products drive traffic and conversions. SEO improvements compound when informed by real user behavior. Shopify A/B Testing Guide: With GTM tracking reliably, run controlled experiments on your store. GTM tags fire the same way regardless of variant, so your test results stay clean. How to Reduce Shopify Customer Acquisition Cost: GTM feeds data to Google Ads, which in turn helps you measure and optimize CAC. The feedback loop only works if GTM is set up correctly. Shopify Sales Funnel Guide: Understanding your full funnel (awareness → consideration → conversion) starts with accurate event tracking in GTM. Without it, you can't measure funnel leakage. Connect Google Tag Manager to Shopify the right way The Google Tag Manager Shopify setup is no longer a single paste-and-forget snippet in 2026. It is a theme install for your storefront and a Custom Pixel for checkout. Get those two pieces talking, and your conversion data finally matches your actual sales. Run your test order today. Open GA4 DebugView, place one order, and confirm a single purchase event fires with a stable transaction ID. If it does, your tracking is sound, and you can start building the tags that actually grow the store. FAQs 1. What is GTM in Shopify? GTM in Shopify means Google Tag Manager, a tool that lets you manage tracking codes like GA4, Google Ads, Meta Pixel, TikTok Pixel, and other scripts from one place instead of adding each code manually to your theme. 2. Do I need Google Tag Manager for Shopify? You don’t need GTM for every Shopify store; Shopify’s built-in Google Analytics / Google channel setup is enough for many basic stores, and you can use its built-in Google Analytics integration to avoid duplicate tracking. But GTM is useful if you run multiple ad platforms, need custom event tracking, or want more control over tags. 3. Where to add Google Tag Manager code in Shopify? For the current Shopify setup, the recommended method is Shopify Admin → Settings → Customer events → Custom pixel, especially if you want GTM to work with modern Shopify checkout/customer events. Google’s normal GTM install uses one code in the <head>, and one after the opening <body>, but Shopify’s GTM custom pixel method is different from simply pasting code into theme.liquid. 4. How to add Google Tag Manager code in Shopify? Go to Google Tag Manager → Admin → Install Google Tag Manager, copy the code Shopify asks for, then in Shopify go to Settings → Customer events → Add custom pixel, paste the GTM custom pixel code, save it, and connect the pixel. After that, test it using Shopify Pixel Helper or GTM preview mode to make sure events are firing correctly.
6 Min • 23 May 2026
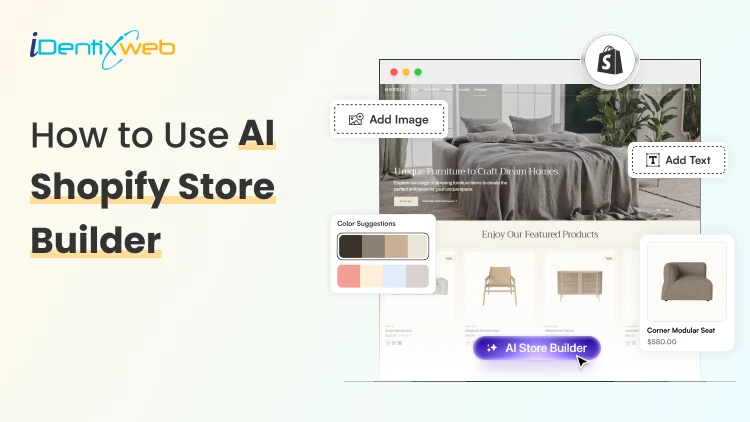
How to Use AI Shopify Store Builder to Create Your Store in Minutes
Setting up a Shopify store used to take days figuring out your theme, writing product descriptions, organizing collections, and making everything look professional. But with the AI Shopify store builder, all of that is changing fast. Today, merchants are launching complete, polished stores in a matter of minutes, not days. If you're a Shopify merchant exploring how AI can do the heavy lifting for you, you're in the right place. In this guide, we'll walk you through everything. What Is AI Shopify Store Builder? Shopify AI Store Builder is an AI-powered ecommerce website generator by Shopify that helps users create a Shopify storefront in seconds using a simple text prompt. Instead of manually designing a website, users describe their business idea; for example, “minimalist skincare brand for sensitive skin” and the AI automatically generates a complete online store layout with branding, homepage sections, colors, images, and marketing copy. Key features include: AI-generated store designs Automatic homepage creation Mobile-responsive layouts Built-in branding suggestions Editable themes inside Shopify Fast setup process Step-by-Step: How to Use an AI Shopify Store Builder Step 1 - Open the Shopify AI Store Builder Go to the Shopify AI Store Builder Page A “Generate” button Step 2 - Write Your Store Prompt Now you will see a short text input field. The AI uses a short description (roughly 100 characters) to generate your store. Add your prompt in that field and click on “Generate” button. Step 4 - Review the Generated Store Designs In the next step, you can describe your store and Shopify typically generates several variations/themes. You can see multiple store designs from which you can select any one. Step 5 - Choose the Best Design Select the design closest to your brand vision and click on choose this design button. Remember: You can edit everything later Focus on structure first Don’t obsess over perfection yet After selection: Shopify creates your actual store The AI-generated theme gets added automatically Step 6 - Create Your Shopify Account If you are not logged in yet enter your email & password. Or if you are new to Shopify create your Shopify account. Step 7 - Enter the Shopify Admin Dashboard After signup, you’ll land inside the Shopify admin panel and you can see your AI-generated storefront is now installed. Step 8 - Customize Your Theme You can now customize your theme by and change the colors, sections, layouts, text, font styles, etc as per your choice. Step 9 - Replace AI Placeholder Content This is one of the most important steps. Replace Placeholder images, AI-generated text, Demo products, Generic messaging with Real product photos, Real product descriptions & actual pricing. Remember AI gives you a starting structure; not a finished brand. Step 10 - Add Products After settin up add your products in your store and add the product details like price, inventory, vendor name, etc. Step 11 - Set Up Navigation Go to Online Store > Navigation and create main menu like home, shop, about, contact & footer menus as per your need. Step 12 - Configure Payments Go to Settings > Payments and add your payment methods. Test payments before launch. Tips to Maximize Your AI-Built Store Once your AI store builder for Shopify has done the initial setup, here are the strategies that separate a mediocre AI store from a high-converting one: 1. Personalize Your AI-Generated Copy The AI gives you a draft. Your job is to make it sound like YOU. Add your brand story, your "why," and specific benefits that only your products offer. Customers connect with authenticity, not generic text. 2. Invest in Great Product Photography This is the single biggest driver of conversions that AI cannot do for you. Studies show that 75% of online shoppers rely on product photos when making a purchase decision. (Source: BigCommerce.com). Use natural lighting, multiple angles, and lifestyle shots. 3. Build a Smart Cart Experience Once your AI-built store is live, the next step is maximizing every sale. iCart Cart Drawer & Cart Upsell lets you add product upsells, cross-sells, free shipping progress bars, and promotional announcements directly in your cart drawer all without touching code. Merchants using iCart report an average 20-30% increase in average order value (AOV). 4. Speed-Test Your Store AI-built themes can sometimes add unnecessary scripts. Run your store through Google PageSpeed Insights and aim for a score above 70 on mobile. A 1-second delay in load time can reduce conversions. 5. Set Up Email Capture From Day One Your AI store builder may suggest a pop-up or footer email form. Use it. Building your email list from launch is one of the smartest marketing moves you can make. Tools like Klaviyo integrate seamlessly with Shopify. Conclusion The emergence of the AI Shopify store builder is genuinely one of the most exciting developments in ecommerce in recent years. What used to require weeks of design work, significant budget, or deep technical knowledge can now be scaffolded in minutes. The merchants who win are the ones who use the AI Shopify store builder to save time on the setup, then invest that saved time into what really matters: knowing their customers, telling their brand story authentically, and continuously optimizing their store's performance. Frequently Asked Questions 1. What is the best AI Shopify store builder available right now? The best AI store builder for Shopify depends on your needs. Shopify Magic (native) is the most accessible and comes included with your Shopify plan. For advanced design control, GemPages AI and Instant Page Builder are popular choices. For pure content generation, tools like Jasper AI or ChatGPT integrated with Shopify can be powerful. Start with Shopify Magic and expand from there. 2. Can I build a Shopify store completely with AI, without any coding? Yes, absolutely. A Shopify AI store builder is specifically designed to be no-code. You won't need to write a single line of code to use Shopify Magic or most third-party AI builder tools. Shopify's platform itself is built for non-developers. 3. How long does it take to build a Shopify store with AI? The initial AI-generated store structure can be ready in as little as 5 to 15 minutes. However, adding your own product photos, reviewing content, configuring payments and shipping, and doing final testing typically takes 2 to 4 hours for a simple store. A more complex store with many products may take a full day. 4. Does an AI-built Shopify store rank on Google? An AI-built store can absolutely rank on Google, but it requires ongoing SEO work beyond the initial AI setup. Shopify Magic configures basic meta tags, but you'll need to create a solid content strategy, get backlinks, and optimize your product pages for target keywords. Consider working with an 5. What is Shopify Magic and how is it different from a standalone AI store builder? Shopify Magic is Shopify's native AI feature suite embedded directly in the Shopify admin. It helps with product descriptions, email subject lines, FAQ suggestions, and more. Standalone AI Shopify store builders (like GemPages AI) are third-party apps that focus specifically on design and page building. Both can work together.
11 Min • 28 May 2026
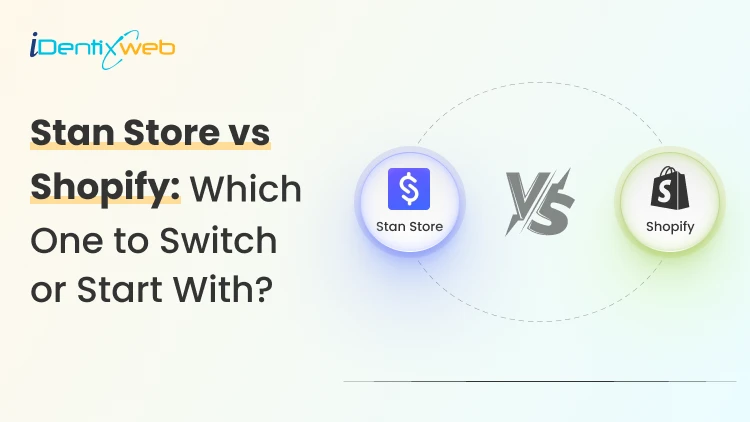
Stan Store vs Shopify: Honest Verdict from an Expert Who Has Used Both
You are an online merchant in 2026. You have two options to manage your brand: Stan Store vs Shopify. Both promise to help you sell online. Both have fans who swear by them. And you have to pick one. Over the past two years, I've helped dozens of creators move from Stan Store to Shopify, a few from Shopify back to Stan as well. Some made the right call. Some moved too early. A few moved too late. Here's the short version. Stan Store wins for solo creators selling digital offers from a link in bio. Shopify wins for sellers who want to scale beyond social, sell physical goods, or build a real brand. If you're still reading, you want the full picture. Pricing math, feature gaps, switch signals, and my honest pick for new stores. All of that is below. Stan Store vs Shopify at a Glance FeatureStan StoreShopifyBest forSolo creators, digital productsBrands, scaling sellers, physical goodsStarting price$29/mo$5/mo (Starter), $39/mo (Basic)Transaction fees0%2.5% to 2.9% + 30¢ (waived with Shopify Payments)Setup time15 to 30 minutes (Approx)2 to 6 hours (Approx)Product typesDigital, courses, coaching, membershipsDigital, physical, subscription services, tech solutionsCustomization11 link-in-bio templates1000+ themes, full code accessApp marketplaceSmall native toolkit16,000+ appsMulti-channel sellingSocial bio onlyWeb, social, retail, marketplaces, POSBest for Digital-only creatorsAnyone planning to grow past social What is a Stan Store? Stan Store was founded by John Hu in 2019. He built it as a TikTok creator who wanted a faster way for other creators to sell without coding or design work. The product lives inside your social bio. Followers tap your link, land on your Stan storefront, and buy whatever you're selling from digital products or online courses. Stan got a serious bump when Shopify quietly retired Linkpop in July 2025. Thousands of creators lost their link-in-bio storefronts overnight. Many landed on Stan. What Is Shopify? Shopify launched in 2006 out of Ottawa. Tobias Lütke and his cofounders built it after struggling to find a decent platform for their own snowboard shop. Twenty years later, Shopify powers millions of stores worldwide. The platform handles everything: storefront, checkout, inventory, shipping, taxes, POS, blogging, SEO, and payments. Shopify isn't a link-in-bio tool. It's a full commerce platform built to grow with you from your first $100 month to your first $10M year. Stan Store vs Shopify pricing: What each one costs Here's where the math gets interesting. Stan Store has two plans: Creator: $29/mo (or $300/year) Creator Pro: $99/mo (or $948/year) Both plans charge zero transaction fees. Shopify has five plans: Starter: $5/mo Basic: $39/mo Shopify: $105/mo Advanced: $399/mo Plus: starts at $2,300/mo Shopify adds a transaction fee of 2.5% to 2.9% plus 30¢ per order. Use Shopify Payments and the fee drops to zero, but standard credit card processing fees still apply. So which is cheaper? Depends on your revenue. A creator doing $2,000/mo in digital sales pays $29 on Stan and keeps it all. The same seller on Shopify Basic pays $39 plus around $58 in processing, so roughly $97 total. Flip the math at higher volume. A merchant doing $30,000/mo in physical products on Shopify Basic pays around $900 in processing plus the $39 subscription. The same revenue on Stan would technically work, but Stan isn't built for physical inventory, shipping, or that kind of scale. The pricing winner depends entirely on what you sell and how much. Stan is cheaper for low-volume digital. Shopify scales more cheaply once you cross a few thousand a month and need real commerce features. Stan Store vs Shopify for digital products Stan Store vs Shopify for digital products is not even close. Stan Store was built for digital. It's the whole product. Memberships, downloads, ebooks, and templates all sell through one checkout. Shopify handles digital products too, but it leans on apps to do it well. Shopify's own Digital Downloads app works for basic files. Courses usually need SendOwl, Thinkific, or a third-party platform connected via integration. Coaching bookings need an app like BookThatApp or Acuity. For a creator selling a $47 ebook to their Instagram followers, Stan is faster and cheaper. For a creator selling a $497 course plus a $97/mo membership plus physical merch, Shopify wins because Stan can't handle the merch piece. I have written a complete breakdown of a step-by-step guide to sell digital products in 2026. Migrate to Shopify to Increase Sales 10X Schedule a Free Strategy Call Stan Store or Shopify: Complete Breakdown 1. Ease of use and setup time I timed both setups recently for two different clients. Stan Store took 22 minutes from signup to a live storefront. Pick a template, add a profile photo, upload three products, plug in Stripe, and copy the link to the Instagram bio. Shopify took just under four hours. I picked a theme, customized the homepage, added products with descriptions and photos, configured shipping zones, set up Shopify Payments, connected a domain, wrote the basic pages (about, contact, refund policy), and installed two essential apps. For a creator with zero technical experience, Stan is the lighter lift. For someone who wants real branding, custom pages, blog content, and SEO from day one, Shopify's setup time pays off later. 2. Themes, designs, and customization freedom Stan offers 11 link-in-bio templates. All mobile-first, clean, conversion-tuned. You can change colors, swap your logo, and rearrange product blocks. The templates look good, but your storefront ends up looking like other Stan stores. Shopify has 1000+ themes in its library. Some free, some $200 to $400 one-time. You get full Liquid code access if you want to go deep. Drag-and-drop sections handle the basic edits. Designers can build something completely custom. Here's the trade-off most new stores miss. Stan's simplicity converts well in the short term because the checkout is fast and mobile-friendly. Shopify's brand flexibility wins long-term because customers remember stores that look distinct. 3. eCommerce features compared Shopify owns the commerce side. Real inventory management. Shipping zones and rates. Tax automation. POS for in-person selling. Multi-currency. International domains and B2B wholesale features. Stan owns the creator's side. One-click checkout is designed for impulse buys. AutoDM that messages new customers on Instagram. Built-in funnels. Calendar-based coaching bookings. Course completion tracking. UTM tracking for social campaigns. The gap I see most often: new sellers pick Stan because it's easy, hit a feature ceiling around month four, and end up rebuilding on Shopify anyway because they want to add a physical or want a real website. 4. Marketing tools built in Both platforms ship email marketing, discount codes, and upsell tools. Shopify pulls ahead on abandoned cart recovery (every plan has it), Shopify Email, SEO, marketing automations, and Shop Pay. It also integrates with Klaviyo, Omnisend, and every major email tool. Stan pulls ahead on creator-specific marketing. Bio link funnels. Affiliate share built in. UTM tracking on every link. Email flows tied to your storefront, not your website. The whole stack assumes you're driving traffic from social, not Google. If you plan to rank on Google and run email campaigns from a real domain, Shopify is the stronger marketing platform. If you live and die by Instagram and TikTok, Stan's tools fit your workflow better. 5. Apps, integrations, and scalability Shopify's App Store has more than 16,000 apps. Dropshipping, print-on-demand, accounting, CRM, ERP, reviews, loyalty programs, subscription billing, and headless commerce. Whatever you need to add, someone has built an app for it. Stan has a small native toolkit and a handful of key integrations: Stripe, PayPal, Mailchimp, and Zapier. Fewer apps mean fewer choices, but also less bloat and fewer monthly app fees stacking up. Scalability is where Shopify really separates. I've watched merchants triple revenue after migrating from Stan because they finally had real inventory tools, multi-channel selling, and proper analytics. 6. Customer support: Who actually picks up the phone Stan's support gets praised everywhere. Human-first, creator-first, 4.8 on Trustpilot, fast email responses. Shopify offers 24/7 live chat, phone support on most plans, a massive help center, and active community forums. The volume is higher, so response quality varies. Some merchants get great answers in five minutes. Others wait hours for a chat rep. For a first-time seller who needs handholding, Stan's support is much better. For a growing brand with technical questions about coding or store optimisation, Shopify wins easily. Pros and cons of each platform Stan Store pros: Live storefront in under 30 minutes Zero transaction fees Built-in courses, coaching, memberships, and communities 11 mobile-first templates Strong creator-focused support AutoDM, funnels, and UTM tracking included Stan Store cons: No real physical product support Limited customization beyond templates Small app ecosystem No native SEO or blogging Feature ceiling for sellers scaling past $20K/mo Tied to social traffic, not search Shopify pros: Sells anything: physical, digital, subscriptions, services 1000+ themes, full code access 16,000+ apps in the App Store Real SEO, blogging, and content marketing Multi-channel: web, social, retail, marketplaces, POS Scales from solo seller to enterprise 24/7 support Shopify cons: Steeper learning curve Setup takes hours, not minutes App costs add up at scale Transaction fees outside Shopify Payments Higher-tier plans get expensive fast When to pick Stan Store (Best for) You sell digital products, courses, coaching, or memberships Your audience lives on Instagram, TikTok, or YouTube You don't need a full website with blogging or SEO Your monthly revenue sits under $10K You hate technical setup and just want to sell Stan is the right call for the solo creator, the coach, the course creator, the podcaster, the fitness pro, and the consultant whose business is built around a personal brand and a social audience. When to pick Shopify (Best for) You sell physical products You want a real brand with a custom website and domain You plan to grow past $10K/mo in the next year You want SEO traffic from Google, not just social You sell across multiple channels: web, social, retail, marketplaces You need real inventory, shipping, and tax tools Shopify is the right call for product brands, scaling stores, multi-product catalogs, omnichannel sellers, and anyone who treats their store as a real business. Five signs to switch from Stan Store to Shopify You want to add a physical product, but can't make it work Your monthly revenue crossed $5K, and the platform feels limiting You want SEO traffic from Google, not just social posts You need real inventory or shipping for what you're selling You're building a brand, not just monetizing a personal audience Your customer list (export the CSV), product files, email subscribers, and course content can carry over to Shopify cleanly. Although you need to rebuild storefront design, theme, payment gateway setup, integrations, and any funnels you had in Stan. My honest take. If you're consistently selling $5K to $10K/mo and feeling boxed in, switch. If you're still under $2K/mo and figuring out what to sell, stay on Stan. Want to migrate to Shopify? Here's a checklist on how to migrate to Shopify in 2026. My verdict: Stan Store vs Shopify in 2026 So here’s the bottom line on Stan Store vs Shopify questions I constantly get. Start on Stan if you sell digital offers and live on social Start on Shopify if you sell anything physical or plan to scale past social For switchers: Move to Shopify once you're consistently doing $5K to $10K/mo and feel boxed in Don't move until you've validated the offer and outgrown the platform Moving back to Stan from Shopify rarely makes sense unless you're simplifying your business Both platforms are great. Stan Store bets that creators win by selling fast, simple, and direct from social. Shopify bets that brands win by owning their storefront, channels, and customer relationships. If you're starting out and selling digital to a social audience, Stan saves you time and money in year one. If you're building something you want to grow for the next five years, Shopify is worth the steeper setup. FAQs 1. Is Shopify better than Stan Store? If you're a solo creator selling digital products from your Instagram bio, Stan Store is actually the better choice right now. It's faster, cheaper, and built for exactly that. If you sell physical goods and want a personal website to create your brand, Shopify wins every time. 2. How much does both Stan Store and Shopify cost? Stan Store costs $29 per month for Creator or $99 per month for Creator Pro, with zero transaction fees. Shopify starts at $5 for Starter, jumps to $39 for Basic, then $105, $399, and up from there. Plus, they have a 2.5% to 2.9% in transaction fee on top unless you use Shopify Payments. 3. Is the Stan Store worth it? For a creator selling courses, coaching, memberships, or ebooks to a social audience, absolutely yes. You'll launch faster, pay zero transaction fees, and get native tools for email and funnels built in. If you sell physical products or plan to scale into a real brand, Shopify will serve you better long-term. 4. Can I sell physical products on the Stan Store? No. You can list physical items as products, but Stan doesn't handle real inventory tracking, shipping integrations, or the order fulfillment complexity that physical products need. If selling physical goods is part of your plan, Shopify is the only platform between these two that makes sense.

Sajini Annie John
3 Min • 5 June 2026
3 Views

Vineet Nair
14 Min • 5 June 2026
4 Views
Vineet Nair
9 Min • 5 June 2026
5 Views

Vineet Nair
8 Min • 4 June 2026
9 Views

Sajini Annie John
2 Min • 3 June 2026
11 Views
")
Vineet Nair
10 Min • 3 June 2026
12 Views

Vineet Nair
7 Min • 2 June 2026
22 Views

Sajini Annie John
6 Min • 30 May 2026
40 Views
")
Vineet Nair
10 Min • 29 May 2026
35 Views
")
Sajini Annie John
5 Min • 28 May 2026
30 Views
Vineet Nair
11 Min • 28 May 2026
34 Views
")
Vineet Nair
8 Min • 26 May 2026
38 Views


