Store Pickup allows your customers to place orders online and pick them up from your physical store location at their preferred date and time. It provides flexibility, eliminates shipping costs, and enhances customer satisfaction by offering convenient pickup scheduling.
Steps to Create Locations
1. Go to your Shopify Admin.
2. Open the Stellar Delivery Date & Pickup App.
3. Navigate to the Settings page.
4. Click on the “Location” settings section.
5. In the top-right corner, click “Create Location”.
6. Fill in your location address (name, tag, address lines, city, province, postal code, country).
7. Click Save.
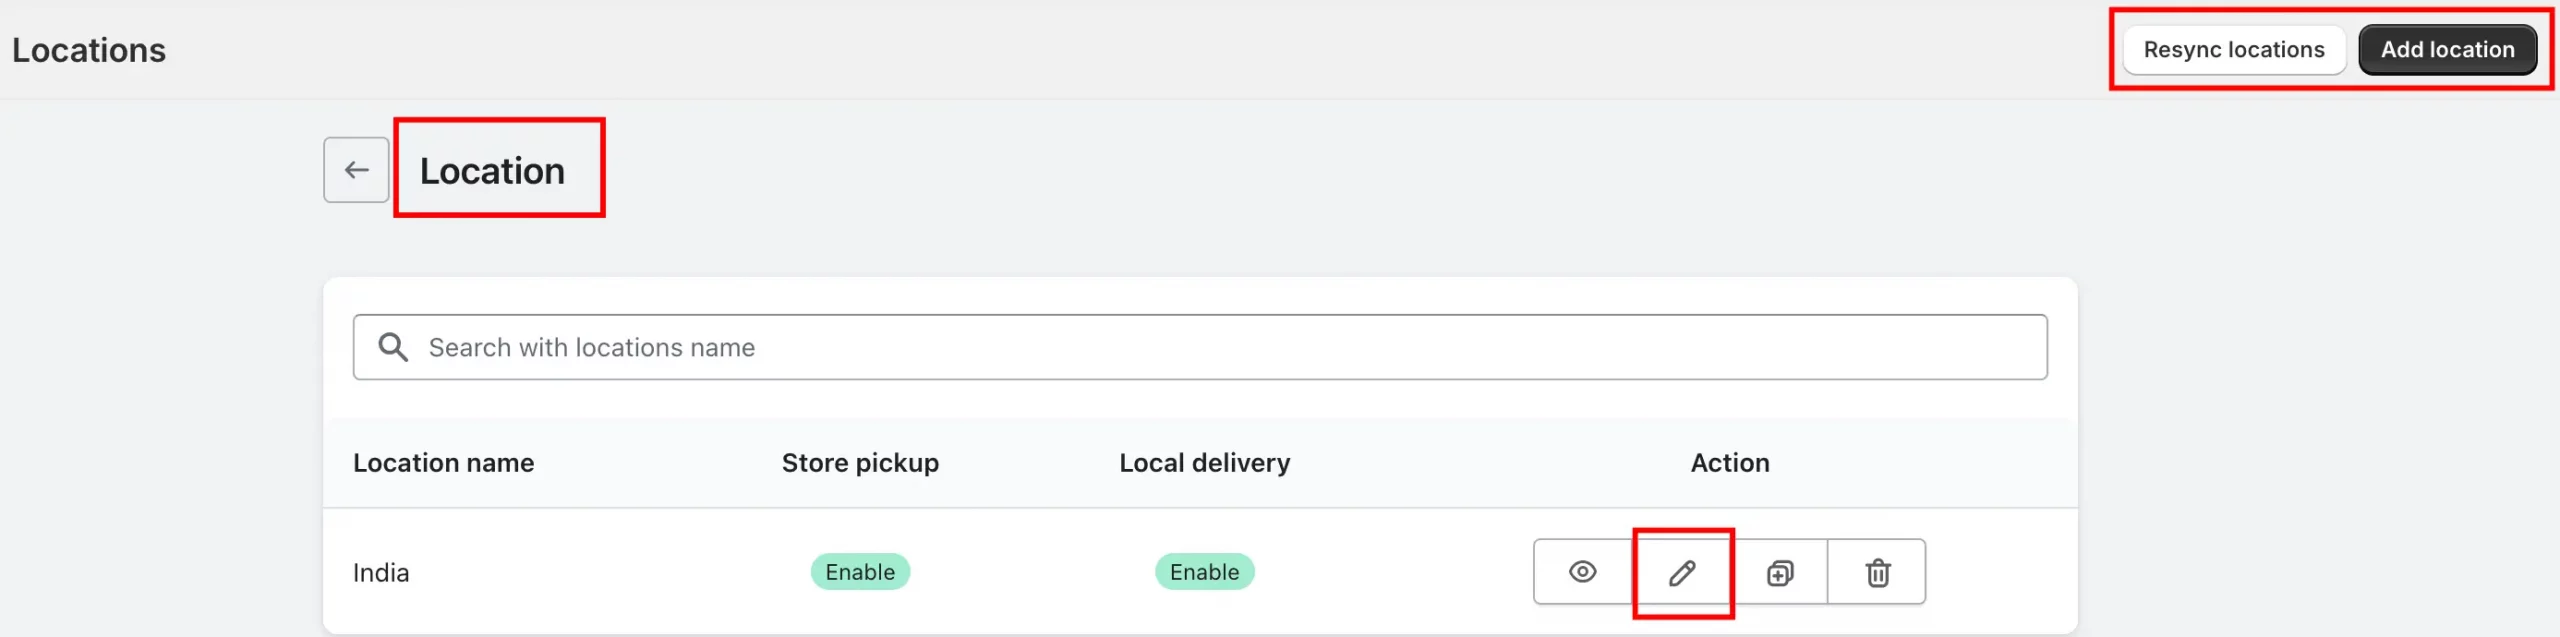
Explore Locations
➝ The app automatically fetches default locations from your Shopify store.
➝ If no locations are shown, click “Resync Location” in the top-right to sync with Shopify.
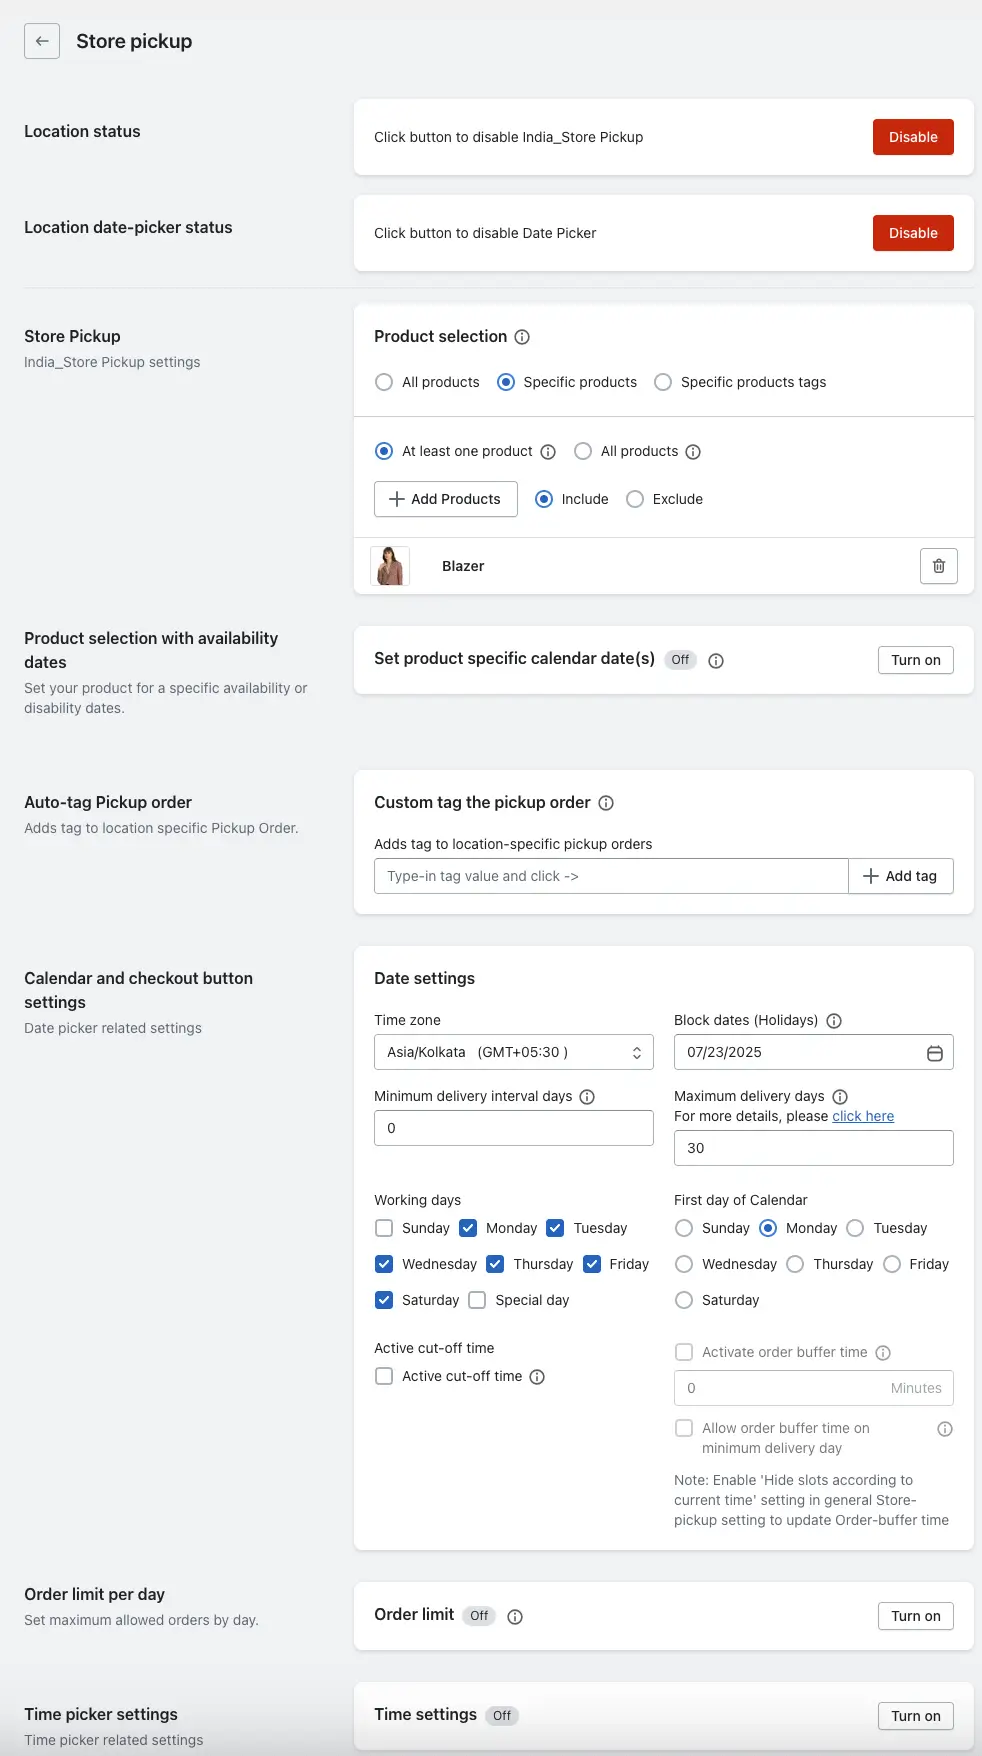
Store Pickup Settings
Inside the Store Pickup settings, you’ll find several configuration options that determine how the feature behaves:
1. Store Pickup Status
➝ If enabled, customers can pick a date and time from a calendar.
➝ If disabled, the store pickup tab will show an error message on the cart.
2. Location Date-picker Status
Enable/disable the calendar display.
➝ Keep it disabled if you want customers to only check availability without showing the calendar.
➝ Keep it enabled to allow customers to select a date and time.
3. Product Selection
Choose which products are available for pickup:
➝ All Products
➝ Specific Products (include/exclude selections)
➝ Product Tags
This gives you full control over what’s eligible for pickup.
If you want to know more details about this feature, please check this guide.
4. Product Selection with Availability Dates
➝ Set specific availability dates for selected products.
➝ Prevents customers from selecting pickup dates when items are out of stock or unavailable.
If you want to know more details about this feature, please check this guide.
5. Auto Tag Pickup Order
➝ Automatically adds a custom tag to pickup orders in Shopify.
➝ Helps you identify and manage store pickup orders quickly.
6. Calendar and Checkout Button Settings
Manage the calendar display and scheduling logic:
➝ Timezone
Select the timezone to ensure correct display of dates and times.
If you want to know more details about this feature, please check this guide.
➝ Block Dates (Holidays)
Mark non-working days like public holidays where pickups are unavailable.
If you want to know more details about this feature, please check this guide.
➝ Minimum Delivery Interval Days
Set a gap between the current date and the earliest available pickup date.
Example: If set to 2, a customer can only schedule a pickup at least 2 days ahead.
If you want to know more details about this feature, please check this guide.
➝ Maximum Delivery Days
Set how far in advance pickups can be scheduled.
Max limit: 180 days
If you want to know more details about this feature, please check this guide.
➝ Working Days
Select which days of the week your store allows pickups.
If you want to know more details about this feature, please check this guide.
➝ First Day of the Calendar
Choose whether the calendar starts with Monday, Sunday, etc., for better alignment with business operations.
➝ Active Cut-off Time
Set a daily deadline for placing same-day pickup orders.
If you want to know more details about this feature, please check this guide.
➝ Active Order Buffer Time
Define a buffer window (in hours) between order placement and available pickup time.
If you want to know more details about this feature, please check this guide.
7. Order Limit Per Day
Set a maximum number of pickup orders per weekday.
Example: Allow only 10 pickups on Monday. Once full, it will move to the next Monday.
8. Time Picker Settings
Configure pickup time slots:
Available Options:
- Default: Same time slots for all days.
- All Days: Apply one rule to all days.
- Day Wise: Set specific time slots for each weekday.
- Slot Wise: Create individual time slots (e.g., 9:00–10:00 AM, 11:00–12:00 PM).
If you want to know more details about this feature, please check this guide.