We’ve introduced one of the most requested features in iCart — Volume/Quantity Discount for items added to the cart. This feature allows you to automatically offer discounts based on the quantity of a specific product or variant in the cart, encouraging bulk purchases and increasing average order value.
⚙️ How to enable volume discount
To get started:
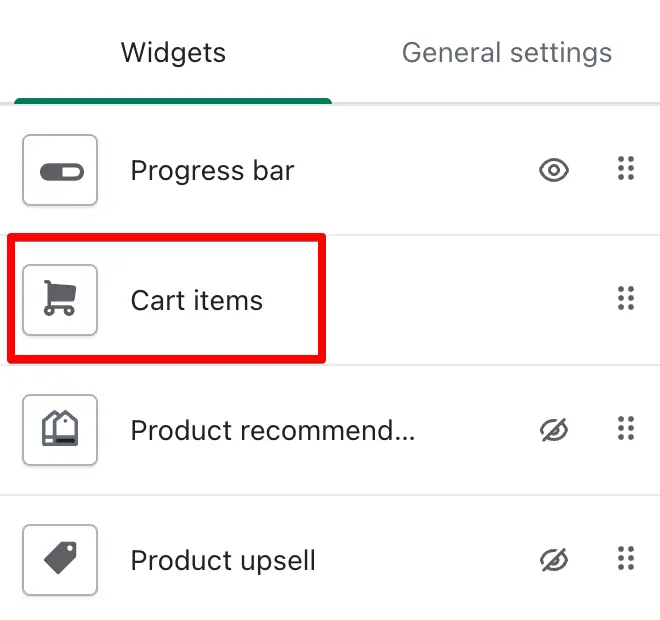
- Go to the Cart Items widget inside the iCart editor.
- Open the Cart items widget.
- Scroll down in the settings and look for “Other upsell” setting.
- Open the Cart items list Volume Discount option.
- Click on the “Enable volume discount” option.
➞ Cart items
➞ Volume discount

Once enabled, you’ll be able to apply volume-based discounts using flexible conditions and product tags.
🧮 Discount application conditions
You have two options to define how the volume discount should apply:
Apply if equal or greater than quantity added
The discount will apply when the quantity in the cart is equal to or greater than the quantity set.
Example:
If you set a 10% discount for quantity 2 and select this option, the discount will apply when a customer adds 2 or more items to the cart.
Apply on the same quantity only
The discount will apply only when the exact quantity is added — not more, not less.
Example:
If you set a 20% discount for quantity 4 and select this option, the discount will apply only when exactly 4 units of the item are added.
🛠️ Available options
These settings help you customize how volume discounts appear to your customers inside the cart drawer. You can choose a layout and design the offer message to match your brand’s tone and style.
01. Select Layout
Choose how you want to display volume discount offers. iCart provides three layout styles:
- Offer view in box – Shows each offer in a clean, bordered box.
- Offer view in select box – Displays available discounts in a dropdown, allowing customers to select.
- Offer view in text – Shows the offer as plain text without any borders or selection options.
Each layout is designed to suit different types of stores and user experiences.
02. Offer Setting Text
Set the custom message that will appear with the discount offer. You can use the following shortcodes to make the message dynamic:
{{quantity}}– Will be replaced with the quantity set for the discount.{{discount}}– Will be replaced with the discount amount.
Example:
If you write Buy {{quantity}} and save {{discount}}, and your discount is 10% on 2 items, customers will see:
Buy 2 and save 10%
Style the offer using:
- Offer text color: Set the text color for your volume discount offer message. Use this to make your offer stand out or align it with your store’s branding.
- Offer background color: Choose the background color of the offer box or message to improve visibility and branding consistency.
- Offer border color: Set the color for the border around your offer box (applies to the “Offer view in box” layout). This helps highlight the offer more clearly in the cart drawer.
03. Price Text
Display the individual item price using the {{individual_price}} shortcode. This is useful for showing price-per-item when multiple quantities are involved.
Example:
If the customer adds 3 items priced at $10.00 each, your message might display:
$10.00 each
You can customize the styling of this section with the following options:
- Selected text color – Set the text color when an offer is selected.
- Selected background color – Set the background color for the selected offer.
- Selected border color – Define the border color for the selected offer.
04. View More Text
When you have multiple discount offers, the widget will show a “View More” or expandable section for additional offers.
- View more text – Customize the label for this expandable section (e.g., “Select More Offers”).
- View more text Color – Set the text color for the view more link to match your design.
05. Discount Name
Enter a custom discount name that will appear in the cart when the volume discount is applied. This helps both customers and store owners identify which discount was applied.
- You don’t need to create this discount manually in Shopify.
- iCart automatically applies the discount using the name you set here.
- This also makes it easier to track which orders used volume discounts in your reporting.
🏷️ How to set up product tags
To use volume discounts, you must add special tags to your products using this syntax:ICTQD_{variant}_{qty}_{discount_with_suffix}
🔍 Tag Components Breakdown
| Part | Meaning |
|---|---|
ICTQD | Fixed prefix required for volume discounts |
{variant} | ALL for all variants or the specific variant ID |
{qty} | Minimum quantity required for discount or NO to exclude |
{discount_with_suffix} | Discount value + P for % or F for fixed amount |
Examples:
• ICTQD_ALL_2_5F — Apply $5 off when 2 or more of any variant are added.
• ICTQD_42705428381935_2_5P — Apply 5% off when 2 units of variant ID 42705428381935 are added.
• ICTQD_42705428381935_NO — Exclude this specific variant from any volume discount — no discount block will appear.
➕ How to add tags to products
To make the volume discount feature work, you need to assign specific tags to your products in Shopify. These tags tell iCart which products and variants should receive a discount based on the quantity added to the cart. You can apply tags to individual products or to multiple products in bulk — whichever suits your store’s workflow.
For Individual Products
- Go to Shopify Admin > Products.
- Select a product.
- In the Tags section, add your volume discount tag (e.g.,
ICTQD_ALL_2_5F). - Save the product.
For Multiple Products (All at Once)
Option 1: From Shopify UI
- Go to Products.
- Select multiple products.
- Click More actions > Add tags.
- Add your tag and save.
Option 2: Using CSV File
- Go to Products > Export all products.
- Keep only 3 columns in the file:
Handle,Title,Tags. - Add your tag in the Tags column.
- Save and Import the file back into Shopify.
🗑️ How to remove tags from products
If you no longer want certain products to be eligible for volume discounts, you can simply remove the tags from those products in Shopify. This ensures that iCart doesn’t apply any discounts linked to those tags. You can delete tags individually or in bulk, depending on your needs.
For Individual Products
01. Go to Shopify Admin > Products.
02. Open the product from which you want to remove the tag.
03. In the Tags section, delete the relevant tag (e.g., ICTQD_ALL_2_5F).
04. Click Save.
For Multiple Products (Bulk Remove)
➞ Option 1: From Shopify UI
- Go to Products.
- Select multiple products.
- Click More actions > Remove tags.
- Enter the tag name you want to remove.
- Click Save.
Option 2: Using CSV File
- Go to Products > Export all products.
- Open the exported CSV file.
- Keep only the following columns:
Handle,Title,Tags. - Use Find & Replace to delete the specific tag from the Tags column.
- Save the updated file and return to Shopify.
- Import the file back to update your product listings.
If you’d like to learn more about the other settings in the Cart Items widget (like widget heading, rules, display settings, and more), check out our Common Widget Settings guide →
💬 Need Help?
If you need any help setting up volume discounts or product tags, feel free to email us or live chat with our support team — we’re always here to assist you!