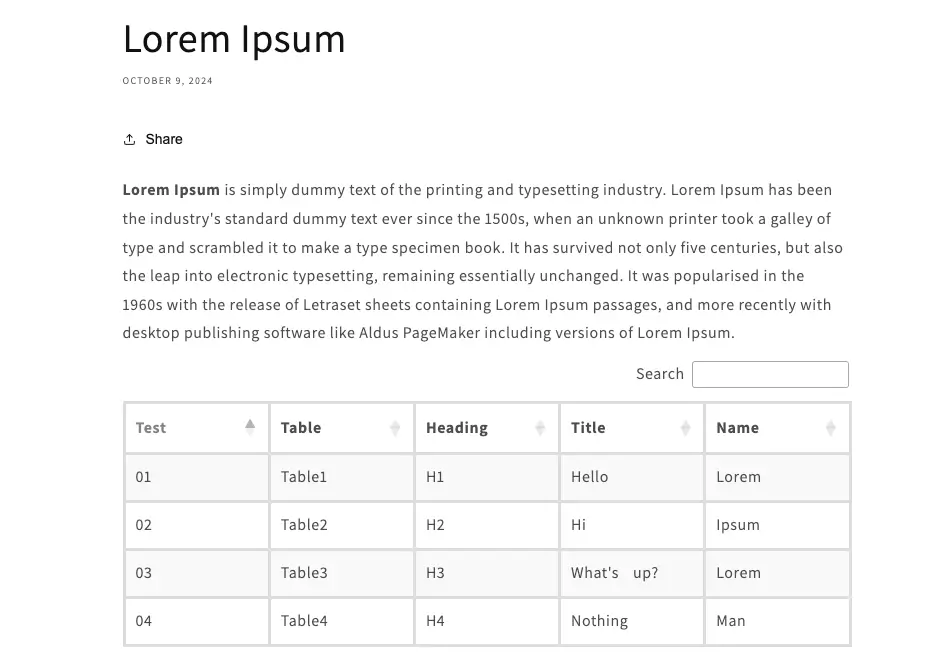
You can add tables to your blog pages in two ways: by creating different tables for specific blog pages or by using the same table across all blog pages. To add a table for a specific blog page, create the table, copy the shortcode, and paste it into the description area of the desired blog page in your Shopify admin. For adding the same table to all blog pages, you can either insert the shortcode directly into the blog liquid file if you have coding knowledge or use the Theme customizer to add a custom block for the table.
To add the shortcode in the blog liquid file, create the table, copy the shortcode, and navigate to the theme code editor to insert it into the blog liquid file. Alternatively, in the Theme customizer, select the blog page, add a custom liquid block, and paste the shortcode there. Ensure you follow these steps carefully to display the table correctly on your blog pages.
You can add different tables for different blog pages, or you can use the same table for all blog pages.
1. Add different table for different blog page
2. Add same table in all blog pages
Add different table for different blog page
Let’s start by adding a table for a specific product only.
Step 1: Create the table.
Step 2: After creating the table, copy the shortcode from the Dashboard.
Step 3: Go to Shopify admin and open the Online Store.
Step 4: find the the Blog page.
Step 5: Open the blog page where you want to add the table.
Step 6: Go to the description area, and on the right side, you will see the “Show Editor” option.
Step 7: Add the shortcode in the description editor area and save it.
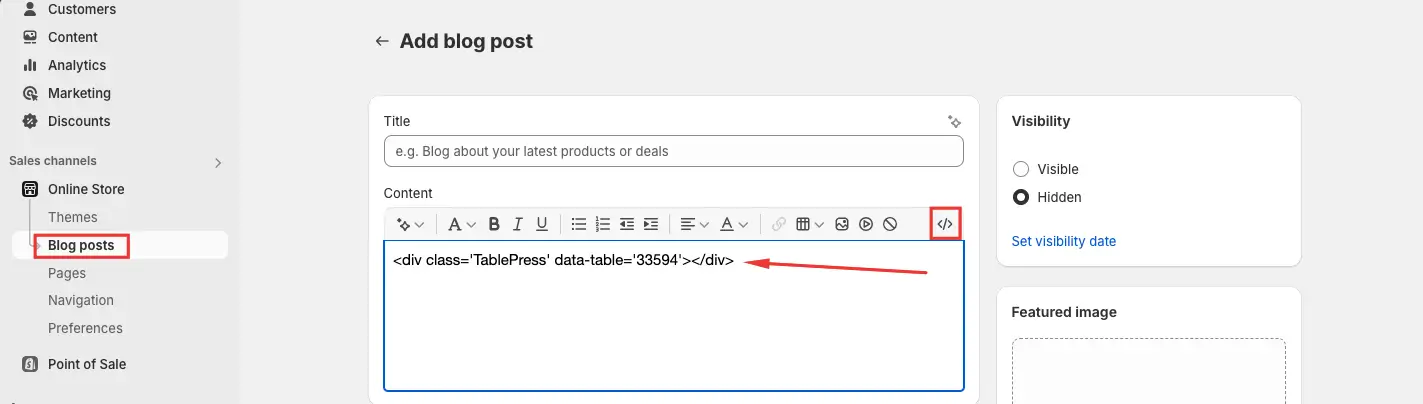
Once these steps are complete, open your blog page in your live store, and the table will display on the specific blog page in description.
Similarly, you can create another table for a different blog page and follow the steps above to add the table to the specific blog page.
Add same table in all blog pages
Let’s start by adding a table for all products. If you have good technical and coding knowledge, you can add the shortcode directly in the blog liquid file. If you’re not familiar with coding, you can add a custom block to include the table. So, there are two ways to add the table for all blogs.
1. Add shortcode in theme liquid file.
2. Add shortcode in Theme customizer.
Add shortcode in theme liquid file
Step 1: Create table in the app.
Step 2: After creating the table, copy the shortcode from the Dashboard.
Step 3: Go to Shopify admin and choose Online store.
Step 4: Click on edit code option in the theme.
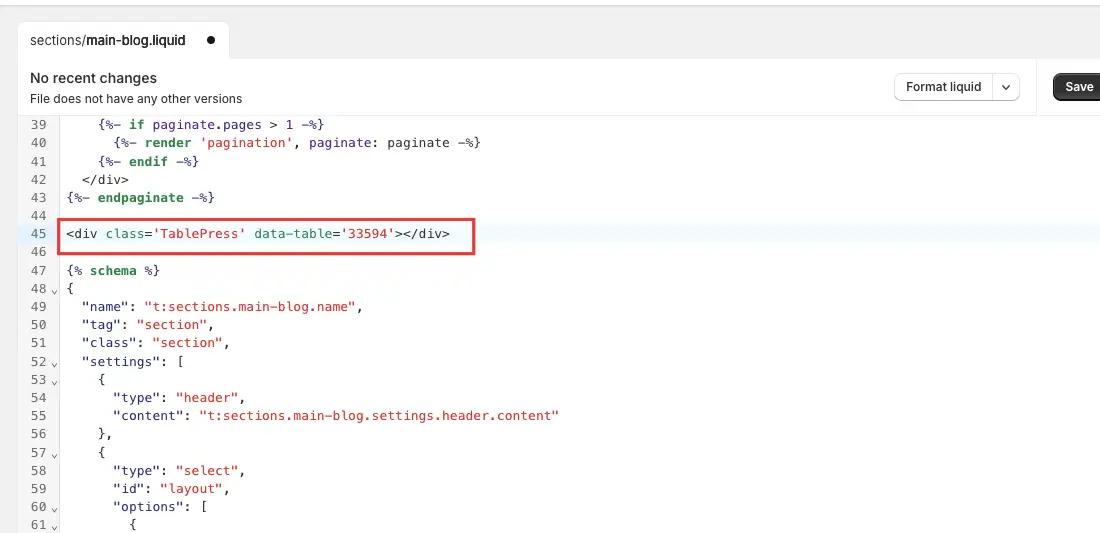
Step 5: find blog liquids file.
Step 6: Add the shortcode to the blog page’s liquid file.
Add shortcode in Theme customizer
Step 1: Create a table in the app.
Step 2: After creating the table, copy the shortcode from the Dashboard.
Step 3: Go to Shopify admin and choose online store, select the desired theme, and click on the Customize button.
Step 4: In the top navigation, at the center, you will see a dropdown list. Please find and select the blog page from that list.
Step 5: Select the blog page and add the block where you want to display the table.
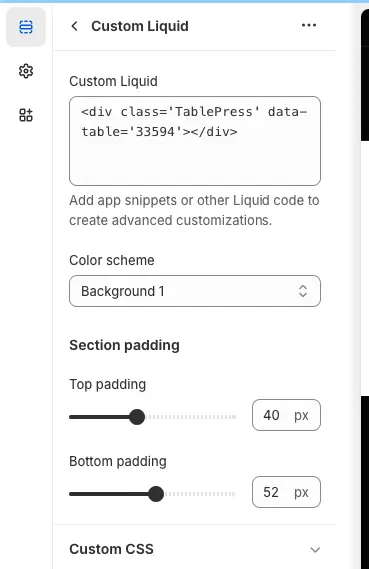
Step 6: After adding the block, select the Custom Liquid option. If you have theme 2.0 then custom liquid block will be display.
Step 7: Click on the custom liquid block and paste your shortcode there.
Result in website: