Generating AI overview
The Import Table option in the TablePress Size Chart & Guide Shopify app allows you to upload data that has already been created or collected in external formats (such as CSV, JSON, or XLSX) into the app.
You can import data as:
- A new table
- Replace an existing table
- Append data to an existing table
- Manage Size Chart tabs (for Size Chart tables)
There are two ways to import the table data.
You can use the Import feature from the left-hand menu below the app name.
Steps: Go to the Shopify Admin > Open the TablePress Size Chart & Guide app > Click the Import option from the left-hand menu below the app name.
Or you can import data directly from the Table Manipulation page for that specific table.
Ways to Access the Import Feature:
Method 1: From the Left Menu
Step 1: Go to your Shopify Admin.
Step 2: Open the TablePress Size Chart & Guide app.
Step 3: Click on Import from the left-hand menu.
Method 2: From the Table Manipulation Page
Step 1: Go to the Dashboard.
Step 2: Click the Edit button under the Actions column next to the table.
Step 3: Open the Import tab on the Table Manipulation page.
Table Type Selection
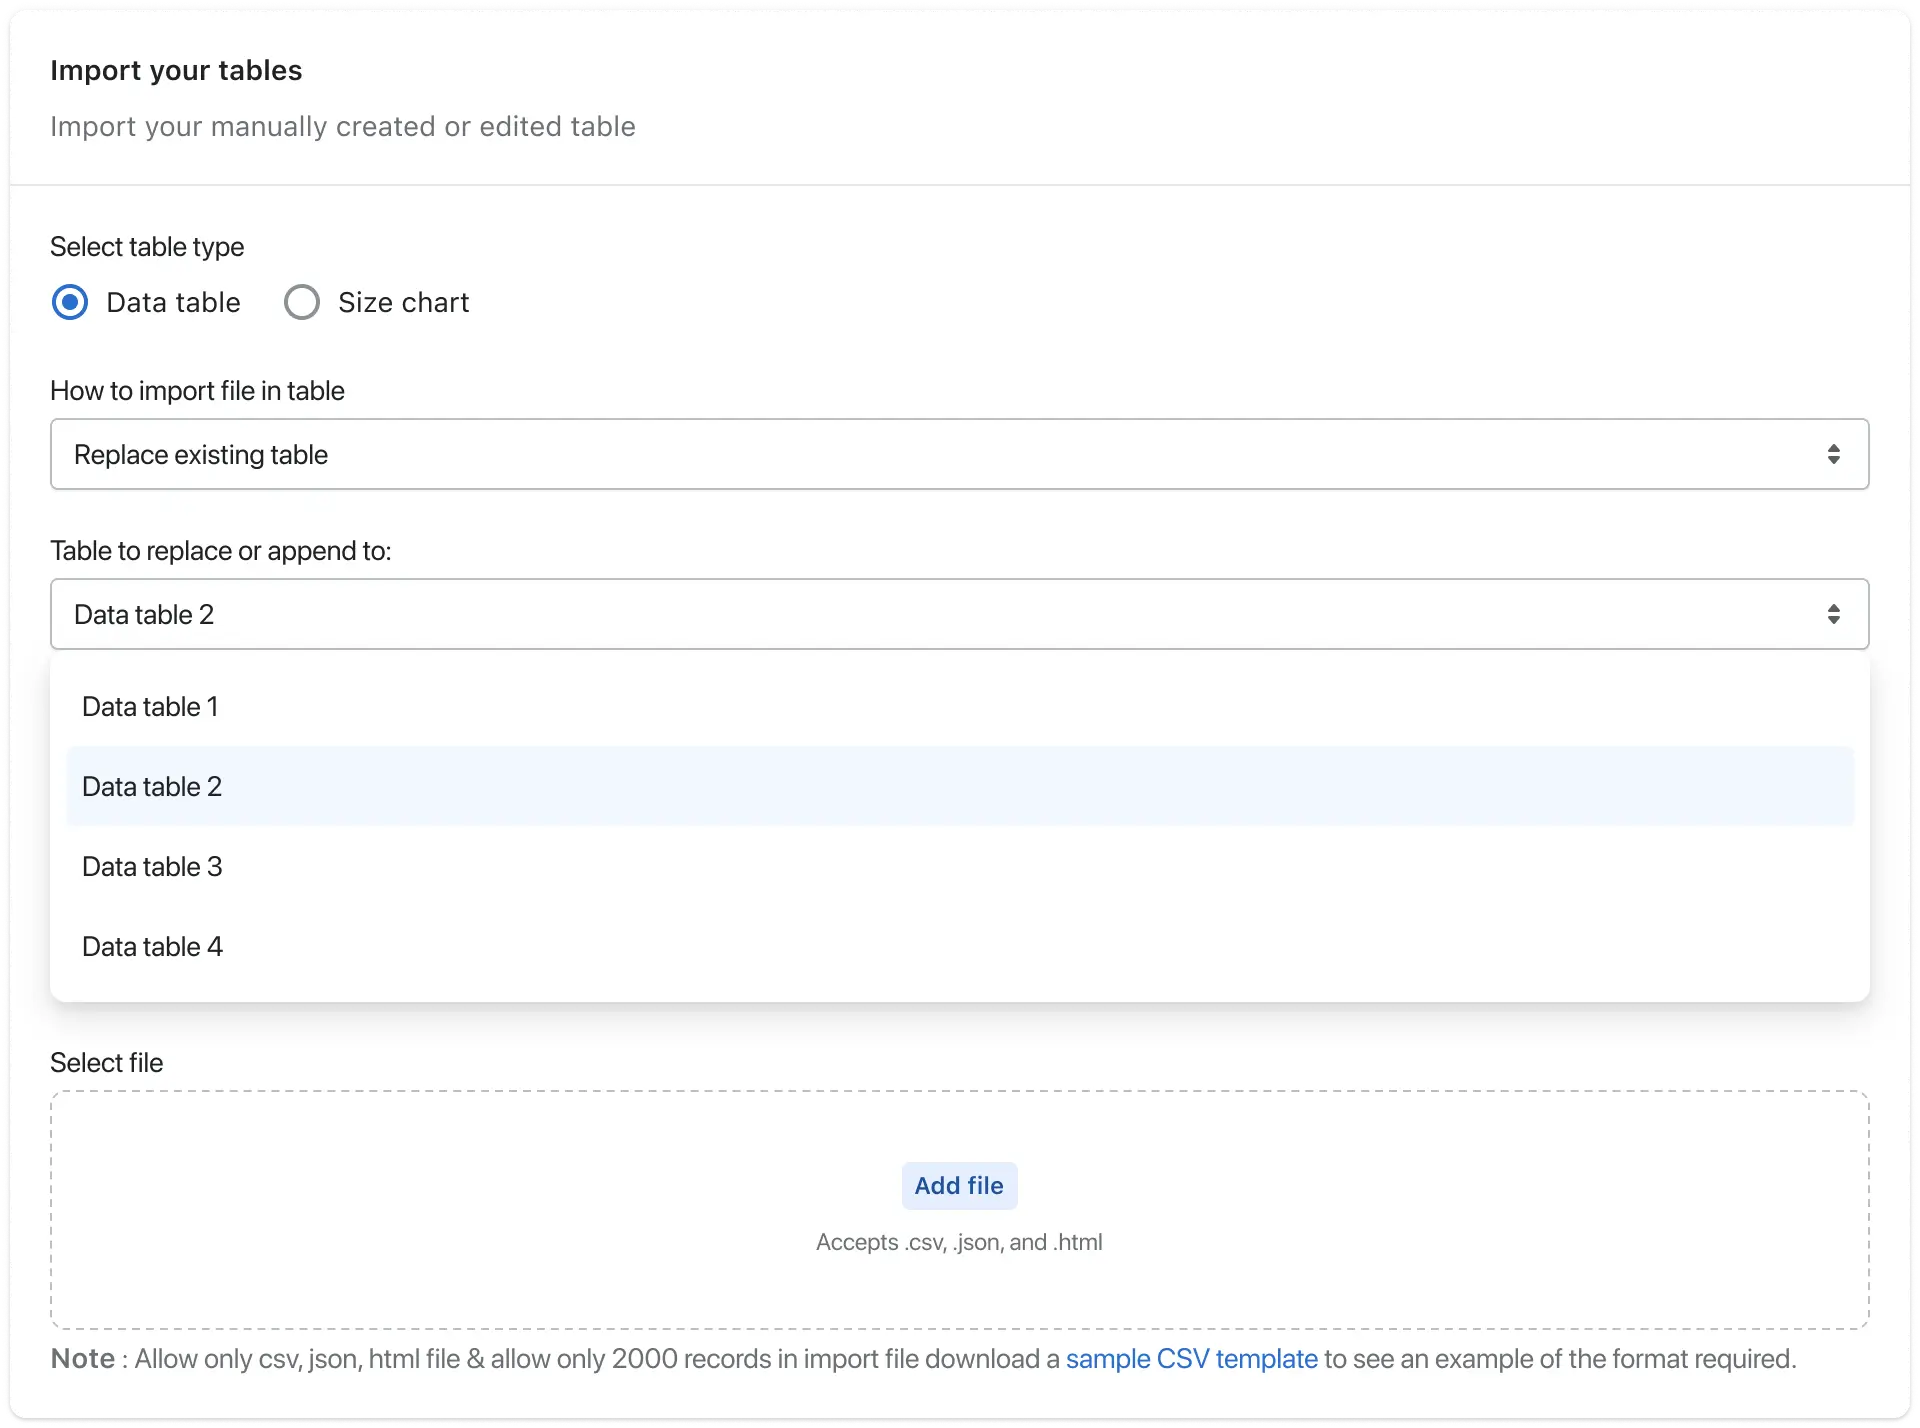
Before selecting the file, you will now see a Table Type option with radio buttons:
- Data Table (Default selected)
- Size Chart
This allows you to define how the imported data should be handled.
When “Data Table” is Selected
The import process works exactly as before.
You can:
- Create a new table
- Replace an existing table
- Append rows above an existing table
- Append rows below an existing table
There are no changes to the existing workflow.
When “Size Chart” is Selected
The import behavior changes to support tab-based Size Chart management.
You will see the following options:
- Create New: A new Size Chart table is created, and the imported data will be added as the first tab. This works the same as the previous “Create New” flow.
- Replace Existing: Choose an existing Size Chart table. Additional tab management options will appear, allowing full control over how the imported data is handled inside the selected Size Chart.
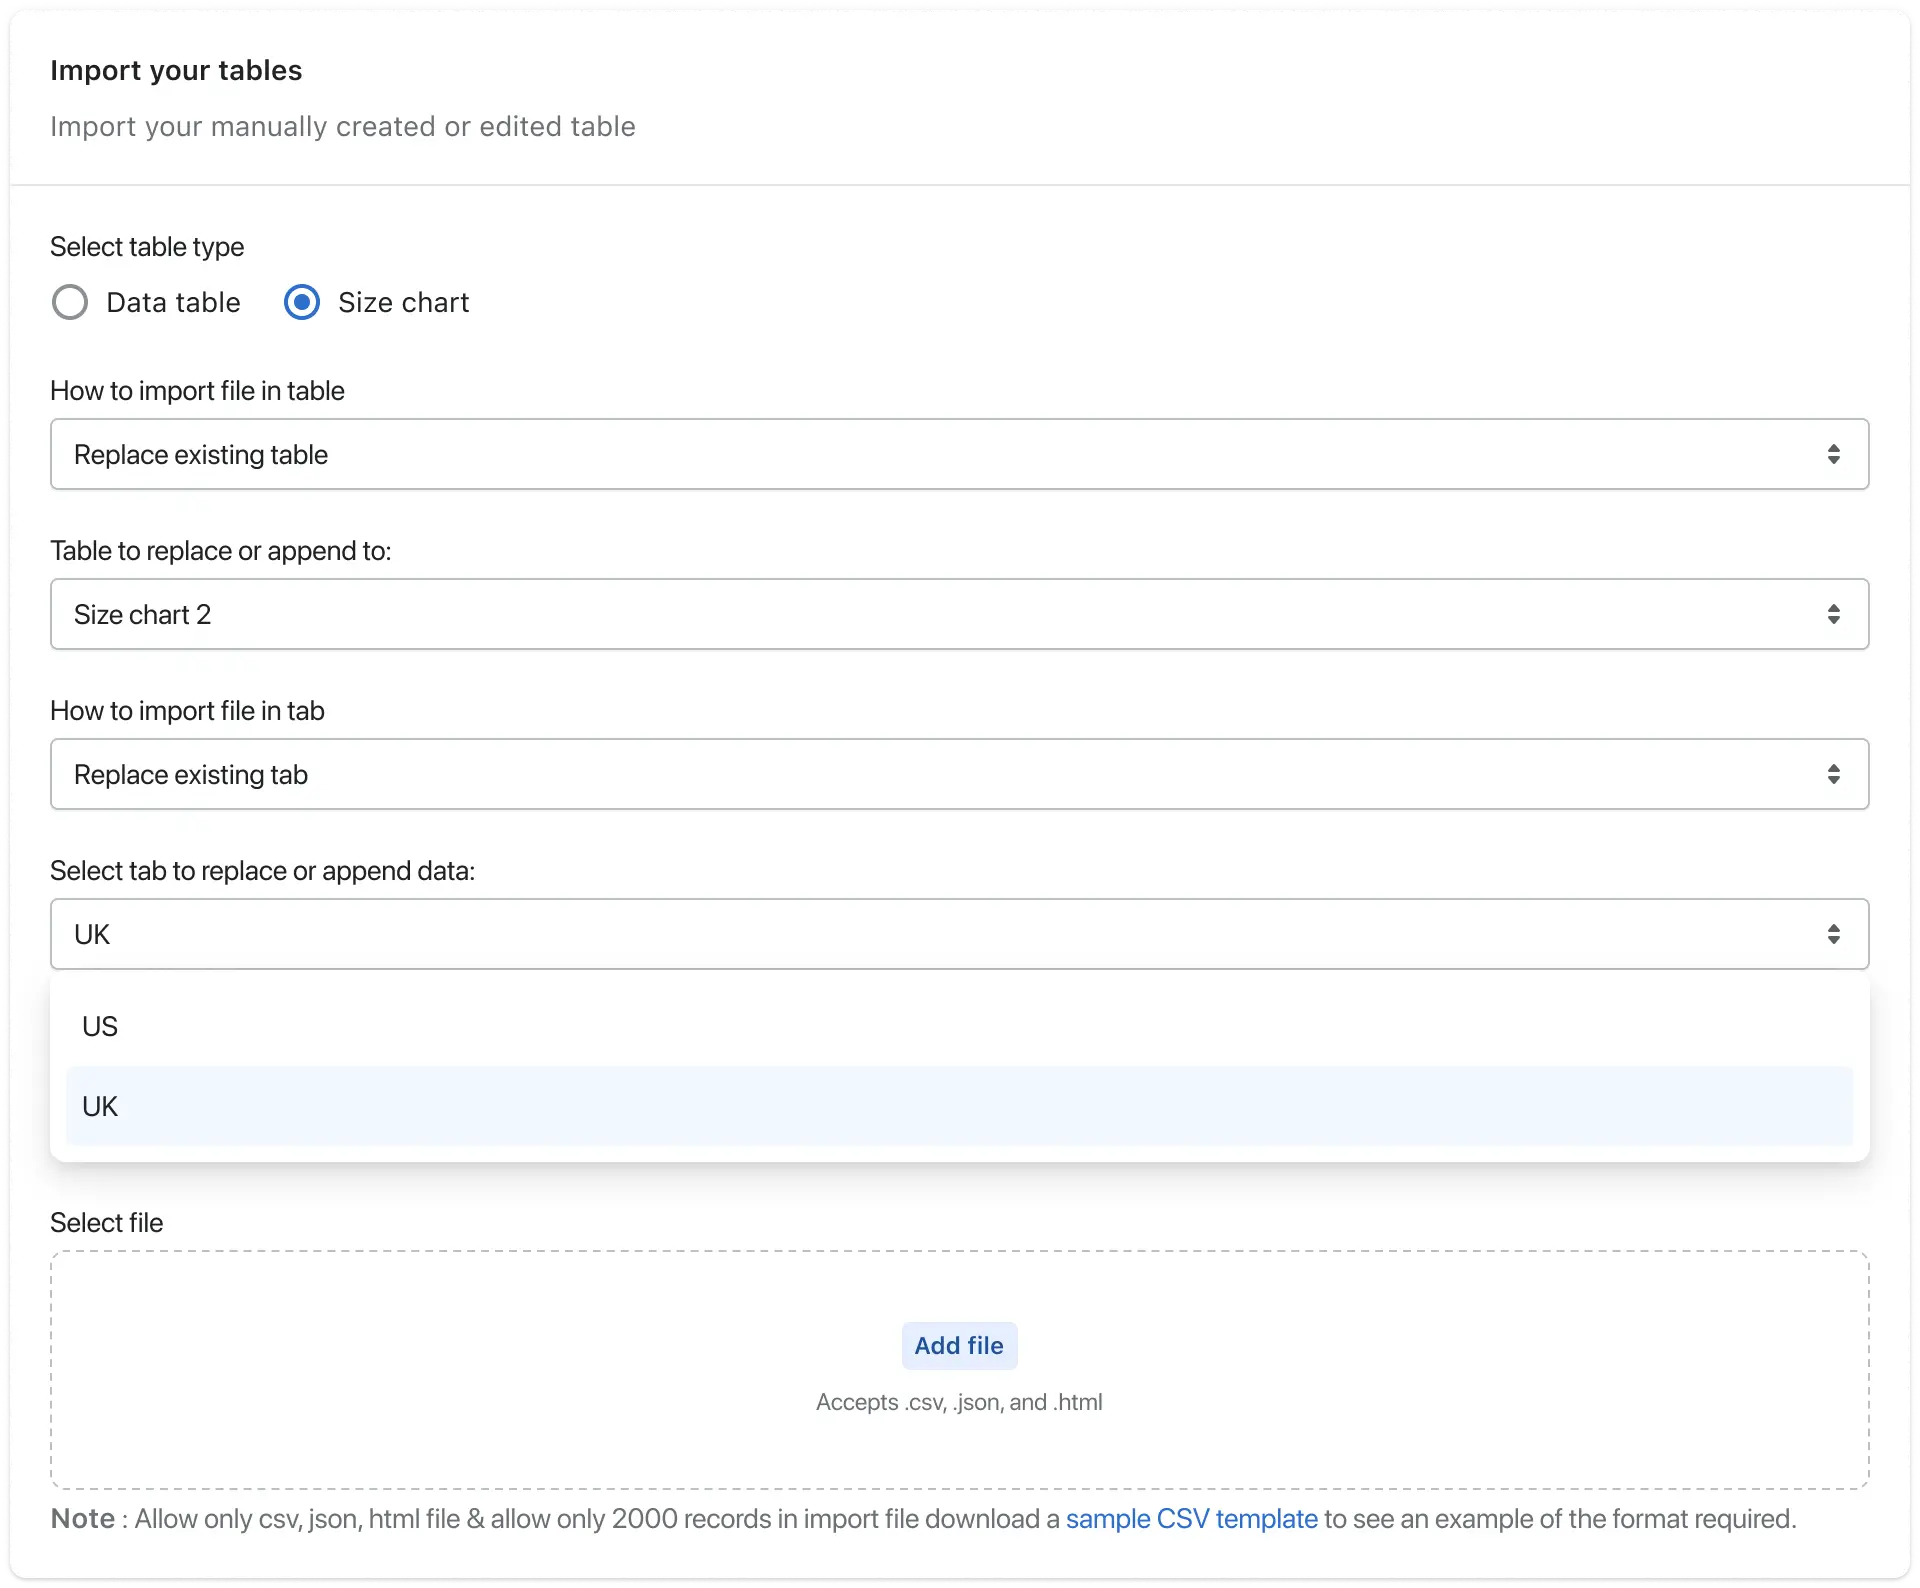
Tab Management Options (For Size Chart)
When replacing an existing Size Chart table, you can choose:
- Create New Tab: The imported data will be added as a new tab inside the selected Size Chart table.
- Replace Existing Tab: Select a specific tab. The imported data will completely replace the selected tab.
- Append Above: Select a specific tab. The imported data will be inserted above the selected tab.
- Append Below: Select a specific tab. The imported data will be inserted below the selected tab.
This provides complete flexibility in organizing Size Chart data within tabs.
Steps to Import a Table
Step 1: Go to your Shopify Admin.
Step 2: Open the app and navigate to the Dashboard.
Step 3: Click Import from the left menu
OR
Click Edit next to a table and open the Import tab.
Step 4: Select the Table Type:
- Data Table
- Size Chart
Step 5: Click Add File and upload your file.
Step 6: Choose the Import Format:
- CSV
- JSON
- XLSX
Step 7: Choose how you want to import the file:
- Create New
- Replace Existing
- Append Above
- Append Below
(Additional tab options will appear if Size Chart is selected.)
Step 8: Click on the “Import Table” option at the top right.
After Import
Once the table is successfully imported:
- You will be redirected to the Table Data page.
- You can edit the table if needed.
- Or go to the Dashboard.
- Copy the table shortcode.
- Paste it wherever you want to display the table.
This updated import flow ensures:
- Clear table-type selection
- Full control over Size Chart tab management
- No changes to existing Data Table workflows
- Better flexibility and organization for Size Charts