Author: Sagarika Das
Gather knowledge about the latest insights, updates, tips, and tricks in the Ecommerce industry.
5 Min • 20 March 2026
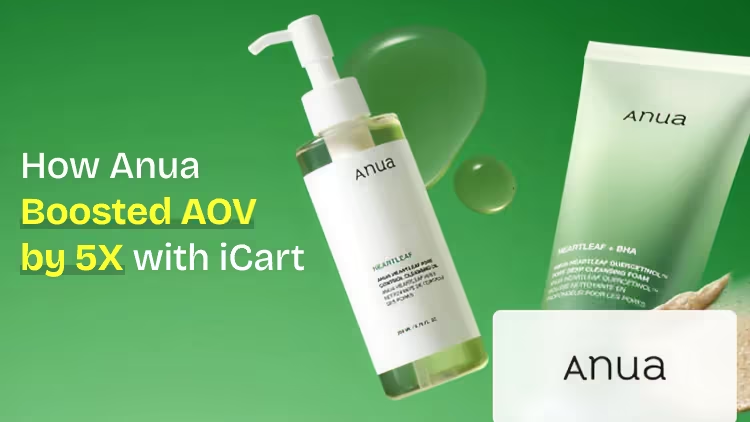
How Anua Unlocked 5X AOV Growth with iCart’s Smart Cart Features
delivery customization Challenges Solutions drive results Scale business delivery customization Challenges Solutions drive results Scale business delivery customization Challenges Solutions drive results Scale business delivery customization Challenges Solutions drive results Scale business Anua is a globally recognized Korean skincare brand known for its minimalist philosophy and focus on gentle yet effective formulations. Built on the idea of simplifying skincare routines, Anua develops products that deliver visible results while avoiding harsh or irritating components, making them suitable for sensitive skin types. Initially using a traditional full cart experience, Anua transitioned to iCart’s side cart solution in August 2025, to create a more seamless and engaging shopping journey. This shift allowed customers to easily explore complementary skincare products without disrupting their browsing flow, making it more intuitive to discover items that fit into a complete routine. By surfacing relevant recommendations directly within the cart, the brand enhanced product visibility across its range. Challenges Before implementing iCart’s side cart solution, Anua faced limitations with their existing full cart experience, which created friction in the customer journey. The traditional cart setup redirected users away from product pages, interrupting their browsing flow and reducing opportunities to explore additional products. As a skincare brand built around routines rather than single-item purchases, this made it difficult to effectively showcase complementary products and encourage customers to build complete regimens. Additionally, the lack of in-cart personalization and strategic upsell opportunities meant that customers were often unaware of related products that could enhance their skincare results. This limited the brand’s ability to increase average order value (AOV) and fully leverage its diverse product range. Anua needed a more dynamic and intuitive cart experience that could seamlessly introduce relevant recommendations while maintaining a smooth and engaging shopping journey. ❌ Cart Value Barriers Low average order value (AOV) due to single-item focus Most customers completed purchases with one primary product instead of building multi-step routines. Cart abandonment near shipping thresholds Customers were not clearly informed or motivated to reach free shipping or discount thresholds. Missed savings opportunities Customers were unaware of potential value in purchasing bundled routines or multiple complementary products. ❌ Absence of Progress-Based Incentives No free shipping or discount progress bar Customers were not motivated to increase their cart value due to lack of visible incentives. Missing tiered rewards system There were no structured milestones (e.g., “Spend more to unlock offers”), reducing upsell opportunities. ❌ Ineffective Cart UI/UX (Pre-Side Cart) Full-page cart disrupted shopping flowCustomers had to leave their browsing journey, increasing friction and drop-offs. No quick add/remove functionality Users couldn’t easily modify their cart or add suggested products without navigating away. Solution To overcome these challenges, Anua implemented iCart’s side cart solution to transform their traditional cart into a high-converting, interactive experience. By replacing the full-page cart with a seamless side cart, the brand ensured that customers could continue browsing while viewing their cart, significantly reducing friction in the shopping journey. Additionally, features like product recommendations & progress bars for free shipping and discounts motivated customers to increase their cart value. By combining personalization, incentive-driven messaging, and a user-friendly interface, Anua successfully turned their cart into a powerful revenue-driving touchpoint rather than just a checkout step. To maximize their cart effectiveness, they implemented two powerful features: ✅ Progress Bar with Multi-Reward Incentives Implemented a tiered progress bar to encourage higher cart value Customers are guided with a clear message like “Add $3.10 to unlock secret offer,” motivating them to continue adding products. Generated over $5M+ in revenue through incentive-driven cart progression Used product-based rewards to align with customer intent Instead of generic discounts, Anua incentivized purchases with relevant skincare items like Dark Spot Pads and mini serums. Built visual motivation for routine expansion As customers add products, they can clearly track progress toward unlocking multiple rewards, encouraging them to build a complete skincare routine. ✅ Product Recommendations Implemented “Frequently Bought Together” recommendations Customers adding a single product (e.g., toner) are shown complementary items like serums, moisturizers, or pads to complete their routine. Generated over 275K revenue through in-cart recommendations Encouraged full skincare regimen building Instead of isolated purchases, the cart suggests step-by-step product combinations aligned with common skincare routines. Increased product discovery at the final stage By surfacing relevant items directly in the cart, Anua ensured customers explore more of their catalog without leaving the checkout flow. Results Achieved in Last 180 Days 22932 Total Store Orders 45101 Total iCart Orders 5X iCart Generated AOV 65.70% Upsell Affected Conversion Rate These improvements reflect a clear shift in customer behavior on Anua’s store. Cart abandonment reduced as shoppers discovered complementary skincare products and felt encouraged to build complete routines. Engagement also increased, with customers interacting more with in-cart recommendations and exploring relevant product pairings. Results & Impact And...Results is Our Main Clarification By implementing iCart’s cart drawer, product recommendations, and progress bar, Anua transformed its cart into a high-performing conversion touchpoint. Shopping Experience Enhancement The improved cart experience encouraged customers to discover complementary products and understand the value of sustainable beauty routines. For instance, the clear presentation of subscription savings alongside one-time purchase options helped customers make more informed decisions about their long-term hair care needs. As Anua continues to optimize its cart experience, the brand is closely monitoring: Routine-based purchasing behavior - tracking how customers move from single items to multi-step regimens Engagement with in-cart recommendations - measuring interaction with suggested products Cart value progression - analyzing how incentives influence higher spending [related_cases_slider] Ready to Write Your Success Story? Try icart App Join successful businesses like Anua and Master your delivery scheduling Delight customers with precise timing Grow your special occasion orders Expand your delivery reach
Read Blog
9 Min • 30 June 2026
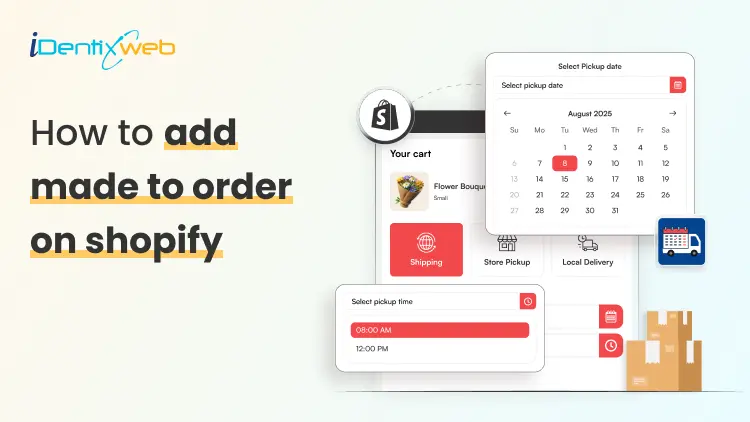
How to Set Up Delivery Scheduling for Made-to-Order Products on Shopify
Made-to-order products are a great fit for Shopify stores that sell custom, handmade, personalized, fresh, or production-based items. Instead of keeping every product ready in stock, you create the item after a customer places an order. This model works well for custom cakes, flower bouquets, handmade jewelry, engraved gifts, tailored clothing, personalized hampers, furniture, artwork, printed products, and many other custom items. But there is one challenge many merchants face: customers do not just want to know that the product is made for them. They also want to know when it will be ready. In this guide, we will cover how to add made to order on shopify, how to set up delivery scheduling, and how to manage production timelines without confusing your customers. What Does Made-to-Order Mean on Shopify? A made-to-order product is a product that is created only after the customer places an order. Unlike regular ready-stock products, these items usually need extra time for preparation, customization, packaging, or delivery planning. For example: A bakery prepares a custom cake after receiving the order. A florist creates a fresh bouquet for a selected date. A jewelry brand engraves initials after purchase. A clothing store stitches or customizes the item after order confirmation. A gift store prepares a personalized hamper based on selected products. The main point is simple: the product is not instantly ready to ship. It needs a clear production timeline and a clear delivery or pickup schedule. Shopify lets merchants create products, add variants such as size or color, and manage product details through the admin. Shopify’s own variant setup allows merchants to add options, values, images, prices, quantities, SKUs, and other product details for different variants. So when people search for how to add made to order on Shopify, they are usually looking for more than a product listing. They want a complete setup where customers understand the customization, production time, and delivery date before placing the order. Why Delivery Scheduling Matters for Made-to-Order Products Made-to-order products depend on timing. A customer ordering a birthday cake, wedding bouquet, custom gift, or event-based product cannot wait for a vague delivery estimate. They need confidence that the product will arrive on the right date. Delivery scheduling helps you: Show available delivery or pickup dates. Add preparation time before customers can choose a slot. Block holidays or unavailable dates. Limit orders per day or time slot. Manage same-day or next-day delivery with cutoff times. Give your team enough time to prepare each order properly. This is especially useful for stores selling fresh, personalized, or event-specific products. Without proper scheduling, customers may choose dates your team cannot fulfill. That creates pressure, delays, refund requests, and poor customer experience. A strong order scheduling Shopify setup solves this problem by connecting the customer’s preferred delivery time with your store’s real production capacity. Use Stellar Delivery Date & Pickup to Make Scheduling Easier For Shopify merchants who sell made-to-order products, the Delivery Date & Pickup Stellar app can make the scheduling process much easier. The app lets customers select a delivery date and time for local delivery, store pickup, and shipping directly from the cart or product page. It also supports estimated delivery date and time, same-day delivery cutoff time, time slot limits, blackout dates, holidays, and route planning. This is helpful because made-to-order stores often need more control than a normal shipping setup. For example, a bakery may want to accept only 20 cake orders per day. A florist may want to block Valentine’s Day slots once capacity is full. A handmade gift store may need three preparation days before showing available delivery dates. For made-to-order stores, this turns delivery scheduling from a manual follow-up task into a smoother buying experience. What You Need Before Setting Up Made-to-Order Products Before you start the setup, prepare the basics. This makes the product page clearer and reduces customer confusion. 1. Clear Product Details Write a product description that explains what is made to order, what customers can customize, and how long production takes. Include details like: Available customization options Materials or ingredients used Size, color, or design choices Production time Delivery or pickup instructions Return or cancellation policy for custom products 2. Product Images or Samples Even if the final product is custom, customers still need visual confidence. Add sample images, past order photos, mockups, or style references. 3. Production Timeline Decide how much time you need before an order can be delivered. For example: Custom cake: 2 days Handmade jewelry: 5–7 days Printed T-shirt: 3 days Custom furniture: 15–20 days Personalized hamper: 1–2 days This production time should be reflected in your delivery schedule. 4. Capacity Limits Do not accept more orders than your team can handle. Decide your daily or slot-wise limit. For example: 10 custom cakes per day 5 flower deliveries per time slot 20 gift hampers per day 3 furniture deliveries per week Stellar’s order limit feature lets merchants control how many orders can be accepted daily or per time slot for shipping, store pickup, and local delivery. How to Add Made to Order on Shopify and Schedule Delivery Dates Now let’s move to the practical setup. Step 1: Create a New Product in Shopify Go to your Shopify admin and open: Products > Add product Add your product title, description, images, price, category, and product status. For the product title, make it clear that the item is made to order. For example: Custom Birthday Cake - Made to Order Personalized Name Necklace - Made to Order Fresh Flower Bouquet - Made to Order Handmade Wooden Frame - Made to Order In the product description, mention that the item is prepared after purchase. Add the estimated production time and delivery instructions. Example: “This product is made after your order is placed. Please allow 3-4 working days for preparation. You can choose your preferred delivery date at checkout.” This small detail sets the right expectation before customers add the product to cart. Step 2: Add Product Variants for Basic Choices If your product has standard options, add them as variants. Variants are useful for choices like: Size Color Material Flavor Finish Style Quantity pack For example, a made-to-order cake may have variants for size and flavor. A personalized bracelet may have variants for metal color and chain length. Shopify allows merchants to add product options like size or color from the Variants section and add option values for the product. Keep your variants simple. Too many options can overwhelm customers. If you need detailed personalization, use custom fields or a product options app instead of creating too many variant combinations. Step 3: Add Customization Fields Made-to-order products often need customer input. For example: Name to engrave Message for cake Preferred flower color Uploaded image Gift note Custom measurement Design reference You can collect this information through product options, line item properties, or customization apps. The goal is to make sure the customer gives all required details before checkout. Use clear labels like: “Enter the name you want printed” “Upload your design file” “Add your cake message” “Choose your preferred delivery occasion” “Mention any special instruction” Also, add character limits where needed. This prevents long text that may not fit on the product. Step 4: Set Inventory Based on Your Production Model Inventory for made-to-order products can be tricky because you may not have finished stock ready. You may only have raw materials, production capacity, or supplier availability. Step 5: Add Production Time to Your Delivery Schedule This is where many Shopify stores make mistakes. They add made-to-order products but forget to adjust delivery availability. For example, if a custom cake needs two days to prepare, customers should not be able to select today or tomorrow as the delivery date. Set a preparation buffer before the first available delivery date. This protects your team and keeps expectations realistic. Example setup: Product ordered on Monday Preparation time: 2 days First available delivery date: Thursday Unavailable dates: Sunday and public holidays Time slots: 10 AM-12 PM, 2 PM-4 PM, 5 PM-7 PM Step 6: Use Cutoff Times for Same-Day or Next-Day Orders Cutoff time means the last time a customer can place an order for a certain delivery option. For example: Orders before 11 AM qualify for next-day delivery. Orders after 11 AM can only choose delivery from the following day. Same-day pickup is available only before 2 PM. Weekend delivery closes every Friday at 5 PM. Stellar Delivery Date & Pickup supports cutoff time settings so merchants can hide same-day delivery slots after a set deadline. This helps stores manage logistics more smoothly and show only realistic delivery slots. This is very useful for made-to-order products because production teams need time to prepare, pack, and dispatch orders. Step 7: Set Order Limits Per Day or Time Slot If your team can make only a fixed number of products per day, order limits are necessary. For example: Product TypeDaily LimitSlot LimitCustom cakes20 orders5 per slotFlower bouquets50 orders10 per slotHandmade gifts15 orders5 per slotTailored clothing5 ordersNot required Without order limits, too many customers may select the same date. That can lead to delays and quality issues. With a proper scheduling setup, customers only see dates and slots that your team can actually handle. Conclusion Setting up made-to-order products on Shopify is not just about adding a product and writing “custom” in the description. You need a complete process that covers customization, production time, inventory logic, delivery scheduling, cutoff times, capacity limits, and customer communication. When customers know what they can customize and when they can receive the product, they feel more confident placing the order. Your team also gets a clearer workflow for preparing and fulfilling each order on time. FAQs 1. How to add made to order on shopify? To add a made-to-order product on Shopify, create a product, mention “Made to Order” in the title or description, add variants or custom fields, set inventory based on your production model, and add delivery scheduling rules. 2. Can Shopify handle made-to-order products? Yes, Shopify can handle made-to-order products using product listings, variants, product options, inventory settings, and delivery scheduling apps. For advanced personalization or scheduling, apps make the process easier. 3. What is the best way to set delivery dates for made-to-order products? The best way is to use a delivery date picker with preparation time, cutoff time, blocked dates, and order limits. This ensures customers can select only realistic delivery or pickup dates. 4. Why is order scheduling shopify important for custom products? Order scheduling shopify is important because custom products need production time before delivery. A proper schedule helps merchants avoid overbooking, manage capacity, and give customers clear delivery expectations.
8 Min • 11 July 2026
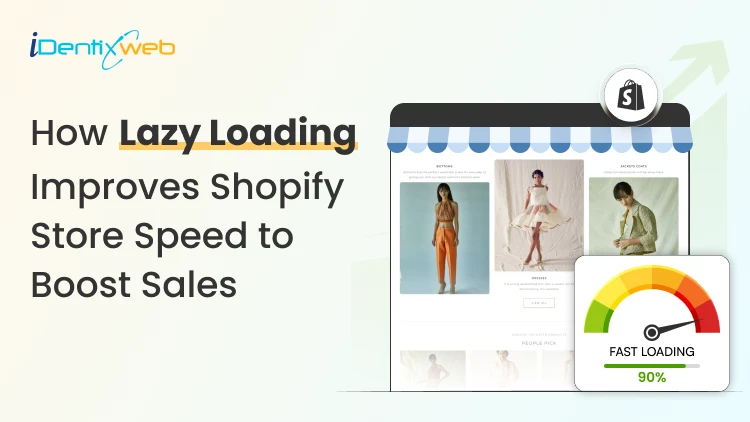
How to Enable Shopify Lazy Load (2026 Step-by-Step Guide)
Images are always the heaviest thing on a Shopify page. Loading every one of them the moment a page opens is what affects the store’s speed. Shopify lazy load is the fix. It tells the browser to download images only as a shopper scrolls toward them. The first screen loads fast, and your visitors stop staring at a blank layout. I have helped design enough Shopify stores to know the mistakes owners make during optimization. I will walk you through the whole thing the way I actually do it. You will learn what lazy loading is, how to check what your theme already does, and how to enable lazy loading in your store. What is lazy loading? Lazy loading is a technique that delays loading images, videos, and other heavy files until they are about to appear on screen. Instead of fetching every image the instant a page opens, the browser downloads only what a visitor can see, then pulls in the rest as they scroll. Less to download up front means a faster store speed and lower data usage, which matters most on mobile. When a page loads, the browser reads the HTML and queues every <img> tag for download. Grabbing all of them at once slows everything down. Lazy loading tells the browser to hold off on the images below the fold, the ones a shopper cannot see yet. One thing worth knowing is that you no longer need to be technical to enable lazy loading. But there are a few things I do before I add lazy loading in the store. First, check if your Shopify theme already lazy loads Most themes built on Online Store 2.0, including Dawn, Craft, Sense, and Refresh, ship with lazy loading on below-the-fold images by default. Adding it again on top duplicates the attribute. Here is the 20-second check I do: Open a collection or product page that has images below the fold. Right-click any image you have to scroll to reach, then click Inspect. Look at the <img> tag in the panel that opens. If you see lazyload and you did not add it yourself, your theme already handles it. Here's how I checked if lazy loading is enabled in the Shopify store, Houseplant. So if your theme is modern and you have already added lazy load, leave it alone. If you are on an older theme or building custom sections, here’s how you can set it up. How to set up Shopify lazy load in your theme? If your theme does not lazy load, or you are editing custom sections, you add the loading="lazy" attribute to the image tags in your Liquid files. The best method in 2026 is to render images with Shopify's image_tag filter, which handles lazy loading, responsive sizing, and dimensions for you. Whatever route you take, duplicate your theme first, so you have a safe rollback if something breaks. Go to Online Store > Themes, click Actions next to your live theme, and choose Duplicate. Work on this copy. To enable lazy loading in Shopify across the whole store, you edit the theme's section and snippet files. Go to Online Store > Themes > Actions > Edit code, then search your files for <img. Common places to look: snippets/card-product.liquid for the product cards used across collections and recommendations sections/featured-collection.liquid for homepage product rows sections/main-collection-product-grid.liquid for collection page grids Add loading="lazy" to the image tags that render below-the-fold content, then save and preview. For example: <img src="{{ section.settings.image | image_url: width: 800 }}" loading="lazy" alt="Product Image"> Pair lazy loading with correctly sized files too. My Shopify image size guide covers the dimensions that keep files light. Which images should you lazy load? The one rule that matters most: do not lazy load anything a shopper sees the instant the page opens. Below are the images you should definitely add the lazy load attribute. Product gallery images Recommended and recently viewed products Blog body images Footer images and badges Lazy loading and Core Web Vitals in 2026 Core Web Vitals are Google’s way of measuring how fast, stable, and responsive your Shopify store feels to visitors. Google currently measures three main Core Web Vitals: 1. Largest Contentful Paint (LCP) LCP measures how quickly the main content at the top of the page appears. This is often your hero banner, product image, or large heading. A good LCP score is under 2.5 seconds. Your main hero image should not be lazy-loaded because customers need to see it immediately. Instead, load the hero image normally and lazy-load images farther down the page. 2. Cumulative Layout Shift (CLS) CLS measures whether content unexpectedly moves while the page is loading. A good CLS score is under 0.1. For example, a customer may try to tap a product button, but an image suddenly loads above it and pushes the button downward. This creates a frustrating shopping experience. 3. Interaction to Next Paint (INP) INP measures how quickly your store responds after a customer clicks, taps, or interacts with something. A good INP score is under 200 milliseconds. Check your scores by visiting ‘pagespeed.web.dev’ and entering your store URL. What this means for your Shopify store Lazy loading works best when you: Load hero images and other above-the-fold content immediately. Lazy-load product images and content farther down the page. Add width and height values to prevent layout movement. Avoid loading too many large images at the same time. Test important pages after making changes. In my experience, collection pages often benefit the most because they usually contain many product images. Do you need a lazy load Shopify app? For images alone, you usually do not need an app. Native browser lazy loading works everywhere, and Shopify's image_tag filter applies it for you. Where a lazy load Shopify app earns its place is in bundling. The good ones compress files, add video facades, defer non-critical scripts, and fix Core Web Vitals. This is useful if you do not want to touch code. If you are weighing options, my guide on top Shopify tools for growth combines image optimization with speed fixes. My honest take after doing this for a living: reach for native lazy loading first, add a well-reviewed speed app only if you need the extra features. If you do want apps for this. I would recommend 3 that I have worked with. 1. Tiny SEO Speed Image Optimizer Tiny SEO offers lazy loading alongside image compression, resizing, alt-text optimization, broken-link management, and other SEO tools. It is a suitable option for merchants looking for an all-in-one image and store optimization app. 2. Avada AI SEO Suite Optimizer Avada combines lazy loading with image optimization, code minification, SEO audits, structured data, and redirects. It can be useful for merchants who want to improve both store speed and technical SEO from one dashboard. 3. WEBP Image Optimizer+Speed SEO This app compresses images, converts JPG and PNG files to WebP, and provides built-in lazy loading. It is worth considering if large image files are the main reason your product or collection pages load slowly. How to test that lazy loading is working Start with DevTools: Open a page with below-the-fold images, right-click, and choose Inspect. Go to the Network tab and, if you like, filter by Img. Refresh the page and scroll slowly from the top. If image requests fire as you scroll instead of all at once, lazy loading is working. I tested it on Netlfix.shop, which is Netflix’s merch store built on Shopify Get Shopify lazy load right Get lazy load in your Shopify store right by letting your theme and the image_tag filter handle the media. Check what your theme already does before you write a single line of code, test with DevTools and PageSpeed Insights. Reach for an app or a developer when you genuinely need more than images handled. FAQs 1. Does Shopify lazy load images by default? Most modern Online Store 2.0 themes apply loading="lazy" to below-the-fold images automatically. Older themes may not. To confirm, right-click an image you have to scroll to see, choose Inspect, and check the <img> tag for loading="lazy". 2. How to lazy load images in Shopify? Shopify themes usually support lazy loading through the loading="lazy" attribute or the Shopify image_tag Liquid filter. To add lazy loading manually, go to Shopify Admin → Online Store → Themes → … → Edit code, open the relevant section or snippet, and find the image code. Add loading="lazy" to a standard image tag—<img src="image.jpg" loading="lazy" width="800" height="600">—or use Shopify Liquid: {{ image | image_url: width: 800 | image_tag: loading: 'lazy' }} 3. What is lazy loading? Lazy loading is a technique that delays loading images and other media until they are close to appearing on the customer’s screen. It reduces the amount of content loaded initially, helping Shopify pages open faster and use less bandwidth. 4. Which is the best lazy load Shopify app? Tiny SEO Speed Image Optimizer is one of the best lazy-loading apps for Shopify because it combines smart lazy loading with image compression, resizing, alt-text optimization, and other speed features.
8 Min • 3 July 2026
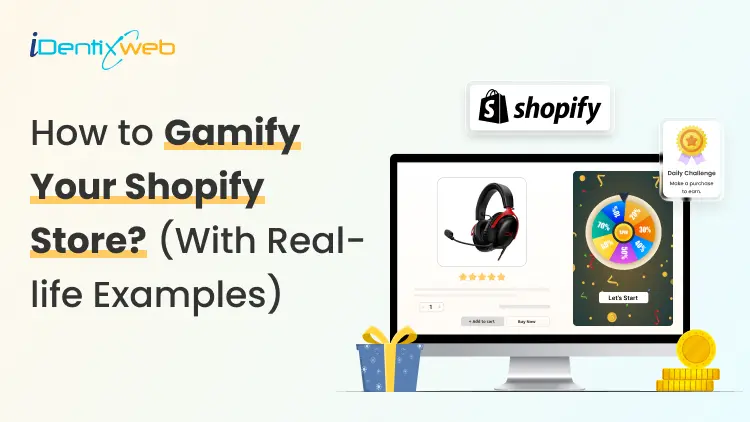
How Do Shopify Stores Use Gamification to Win More Customers
Shoppers in 2026 get overwhelmed by discount emails and static pop-ups. That also includes me 😶 Most click away without a second thought. But some Shopify stores are doing something different… They are turning the shopping experience into a game, and buyers keep coming back because of it. Understanding how Shopify stores use gamification is the first step to building a store that converts better and retains customers longer. This blog is to help you understand the power of gamification with real-life Shopify store gamification examples that I have researched. I will also educate you on the best Shopify gamification apps and pop up builders that I use in stores. What is gamification in a Shopify store? Gamification means adding game mechanics to your store experience so shoppers feel motivated to act, earn, and return. Points, progress bars, spin wheels, quizzes, badges, and tiered challenges are all gamification tools. The goal is to make every interaction feel rewarding, so shoppers buy more and come back. The market backs this up. In ecommerce specifically, gamified popups convert between 8-15% of visitors, while standard discount popups convert between 3-5%. Why gamification works especially well in 2026 Third-party cookies are mostly gone Most browsers block them by default, so the behavioral data is difficult to get. Gamification, especially quizzes and interactive sign-up flows, gives you first-party and zero-party data your competitors cannot buy. When a shopper answers four questions in a product finder quiz, you learn their preferences directly. Shoppers are desensitized to static offers A flat "15% off for your email" discount barely gets clicks anymore. A spin wheel where the prize is unknown? This will immediately get clicks. This is the same principle that makes slot machines in Vegas compelling. Not knowing the reward is often more motivating than a guaranteed one. Exit popups fail on mobile Standard exit-intent popups cannot fire on mobile because there is no cursor to track. Stores that use gamified teasers, small interactive elements that sit on the screen until tapped, capture mobile leads easily. How do Shopify stores use gamification: 5 proven examples 1. Gamified popups: Spin wheels, scratch cards, & mystery discount A gamified popup puts a game at the first moment a new visitor lands. Instead of showing a static form, you show a spin wheel or scratch card that requires a small interaction to reveal the reward. As per Sleeknote's report, spin-to-win popups averaged 8.67% conversion compared to 3.70% for standard popups. In my experience, scratch cards and mystery reveals work especially well for premium or minimalist brands. The shopper swipes or clicks to reveal their offer, and the earned reward feels more valuable because they worked for it. Fishwife uses an awesome mystery discount popup. Checkout my guide to adding a pop-up on Shopify for a full breakdown of how to configure a pop-up on your store. 2. Cart drawer progress bars and tiered rewards Gamification does not stop at the pop-up. Inside the cart, progress bars are one of the highest-ROI mechanics available. A cart drawer progress bar shows shoppers exactly how close they are to a reward: "You are $12 away from free shipping". Shoppers see a clear goal and feel the pull toward the finish line. A three-tier reward system works well for most stores. Each tier targets a different shopper type without squeezing margins. Anua, the Shopify skincare brand, uses a great three-tier reward system in their cart. This helps to increase AOV because shoppers always see the next reward, and most feel close enough to hit it with one extra item. Turn Your Shopify Cart Into a Mini Reward System Most carts only show products... iCart can show revenue-boosting offers. Try Free Till 100 Orders If you want to gamify the cart experience, iCart helps you add progress bars, free shipping goals, product upsells, free gifts, and cart-based offers inside the cart drawer. For a full setup guide, check out my guide on Shopify cart drawer gamification and tiered rewards that lift AOV. 3. Product discovery quizzes Quizzes are most valuable for stores with complex catalogs. A shopper who completes a five-question quiz about their lifestyle, budget, and preferences hands you a detailed preference profile you can use across every future channel: email, retargeting, and on-site recommendations. For Shopify DTC brands and beauty, skincare, or supplement stores, zero-party data is now essential. Without it, personalization relies on purchase history alone. With it, you know what shoppers want before they buy the first time. 4. Loyalty program tiers & badges Most people do not realize that loyalty programs are the most common form of gamification. Points, tiers, and badges keep shoppers engaged between purchases. A flat points program with no tier progression earns 1.8 times less ROI than one with tiers. Also, tier progression feels like leveling up. Shoppers close to Gold status find a way to qualify, the same way gamers push for a new rank. Starbucks' rewards system is a great example of a loyalty program used to gamify your store. For stores just getting started, my guide to setting up the best Shopify loyalty program walks through point structures and tier naming. 5. Countdown timers and time-based challenges Countdown timers and time-limited challenges create urgency. For example, "Buy in the next 2 hours for 20% off" gives shoppers a hard deadline. A timer with 90 minutes on the clock stops a browser mid-scroll in a way that a permanent banner never does. Countdown timers placed on cart pages are especially effective at reducing abandonment since the shopper has already signaled intent. See my full breakdown on the ‘While Supplies Last’ strategy for examples and tips to create urgency. Best popup builder/ Shopify gamification apps in 2026 Popup BuilderKey Gamification FeaturesWhy Choose ItSleeknoteSpin-to-win, scratch cards, seasonal calendars, daily offers, multi-step quizzesA strong all-around option for stores that want multiple gamified popup formats in one platform. It also bills by visitor instead of page view, so repeat shoppers do not unnecessarily increase costs.OptiMonkPersonalized gamified offers based on cart value, product categories, and customer tagsIdeal for Shopify stores that want offers triggered by real customer and store data, not just basic page behavior.OdicciInteractive quizzes, preference-based templates, data capture for email personalizationA good fit if your main goal is collecting shopper preferences and using that data for Klaviyo segmentation and personalization.WheelioSpin-to-win popups, Klaviyo integration, Mailchimp integrationBest for stores that want a quick, low-cost spin wheel setup without needing a full gamification platform. To wrap it up: Which gamification should I go with? Gamification mechanicWorks best forSpin wheelsFashion, beauty, lifestyle, and home goods stores with discount-driven shoppers. QuizzesStores with complex catalogs or health and wellness products where personalization drives purchases. Progress barsVirtually every store selling physical products. They operate in every session without any explicit interaction, so they never feel intrusive to shoppers who dislike pop-ups.Tiered loyaltyHigh-frequency stores selling coffee, supplements, pet food, or skincare see the strongest engagement because shoppers earn points fast enough to feel genuinely rewarded.Challenges and countdownsChallenges and countdowns work as a layer on top of any other mechanic. Run them around product launches, Black Friday, or slow-sales windows that need a revenue push. FAQs 1. What is gamification in a Shopify store? Gamification in a Shopify store means adding game mechanics to the shopping experience. Shopify store gamification examples include spin-to-win popups, cart progress bars, product discovery quizzes, tiered loyalty programs, and time-limited referral challenges. 2. What is the difference between gamified popups and standard popups? Standard popups usually ask shoppers to sign up or claim a discount. Gamified popups add interaction, such as spin wheels, quizzes, scratch cards, or reward unlocks, which makes the offer feel more engaging and will increase email sign-ups. 3. What are the best Shopify gamification apps in 2026? The best Shopify gamification apps in 2026 include Sleeknote for the strongest all-around popup and gamification suite, OptiMonk for on-site personalization, Odicci for quiz-based zero-party data capture, and Wheelio for a single-purpose spin wheel. 4. What is the best popup builder for gamification on Shopify in 2026? The best popup builder for gamification on Shopify in 2026 is Sleeknote for most mid-size ecommerce stores. It combines spin wheels, scratch cards, seasonal calendars, and multi-step quizzes in one platform, handles mobile compliance to avoid Google interstitial penalties, and integrates natively with Shopify and Klaviyo. 5. How do Shopify stores use gamification? Shopify stores use gamification to encourage actions like email sign-ups, product discovery, referrals, repeat purchases, and higher cart values. Common examples include spin-to-win discounts, product finder quizzes, free shipping progress bars, loyalty tiers, referral challenges, and countdown-based offers.
Sagarika Das
September 8, 2021
9397 Views
Sagarika Das
April 29, 2021
10491 Views
Sagarika Das
January 20, 2022
17749 Views
Sagarika Das
July 17, 2021
91287 Views
![How to Display Estimated Delivery Date in Shopify Store [Just 3 Simple Steps]](https://www.identixweb.com/wp-content/uploads/2021/06/How-to-Display-Estimated-Delivery-Date-in-Shopify.webp "How to Display Estimated Delivery Date in Shopify Store [Just 3 Simple Steps]")
Sagarika Das
June 18, 2021
20274 Views
Sagarika Das
May 19, 2021
22645 Views
Sagarika Das
June 7, 2021
21013 Views

Sagarika Das
August 19, 2021
24500 Views

Sagarika Das
October 13, 2021
32023 Views
Sagarika Das
December 21, 2021
7835 Views
Sagarika Das
August 9, 2021
16708 Views

Sagarika Das
June 26, 2021
11472 Views