

The Create Template feature in Order Printer PDF Invoice allows you to easily design a custom invoice, packing slip, or refund template for your store in a streamlined process. You can select a design, name it, and customize it all within one window, making it simple to create a template that meets your needs without losing your place. To create a template, start by opening the Templates page and clicking the Create template button. Choose the document type and a design from the available options, then give your template a name.
Customize the template by adjusting fonts, colors, and content, and use the Preview order button to check your changes. Remember that only one template per document type can be published at a time, and if you wish to use a Premium design, you will need to upgrade your plan. Once satisfied, save your template, which will appear under Created templates for easy management.
In this guide, you will learn how to create an invoice template, packing slip template, or refund template in just a few clicks. We will walk through each step, from opening the template list to saving your final design.
How This Feature Works
Creating a template used to take several steps. Now, the whole process happens in one smooth flow.
First, you open the Templates page and click Create template. Next, a dedicated window opens where you pick a template from the list and give it a name. Then, you land directly on the customize screen, where you can change colors, fonts, and content. As a result, you go from “no template” to “ready to use template” without losing your place.
Feature Settings Explained
Step 1: Open the Templates Page Start Here
Templates List Overview
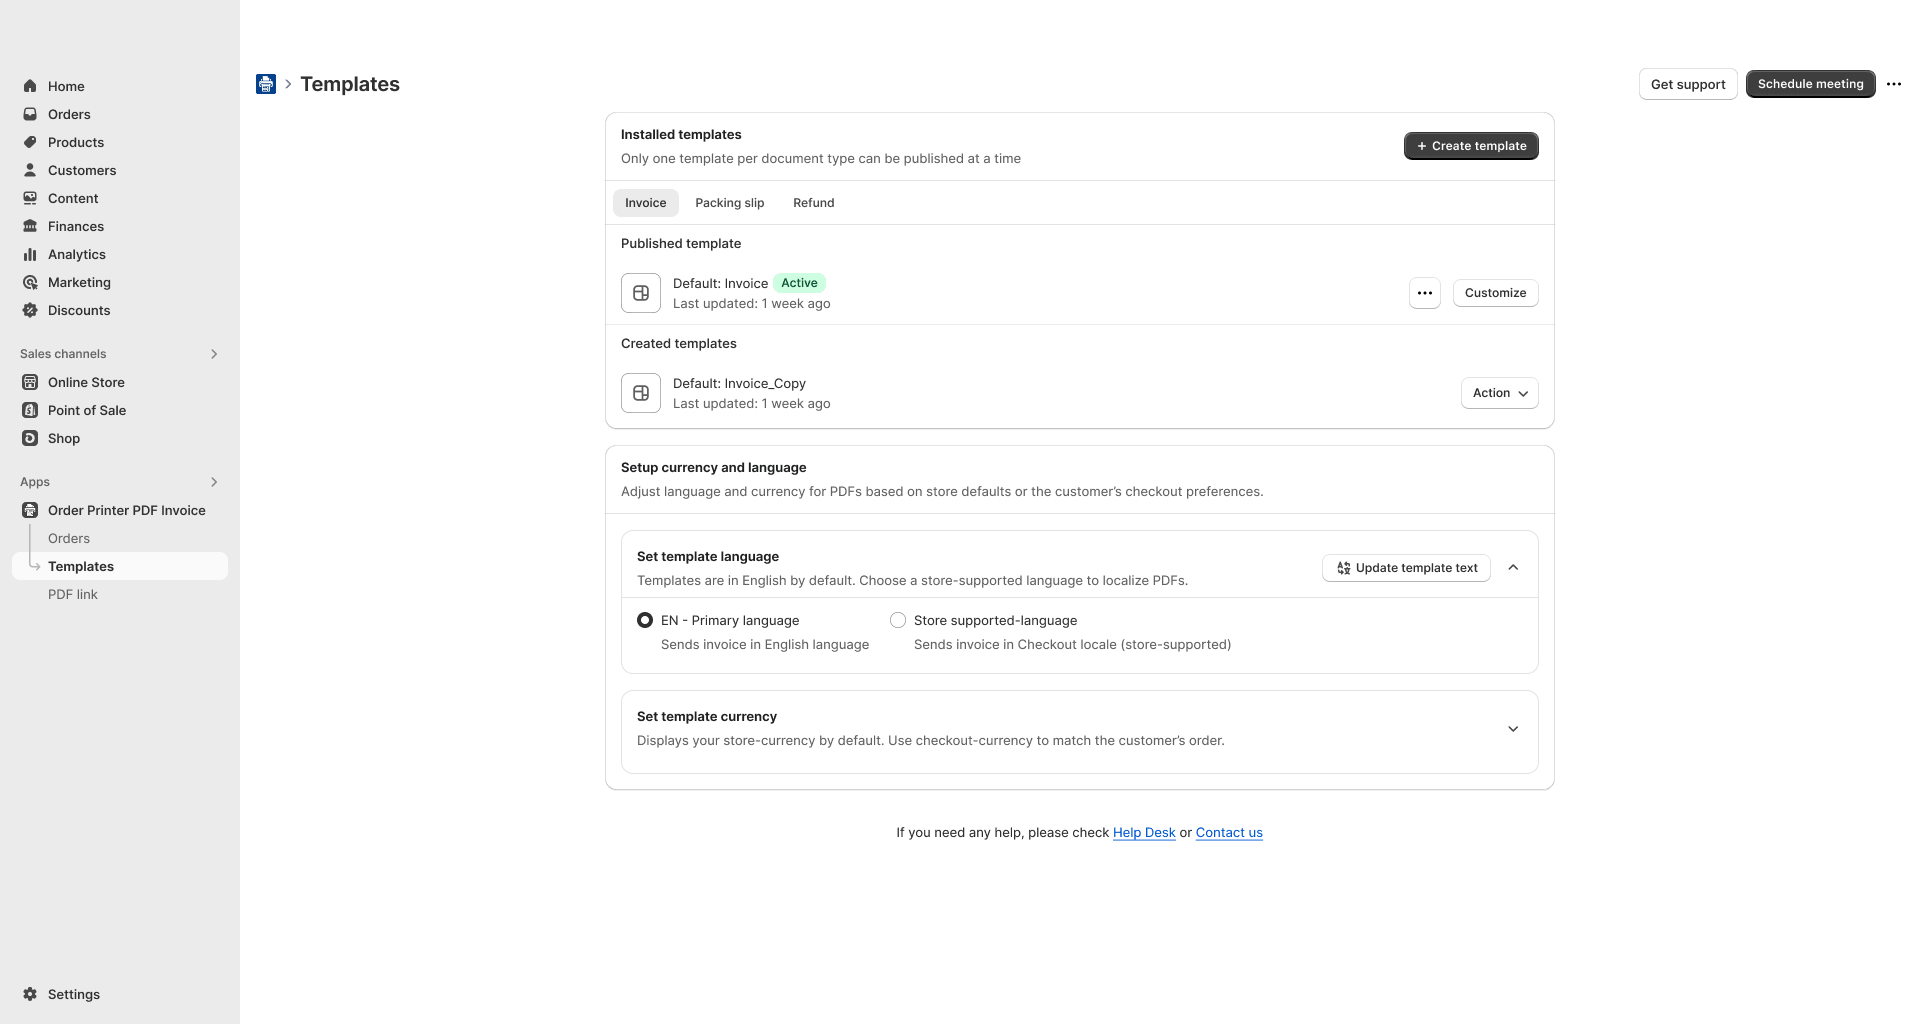
Go to the Templates section inside the app. Here, you can see your published template and any templates you have already created. Each document type, like Invoice, Packing slip, and Refund, has its own tab.
Create Template Button Button
Click the Create template button in the top right corner. This opens the new template creation window.
Step 2: Choose a Template and Add a Name Preview & Setup
Document Type Tabs Toggle
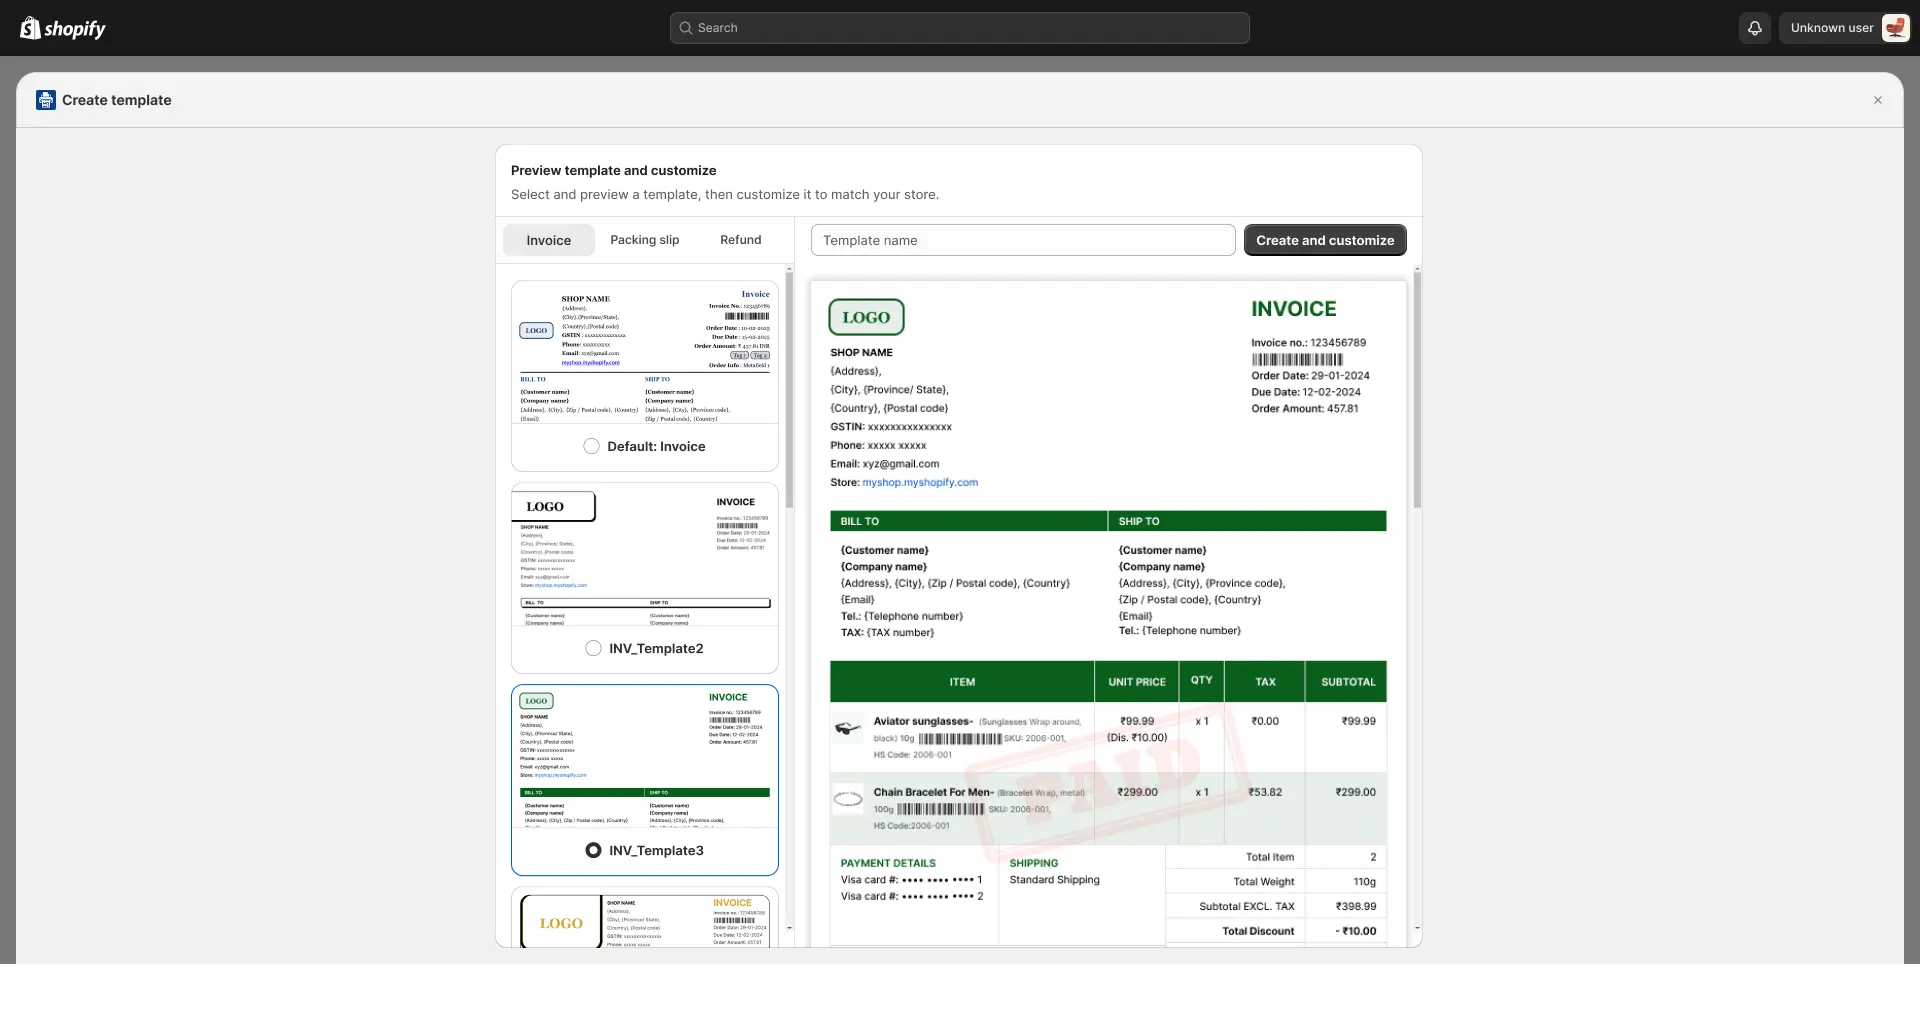
At the top of the preview window, pick Invoice, Packing slip, or Refund. This tells the app which kind of document you are building.
Template List Selection
On the left side, browse the available designs, such as Default: Invoice, Thermal, or INV_Template2. Click on any template to see that template sample preview on the right.
Enter Template Name Text
Type a name for your new template in the text box. Use a name that helps you remember its purpose later, like “Holiday Invoice” or “Wholesale Packing Slip.”
Create and customize Button Button
Once you pick a template and add a name, click Create and customize. This creates your new template and takes you straight to the customize screen.
Step 3: Customize Your Template Design
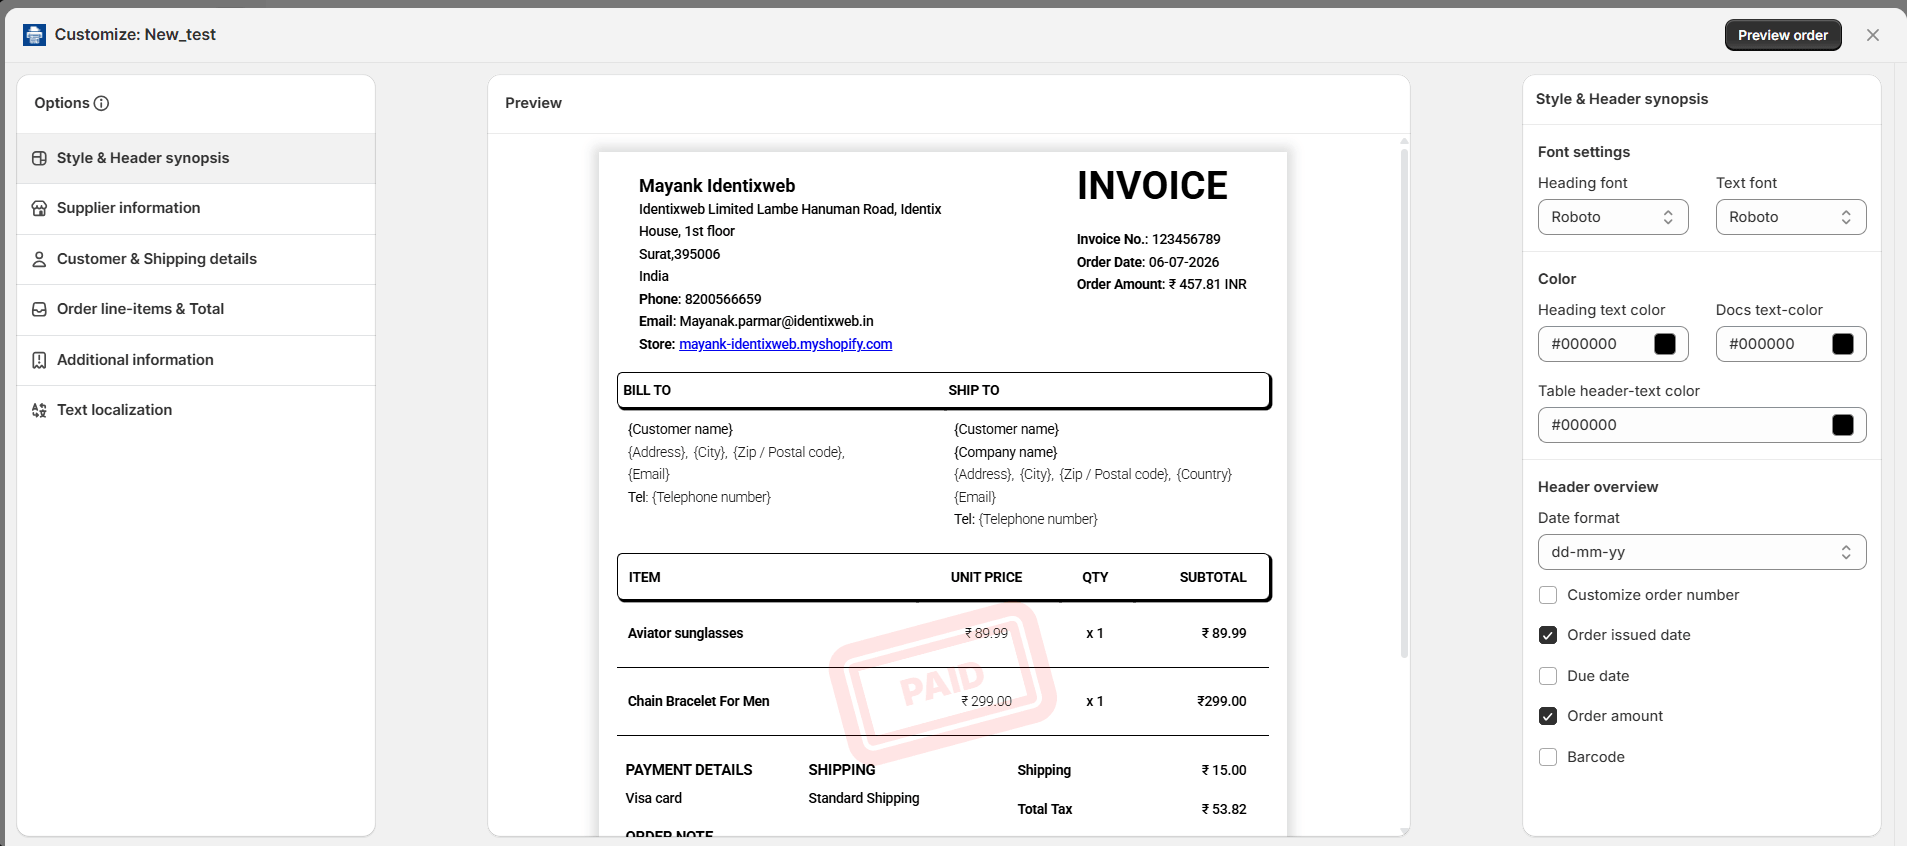
Style & Header Synopsis Fonts & Colors
Change your heading font, text font, and color choices for headings, text, and table headers. Also, pick a date format and choose which header details to show, like order issued date or barcode.
Supplier Information Store Details
Add or edit your shop name, address, phone number, email, and logo. This information appears at the top of every document.
Customer & Shipping Details Bill To / Ship To
Control which customer fields show up, such as name, address, and tax number. This keeps the bill-to and ship-to sections clean and accurate.
Order Line-items & Total Table Settings
Decide how product rows look, including images, SKUs, and pricing columns. You can also adjust how the subtotal, tax, and grand total appear.
Additional Information Notes & Extras
Add extra text, such as order notes or payment terms, that should print on the document.
Text Localization Language
Translate static labels, like “Bill To” or “Subtotal,” into another language if your store serves customers in different regions.
Step 4: Manage Your Saved Templates Templates List
Created Templates Section List
After you save your template, it appears under Created templates on the Templates page. You will see its name and the last time you updated it.
Action Menu Dropdown
Click Action next to any template to publish, duplicate, rename, or delete it. This makes it simple to manage multiple designs for the same document type.
Common Use Cases
Seasonal Invoice Design
Create a festive invoice template for holiday sales, then switch back to your default design once the season ends.
Wholesale Packing Slips
Build a separate packing slip template for wholesale orders that hides retail pricing and shows bulk quantities instead.
Branded Refund Notices
Design a refund template that matches your store’s branding, so customers recognize your documents right away.
Testing New Layouts
Duplicate your current template, try a new layout on the copy, and publish it only after you are happy with the preview.
Tips & Best Practices
2. Preview before you publish — Always check the live preview with real order data, since some fields only show up when an order has that information.
3. Keep a backup template — Duplicate your published template before making big changes. As a result, you can revert quickly if something looks wrong.
4. Match your branding — Use the same fonts, colors, and logo as your storefront, so customers feel confident the document came from you.
5. Update one document type at a time — Finish and test your invoice template first, then move on to packing slips and refunds.
Summary
- One continuous flow — Selecting, previewing, creating, and customizing now happen in a single guided process.
- Faster setup — You can go from a blank template list to a fully styled invoice in just a few clicks.
- Flexible designs — Choose from multiple starting styles, including Default, Thermal, and premium designs.
- Easy management — All your created templates stay organized on the Templates page, ready to publish or edit anytime.
- Better control — Detailed settings let you adjust fonts, colors, customer fields, and more, without any coding.


