Blog
Gather knowledge about the latest insights, updates, tips, and tricks in the Ecommerce industry.

5 Min • 20 March 2026
How Anua Unlocked 5X AOV Growth with iCart’s Smart Cart Features
delivery customization Challenges Solutions drive results Scale business delivery customization Challenges Solutions drive results Scale business delivery customization Challenges Solutions drive results Scale business delivery customization Challenges Solutions drive results Scale business Anua is a globally recognized Korean skincare brand known for its minimalist philosophy and focus on gentle yet effective formulations. Built on the idea of simplifying skincare routines, Anua develops products that deliver visible results while avoiding harsh or irritating components, making them suitable for sensitive skin types. Initially using a traditional full cart experience, Anua transitioned to iCart’s side cart solution in August 2025, to create a more seamless and engaging shopping journey. This shift allowed customers to easily explore complementary skincare products without disrupting their browsing flow, making it more intuitive to discover items that fit into a complete routine. By surfacing relevant recommendations directly within the cart, the brand enhanced product visibility across its range. Challenges Before implementing iCart’s side cart solution, Anua faced limitations with their existing full cart experience, which created friction in the customer journey. The traditional cart setup redirected users away from product pages, interrupting their browsing flow and reducing opportunities to explore additional products. As a skincare brand built around routines rather than single-item purchases, this made it difficult to effectively showcase complementary products and encourage customers to build complete regimens. Additionally, the lack of in-cart personalization and strategic upsell opportunities meant that customers were often unaware of related products that could enhance their skincare results. This limited the brand’s ability to increase average order value (AOV) and fully leverage its diverse product range. Anua needed a more dynamic and intuitive cart experience that could seamlessly introduce relevant recommendations while maintaining a smooth and engaging shopping journey. ❌ Cart Value Barriers Low average order value (AOV) due to single-item focus Most customers completed purchases with one primary product instead of building multi-step routines. Cart abandonment near shipping thresholds Customers were not clearly informed or motivated to reach free shipping or discount thresholds. Missed savings opportunities Customers were unaware of potential value in purchasing bundled routines or multiple complementary products. ❌ Absence of Progress-Based Incentives No free shipping or discount progress bar Customers were not motivated to increase their cart value due to lack of visible incentives. Missing tiered rewards system There were no structured milestones (e.g., “Spend more to unlock offers”), reducing upsell opportunities. ❌ Ineffective Cart UI/UX (Pre-Side Cart) Full-page cart disrupted shopping flowCustomers had to leave their browsing journey, increasing friction and drop-offs. No quick add/remove functionality Users couldn’t easily modify their cart or add suggested products without navigating away. Solution To overcome these challenges, Anua implemented iCart’s side cart solution to transform their traditional cart into a high-converting, interactive experience. By replacing the full-page cart with a seamless side cart, the brand ensured that customers could continue browsing while viewing their cart, significantly reducing friction in the shopping journey. Additionally, features like product recommendations & progress bars for free shipping and discounts motivated customers to increase their cart value. By combining personalization, incentive-driven messaging, and a user-friendly interface, Anua successfully turned their cart into a powerful revenue-driving touchpoint rather than just a checkout step. To maximize their cart effectiveness, they implemented two powerful features: ✅ Progress Bar with Multi-Reward Incentives Implemented a tiered progress bar to encourage higher cart value Customers are guided with a clear message like “Add $3.10 to unlock secret offer,” motivating them to continue adding products. Generated over $5M+ in revenue through incentive-driven cart progression Used product-based rewards to align with customer intent Instead of generic discounts, Anua incentivized purchases with relevant skincare items like Dark Spot Pads and mini serums. Built visual motivation for routine expansion As customers add products, they can clearly track progress toward unlocking multiple rewards, encouraging them to build a complete skincare routine. ✅ Product Recommendations Implemented “Frequently Bought Together” recommendations Customers adding a single product (e.g., toner) are shown complementary items like serums, moisturizers, or pads to complete their routine. Generated over 275K revenue through in-cart recommendations Encouraged full skincare regimen building Instead of isolated purchases, the cart suggests step-by-step product combinations aligned with common skincare routines. Increased product discovery at the final stage By surfacing relevant items directly in the cart, Anua ensured customers explore more of their catalog without leaving the checkout flow. Results Achieved in Last 180 Days 22932 Total Store Orders 45101 Total iCart Orders 5X iCart Generated AOV 65.70% Upsell Affected Conversion Rate These improvements reflect a clear shift in customer behavior on Anua’s store. Cart abandonment reduced as shoppers discovered complementary skincare products and felt encouraged to build complete routines. Engagement also increased, with customers interacting more with in-cart recommendations and exploring relevant product pairings. Results & Impact And...Results is Our Main Clarification By implementing iCart’s cart drawer, product recommendations, and progress bar, Anua transformed its cart into a high-performing conversion touchpoint. Shopping Experience Enhancement The improved cart experience encouraged customers to discover complementary products and understand the value of sustainable beauty routines. For instance, the clear presentation of subscription savings alongside one-time purchase options helped customers make more informed decisions about their long-term hair care needs. As Anua continues to optimize its cart experience, the brand is closely monitoring: Routine-based purchasing behavior - tracking how customers move from single items to multi-step regimens Engagement with in-cart recommendations - measuring interaction with suggested products Cart value progression - analyzing how incentives influence higher spending [related_cases_slider] Ready to Write Your Success Story? Try icart App Join successful businesses like Anua and Master your delivery scheduling Delight customers with precise timing Grow your special occasion orders Expand your delivery reach
Read Blog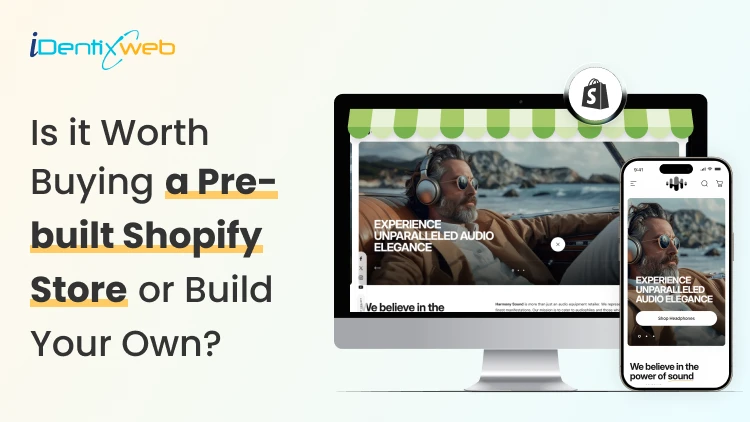
7 Min • 14 July 2026
Are Pre-Built Shopify Stores Worth It in 2026? A Straight Answer
Yes. Pre-built Shopify stores are absolutely worth it. A pre-built Shopify store promises the one thing every new entrepreneur wants: a shortcut. Skip the setup and guesswork, and buy something that already looks finished. I have reviewed dozens of these listings over the years, and the honest answer is a bit complicated. This guide covers what these stores actually are and the most important question of all: Are pre built Shopify stores worth it? What are pre-built Shopify stores? A pre-built Shopify store is a store someone else designed, configured, then sells to you as a finished product. These listings fall into three real categories. Turnkey dropshipping stores. A provider builds a store around a niche, loads it with products, and hands you the login. No sales history, no customers, just a ready-to-market store. Custom-built stores. A freelancer or agency builds a store to your spec. You get more input on design and product selection, but you're still starting from zero revenue. Established stores. These come with real sales history, existing customers, and traffic. You're buying an operating business Do pre-built Shopify stores work? Yes, it does. A pre-built store gives you a working storefront on day one. But the traffic and customer base have to be earned after purchase. I have seen turnkey stores generate real revenue within weeks, and I have seen identical templates from the same provider sit at zero sales for months. The difference almost never comes down to the store itself. It comes down to what the buyer does with it afterwards: product testing, ad spend, and consistent marketing. If you buy a one-product turnkey store expecting it to sell itself, read my guide on building a one-product Shopify store first. It explains why focus and offer clarity matter more than the store's design. How to vet a seller before you pay? Ask for read-only access to Google Analytics and Search Console if the listing claims traffic. Screenshots can be faked; live dashboard access is much harder to fake convincingly. Check the domain's history using a WHOIS lookup tool. A domain registered last month can't have "three years of organic traffic." Request an export of order history if you're buying an established store with sales claims. Ask why they're selling. A vague or evasive answer about a declining niche is worth more than any pitch deck. Use a marketplace with built-in escrow whenever the deal size justifies it, rather than paying a stranger directly. Confirm what you're actually inheriting. Products, theme, apps, domain, social accounts, email list. Get it in writing. Once the store is yours, you'll want visibility into what you actually bought. Go through my guide to pulling a Shopify inventory report to do just that. Do not buy a pre-built Shopify store if you see these red flags The seller refuses to give you a live demo link or read-only admin access before purchase. Revenue or proof of traffic comes only as screenshots, with no way to verify them independently. Payment is only accepted via wire transfer or crypto, with no escrow option. The seller pressures you to decide within hours. You can't find any independent reviews of the provider outside their own website. Only the current store owner can transfer ownership, and a store can only have one owner at a time. Here’s my guide on how you can transfer Shopify store ownership in 2026. Best websites to buy pre-built Shopify stores in 2026 1. BeBiggy BeBiggy sells ready-made Shopify dropshipping stores across niches such as fashion, pets, beauty, home products and coffee. Its stores include a completed design, imported products and connections to dropshipping suppliers. This makes it suitable for beginners who do not want to build everything from the beginning. Best for: Beginners looking for an affordable, ready-to-launch dropshipping store. 2. Dropbuild Dropbuild provides custom Shopify dropshipping stores rather than selling the same basic template. Its packages include product research, suppliers, advertising materials and a strategy for launching the store. This may be a better choice when you want more assistance with product selection and store setup. However, carefully check exactly what is included in your package because advertising, content creation and ongoing store management may still require additional work. Best for: Merchants who want a more customized store with launch support. 3. Zendrop Zendrop offers AI-built Shopify dropshipping stores that come with a theme and products selected by its product discovery team. Its pre-built store service is connected to the wider Zendrop platform, which helps merchants source and fulfil dropshipping products. This option is useful when you want your store and supplier system in one place. However, being connected to one supplier platform can reduce your flexibility. So review product costs, shipping locations and delivery times before choosing your products. Best for: New dropshippers who want store creation and product fulfilment under one platform. 4. Flippa Flippa is different from basic pre-built store providers. It is a marketplace where you can find stores and other online businesses for sale. Some listings are new starter stores, while others have existing traffic, customers and revenue. The benefit is that you may be able to purchase more than a website design. You could acquire a domain, customer list, supplier relationships, social media accounts and sales history. However, Flippa is an open marketplace, so buyers must independently verify revenue, profit, traffic and ownership before making an offer. Best for: Buyers who want a wider range of starter and established Shopify stores. 5. Empire Flippers Empire Flippers focuses on established and profitable online businesses, including Shopify-based ecommerce stores. Its listings can include information about revenue, net profit, business age and operating model, and the platform follows a more selective vetting process than a general marketplace. Stores listed here usually cost significantly more than newly created turnkey stores because you are purchasing an operating business rather than just a Shopify theme with imported products. It is more suitable for experienced merchants or investors with enough capital to acquire a proven business. Best for: Buyers looking for a vetted Shopify business with real operating history. Are pre-built Shopify stores worth it? My verdict It depends on what you're optimizing for. If you want to skip the setup and you understand you're still doing the marketing work, a budget turnkey store can be a reasonable starting point. If you have a budget and want lower risk with proven numbers, buy an established store bought through a real business marketplace. What doesn't hold up anymore is buying a pre-built Shopify store to avoid technical setup. That specific problem is largely solved by Shopify itself now. Whatever you choose, treat the purchase like buying any small business. Verify everything, use Shopify's official transfer process, and budget for the marketing work that starts the day you take ownership. FAQs 1. Do pre-built Shopify stores work? They can, but they don't run themselves. A pre-built store gives you a working storefront, not traffic or customers. Success still depends on product validation, ad spend, and ongoing marketing after you take ownership. 2. Are pre-built Shopify stores worth it? It depends on your goal. They're worth it if you want to skip technical setup, but understand the marketing still falls on you. They're less worth it if avoiding setup work was your only reason to buy, since Shopify's own AI tools can now build a functional store in a fraction of the time. 3. What are the best websites to buy Shopify pre built stores? Some popular websites for buying pre-built Shopify stores include BeBiggy, Dropbuild, Zendrop, Flippa and Empire Flippers. BeBiggy, Dropbuild and Zendrop are better for new, ready-to-launch stores, while Flippa and Empire Flippers are more suitable for buying established ecommerce businesses. 4. Can I buy a pre-built Shopify store? Yes, you can buy a pre-built Shopify store that already includes a theme, products, supplier connections and basic store setup. However, always verify store ownership, app costs, supplier reliability, sales data and included assets before making the purchase.
9 Min • 22 July 2026
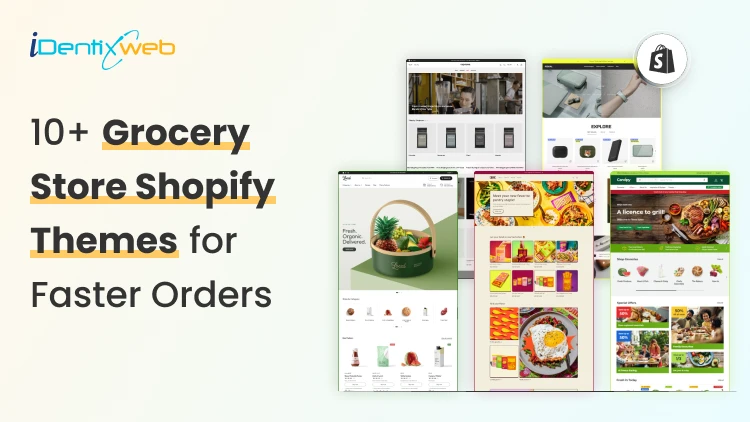
How to Pick the Right Shopify Theme for Your Grocery Store in 2026
A grocery store lives or dies on how fast a shopper finds what's on their list and gets to checkout. Pick the wrong grocery store Shopify theme and your sales will definitely drop. The theme decision shapes almost everything that comes after it, from how customers browse to how fast you can add new product categories. Here's a walkthrough of the best Shopify themes for grocery stores that I have come across as a Shopify expert. This is a mix of both free and paid themes. Grocery store Shopify theme comparison in 2026 ThemeTypePriceRatingBest forCraveFree Free33%New food and drink stores testing the marketTasteFree Free54%Smaller SKU count, story-driven brandsSavorFree Free21%Visual, magazine-style food brandingLocalPaid $38098%Stores with a physical location tooCanopyPaid $40095%Full-line supermarkets, large SKUsExpansePaid $40093%Multipurpose growth beyond groceriesEmpirePaid $34079%Large catalogs across multiple categoriesTaigaPaid $490100%Premium build, smaller review baseGroca / Vegist / OrganiciMarketplaceVariesVariesBudget-friendly, style-specific templates Free grocery store Shopify themes worth starting with 1. Crave When I evaluate free Shopify themes for grocery stores, Crave is usually one of the first options I consider. Its bold colors, prominent product cards, and mobile-optimized layout work well for stores selling snacks, beverages, fresh produce, packaged foods, or other visually appealing products. Key features: Mobile-optimized layouts Quick-buy functionality In-store pickup support Mega menu Product filtering and sorting Recommended products and cross-selling Shipping and delivery information Product videos, image zoom, and galleries Color swatches and swatch filters Rating: 33% Price: Free 2. Taste I recommend Taste when the grocery store needs to communicate product quality, sourcing, ingredients, or craftsmanship. Its spacious layout, large product cards, bold headings, and built-in FAQ capabilities make it especially suitable for specialty coffee, organic foods, gourmet products, bakeries, premium beverages, and artisan grocery brands. Key features: Large product cards and product highlights Custom FAQ pages Quick buy In-store pickup support Product recommendations and cross-selling Mega menu Product filtering and sorting Sticky header High-resolution images, galleries, and image zoom Product videos and slideshows Shipping and delivery information Rating: 54% Price: Free 3. Savor I would consider Savor for a grocery or food brand that wants a newer, more immersive storefront. As part of Shopify’s Horizon collection, it supports nested theme blocks, edge-to-edge imagery, large flexible product cards, and more advanced merchandising layouts. I find it particularly suitable for recipe-driven brands, speciality foods, premium ingredients, meal kits, beverages, and stores that rely heavily on visual storytelling. Key features: Flexible nested theme blocks Large, immersive product imagery Quick view and quick buy Slide-out cart In-store pickup support Product badges and stock counter Recently viewed products Infinite scroll Mega menu and in-menu promotions Product filtering, sorting, and swatch filters Recommended products and cross-selling Product videos, animations, and image galleries Rating: 21% Price: Free 4. Dawn Dawn is not designed specifically for grocery stores, but I still see it as one of the safest starting points for merchants who prioritize simplicity and flexibility. It keeps attention on product photography and can be adapted for produce, pantry products, beverages, household essentials, or smaller grocery catalogs. Key features: Minimalist, product-focused design Quick buy In-store pickup support Cart notes Mega menu Product filtering and sorting Recommended products and cross-selling Sticky header Product videos and high-resolution images Image zoom, rollover, and galleries Shipping and delivery information Color swatches and swatch filters Rating: 35% Price: Free To see successful stores using Dawn, here's my list of the best Shopify Dawn theme examples in 2026. If you're brand new to Shopify and want the fundamentals on themes, my guide on how to choose a Shopify theme for your online store covers the basics for merchants. Let Customers Choose When Their Groceries Arrive Stellar Delivery Date & Pickup helps grocery merchants who want customers to choose a convenient date and time for local delivery, store pickup, or shipping directly from the product or cart page. Losing orders because buyers want flexible delivery? A simple calendar at checkout fixes that. Start Your Free Plan You can also manage cut-off times, unavailable dates, delivery schedules, and pickup slots without rebuilding your theme. Best paid grocery store Shopify themes for bigger catalogs 1. Local When I evaluate premium Shopify themes for grocery businesses with physical locations, Local is usually the first one I recommend testing. It is designed specifically for food, beverage, and local retail businesses that sell online and in person. Its combination of in-store pickup, quick-buy tools, nutritional information, cross-selling, age verification, and flexible store sections makes it especially useful for grocery stores, cafés, bakeries, specialty food shops, and beverage brands. Key features: In-store pickup Quick buy Slide-out and sticky carts Pre-orders Cross-selling and recommended products Age-verification popup Back-in-stock alerts Product badges and stock counter Enhanced search Mega menu Product filtering and sorting More than 30 customizable sections Five ready-made presets Rating: 98% Price: $380 USD 2. Canopy I recommend Canopy when a grocery store has a large inventory, and shoppers need to find products quickly. Its Amazon-inspired layout places search and product discovery at the center of the experience, while the optional always-visible cart sidebar works well for customers building larger grocery orders. Key features: Prominent enhanced search Quick-order list Quick buy and quick view Slide-out and sticky carts In-store pickup Pre-orders Product filtering and sorting Infinite scroll Mega menu Collection-page navigation Recently viewed products Recommended products and cross-selling Back-in-stock alerts Product badges and stock counter Rating: 95% Price: $420 USD 3. Expanse Expanse stands out for its balance of merchandising, promotions, and large-inventory navigation. I would consider it for grocery businesses planning to expand into household essentials, personal care, kitchen products, or other adjacent categories because its design is not restricted to food alone. Key features: Cart upsells and cross-selling Recommended products Quick buy and quick view Slide-out cart In-store pickup Advanced promotional banners and tiles Product badges and stock counter Enhanced search Multi-category product filtering Mega menu Recently viewed products Product tabs and product videos Five ready-made presets Rating: 93% Price: $420 USD 4. Empire I usually shortlist Empire when a grocery store has hundreds or thousands of products and needs more structured catalog navigation. It is optimized for large collections and includes advanced filters, product comparison, a prominent mega menu, quick ordering, and shoppable imagery. In my assessment, its biggest strength is versatility: the same catalog-first structure can support groceries, household supplies, wholesale products, electronics, or fashion without forcing the merchant into a highly niche visual style. Key features: Advanced product filtering and sorting Product comparison Bold mega menu Slide-out cart In-store pickup Pre-orders Recently viewed products Product badges and stock counter Shoppable image hotspots Shipping and delivery information Multi-language and multi-currency support Rating: 79% Price: $360 USD 5. Taiga I would consider Taiga for a premium grocery or food brand that relies heavily on photography, video, and visual storytelling. It combines a modern, conversion-focused layout with more than 10 video sections and separate presentation controls for desktop and mobile. This makes it a strong option for premium beverages, organic foods, meal kits, supplements, specialty ingredients, and visually led direct-to-consumer food brands. Key features: More than 10 video-focused sections Separate visual controls for desktop and mobile Ingredients and nutritional information Quick buy and quick view Slide-out and sticky carts Pre-orders Cross-selling and recommended products Enhanced search Infinite scroll Mega menu Product filtering and sorting Recently viewed products Four ready-made presets Rating: 100% Price: $500 USD If $340 to $490 is more than your starting budget allows, my roundup of the cheapest Shopify themes worth buying in 2026 has lower-cost picks that still hold up for a smaller grocery catalog. Shopify grocery store templates from theme marketplaces Marketplaces like Envato are great for buying premium Shopify themes. The four below are the best ones for grocery stores. Groca, built specifically for grocery and supermarket stores, with multiple mega menu styles and built-in newsletter popups. Vegist, aimed at organic and vegetable-focused stores, with more than a dozen homepage layout variations. Organici, a newer Shopify 2.0 compatible option built for organic food and general grocery, with SEO-focused setup out of the box. Appetiza, designed around supermarket and delivery use cases, with a bright, multipurpose layout that can flex beyond food if needed. What to look for in a Shopify theme for grocery stores Advanced filtering and search. Shoppers need to narrow by category, brand, or price without loading a new page each time. Quick buy from the collection page. Grocery is list-shopping. Forcing every add-to-cart through a full product page slows people down and costs you sales. Clear variant display. A theme should show pack sizes, weights, or flavors without extra clicks. Mobile-first layout. Most grocery orders start on a phone, often while someone is standing in their kitchen checking what's missing. Room for delivery and pickup messaging. Shoppers want to know how they'll get their order before they finish checkout. Reorder-friendly structure. Best-selling grocery products get bought weekly. A layout that supports ‘buy again’ or subscription blocks pays off fast. Wrapping up The right grocery store Shopify theme is the one that matches your catalog size and your delivery model. Start free with Crave or Taste if you're testing the market. Move to Local, Canopy, or Empire once your SKU count increases, or look at a marketplace template if budget matters more than official support. FAQs 1. Where to find Shopify themes for grocery stores? Go to the official Shopify theme store and in the ‘Industry’ section on the left, select Food and drink. There will be 100+ themes you can choose from for your grocery store. 2. What is the best Shopify theme for a grocery store? For a smaller grocery store, Crave or Taste (both free) cover most needs. For a large, multi-category supermarket, Local, Canopy, or Empire handle bigger catalogs with stronger filtering and search. 3. Are there free Shopify themes built for grocery stores? Yes. Shopify offers Crave and Taste as free themes designed specifically for food and drink stores, along with a newer option called Savor. All three support features like nutritional information display and quick buy. 4. How much do paid grocery Shopify themes cost? Most paid themes for grocery stores range from around $150 for simpler options up to $490 for premium picks like Taiga. Local, Canopy, and Expanse typically fall between $380 and $420.
10 Min • 1 July 2026
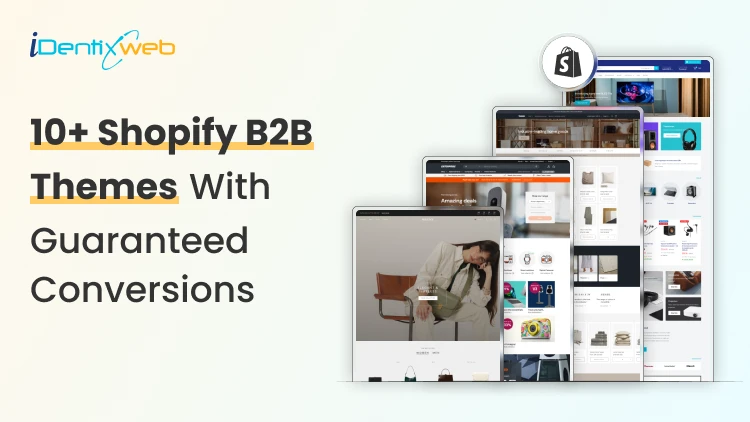
Best B2B Shopify Theme for 2026: Free and Paid Options for Wholesale Brands
Picking the wrong B2B Shopify theme can negatively impact your wholesale operation. I have seen it happen a lot of times this year. The good news is that Shopify's B2B ecosystem has grown significantly in 2026. B2B features like company profiles, custom catalogs, and volume pricing are no longer only for Shopify Plus. Merchants on Basic, Grow, and Advanced plans can now access many native wholesale tools directly. Your theme choice, though, still matters. The right B2B Shopify theme creates a buying experience that business customers trust and return to. Being a Shopify expert, I have tried and tested many wholesale themes. In this article, I will add the best ones that have brought sales to my clients over the years. 10+ features every B2B Shopify theme must have 1. Fast predictive search and faceted filtering Wholesale buyers search by SKU, variant, category, and spec. A theme without strong filtering wastes their time and yours. 2. Bulk add-to-cart or quick order list Buyers placing orders of 200+ units cannot add items one by one. A quick order form or table view is essential. 3. Login-gated pricing display Wholesale pricing should only be visible to approved buyers. The theme must support hiding prices or showing custom prices based on customer account status. 4. Volume pricing table display The theme should surface pricing tiers clearly on product pages. Buyers need to see how the price changes at 10, 50, and 500 units without asking a sales rep. 5. App compatibility for wholesale workflows Confirm the theme works with the wholesale apps you plan to use. Some B2B Shopify themes have conflicts with third-party pricing or quick order apps. Checkout my complete breakdown on the best Shopify wholesale apps for B2B merchants in 2026. Best B2B Shopify themes for 2026 Trade: Best free B2B Shopify theme Developer: Shopify | Price: Free | Best for: New and early-stage wholesale stores Trade is the only free theme on the Shopify Theme Store built specifically for B2B merchants. Shopify designed it from scratch around wholesale workflows. The layout is clean, and product grids load fast. I love how its navigation is structured for catalog browsing. For merchants starting their Shopify wholesale business without a large budget, Trade is the most logical starting point. Key strengths: Built-in quick order form, compatibility with Shopify's native B2B features (company profiles, volume pricing, quantity rules), and customizable contact forms for capturing wholesale account inquiries. Rating: 31% Hyper: Best overall B2B Shopify theme Developer: FoxEcom | Price: $400 | Best for: High-growth wholesale and hybrid B2B stores For me, this theme is built around three problems that kill wholesale conversions: Buyers who take too many clicks to evaluate products Pricing tiers that are invisible until checkout Catalog structures that break down at high SKU counts. Hyper solves the first problem with collection list grids and featured product tabs that let buyers evaluate multiple items. Comparison tables for product specifications sit inside those category cards, reducing the back-and-forth that wastes buyers' time. The second problem is addressed through profile-based pricing display, which shows each buyer their specific pricing tier immediately on login. For distributors managing thousands of products, the semantic search and advanced filtering handle SKU discovery at scale. Key strengths: Native bulk ordering, minimum order enforcement, quick order forms, multi-currency support, volume pricing display, and cart drawer controls that are best-in-class. Rating: 99% Warehouse: Best Shopify B2B theme for large catalogs Developer: Maestrooo | Price: $320 | Best for: Distributors, manufacturers, and industrial suppliers with 1,000+ SKUs Warehouse is built to handle large catalogs. Enterprises managing tens of thousands of SKUs, complex variant structures, and multi-category inventories consistently name Warehouse as the most operationally reliable theme for their scale. Key strengths: The collection page experience is the standout feature. Advanced filtering, predictive search, sticky navigation, and mega menus with promotional tiles work together to give wholesale buyers fast, organized product discovery. I think where Warehouse requires extra work is in customer-group pricing and login gating. The theme does not include native controls for these. You need Shopify's B2B features or a dedicated Shopify B2B pricing app to implement account-specific pricing on top of the Warehouse foundation. Rating: 85% Enterprise: Best Shopify theme for hybrid B2B + DTC stores Developer: Clean Canvas | Price: $420 | Best for: Brands running retail and wholesale from one storefront Enterprise solves a specific problem: merchants who sell to consumers and wholesale buyers from the same store without wanting to build two separate storefronts. The theme handles both use cases in a single layout. Key strengths: Conversion-focused merchandising combines well with bulk ordering tools. This theme also integrates smoothly with Shopify B2B apps for account-level pricing, company profiles, and custom catalog visibility. For brands using Shopify Plus or Advanced as their plan, Enterprise works well on both, though Plus gives access to the full native B2B feature set. Rating: 94% Normcore: Best minimalist Shopify wholesale theme Developer: SalesHunterThemes | Price: $320 | Best for: B2B sellers with focused product lines and repeat buyers Normcore proves that a minimalist theme can support wholesale operations. Its setup is organized around repeat purchasing rather than new buyer discovery. Key strengths: Quick order lists and bulk add-to-cart are built in, which removes the need for third-party order apps. The mobile experience is optimized for wholesale browsing. For B2B stores where buyers return weekly or monthly with predictable orders, Normcore's layout reduces cognitive load and speeds up checkout. Rating: 100% Ignite: Best Shopify B2B theme for search-first stores Developer: FoxEcom | Price: $360 | Best for: Hybrid B2B stores with dense, specification-heavy catalogs Ignite follows a marketplace-style layout similar to how Amazon organizes product discovery. This helps buyers navigate through filters and structured product grids. For B2B stores where buyers know exactly what they need and want to find it in three clicks, Ignite is the most efficient layout available. Key strengths: The Enhanced Search feature handles dense catalogs with strong product title structuring and category hierarchies. SEO-optimized product pages and collection structures make Ignite one of the better themes for organic visibility alongside B2B functionality. Rating: 100% Prestige: Best Shopify Plus wholesale theme for premium brands Developer: Maestrooo | Price: $400 | Best for: High-end brands running premium wholesale alongside DTC Prestige combines the benefits of both luxury presentation and B2B function. Most wholesale themes sacrifice design quality for operational efficiency. Prestige does not make that trade-off. Key strengths: High-resolution imagery, editorial layouts, and refined typography are combined with full Shopify B2B app integration and tiered pricing support. Rating: 91% Keystone: Best paid Shopify B2B theme for wholesale-first stores Developer: Brickspace Lab | Price: $440 | Best for: Wholesale stores that want built-in B2B selling tools without depending too much on extra apps Keystone is built specifically around B2B storefronts, bulk buying, and account-driven selling. It has a built-in quick ordering, account limits, order minimums, upsells, bundles, and product recommendations. Key strengths: Built-in quick order list, order minimum support, account limits, slide-out cart, sticky cart, product filtering, enhanced search, mega menu, swatch filters, customizable contact forms, and Shopify Plus quantity pricing support. Rating: 100% Canopy: Best Shopify B2B theme for large carts and inventory-heavy stores Developer: Clean Canvas | Price: $420 | Best for: Wholesale stores, food suppliers, retail distributors, and merchants with large inventories Canopy is a strong option for B2B stores where buyers usually add multiple products to the cart in one session. It is Amazon-inspired, feature-rich, and optimized for large-scale selling, with a prominent search bar and always-visible cart sidebar for stores with large carts and inventories. Key strengths: Prominent search, advanced product filters, predictive search, quick order list, quick view, sticky cart, slide-out cart, mega menu, product filtering and sorting, promo tiles, stock counter, and recommended products. Rating: 95% Xtra: Best affordable premium B2B Shopify theme Developer: Someone You Know | Price: $100 | Best for: Small and mid-sized B2B stores that want premium features at a lower cost For merchants who want more than a free theme but do not want to spend $300–$400 upfront, Xtra is a practical choice. It is especially useful for stores that need quick ordering, product specifications, upsells, and strong catalog navigation without adding too many third-party apps. Key strengths: Quick order list, bulk upsells, quick view, product specifications, slide-out cart, sticky cart, product filtering, enhanced search, mega menu, swatch filters, recommended products, countdown timer, and Shopify Plus quantity pricing support. Rating: 98% Empire: Best marketplace-style Shopify B2B theme for large catalogs Developer: Pixel Union | Price: $360 | Best for: Large catalog stores, industrial suppliers, electronics sellers, and marketplace-style B2B storefronts Empire is another theme that is built for big catalogs. Shopify positions it as a theme optimized for large catalogs with advanced filters, shoppable images, product comparison, and a bold mega menu. That makes it useful for B2B stores where buyers need to move through multiple categories, compare products, and find exact items quickly. Key strengths: Advanced product filtering, enhanced search, mega menu, product comparison, quick order list, quick view, product badges, promo tiles, recommended products, slide-out cart, sticky header, swatch filters, and multi-currency/multi-language support. Rating: 79% Read my complete breakdown on things to look out for before choosing a Shopify theme this year. Choose the right B2B Shopify theme in 2026 The B2B Shopify theme landscape in 2026 is better than it has ever been. The key shift worth mentioning this year is that B2B functionality on Shopify is no longer only for Plus merchants. The platform has opened up enough that merchants on standard plans can run wholesale operations with the right theme. Your theme choice is about finding the structure that matches your buyers' behavior, not about finding the most feature-rich option on the market. FAQs 1. What is the best free B2B Shopify theme? Trade is the best free B2B Shopify theme. It is built by Shopify specifically for wholesale merchants and includes a quick order form, login-gating support, and compatibility with Shopify's native B2B features. 2. Which Shopify wholesale theme is best for large catalogs? Warehouse by Maestrooo is the most reliable Shopify wholesale theme for stores with large product catalogs. Its advanced filtering, predictive search, mega menus, and high-speed collection pages are built to handle thousands of SKUs without degrading the buyer experience. 3. Do I need Shopify Plus to use a B2B theme effectively? No. As of 2026, Shopify's native B2B features, including company profiles, custom catalogs, and volume pricing, are available on Basic, Grow, and Advanced plans. Most B2B themes work well on all plan levels. 4. How much does a good Shopify B2B theme cost? Free themes like Trade are available at no cost. Premium B2B Shopify themes range from $320 (Warehouse, Normcore) to $400 (Hyper, Enterprise, Prestige). These are one-time fees with lifetime licenses for the purchasing store.

Bhavesha Ghatode
8 Min • 7 January 2025
2166 Views

Bhavesha Ghatode
12 Min • 3 January 2025
4065 Views

Bhavesha Ghatode
9 Min • 31 December 2024
3341 Views

Bhavesha Ghatode
2 Min • 27 December 2024
2466 Views

Bhavesha Ghatode
8 Min • 24 December 2024
2298 Views

Bhavesha Ghatode
8 Min • 20 December 2024
3413 Views

Bhavesha Ghatode
6 Min • 17 December 2024
2310 Views

Bhavesha Ghatode
8 Min • 13 December 2024
2501 Views

Bhavesha Ghatode
6 Min • 10 December 2024
2295 Views

Bhavesha Ghatode
13 Min • 6 December 2024
2480 Views

Bhavesha Ghatode
12 Min • 4 December 2024
2801 Views

Bhavesha Ghatode
7 Min • 29 November 2024
2364 Views


