Blog
Gather knowledge about the latest insights, updates, tips, and tricks in the Ecommerce industry.

5 Min • 20 March 2026
How Anua Unlocked 5X AOV Growth with iCart’s Smart Cart Features
delivery customization Challenges Solutions drive results Scale business delivery customization Challenges Solutions drive results Scale business delivery customization Challenges Solutions drive results Scale business delivery customization Challenges Solutions drive results Scale business Anua is a globally recognized Korean skincare brand known for its minimalist philosophy and focus on gentle yet effective formulations. Built on the idea of simplifying skincare routines, Anua develops products that deliver visible results while avoiding harsh or irritating components, making them suitable for sensitive skin types. Initially using a traditional full cart experience, Anua transitioned to iCart’s side cart solution in August 2025, to create a more seamless and engaging shopping journey. This shift allowed customers to easily explore complementary skincare products without disrupting their browsing flow, making it more intuitive to discover items that fit into a complete routine. By surfacing relevant recommendations directly within the cart, the brand enhanced product visibility across its range. Challenges Before implementing iCart’s side cart solution, Anua faced limitations with their existing full cart experience, which created friction in the customer journey. The traditional cart setup redirected users away from product pages, interrupting their browsing flow and reducing opportunities to explore additional products. As a skincare brand built around routines rather than single-item purchases, this made it difficult to effectively showcase complementary products and encourage customers to build complete regimens. Additionally, the lack of in-cart personalization and strategic upsell opportunities meant that customers were often unaware of related products that could enhance their skincare results. This limited the brand’s ability to increase average order value (AOV) and fully leverage its diverse product range. Anua needed a more dynamic and intuitive cart experience that could seamlessly introduce relevant recommendations while maintaining a smooth and engaging shopping journey. ❌ Cart Value Barriers Low average order value (AOV) due to single-item focus Most customers completed purchases with one primary product instead of building multi-step routines. Cart abandonment near shipping thresholds Customers were not clearly informed or motivated to reach free shipping or discount thresholds. Missed savings opportunities Customers were unaware of potential value in purchasing bundled routines or multiple complementary products. ❌ Absence of Progress-Based Incentives No free shipping or discount progress bar Customers were not motivated to increase their cart value due to lack of visible incentives. Missing tiered rewards system There were no structured milestones (e.g., “Spend more to unlock offers”), reducing upsell opportunities. ❌ Ineffective Cart UI/UX (Pre-Side Cart) Full-page cart disrupted shopping flowCustomers had to leave their browsing journey, increasing friction and drop-offs. No quick add/remove functionality Users couldn’t easily modify their cart or add suggested products without navigating away. Solution To overcome these challenges, Anua implemented iCart’s side cart solution to transform their traditional cart into a high-converting, interactive experience. By replacing the full-page cart with a seamless side cart, the brand ensured that customers could continue browsing while viewing their cart, significantly reducing friction in the shopping journey. Additionally, features like product recommendations & progress bars for free shipping and discounts motivated customers to increase their cart value. By combining personalization, incentive-driven messaging, and a user-friendly interface, Anua successfully turned their cart into a powerful revenue-driving touchpoint rather than just a checkout step. To maximize their cart effectiveness, they implemented two powerful features: ✅ Progress Bar with Multi-Reward Incentives Implemented a tiered progress bar to encourage higher cart value Customers are guided with a clear message like “Add $3.10 to unlock secret offer,” motivating them to continue adding products. Generated over $5M+ in revenue through incentive-driven cart progression Used product-based rewards to align with customer intent Instead of generic discounts, Anua incentivized purchases with relevant skincare items like Dark Spot Pads and mini serums. Built visual motivation for routine expansion As customers add products, they can clearly track progress toward unlocking multiple rewards, encouraging them to build a complete skincare routine. ✅ Product Recommendations Implemented “Frequently Bought Together” recommendations Customers adding a single product (e.g., toner) are shown complementary items like serums, moisturizers, or pads to complete their routine. Generated over 275K revenue through in-cart recommendations Encouraged full skincare regimen building Instead of isolated purchases, the cart suggests step-by-step product combinations aligned with common skincare routines. Increased product discovery at the final stage By surfacing relevant items directly in the cart, Anua ensured customers explore more of their catalog without leaving the checkout flow. Results Achieved in Last 180 Days 22932 Total Store Orders 45101 Total iCart Orders 5X iCart Generated AOV 65.70% Upsell Affected Conversion Rate These improvements reflect a clear shift in customer behavior on Anua’s store. Cart abandonment reduced as shoppers discovered complementary skincare products and felt encouraged to build complete routines. Engagement also increased, with customers interacting more with in-cart recommendations and exploring relevant product pairings. Results & Impact And...Results is Our Main Clarification By implementing iCart’s cart drawer, product recommendations, and progress bar, Anua transformed its cart into a high-performing conversion touchpoint. Shopping Experience Enhancement The improved cart experience encouraged customers to discover complementary products and understand the value of sustainable beauty routines. For instance, the clear presentation of subscription savings alongside one-time purchase options helped customers make more informed decisions about their long-term hair care needs. As Anua continues to optimize its cart experience, the brand is closely monitoring: Routine-based purchasing behavior - tracking how customers move from single items to multi-step regimens Engagement with in-cart recommendations - measuring interaction with suggested products Cart value progression - analyzing how incentives influence higher spending [related_cases_slider] Ready to Write Your Success Story? Try icart App Join successful businesses like Anua and Master your delivery scheduling Delight customers with precise timing Grow your special occasion orders Expand your delivery reach
Read Blog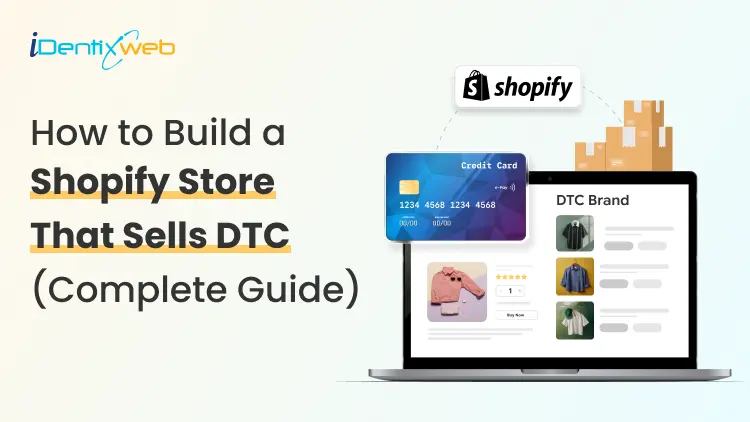
9 Min • 19 June 2026
Shopify for DTC Websites: The 2026 Playbook for Direct-to-Consumer Brands
Direct-to-consumer ecommerce sales in the US hit $239.75 billion last year [Source: Emarketer]. Brands that sell directly now own the margin, the data, and the relationship. Shopify for DTC websites has become the default operating system for brands that want to build that kind of business from the ground up, or shift away from marketplaces. Why is Shopify built for DTC websites? Shopify was built with B2C selling in mind from day one. You get a hosted, scalable storefront with checkout, payments, analytics, and fulfillment tools bundled together. For DTC, that means you are launching on infrastructure that already understands how direct selling works. The bigger reason DTC brands migrate to Shopify? Ownership. Every order on a marketplace like Amazon leaves customer data behind. On Shopify, first-party data flows directly to you. You know who bought it, when, what, and how often. You can build email sequences, loyalty programs, and personalization around that data without asking a platform's permission. Shopify's app ecosystem extends this advantage. Tools for subscriptions, post-purchase upsells, SMS recovery, and loyalty rewards integrate natively. For a look at how DTC brands can build their marketing engine further, check out my guide on Shopify marketing strategies for merchants. How to scale an Amazon brand to a Shopify DTC store? Scaling an Amazon brand to Shopify DTC is one of the highest-leverage moves a product seller can make right now. The first thing that changes is the margin. Amazon charges referral fees, fulfillment fees, and advertising costs that can push total selling costs to 30-50% of revenue. A Shopify DTC store cuts those intermediary costs significantly. The same product sold directly can carry 20-30 points more gross margin. The second thing that changes is the data. Amazon sellers operate with aggregate data and no customer email list. Every Shopify DTC order generates a customer profile you own. You can email, retarget, and build loyalty flows around that customer for years. Many Amazon sellers run both channels simultaneously. Once you connect Shopify to Amazon through the Marketplace Connect app, you can sync inventory, orders, and catalog from one dashboard. Here’s my complete breakdown on connecting Shopify to Amazon with proven methods. Here’s one practical step many sellers miss that I have experienced. > Before launching the DTC store, make sure your brand identity can carry a standalone site. Amazon product listings focus on features and ratings. A Shopify DTC store needs a brand story, lifestyle visuals, and a homepage that communicates who the product is for in the first five seconds. Strong brand work is what separates an Amazon catalog clone from a store that customers actually trust. Shopify B2B vs DTC: Key differences that affect your build AspectDTC Shopify StoreB2B Shopify StoreTarget customerIndividual consumers buying for personal useBusinesses, wholesalers, distributors, or professional buyersStore architectureBuilt around a simple product discovery and purchase journeyBuilt around account-based buying, bulk ordering, and repeat purchasingPricingPublic pricing visible to everyoneCustomer-specific pricing, custom price lists, or negotiated ratesCheckout flowStreamlined for one-time or repeat consumer purchasesMay include minimum order quantities, draft orders, payment terms, and approval workflowsPersonalizationProduct recommendations, upsells, loyalty programs, and email/SMS flowsPersonalized catalogs, company-specific prices, account permissions, and order historyDesign focusLifestyle visuals, editorial layouts, reviews, social proof, and brand storytellingFast product search, quantity selectors, reorder options, and account-level navigationFeature requirementsUpsells, bundles, subscriptions, loyalty, reviews, and abandoned cart recoveryCompany profiles, custom price lists, MOQ, bulk ordering, draft orders, and B2B login accessBest user experienceQuick, emotional, brand-led shopping experienceEfficient, practical, account-led buying experienceStore setup recommendationWorks well as a standalone public storefrontOften works better as a separate wholesale/B2B storefront or gated portalWhen combining bothCan work if the audience overlap is small and the UX is carefully plannedCombining B2B and DTC in one theme can confuse both audiences and reduce usabilityBest approachUse Shopify Markets for geographic or regional DTC segmentationUse a separate URL, login flow, or Shopify Plus B2B setup for professional buyers Shopify Plus DTC: Methodology and best practices for website design & development Use Shopify Plus features that improve revenue Shopify Plus gives DTC brands advanced tools that standard Shopify plans do not offer. But the goal is not to use every Plus feature. The goal is to understand which features directly improve checkout, AOV, speed, and customer experience. Checkout extensibility Checkout extensibility is one of the biggest advantages of Shopify Plus. With Checkout Blocks and Shopify Functions, brands can add upsell banners, custom fields, and conditional checkout logic without heavily depending on custom code. For DTC brands focused on increasing average order value, checkout and post-purchase upsells should be a serious part of the build strategy. Theme-based store vs headless store Many DTC brands overthink the headless decision. For stores under $5M in annual revenue, a well-built Liquid theme with a fast, mobile-first layout is usually a better choice than a complex headless setup. Shopify’s Hydrogen and Oxygen framework is powerful, but it needs a dedicated engineering team to maintain. For most growing DTC brands, a premium custom theme, lean development, and strong performance optimization is the smarter path. Mobile-first store design Mobile-first design is no longer optional. A large share of Shopify traffic now comes from mobile, so every key buying action should be easy on a small screen. High-converting Shopify stores usually include sticky add-to-cart buttons, one-thumb checkout flows, swipe-friendly product galleries, and clean mobile product pages. Speed and performance optimization Store speed affects both SEO and conversion. Every extra second of load time can hurt the buying experience and reduce sales. Keep the theme lightweight, reduce unnecessary JavaScript, compress images, and regularly remove apps that are slowing down the storefront. For a detailed look at the tech stack, see my breakdown of the Shopify tech stack across design, marketing, and operations layers. Full-service DTC digital marketing for Shopify e-commerce I experienced one major thing last year. DTC brands that treat paid ads, email, SEO, and CRO as separate workflows lost revenue. The margin pressure in direct selling makes channel efficiency a survival requirement, not a nice-to-have. A full-service DTC digital marketing approach on Shopify means integrating all growth channels around a single data layer. Here is what that looks like in practice. Paid acquisition on Google and Meta drives top-of-funnel traffic. For DTC brands on Shopify, Google Shopping campaigns run by a well-structured product catalog perform consistently across most categories. Meta retargeting helps owners to attract shoppers who browsed but did not buy. My guide on Shopify PPC covers campaign architecture, bid strategy, and how to avoid the most common budget mistakes. Email and SMS are where DTC brands retain the margin they spent to acquire. A post-purchase flow that delivers value is the single highest channel for the best ROI return that most stores are not running properly. I normally connect Klaviyo with Shopify customer data and make this automation accessible without a developer. Shopify's URL structure and collection architecture are SEO-friendly when set up correctly. Blog content, collection page optimization, and structured data schema all help owners over time. For stores that want to migrate, this matters a lot. My Shopify SEO migration guide covers how to move platforms without losing rankings. Small improvements in checkout completion rate, add-to-cart rate, and returning customer rate will multiply your returns. What Shopify for DTC websites looks like in 2026 AI-driven personalization has definitely become important in 2026. Shopify's native recommendation engine, Shopify Magic $ Sidekick, and third-party tools now surface personalized product suggestions that lift AOV by 15-30% across well-configured stores. For DTC brands, personalization also helps with loyalty. Shoppers who run a store understand that their preferences return more often than agencies. Third-party cookies are disappearing, and because of that, DTC brands are building quiz flows, preference centers, and sign-up incentives that capture customers. Brands running these campaigns own data that no marketplace can replicate. Agentic commerce is emerging as the next DTC surface. Shopify's Spring 2026 Edition introduced Catalog API. This helps developers build an end-to-end agentic experience without approvals. DTC brands that optimize for AI discovery now, through structured product data, will capture early share in this channel before competition intensifies. My breakdown of booming Shopify trends covers the ones worth executing this year versus the ones worth watching. Building your DTC brand on Shopify in 2026: Where to start Shopify for DTC websites works best when the foundation is right. Audit your brand identity, product photography, and core positioning first. A DTC site that converts is built around a clear value proposition. Choose a theme that matches your current revenue stage. Invest in custom design when the business needs it. Build your marketing channels in sequence: organic and email first, then paid. Connect Shopify to any existing marketplace channels to maintain sales while the DTC store grows. The brands that scale on Shopify DTC are the ones with the best customer experience, the cleanest checkout, and a full-funnel marketing system that helps to increase your ROI. FAQs 1. What is Shopify for DTC websites? Shopify for DTC means using the Shopify platform to sell directly to end consumers through a brand-owned online store, without relying on marketplaces. It gives brands control over pricing, customer data, and the purchase experience. 2. How do I scale an Amazon brand to Shopify DTC? Start by connecting both platforms using Shopify Marketplace Connect to sync inventory and orders. Build a Shopify storefront with original lifestyle content, a setup to capture emails, and a post-purchase flow. Gradually shift ad spend toward driving traffic to the store as the DTC channel builds its own customer base. 3. What is the difference between Shopify B2B and DTC? DTC Shopify stores serve individual consumers with public pricing, streamlined checkout, and personalization features. B2B Shopify setups use customer-specific price lists and minimum order quantities. Shopify Plus supports both setups. 4. Do I need Shopify Plus for a DTC website? Shopify Plus is not required to launch a DTC store, but it unlocks checkout extensibility, Shopify Functions, and B2B features that DTC brands need. Most stores should start on a standard Shopify plan and upgrade when annual revenue increases. 5. What does a full-service DTC digital marketing agency do on Shopify? A full-service agency handles design, development, SEO, paid acquisition, email and SMS automation, and CRO as an integrated system. A good agency ties all growth activities together to build on Shopify's analytics infrastructure. 6. What DTC trends should Shopify brands focus on in 2026? The biggest trends in 2026 are AI-powered personalization, third-party data collection, agentic commerce through AI platforms, mobile-first checkout optimization, and subscription or bundling models for recurring revenue. Focus on two or three of these and execute them well before adding more.
6 Min • 1 July 2026
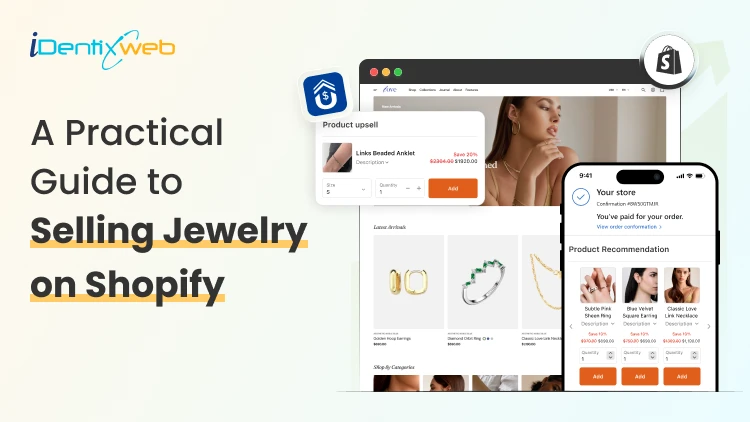
A Practical Guide to Selling Jewelry on Shopify: Upsells & Post Purchase Tricks
Selling Jewelry on Shopify is one of the most practical ways to turn a creative product into a scalable online business. Jewelry is visual, emotional, gift-friendly, and highly personal, which makes it a strong category for ecommerce. But at the same time, jewelry buyers need trust before they purchase. They want clear product images, metal details, size guidance, return policies, secure checkout, and a shopping experience that feels premium. In this guide, we will cover the complete process of Selling Jewelry on Shopify, including store setup, product presentation, marketing, upsells, and post-purchase tricks that can help you get more value from every order. How to sell jewelry on Shopify Step 1: Choose a Clear Jewelry Niche Most competitor blogs start with niche selection, and for good reason. Shopify’s own jewelry business guide also lists finding a niche, researching trends, defining the brand, sourcing products, taking product photos, building the store, marketing, and scaling as core steps. Your niche helps customers understand why they should buy from you instead of another store. A general jewelry store can work, but a focused brand is easier to position. You can build your niche around: Minimal everyday jewelry Premium gold-plated jewelry Handmade or artisan jewelry Bridal and engagement jewelry Personalized name necklaces Men’s bracelets and chains Spiritual, cultural, or zodiac jewelry Affordable luxury jewelry Stackable rings and bracelets Gift-ready jewelry for birthdays, anniversaries, and weddings Many Shopify jewelry stores perform better when they sell around a lifestyle, not just a product. For example, instead of saying “We sell rings,” your brand can say “Everyday stackable rings for modern women.” That instantly creates a clearer customer image. Step 2: Build a Brand That Feels Trustworthy Jewelry is not an impulse product for every customer. Some products may be affordable, but buyers still care about quality, material, packaging, skin safety, durability, and returns. Your brand identity should answer these concerns before the customer asks. Create a strong brand foundation with: A clear brand story Consistent logo, colors, and typography Premium product photography Detailed product descriptions Easy-to-find policies Customer reviews Gift packaging details Care instructions Authentic product videos For jewelry Shopify stores, trust is part of the design. A clean homepage, elegant product cards, visible reviews, and a simple navigation structure can make the store feel more premium. Your brand should also define what makes your jewelry different. Is it handmade? Tarnish-resistant? Waterproof? Customizable? Ethically sourced? Gift-ready? Designed for daily wear? These details help customers justify the purchase. Step 3: Select the Right Shopify Theme Competitor blogs often include theme recommendations because jewelry stores depend heavily on visuals. A good theme should make your products feel premium without slowing down the site. BOGOS also includes themes, product media, collections, apps, homepage optimization, marketing, store examples, and FAQs in its Shopify jewelry guide structure. When choosing a Shopify theme for a jewelry store, look for: Large product image support Mobile-first product pages Quick view option Video support Product filtering Collection-focused layout Lookbook or lifestyle image sections Sticky add-to-cart Recently viewed products Cross-sell sections Fast loading speed If you are just starting, Dawn can work well as a free theme. For premium jewelry brands, choose a theme with stronger visual storytelling, editorial sections, and better collection layouts. The best Shopify jewelry stores do not overload the homepage. They guide customers through clear sections like new arrivals, bestsellers, gifts under a certain price, personalized jewelry, and occasion-based collections. Step 4: Create Product Pages That Sell Your product page is where trust and desire meet. Nivoda’s guide on Shopify jewelry sales recommends rich product descriptions that go beyond basic specs and include craftsmanship, stone quality, carat weight, origin, and care instructions to support both SEO and buyer confidence. For Selling Jewelry on Shopify, every product page should include: Product name with material or style Clear pricing Multiple high-quality images Short product benefit summary Metal, stone, plating, size, and weight details Size guide Care instructions Shipping and return details Warranty or guarantee information Customer reviews Gift packaging details Related products A weak product description says: “This is a gold necklace for women.” A stronger description says: “Designed for everyday layering, this 18k gold-plated necklace adds a minimal shine to workwear, party outfits, and casual looks. Its lightweight chain makes it comfortable for daily wear, while the gift-ready packaging makes it a thoughtful choice for birthdays and anniversaries.” The second version gives style, usage, occasion, and gifting value. That is what helps customers imagine the product in their life. Step 5: Organize Collections Around Buying Intent Do not create collections only by product type. Jewelry shoppers often search by occasion, price, material, and recipient. Useful collection ideas include: Rings Necklaces Earrings Bracelets Anklets Personalized jewelry Gifts for her Gifts for him Wedding jewelry Minimal jewelry Gold jewelry Silver jewelry Jewelry under $50 New arrivals Bestsellers Stackable sets This type of collection structure helps both users and SEO. It also gives you more opportunities to create targeted landing pages for paid ads and email campaigns. Step 6: Use Post-Purchase Tricks That Feel Natural Post-purchase upsells work because the customer has already trusted your brand. They have completed the hardest step: placing the first order. Now you can offer something that improves their purchase. Shopify’s developer documentation notes that thank you and order status pages appear at the end of checkout and can be customized using checkout UI extensions. Here are some post-purchase tricks for jewelry Shopify stores: 1. Offer Matching Products If someone buys earrings, offer the necklace from the same collection. If someone buys a pendant, offer the matching chain. 2. Promote Gift Packaging Jewelry is often bought as a gift. Offer premium packaging, greeting cards, or custom notes after purchase. 3. Add Jewelry Care Products Offer polishing cloths, storage boxes, anti-tarnish pouches, or cleaning kits. 4. Use Limited-Time Offers Carefully Countdown timers can work, but avoid making the offer feel cheap. Use wording like “Add this matching piece before your order is packed.” 5. Offer a Second Piece at a Small Discount For stackable rings or bracelets, offer a second piece with a small discount. This works well because stacking jewelry looks better in pairs or sets. 6. Promote Bestsellers If the original product does not have a perfect match, recommend a bestseller from the same price range. These small offers can turn a single-product order into a larger order without interrupting checkout. Use SellMore to Increase AOV After Checkout Once a customer buys jewelry, the buying journey does not have to end. This is where SellMore Post Purchase Upsell can be useful for Shopify merchants who want to increase average order value without disturbing the original checkout flow. SellMore helps merchants show upsell offers on pages such as the post-purchase page, thank you page, order status page, and checkout page for Shopify Plus stores. Sell More After Every Sale Show irresistible one-click post purchase upsells at the right moment that converts.
13 Min • 18 June 2026
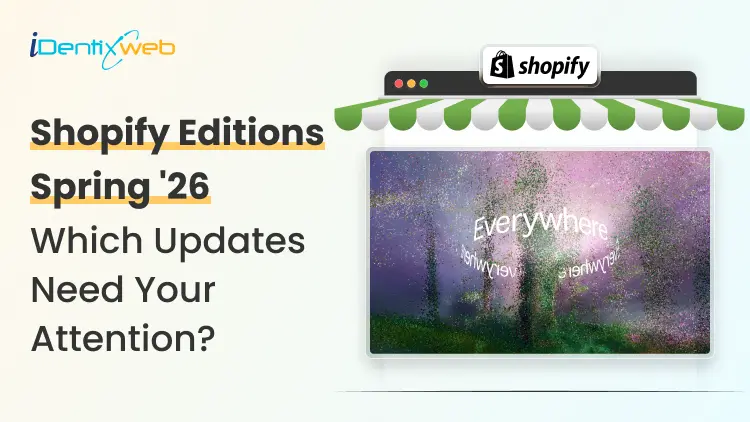
Shopify Spring ’26 Edition: Which Updates Merchants Need to Act On?
Shopify dropped its Spring '26 Edition on June 17, 2026, and branded it "Everywhere" for good reason. Your products can now show up inside ChatGPT, Microsoft Copilot, Google AI Mode, and the Shop app, all without you touching a setting. Over 150 updates shipped in a single release, but only a handful are worth acting on immediately. And one of them is a hard deadline you cannot miss if you want your checkout to keep working after June 30. Here is the practical breakdown. What Is the Shopify Spring '26 Edition? Shopify releases two major product showcases each year under the "Editions" label. Spring '26 is the ninth Edition overall, and it launched on June 17, 2026. The theme is simple: if you are on Shopify, your products get there first, wherever commerce goes next. The 150+ updates span agentic commerce, Sidekick, marketing automation, checkout, payments, point of sale, analytics, B2B, and developer tooling. Some updates are enabled automatically. Others require action on your end. A few are gated behind Advanced or Plus plans. For context on where things stood before this release, see my breakdown of the Shopify Winter '26 Edition released just before this. Shopify Catalog & UCP: Your Products Are Discoverable by AI Image Source: Shopify Two pieces of infrastructure power the "Everywhere" theme: Shopify Catalog and the Universal Commerce Protocol (UCP). Shopify Catalog is a global, structured product database spanning billions of products across millions of merchants. UCP, co-developed with Google, is the open standard that gives AI agents one shared language to communicate with merchants, covering everything from product discovery to checkout, including discounts, subscription terms, and special conditions. Both are live for eligible Shopify merchants by default. Here is the part most guides will skim past: enabled and optimized are not the same thing. Your products are in Catalog by default, but whether an AI agent surfaces them over a competitor's depends entirely on your data quality. Shopify states that AI searches powered by clean Catalog data convert at roughly 2x the rate of searches using scraped data. New in this Edition: The Catalog API now supports Sign in with Shop, so signed-in shoppers see personalized results. Developers have also gained access to bulk lookup and image search endpoints. The Knowledge Base feature is the most underreported update in Spring '26 for me. It lives in the Agentic Storefronts section of your Admin. Shopify now shows you the questions AI agents are actively asking about your brand, things like retail locations, bulk ordering terms, and customer service policies, and lets you fill in the answers directly. I recommend that merchants spend a few minutes here to improve how AI assistants describe your business to potential buyers. Understanding the broader role AI in ecommerce plays in 2026 gives useful context for why getting this right matters beyond just Shopify's own channels. Sidekick Gets Smarter Across Every Device Image Source: Shopify Sidekick has expanded significantly in Spring '26. Three updates are worth knowing about in practical terms. Sidekick App Extensions connect third-party tools directly to Sidekick. Over 15 partner apps are supported at launch, including Klaviyo, Loop, Judge.me, and Smile. Instead of switching between your Shopify Admin and a separate Klaviyo dashboard to check campaign performance, you ask Sidekick and get the answer in one place. Sidekick Pulse powers the redesigned Admin home. It analyzes your store's sales, traffic, and inventory data in the background and surfaces your next best actions proactively. Sidekick on more devices is now live across every screen in the Shopify app. Merchants can use typing or voice to make changes to their online store from a phone. Sidekick now runs on Apple Watch as well, so quick business lookups work without opening a screen. For a closer look at getting real value from the tool, my guide on how to use Shopify Sidekick covers every use case. Campaign Autopilot Image Source: Shopify Campaign Autopilot is Shopify's structural answer to that problem. It runs paid and organic campaigns across Facebook, Instagram, Shop, and email using your store's commerce data to optimize results within the guardrails you set. ▶ Shop Campaigns has also expanded. It now reaches ChatGPT, Pinterest, and the open web through Microsoft Monetize. You can set custom bids for specific customer segments, like new versus lapsed buyers, and all billing lands on your Shopify invoice. More channels are coming soon, including Microsoft Advertising, ChatGPT Ads, and Snapchat. A new AI sales associate lives inside Shopify Inbox. It answers buyer questions, suggests products, and handles order inquiries using your catalog, inventory, and store policies. Shoppers who sign in with Shop get personalized recommendations in the chat window. ▶ WhatsApp is now a native marketing channel inside Shopify Messaging. Consent management sits alongside email and SMS, making it easier to keep your messaging preferences organized in one place. If you are already running paid campaigns for your Shopify store, Campaign Autopilot fits naturally into a broader multi-channel strategy. Shop Pay Goes Beyond Shopify Stores Image Source: Shopify Shop Pay expanding outside of Shopify is another big structural shift in Spring '26 for me. Any brand on any platform can now offer Shop Pay at checkout, gaining access to a Shopify-stated network of 250M+ shoppers and one-click purchasing. Shopify is positioning its wallet, sign-in, and payments infrastructure as the checkout layer for commerce across the internet. ▶ Sign in with Shop reinforces that direction. A buyer's profile, purchase history, and saved details follow them across surfaces, and builders can integrate the same trusted sign-in into any experience they create. For merchants operating beyond their Shopify storefront, like selling through a separate website or marketplace, activating Shop Pay there is now an option worth exploring. On the Shopify side, managed payment methods is a latest update in this edition. Shopify Payments now dynamically reorders payment options at checkout to surface whatever method is most likely to convert for that specific buyer, rather than showing a fixed list. My guide on Shopify Shop Pay covers how enabling it affects checkout conversion for merchants who haven't set it up yet. The Checkout Redesign Is Live on Every Plan Right Now The Spring '26 checkout redesign is mobile-first and available across all plans immediately. This is where things got interesting while I read the latest edition, specifically the three new Shopify updates. Ship and pick up in one checkout solves a problem omnichannel merchants have lived with for years. Before Spring '26, a customer who wanted to ship one item and collect another in-store had to place two separate orders. That is gone now. For any merchant with a physical location and an online store, enabling this should be a priority. Unified branding means you set your logo, colors, and typography once, and it applies consistently across checkout, customer account pages, and sign-in screens. The "set once, applies everywhere" model is a trust-and-cohesion win merchants can ship without developer support. 365-day customer account sessions reduce the friction of being signed out between visits, making it easier for returning customers to pick up where they left off. My guide to Shopify checkout optimization covers the additional steps worth layering on top of the redesign to push conversion further. POS v11: Shopify's Fastest In-Store Update Yet POS v11 is Shopify's fastest-ever point of sale. Shopify states that staff save over a minute on complex cart transactions. On a busy trading day with a line at the register, that time difference is meaningful. The cart now stays visible throughout the entire transaction. Discounts, edits, and customer lookups open in a side panel so staff never lose their place. Multi-select on line items allows bulk edits without repeated taps. Customer search is faster across the board. Returns, exchanges, and new sales can all be processed within a single cart using modular workflows. That removes a genuine source of friction for retail staff managing mixed transactions. ▶ New hardware: The Verifone Victa Mobile scans barcodes, takes card payments, and doubles as a countertop terminal when docked to a tablet. It is currently in Early Access for pre-order in the US and Canada. Analytics That Tell You What to Act On Most merchants are not short on data. The harder problem is knowing which numbers deserve a response. Spring '26 addresses that gap directly inside Shopify Analytics. ▶ Daily insights flag the trends worth your attention each day. Metric annotations explain why a specific number moved, removing much of the guesswork about sudden changes. You can set metric targets and track progress against them inside the platform. New visualization types have been added too: scatter plots, radar charts, bubble charts, and sunbursts. Paired with Sidekick Pulse, your Admin home now opens with recommendations drawn from your actual store data. Shopify Flow can now query sales, traffic, and inventory using ShopifyQL and trigger follow-up actions based on those results. For merchants comfortable with Flow, the automation possibilities have expanded. My Shopify analytics guide covers the core metrics worth tracking and how to use that data to make decisions that actually move revenue. Rollouts: Native A/B Testing Is Now Built Into Shopify Storefront testing has required third-party apps for years. Rollouts change that. It gives merchants native A/B testing for themes, checkout configurations, and customer account setups, all managed inside the Admin. You can also schedule a publish for a specific time without staying up late to flip the switch manually. For any merchant paying for a standalone A/B testing app, Rollouts is a direct cost replacement. More importantly, your test data sits inside Shopify's ecosystem alongside conversion and revenue reporting. A tool is not a strategy, though. Someone still needs to decide what is worth testing and interpret the results clearly. The Agentic Plan: A New Option for Businesses Not on Shopify Spring '26 introduces a standalone Agentic plan for businesses that are not on Shopify's main platform. These merchants can now sync their product catalog to Shopify Catalog and sell through AI channels and the Shop app without migrating their existing setup. For current Shopify merchants, the relevant implication is that the Catalog ecosystem is growing. More sellers joining means more data for AI agents to work with, and more reasons for those agents to prioritize Catalog-powered results. 1 Deadline You Cannot Miss: Shopify Scripts Ends June 30, 2026 Shopify Scripts stops running on June 30, 2026. Any checkout customizations still built on Scripts will break after that date. The replacement is Shopify Functions, and the migration needs to happen before the deadline. If your store uses Scripts to apply discounts, control shipping options, or run any checkout logic, those customizations will silently stop working the moment Scripts is shut off. Auditing what your store runs on Scripts and getting the migration scheduled now is the only responsible move. Checkout logic that fails mid-promotion is the worst time to find out about a deadline you missed. What You Should Actually Do First? Spring '26 ships 150+ updates. Prioritizing realistically matters more than trying to act on everything at once. Here is where most merchants should start. Clean up your product data. Shopify Catalog feeds every AI channel, and incomplete listings will not surface well against competitors with clean data. Start with titles, descriptions, dimensions, and variant attributes. This is the highest-leverage action in this entire edition. Fill in your Knowledge Base. Find the Agentic Storefronts section in your Admin, check the Knowledge Base, and answer the questions AI agents are already asking about your brand. It takes minutes and directly improves how AI assistants describe your business. Handle the Shopify Scripts migration immediately. If Scripts is running in your store, migrate to Shopify Functions before June 30, 2026. Enable unified branding and ship-and-pickup. Both are live on all plans and require no developer support. Start Campaign Autopilot on one channel. Set conservative guardrails, measure results, then expand. Connect Sidekick to your third-party apps. If you use Klaviyo, Loop, or any of the 15+ launch partners, connect them through Sidekick App Extensions. Reviewing your Shopify pricing plan is also worth doing now. Some Spring '26 features are restricted to certain plans and an upgrade might unlock more value than an additional app would. FAQs 1. What is the Shopify Spring '26 Edition? Shopify Spring '26 Edition is Shopify's twice-yearly product showcase, launched on June 17, 2026, with over 150 updates. Themed "Everywhere," it focuses on agentic commerce, Shopify Catalog, the Universal Commerce Protocol, AI-powered marketing through Campaign Autopilot, a redesigned checkout, POS v11, expanded payments, B2B expansion, and new analytics tools. 2. What is Shopify Catalog and do I need to set it up? Shopify Catalog is a global structured product database that AI agents search to find and recommend products. Eligible Shopify merchants are included by default, so no manual setup is required. 3. What is the Universal Commerce Protocol (UCP)? UCP is an open standard Shopify co-developed with Google. It gives AI agents a shared language to communicate with merchants, covering product discovery, cart building, and checkout in a standardized way. Shopify merchants are UCP-enabled by default, meaning any surface built on UCP can incorporate your checkout rules and discounts automatically. 4. What is the Shopify Scripts deadline, and what happens if I miss it? Shopify Scripts stops running on June 30, 2026. Any checkout customizations still using Scripts will stop working after that date. Merchants need to migrate those customizations to Shopify Functions before the deadline. Check your Admin now to confirm whether your store uses Scripts. 5. Is Campaign Autopilot available on all Shopify plans? Campaign Autopilot is currently in early access. Check your Admin for current availability on your plan. Shop Campaigns, which now includes ChatGPT, Pinterest, and Microsoft Monetize as surfaces, has broader general availability. 6. Can any brand now use Shop Pay, even without a Shopify store? Yes. Brands on any ecommerce platform can offer Shop Pay at checkout through Shopify's simplified onboarding. Access to a Shopify-stated network of 250M+ shoppers and one-click purchasing comes with it. 7. What is the Agentic plan announced in Spring '26? The Agentic plan is a new standalone option for businesses not on Shopify's platform. It lets them sync their product catalog to Shopify Catalog and sell through AI channels and the Shop app without migrating their existing store setup. 8. What changed in Shopify POS with Spring '26? POS v11 is Shopify's fastest-ever point of sale. It saves staff over a minute on complex cart transactions, keeps the cart visible throughout the transaction, supports returns and exchanges in one cart, and introduces the Verifone Victa Mobile as new hardware in Early Access for the US and Canada. 9. How does the ship-and-pickup in one checkout work? Previously, customers who wanted to ship some items and pick up others had to place two separate orders. Spring '26 fixes this. One cart now supports mixed fulfillment within a single checkout session. The feature is available on all plans.

Bhavesha Ghatode
12 Min • 23 May 2025
1548 Views

Sajini Annie John
9 Min • 22 May 2025
3776 Views

Bhavesha Ghatode
13 Min • 21 May 2025
1606 Views

Vineet Nair
7 Min • 20 May 2025
1665 Views

Vineet Nair
9 Min • 19 May 2025
1641 Views

Bhavesha Ghatode
11 Min • 17 May 2025
1846 Views

Vineet Nair
8 Min • 16 May 2025
1528 Views

Vineet Nair
8 Min • 15 May 2025
1554 Views
![How to Change Currency in Shopify [Updated Steps in 2026]](https://www.identixweb.com/wp-content/uploads/2025/05/Change-Shopify-Currency-A-Complete-Guide-for-Global-Sellers.webp "How to Change Currency in Shopify [Updated Steps in 2026]")
Bhavesha Ghatode
16 Min • 14 May 2025
1740 Views

Vineet Nair
8 Min • 13 May 2025
1883 Views

Vineet Nair
8 Min • 12 May 2025
1588 Views

Vineet Nair
7 Min • 9 May 2025
1554 Views


