Ecommerce
Gather knowledge about the latest insights, updates, tips, and tricks in the Ecommerce industry.

5 Min • 29 April 2026
How Anua Unlocked 5X AOV Growth with iCart’s Smart Cart Features
delivery customization Challenges Solutions drive results Scale business delivery customization Challenges Solutions drive results Scale business delivery customization Challenges Solutions drive results Scale business delivery customization Challenges Solutions drive results Scale business Anua is a globally recognized Korean skincare brand known for its minimalist philosophy and focus on gentle yet effective formulations. Built on the idea of simplifying skincare routines, Anua develops products that deliver visible results while avoiding harsh or irritating components, making them suitable for sensitive skin types. Initially using a traditional full cart experience, Anua transitioned to iCart’s side cart solution in August 2025, to create a more seamless and engaging shopping journey. This shift allowed customers to easily explore complementary skincare products without disrupting their browsing flow, making it more intuitive to discover items that fit into a complete routine. By surfacing relevant recommendations directly within the cart, the brand enhanced product visibility across its range. Challenges Before implementing iCart’s side cart solution, Anua faced limitations with their existing full cart experience, which created friction in the customer journey. The traditional cart setup redirected users away from product pages, interrupting their browsing flow and reducing opportunities to explore additional products. As a skincare brand built around routines rather than single-item purchases, this made it difficult to effectively showcase complementary products and encourage customers to build complete regimens. Additionally, the lack of in-cart personalization and strategic upsell opportunities meant that customers were often unaware of related products that could enhance their skincare results. This limited the brand’s ability to increase average order value (AOV) and fully leverage its diverse product range. Anua needed a more dynamic and intuitive cart experience that could seamlessly introduce relevant recommendations while maintaining a smooth and engaging shopping journey. ❌ Cart Value Barriers Low average order value (AOV) due to single-item focus Most customers completed purchases with one primary product instead of building multi-step routines. Cart abandonment near shipping thresholds Customers were not clearly informed or motivated to reach free shipping or discount thresholds. Missed savings opportunities Customers were unaware of potential value in purchasing bundled routines or multiple complementary products. ❌ Absence of Progress-Based Incentives No free shipping or discount progress bar Customers were not motivated to increase their cart value due to lack of visible incentives. Missing tiered rewards system There were no structured milestones (e.g., “Spend more to unlock offers”), reducing upsell opportunities. ❌ Ineffective Cart UI/UX (Pre-Side Cart) Full-page cart disrupted shopping flowCustomers had to leave their browsing journey, increasing friction and drop-offs. No quick add/remove functionality Users couldn’t easily modify their cart or add suggested products without navigating away. Solution To overcome these challenges, Anua implemented iCart’s side cart solution to transform their traditional cart into a high-converting, interactive experience. By replacing the full-page cart with a seamless side cart, the brand ensured that customers could continue browsing while viewing their cart, significantly reducing friction in the shopping journey. Additionally, features like product recommendations & progress bars for free shipping and discounts motivated customers to increase their cart value. By combining personalization, incentive-driven messaging, and a user-friendly interface, Anua successfully turned their cart into a powerful revenue-driving touchpoint rather than just a checkout step. To maximize their cart effectiveness, they implemented two powerful features: ✅ Progress Bar with Multi-Reward Incentives Implemented a tiered progress bar to encourage higher cart value Customers are guided with a clear message like “Add $3.10 to unlock secret offer,” motivating them to continue adding products. Generated over $5M+ in revenue through incentive-driven cart progression Used product-based rewards to align with customer intent Instead of generic discounts, Anua incentivized purchases with relevant skincare items like Dark Spot Pads and mini serums. Built visual motivation for routine expansion As customers add products, they can clearly track progress toward unlocking multiple rewards, encouraging them to build a complete skincare routine. ✅ Product Recommendations Implemented “Frequently Bought Together” recommendations Customers adding a single product (e.g., toner) are shown complementary items like serums, moisturizers, or pads to complete their routine. Generated over 275K revenue through in-cart recommendations Encouraged full skincare regimen building Instead of isolated purchases, the cart suggests step-by-step product combinations aligned with common skincare routines. Increased product discovery at the final stage By surfacing relevant items directly in the cart, Anua ensured customers explore more of their catalog without leaving the checkout flow. Results Achieved in Last 180 Days 22932 Total Store Orders 45101 Total iCart Orders 5X iCart Generated AOV 65.70% Upsell Affected Conversion Rate These improvements reflect a clear shift in customer behavior on Anua’s store. Cart abandonment reduced as shoppers discovered complementary skincare products and felt encouraged to build complete routines. Engagement also increased, with customers interacting more with in-cart recommendations and exploring relevant product pairings. Results & Impact And...Results is Our Main Clarification By implementing iCart’s cart drawer, product recommendations, and progress bar, Anua transformed its cart into a high-performing conversion touchpoint. Shopping Experience Enhancement The improved cart experience encouraged customers to discover complementary products and understand the value of sustainable beauty routines. For instance, the clear presentation of subscription savings alongside one-time purchase options helped customers make more informed decisions about their long-term hair care needs. As Anua continues to optimize its cart experience, the brand is closely monitoring: Routine-based purchasing behavior - tracking how customers move from single items to multi-step regimens Engagement with in-cart recommendations - measuring interaction with suggested products Cart value progression - analyzing how incentives influence higher spending [related_cases_slider] Ready to Write Your Success Story? Try icart App Join successful businesses like Anua and Master your delivery scheduling Delight customers with precise timing Grow your special occasion orders Expand your delivery reach
Read Blog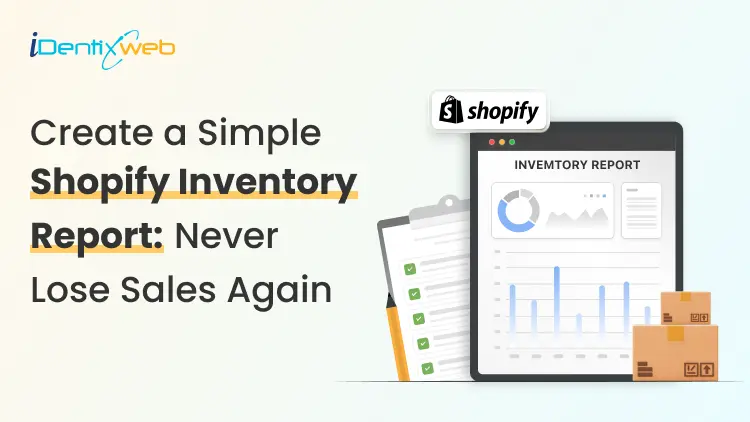
12 Min • 23 June 2026
Shopify Inventory Report: Types, How to Pull Them, & What They Actually Tell You (2026)
Your Shopify inventory report is one of the most underused tools in your admin. Most store owners check stock levels manually and have no real visibility into which products are helping them get conversions. The reports sitting inside your analytics section can fix that, but only if you know which one to open and what to do with the numbers. Shopify has multiple built-in inventory reports, each answering a different question about your stock. Some show you the end-of-month snapshots while others give you a permanent audit trail of every adjustment ever made to your inventory. The 2026 Winter and Spring editions added real-time intelligence on top of all of this through Sidekick. Here is a full breakdown of every report type, how to access them, what each column actually means, and how to turn the data into action. What is a Shopify inventory report? A Shopify inventory report is a structured data view inside your analytics section that tracks the quantity, value, velocity, and history of your stock. These reports are generated from your store's live inventory data at the variant level, so every size, color, and option gets tracked independently. Here’s how an inventory looks inside the Shopify admin Shopify’s inventory reports show you how fast a product sells per day or what percentage of your stock you have moved. We will discuss the types of inventory in the coming section. For a full picture of how inventory fits inside your broader store operations, my Shopify store management guide covers the daily tasks that works with inventory tracking. How to pull an inventory report from Shopify? Both mobile and desktop have the same workflow to pull inventory reports Log in to your Shopify admin. Go to Analytics in the left navigation. Click Reports. Click the Category filter at the top of the report list. Select Inventory. The list now shows only inventory-related reports. Click any one to open it. The different inventory reports available in Shopify: Explained 1. Month-end inventory snapshot The month-end inventory snapshot shows the ending available quantity of every product variant at the close of each month. Available quantity means your on-hand stock minus committed units (orders placed but not yet shipped) Key columns: Product title, Variant title, Variant SKU, Ending quantity. When to use it: Use this report at the end of every month to confirm stock levels and catch variants that sold more units than you physically had in stock. If you see negative ending quantities, a product was oversold, or inventory tracking was disabled on that variant. 2. Month-end inventory value The month-end inventory value report functions like the report above, but it layers in the cost per item assigned to each variant at the time of sale. The result is the total dollar value of your available inventory at the end of the month. Key columns: Product title, Variant title, SKU, Cost, Ending quantity, Total inventory value. When to use it: Use it to understand how much capital you have in your warehouse. For Shopify inventory management, this report is the foundation of any cost-of-goods-sold analysis. 3. Inventory sold daily by product Shopify's daily inventory sold report calculates the average number of units sold per day for each variant over your selected period. The formula is simple: total units sold divided by the number of days in the range. Key columns: Product title, Variant title, SKU, Quantity sold, Ending quantity, Quantity sold per day. When to use it: Set this report to the last 30 days and sort by Quantity sold per day. The top rows are your bestsellers. For example, if a variant has 50 units remaining and a sell rate of 10 per day, you have five days of stock left. 4. Products by percentage sold The percentage sold report shows what share of each variant's opening stock you moved during the selected period. It divides total units sold by the starting quantity. Key columns: Product title, Variant title, SKU, Quantity sold, Starting quantity, Percent sold. A percent sold value above 100% means the variant was oversold. A value below 0% means the starting quantity was already negative when the period began. N/A displays when the starting quantity is zero. When to use it: Use this for seasonal planning. A summer product at 95% sold through by mid-July tells you to reorder urgently. 5. ABC product analysis The ABC analysis report assigns each variant a grade based on its contribution to revenue over the last 28 days. Shopify updates it daily. A-grade: The variants that collectively account for 80% of your revenue. B-grade: The next 15% of revenue. C-grade: The bottom 5%. Key columns: Product title, Variant title, SKU, Product grade, Ending quantity, Total value (cost), Total value (price). When to use it: Focus your restocking budget on A-grade variants first. This is what I always do. If an A-grade product that goes out of stock will negatively affect your sales. For a deeper look at how ABC analysis fits into a broader product strategy, check our Shopify analytics guide for merchants. 6. Products by sell-through rate The sell-through rate report measures the percentage of total inventory you have sold during the selected period. The formula is: Units sold / (Units sold + Units still in inventory) Shopify displays results with a two-day lag (three days for UTC+14:00 time zones) to account for data processing. Key columns: Product title, Variant title, SKU, Sell-through rate. When to use it: A high sell-through rate confirms strong demand. A low rate signals potential unsold merchandize. Use this report monthly to identify which variants are not moving and decide whether to run a promotion or discontinue the SKU entirely. 7. Inventory remaining per product This is the report I use the most. Shopify's inventory remaining report gives you an estimated number of days before each variant runs out based on current sales. It combines current stock levels with the average daily sell rate to produce a days-remaining figure. When to use it: I view this report weekly. Any variant with fewer than 14 days of stock remaining should trigger a purchase order, assuming a minimum 7-day supplier lead time. For products with longer lead times, adjust your reorder threshold accordingly. My guide to Shopify local pickup multi-location management covers how to handle stock distribution across stores. 8. Inventory adjustment changes For me, this report is the most powerful and least-read report in Shopify. It logs every single manual inventory adjustment made to your store: who made it, when, on which variant, at which location, what the adjustment reason was, and the before and after quantities. Key columns: Date, Location, Staff/app that made the change, SKU, Variant, Adjustment reason, Quantity change. When to use it: I pull this report when inventory numbers do not match expectations. A sudden drop in stock for a variant you have not fulfilled could mean a team member corrected a count error, or a receiving entry was incorrectly processed. 9. Inventory adjustments by count Where the adjustment changes report logs every individual change, the adjustments by count report rolls them up. It shows the total number of adjustments per SKU and location over a selected period. When to use it: A variant with dozens of small adjustments in a short window points to a process problem in your warehouse. A variant with one large adjustment deserves a conversation with whoever made it. Shopify inventory history report: How to track adjustment changes over time I use two reports for this purpose. Inventory Adjustment Changes (detailed, per-entry log) and Inventory Adjustments by Count (rolled-up totals). Together, they can form your inventory history analytics. An important limitation to know: historical data for inventory-based metrics only goes back to October 1, 2023, in Shopify's system. Data before that date is not available for inventory metrics. For deleted products, the rule changed in January 2026. Products deleted on or before January 14, 2026, still display their inventory data up to that date. Products deleted after January 14, 2026, no longer display inventory data past their deletion date. If you need to create custom inventory reports that go beyond these defaults, Shopify supports custom data explorations using ShopifyQL. On Advanced and Plus plans, you can build tailored views that filter by location, adjustment reason, date range, or specific SKUs. I actually use Sidekick AI assistant to write ShopifyQL queries in plain English without touching the query syntax myself. Merchants will definitely prefer this method. What plan do you need for Shopify inventory reports? All paid Shopify plans include the core inventory reports. Here is how access breaks down: Starter: Analytics are limited. Inventory reports are not accessible on the Starter plan. Basic ($39/month): Full access to all nine native inventory reports plus date filtering and CSV exports. Grow ($105/month): All Basic features plus more detailed financial reports and additional data exploration options. Advanced ($399/month) and Plus: Full Shopify/SQL access, custom data explorations, and the ability to build and save custom inventory report views. If you are on Basic or Grow and need custom reporting, apps like Report Pundit, Better Reports, and Glew can help you with custom reports. What changed in 2026: Upgrades in Shopify inventory reports Permanent adjustment history: The prior 180-day cap on inventory adjustment data is gone. All adjustment history is now stored indefinitely, which helps with annual audits. Real-time sell-through and days-of-stock calculations: Shopify's analytics now updates the sell-through rate and days of stock remaining on a near-real-time basis. This is a significant improvement over the older reporting cycle, where data could lag by days. Sidekick for inventory intelligence. Sidekick monitors your inventory data proactively. Instead of waiting for you to open a report and look for a problem, it surfaces inventory alerts and restock recommendations directly in your admin panel. You can also ask Sidekick directly: "Which products need reordering?" and get a prioritized list. ShopifyQL for inventory queries: Sidekick can now write ShopifyQL queries for inventory data, including pulling sales, sessions, and inventory data into workflows. 2,048 product variants. Shopify increased the maximum variants per product from 100 to 2,048. If you run a catalogue with complex size/color/material combinations, your inventory reports now cover the full range of variants. Flexible inventory transfers. You can now edit shipment details during transit and receive inventory from unspecified origin locations. Inventory adjustments also give a complete audit history, tracking who changed what, when, and by how much. When Shopify's native inventory reports are not enough For most stores under 500 SKUs, Shopify's built-in inventory reports cover the essentials. The problems appear for stores with 500+ products. Shopify's native reports do not include: Demand forecasting based on seasonal trends, external signals, or promotional lift. Multi-channel inventory sync reporting across Amazon, wholesale, and other platforms. Inventory value by supplier or vendor is segmented for purchasing analysis. Open purchase order tracking versus what has been received. Reorder point automation based on lead time and safety stock calculations. If you are managing 100+ SKUs or selling across multiple channels, a dedicated inventory planning tool will help. Shopify apps like Sumtracker and Prediko integrate directly with your inventory data and layer on the forecasting and multi-source visibility that native reports do not provide. For B2B and wholesale operations, inventory reporting is more important: visibility into PO status, and bulk order impact on available-to-sell stock all require tools that are not available in native Shopify reports. My Shopify B2B guide covers how to manage stock in a wholesale context in 2026. How I perform a weekly inventory review Every Monday: Open the Inventory Remaining per Product report. Flag everything under 14 days of stock. Open the Inventory Adjustment Changes report. Review the last seven days for any unusual adjustments. End of each month: Pull the Month-End Inventory Snapshot and Month-End Inventory Value reports. Save the CSV. Review the ABC Product Analysis for any grade shifts. An A-grade product that dropped to a B is worth investigating. Check the Products by Sell-Through Rate against your seasonal expectations. Automating these reviews with Shopify Flow makes the process even faster. My breakdown of Shopify Flow examples includes workflows for inventory reporting. FAQs regarding Shopify inventory reports 1. What is a Shopify inventory report? A Shopify inventory report is a built-in analytics view inside your Shopify admin that tracks stock quantities, sales velocity, percentage sold, product value, and adjustment history at the variant level. You access them through Analytics > Reports > Category: Inventory. 2. Does Shopify have an inventory report? Yes. Shopify has built-in inventory reports that help merchants track stock levels, inventory value, sell-through rate, days of stock remaining, and inventory adjustments. These reports are enough for most small to mid-sized stores that need basic inventory visibility without adding another app. 3. How to print an inventory report in Shopify? To print an inventory report in Shopify, go to Analytics > Reports, open the inventory report you want, click the three-dot menu, and choose Print. You can either print it directly or save it as a PDF, depending on your device settings. 4. How do I pull an inventory report from Shopify? Go to your Shopify admin, click Analytics, then Reports, then use the Category filter to select Inventory. Choose the specific report you need, set your date range, and optionally export it as a CSV using the Export button in the top right corner. 5. What are the different types of Shopify inventory reports? Shopify includes nine native inventory reports: Month-End Inventory Snapshot, Month-End Inventory Value, Inventory Sold Daily by Product, Products by Percentage Sold, ABC Product Analysis, Products by Sell-Through Rate, Inventory Remaining per Product, Inventory Adjustment Changes, and Inventory Adjustments by Count. 6. What is the Shopify inventory history report? Shopify does not have a single report named "inventory history." The history functionality lives in the Inventory Adjustment Changes report, which logs every manual and automated stock change with a full audit trail. As of the Winter 2026 edition, this history is stored permanently with no cap. 7. What is the best inventory app for Shopify? For small and mid-sized stores, Shopify’s native inventory tools are enough. For stores with 500+ SKUs, apps like Stock Sync, EasyScan, Syncio, Cin7, or SKULabs are worth considering.
11 Min • 24 June 2026
Shopify Plus vs Advanced: What Enterprise Stores Are Choosing in 2026
Deciding between Shopify Plus vs Advanced used to be a straightforward revenue question. Cross a certain GMV threshold, upgrade, and move on. In 2026, it will be a little more complicated than that. The platform gap between these two plans has widened significantly, and the features that matter most for enterprise brands, including checkout control, native B2B, and agentic commerce, now come exclusively on Plus. Getting this decision wrong in either direction is expensive. Upgrading before you need Plus means paying for infrastructure you cannot use. Staying on Advanced if your brand doesn't need it means paying for apps for things that Plus handles natively. Here is my updated and honest breakdown of the comparison between the two plans so enterprise stores can make the call. Quick answer: Shopify Plus vs Advanced, which plan wins? Shopify Advanced at $299/month (billed annually) is the right plan for a single-store DTC business that does not need checkout customization, has fewer than 15 staff, and doesn't run a B2B operation. Shopify Plus at $2,300/month (three-year term) becomes the better investment when you need a second storefront, want native B2B, need full checkout logic through Checkout Extensibility, or your annual third-party transaction fees on Advanced exceed roughly $35,000. Quick comparison between Plus and Advanced 2026 Pricing for Shopify Plus vs Shopify Advanced PlanPricingKey feesWhat you getShopify Advanced$399/month or $299/month billed annuallyOnline card rates start around 2.5% + 30¢ in the US. The third-party payment gateway fee is 0.6%.Includes 15 staff accounts, 10 inventory locations, custom reports, enhanced 24/7 chat support, real-time carrier shipping rates, and advanced international selling tools.Shopify PlusStarts at $2,500/month on a 1-year term or $2,300/month on a 3-year term.Third-party gateway fee drops to 0.20%. Shopify Payments users can avoid third-party transaction fees.Includes unlimited staff accounts, up to 200 locations, checkout customization, 9 expansion stores, B2B tools, priority support, and Plus-only features.Shopify Plus trialStarts at $399/month for eligible merchants.Trial pricing varies by currency and region.Gives access to most Plus features for 1–2 months before moving to a full Plus plan. For a full breakdown of pricing, my Shopify pricing guide covers every tier, including the hidden fees most merchants miss on day one. The break-even calculation I run for enterprise stores Before comparing features, I always explain the transaction fee for owners. For me, it is the fastest way to evaluate Shopify Plus and Shopify Advanced. Advanced charges 0.6% on every order processed through a third-party gateway. Plus charges 0.2%. The 0.4 percentage point difference compounds quickly at scale. For example, I have worked with a brand processing $7M annually through a third-party gateway, which pays $42,000/year in Shopify transaction fees on Advanced. They then shifted to Plus and paid $14,000/year. The $28,000 saving alone covers more than the annual plan cost difference between the two tiers. Checkout Extensibility: The feature that changed everything On Shopify Advanced, checkout customization is limited to visual branding. You can change your logo, colors, and fonts. The structure of the checkout itself is locked. Any checkout logic change requires a third-party app. The Easiest Upsell Happens At Checkout The checkout page is one of the easiest places to increase order value because the customer has already decided to pay. Sell More After Every Sale Show irresistible one-click post purchase upsells at the right moment that converts. Install SellMore SellMore lets you use that moment to show targeted upsell offers without adding friction before checkout. On Shopify Plus, Checkout Extensibility gives you more control. You can rearrange sections, add custom fields above or below forms, insert upsell blocks in the checkout right column, apply B2B-specific payment flows, and create dynamic shipping rules based on cart contents. Shopify Functions also lets developers add more backend commerce logic: discount stacking, custom payment conditions, tax exemptions by customer type, and proprietary shipping calculations. All of that requires Plus. Advanced users are limited to whatever predefined Functions are available through public apps. Multi-store, expansion stores, and global markets in 2026 Shopify Advanced supports exactly one store. International growth on Advanced means either running separate Advanced plans per country at $299/month, or using Shopify Markets to localize within a single store. Shopify Markets is available on both plans and handles currency, language, and regional pricing. Advanced includes three markets, with additional markets at $59/month each. Plus includes up to 50 markets at no extra charge. Plus also gives you a different model entirely: your main store plus nine expansion stores, all managed from a single Organization Admin. This is a centralized dashboard that gives you oversight of all stores, users, and settings in one place. Each expansion store is fully independent, with its own domain, theme, product catalog, language settings, staff permissions, analytics, and bank account for payouts. For brands already managing multiple Shopify stores, my Shopify store management guide covers everything you need to know about multi-store operations. Native B2B: The clearest differentiator between plans If your business runs a wholesale or B2B channel alongside DTC, the Shopify Plus vs Advanced decision is settled by this section alone. Advanced has no native B2B functionality. Building a wholesale operation on Advanced needs third-party apps, a separate wholesale store, or both. Shopify Plus includes a full native B2B suite as part of the plan price. You can run B2B and DTC from the same store, or build a dedicated B2B storefront at no extra cost. That B2B store does not count as one of your nine expansion stores. The B2B feature set covers company profiles with assigned buyers and locations, custom price lists with company-specific or tiered pricing, net payment terms (Net 30, Net 60, and pro-forma invoices), minimum and maximum order quantities, draft orders and quote workflows, and one-off shipping address flexibility. The real argument for Plus over Advanced is the operational consolidation. For hybrid DTC plus wholesale brands, removing the B2B setup reduces ongoing complexity more than any single feature on the plan comparison table. Automation: Flow, Launchpad, Functions, and Audiences Several of the most valuable tools in Shopify's automation layer are now Plus-only in 2026. Shopify Flow is available on both plans. It handles rules-based automation across the admin. For example, it automatically tags customers when they cross a lifetime value threshold. Flow now integrates with Klaviyo, Gorgias, Yotpo, Recharge, LoyaltyLion, and several other platforms. Shopify Launchpad is Plus-only. It schedules merchandising changes to fire at a precise time: flash sales, price changes, product drops, theme swaps, and discount activation or deactivation. Brands running major promotional events use Launchpad to execute without manual intervention at midnight. There is no equivalent on Advanced. Shopify Audiences is another Plus-only. It builds high-intent lookalike audiences for Meta, Google, TikTok, and Pinterest using commerce data across the Shopify Plus merchant network. I have written a complete breakdown on Shopify Audiences how it works and how to use it. Enterprise operations: Staff, APIs, security, reporting, & POS Staff accounts and permissions Advanced supports 15 staff accounts with standard admin roles. Plus supports unlimited staff with store-level access controls. API access Advanced supports 4 REST API requests per second and 200 GraphQL points per second. Plus raises that to 20 REST requests per second and 1,000 GraphQL points per second, with prioritized webhook delivery and access to staging environments. Custom apps on Plus can also access PII data, while on Advanced, they cannot access PII. POS Pro Advanced requires $89/month per retail location for POS Pro. Plus includes POS Pro for the first 20 retail locations at no additional cost. If you use Shopify Payments and process at least one retail transaction per month at any location, POS Pro is waived on all retail locations up to a maximum of 200. Inventory locations Advanced supports 10 inventory locations. Plus supports 200. I suggest brands running multiple warehouses definitely go with Plus on this one. Reporting Advanced gives you Shopify's full reporting suite, including custom reports. Plus adds ShopifyQL Notebooks, a custom reporting tool that lets data teams write queries, combine data sources, and build tailored dashboards. Headless storefronts Advanced supports one Hydrogen storefront. Plus supports up to 25 Hydrogen storefronts hosted on Oxygen, making it the right setup for brands launching headless campaign sites, B2B portals, or international storefronts with custom front-end experiences. What is new in 2026: Sidekick, agentic commerce, & MCP Shopify Sidekick, the AI assistant embedded in the admin, is now available across all plans. It writes copy, configures discounts, builds Flow automations, and answers analytics questions in plain language. The gap between Advanced & Plus at the agentic layer. Advanced agentic capabilities, where the AI takes actions across the store, are better supported on Plus because of higher API limits, broader permissions, and staging environments for safe action testing. A merchant asking Sidekick to "set up a flash sale for this weekend across all three regional stores" needs Plus to execute that. MCP (Model Context Protocol) integration, which lets AI tools connect directly to Shopify's backend, is used by enterprise brands that need AI agents with direct admin access. For me, Plus is always better for MCP-based workflows because the API and security controls make those integrations safe to connect. If you are deciding for the next 3 years, Plus is a much better choice just because of the agentic commerce feature. 5 signals your store is ready to move from Advanced to Plus Signal 1: You need a second storefront If you want a separate domain, a dedicated B2B store, or a different storefront under the same brand, Advanced cannot support that. Plus gives you up to nine expansion stores under one contract with one Admin. Signal 2: Your B2B channel is growing If your wholesale revenue is good and your current app stack is creating a problem, native B2B on Plus removes this issue. Company profiles, net terms, custom catalogs, and a buyer self-serve portal are all native and free with the plan. Signal 3: Your checkout has a requirement that it cannot meet Any checkout that needs custom fields, dynamic shipping logic, upsell blocks inside checkout, or discount stacking rules requires Plus. Advanced's checkout only works for visual branding. Signal 4: Your third-party transaction fees exceed $35,000/year At that threshold, the 0.4% fee reduction on Plus covers more than the annual plan cost difference. The upgrade saves your money from day one. When Shopify Advanced is the right call Advanced is the right plan if you Run a single-store DTC business Your team is under 15 people You use Shopify Payments as your primary gateway You have no current B2B operations, and your checkout does not need customization For inspiration on what Shopify Plus stores look like, checkout my article on successful Shopify Plus websites to research on Plus brands. Making the right Shopify Plus vs Advanced decision ▶ Advanced is the best plan for a growing single-store DTC business. ▶ Shopify Plus is the right setup for brands that need more than one storefront, a native B2B channel, full checkout control, automation, or the API and security that enterprise operations demand. At Identixweb, we work with Shopify brands at exactly this decision point and through the implementation that follows. If you want a clear plan, evaluation and an upgrade roadmap built around your actual operational constraints, our Shopify consulting team can give you a direct answer without the guesswork. FAQs 1. Is Shopify Plus better than Shopify Advanced? Yes. Shopify Plus is better in capability, but not better for every store. Shopify Advanced already gives you 15 staff accounts, carrier-calculated shipping, custom reports, international selling tools, and enhanced chat support. Plus becomes better when you need enterprise features like unlimited staff, 200 inventory locations, unlimited B2B catalogs, priority support, checkout customization, expansion stores, bot protection, and higher API limits. 2. Is it worth upgrading to Shopify Plus? It is worth upgrading to Shopify Plus only when the business problem is bigger than what Advanced can solve. The strongest reasons are checkout customization, advanced B2B setup, expansion stores, higher API limits, bot protection, priority support, and high-volume sales events. 3. Is Shopify Advanced worth it? Yes. Shopify Advanced is worth it for stores that are growing internationally, need better reporting, or want more operational control without paying Plus pricing. It gives you custom reports, carrier-calculated shipping, international commerce tools, lower standard transaction fees, 15 staff accounts, and enhanced 24/7 chat support. 4. How much is Shopify Advanced per month? Shopify pricing is localized by country, and subscriptions can be billed in currencies such as INR, USD, GBP, or EUR, depending on location. In the USA, Shopify Advanced currently costs $399/month when paid monthly, or $299/month when paid yearly. 5. Why is Shopify Plus so expensive? Shopify Plus is expensive because it is priced for enterprise-level control, scale, and support. You are paying for things like full checkout customization, unlimited staff, 200 inventory locations, unlimited B2B catalogs, priority support, free expansion stores, bot protection, higher API limits, and feature testing environments.

10 Min • 23 June 2026
Shopify SEO Migration: How to Move Platforms Without Losing Rankings (2026)
A Shopify SEO migration scares most store owners for one reason: ▶ They have seen sites lose months of organic traffic after a replatform. I have run enough of these to tell you the platform is rarely the problem. Traffic drops because URLs change, redirects get missed, and on-page signals quietly disappear during the move. Get those three right and your rankings hold, they even climb as well if you continue with best SEO practices. In this guide I will walk you through exactly how to migrate to Shopify without losing SEO, the mistakes that lose rankings, and the steps I follow on every project. What a Shopify SEO migration actually is? A Shopify SEO migration is the process of moving your store to Shopify while keeping your search rankings, indexed pages, and organic traffic intact. It covers your: URL structure Redirects Content, metadata & structured data In my experience, protecting search equity is where most Shopify SEO migrations succeed or fail. When you change platforms, almost every URL changes too. Search engines have those old URLs indexed and ranked. If they hit a dead page instead of the right new one, rankings for that page slide. SEO work for Migrating to Shopify work is really about controlling that handoff so Google updates its index to your new URLs without losing the trust your old pages built. Common SEO mistakes during a Shopify SEO migration Most ranking loss comes from a short list of avoidable errors. The platform gets blamed, but the damage is almost always self-inflicted during planning. Here are the common SEO mistakes I see on Shopify migrations and how to dodge them. No URL inventory before launch. You cannot redirect pages you never recorded. Skip the crawl and you will miss orphan pages that still earn traffic. Incomplete or wrong redirects. A redirect map that covers products but forgets blog posts, collections, or old filtered URLs leaves dozens of dead pages behind. Redirect chains. Old URL points to URL B, which points to URL C. Chains slow crawling and loses link equity. Point old straight to final. Lost metadata. Titles, meta descriptions, H1s, and alt text often get regenerated by the new theme. Rankings depend on those signals matching. Launching without testing. Pushing live with no staging review means you discover broken redirects after Google already crawled them. Forgetting the sitemap and Search Console. A new site that never resubmits its sitemap takes far longer to get recrawled. Avoid these six and you have removed most of the risk. The rest is execution. Shopify migration SEO best practices: a step-by-step plan The safest way to protect SEO ranking from migrating to Shopify is to treat it as a controlled site move. Below is the exact sequence I use, and it holds up whether you are coming from WooCommerce, Magento, or BigCommerce. ▶ Here’s a complete breakdown of BigCommerce to Shopify migration for beginners. ▶ I have also created complete guide on Magento to Shopify migration for beginners. 1. Crawl and inventory every URL Start by capturing every page that currently exists and ranks. Crawl the full site with Screaming Frog or Sitebulb and pull title tags, H1s, meta descriptions, word count, and status codes into one spreadsheet. Cross-reference that crawl against your XML sitemap, Google Analytics top pages, and Google Search Console so you catch orphan pages the crawler would miss. This master sheet becomes the backbone of the whole Shopify SEO migration. 2. Map old URLs to new Shopify URLs Build a one-to-one map of every old URL to its new Shopify destination. Shopify forces certain prefixes into URLs, so even pages with the same name change paths. Knowing how to migrate to Shopify SEO URLs means accepting those structural changes and matching each old path to the closest, most relevant new page rather than a generic homepage. A rough sense of Shopify's structure: Products live under /products/ Collections live under /collections/ Blog posts live under /blogs/blog-name/post-name Static pages live under /pages/ Keep your handles short and descriptive while you map. A slug like /products/leather-wallet beats a bloated auto-generated one. 3. Set up 301 redirects Use 301 redirects for every changed URL, because a 301 tells Google the move is permanent and passes nearly all of the page's ranking power to the new URL. A 302 is temporary and does not carry that equity, so avoid it for a Shopify SEO migration. Import your redirect list in the Shopify admin under Online Store, then Navigation, then URL Redirects, and prioritize your highest-value pages first: Top collections, best-selling products, and blog posts that pull organic traffic. For a deeper walkthrough, my Shopify migration checklist breaks down the 30-day QA I run after every go-live. 4. Preserve metadata, headings, and content Carry over your title tags, meta descriptions, H1s, body content, and image alt text exactly. These are direct ranking signals, and a theme that regenerates them with generic text will erase years of optimisation. Spot-check your top 20 pages by hand after import to confirm the on-page elements survived the move. 5. Rebuild structured data and replace SEO apps Your old platform's SEO plugins do not come with you. If you relied on Yoast, RankMath, or a Magento SEO module, plan replacements like Yoast SEO for Shopify or Smart SEO, and make sure product, review, and article schema is reapplied. This is especially important for White Label SEO services, ensuring consistent and scalable optimization across client projects. Shopify themes handle canonicals and basic schema natively, so do not pile on apps for jobs the theme already does. Here’s my step-by-step Shopify SEO guide that covers which on-page elements matter most once you are live. 6. Test everything on a staging build first Validate the new store before Google checks it. Run a fresh crawl of the staging site, check that redirects resolve in one hop, confirm canonicals point to the right URLs, and verify no important pages carry an accidental noindex tag. Catching it after Google recrawls will cost you rankings. 7. Launch, submit your sitemap, and monitor Search Console Go live, then immediately submit your new XML sitemap in Google Search Console and request indexing for key pages. Watch the Coverage and Pages reports daily for the first two weeks for 404s, redirect errors, and crawl anomalies. Fast detection is the difference between a small dip and a real decline. Migration can go wrong without experts Schedule a Free Strategy Call The Shopify URL reality nobody warns you about Shopify will not let you match your old URLs perfectly, and that is fine. The forced /collections/, /products/, /pages/, and /blogs/ prefixes mean your paths will change even when page names stay identical. Accept it, redirect cleanly, and Google adapts. A few Shopify-specific limits worth knowing before launch: Shopify only creates 301 redirects through the admin, not 302s, which is what you want for a migration. You cannot redirect a URL that is still live. The destination has to exist and the old path has to be free. Shopify carries query parameters through redirects, so a redirect on /products/old also catches /products/old?variant=123. When you later edit a product, collection, or page handle, Shopify offers a "Create a URL redirect" checkbox. Always tick it. How long until traffic recovers? Expect some movement, then recovery. Any time URLs change there is a short-term wobble while Google recrawls and reassigns equity. Smaller sites usually settle within a few weeks; large catalogues can take a couple of months to fully stabilise. The size of the dip tracks how clean your redirects and on-page preservation were. A tidy one-to-one redirect map with intact metadata recovers fast. A patchy map with missing pages recovers slowly, if at all. Recovery is a measure of migration quality. Don't ignore AI for Shopify SEO migration in 2026 To protect SEO ranking from migrating to Shopify in 2026, treat AI search engines as part of the equation. AI crawlers from tools like Google's AI Overviews, ChatGPT, and Perplexity follow the same redirects and read the same structured data your pages serve. Broken redirects and missing schema cost you visibility in AI answers exactly the way they cost you in classic search. Keep your schema markup intact through the move, make sure your most authoritative pages still resolve cleanly, and confirm your FAQ and product structured data survives import. A migration done well for traditional SEO is already most of the way to staying visible in AI-driven results. Want to rank in AI search engines? Here’s my AEO guide for Shopify owners to rank their storefronts in AI search engines. Migrate to Shopify without losing SEO A Shopify SEO migration is easy when you control the variables. Inventory every URL, map old to new, redirect with 301s, preserve your on-page signals, test on staging, then watch Search Console closely after launch. Do those things and you migrate to Shopify without losing SEO, often coming out faster and cleaner than the store you left. If your catalogue is large or your old store has heavy custom logic, the redirect mapping alone can run into thousands of rows, and that is where a careful hand matters most. If you would rather hand it off, Identixweb's Shopify migration services team handles the URL mapping, redirects, and SEO preservation end to end. FAQs 1. Will migrating to Shopify hurt my SEO? It can cause a short-term dip because URLs change, but it will not cause lasting loss if you redirect properly. With clean 301 redirects and preserved metadata, most sites recover within a few weeks to a couple of months and some improve. 2. What are the most common SEO mistakes during a Shopify migration? Skipping a full URL inventory, building incomplete redirects, creating redirect chains, losing title tags and meta descriptions, launching without testing, and forgetting to resubmit the sitemap. 3. How do I migrate to Shopify without losing SEO? Crawl and record every existing URL, map each one to its new Shopify URL, set up 301 redirects, preserve all on-page elements, rebuild structured data, test on staging, then submit your sitemap and monitor Search Console after launch. 4. Do I have to change my URLs when moving to Shopify? Yes. Shopify forces prefixes like /products/ and /collections/ into paths, so even pages with the same name change URLs. The fix is a complete 301 redirect map from every old path to the right new one. 5. How long does it take to recover rankings after a Shopify migration? Small stores usually stabilize within a few weeks. Large catalogues can take up to a couple of months. The cleaner your redirects and metadata preservation, the faster the recovery. 6. Should I keep my old site live during the migration? Keep it accessible until you have confirmed the domain points to Shopify and your redirects resolve correctly. A short overlap gives you a safety net to verify everything before fully cutting over.

Vineet Nair
6 Min • 28 April 2026
111 Views

Sajini Annie John
3 Min • 29 April 2026
114 Views

Sajini Annie John
2 Min • 29 April 2026
135 Views

Sajini Annie John
7 Min • 22 April 2026
110 Views

Vineet Nair
7 Min • 27 April 2026
117 Views

Vineet Nair
7 Min • 20 April 2026
136 Views

Vineet Nair
7 Min • 20 April 2026
116 Views

Sajini Annie John
7 Min • 15 May 2026
118 Views

Vineet Nair
7 Min • 16 April 2026
134 Views

Vineet Nair
6 Min • 16 April 2026
146 Views

Sajini Annie John
11 Min • 15 April 2026
131 Views
")
Vineet Nair
7 Min • 15 April 2026
140 Views


