

Author: Vineet Nair
Gather knowledge about the latest insights, updates, tips, and tricks in the Ecommerce industry.

5 Min • 20 March 2026
How Anua Unlocked 5X AOV Growth with iCart’s Smart Cart Features
delivery customization Challenges Solutions drive results Scale business delivery customization Challenges Solutions drive results Scale business delivery customization Challenges Solutions drive results Scale business delivery customization Challenges Solutions drive results Scale business Anua is a globally recognized Korean skincare brand known for its minimalist philosophy and focus on gentle yet effective formulations. Built on the idea of simplifying skincare routines, Anua develops products that deliver visible results while avoiding harsh or irritating components, making them suitable for sensitive skin types. Initially using a traditional full cart experience, Anua transitioned to iCart’s side cart solution in August 2025, to create a more seamless and engaging shopping journey. This shift allowed customers to easily explore complementary skincare products without disrupting their browsing flow, making it more intuitive to discover items that fit into a complete routine. By surfacing relevant recommendations directly within the cart, the brand enhanced product visibility across its range. Challenges Before implementing iCart’s side cart solution, Anua faced limitations with their existing full cart experience, which created friction in the customer journey. The traditional cart setup redirected users away from product pages, interrupting their browsing flow and reducing opportunities to explore additional products. As a skincare brand built around routines rather than single-item purchases, this made it difficult to effectively showcase complementary products and encourage customers to build complete regimens. Additionally, the lack of in-cart personalization and strategic upsell opportunities meant that customers were often unaware of related products that could enhance their skincare results. This limited the brand’s ability to increase average order value (AOV) and fully leverage its diverse product range. Anua needed a more dynamic and intuitive cart experience that could seamlessly introduce relevant recommendations while maintaining a smooth and engaging shopping journey. ❌ Cart Value Barriers Low average order value (AOV) due to single-item focus Most customers completed purchases with one primary product instead of building multi-step routines. Cart abandonment near shipping thresholds Customers were not clearly informed or motivated to reach free shipping or discount thresholds. Missed savings opportunities Customers were unaware of potential value in purchasing bundled routines or multiple complementary products. ❌ Absence of Progress-Based Incentives No free shipping or discount progress bar Customers were not motivated to increase their cart value due to lack of visible incentives. Missing tiered rewards system There were no structured milestones (e.g., “Spend more to unlock offers”), reducing upsell opportunities. ❌ Ineffective Cart UI/UX (Pre-Side Cart) Full-page cart disrupted shopping flowCustomers had to leave their browsing journey, increasing friction and drop-offs. No quick add/remove functionality Users couldn’t easily modify their cart or add suggested products without navigating away. Solution To overcome these challenges, Anua implemented iCart’s side cart solution to transform their traditional cart into a high-converting, interactive experience. By replacing the full-page cart with a seamless side cart, the brand ensured that customers could continue browsing while viewing their cart, significantly reducing friction in the shopping journey. Additionally, features like product recommendations & progress bars for free shipping and discounts motivated customers to increase their cart value. By combining personalization, incentive-driven messaging, and a user-friendly interface, Anua successfully turned their cart into a powerful revenue-driving touchpoint rather than just a checkout step. To maximize their cart effectiveness, they implemented two powerful features: ✅ Progress Bar with Multi-Reward Incentives Implemented a tiered progress bar to encourage higher cart value Customers are guided with a clear message like “Add $3.10 to unlock secret offer,” motivating them to continue adding products. Generated over $5M+ in revenue through incentive-driven cart progression Used product-based rewards to align with customer intent Instead of generic discounts, Anua incentivized purchases with relevant skincare items like Dark Spot Pads and mini serums. Built visual motivation for routine expansion As customers add products, they can clearly track progress toward unlocking multiple rewards, encouraging them to build a complete skincare routine. ✅ Product Recommendations Implemented “Frequently Bought Together” recommendations Customers adding a single product (e.g., toner) are shown complementary items like serums, moisturizers, or pads to complete their routine. Generated over 275K revenue through in-cart recommendations Encouraged full skincare regimen building Instead of isolated purchases, the cart suggests step-by-step product combinations aligned with common skincare routines. Increased product discovery at the final stage By surfacing relevant items directly in the cart, Anua ensured customers explore more of their catalog without leaving the checkout flow. Results Achieved in Last 180 Days 22932 Total Store Orders 45101 Total iCart Orders 5X iCart Generated AOV 65.70% Upsell Affected Conversion Rate These improvements reflect a clear shift in customer behavior on Anua’s store. Cart abandonment reduced as shoppers discovered complementary skincare products and felt encouraged to build complete routines. Engagement also increased, with customers interacting more with in-cart recommendations and exploring relevant product pairings. Results & Impact And...Results is Our Main Clarification By implementing iCart’s cart drawer, product recommendations, and progress bar, Anua transformed its cart into a high-performing conversion touchpoint. Shopping Experience Enhancement The improved cart experience encouraged customers to discover complementary products and understand the value of sustainable beauty routines. For instance, the clear presentation of subscription savings alongside one-time purchase options helped customers make more informed decisions about their long-term hair care needs. As Anua continues to optimize its cart experience, the brand is closely monitoring: Routine-based purchasing behavior - tracking how customers move from single items to multi-step regimens Engagement with in-cart recommendations - measuring interaction with suggested products Cart value progression - analyzing how incentives influence higher spending [related_cases_slider] Ready to Write Your Success Story? Try icart App Join successful businesses like Anua and Master your delivery scheduling Delight customers with precise timing Grow your special occasion orders Expand your delivery reach
Read Blog

10 Min • 31 July 2026
Grow Your Store With Shopify Referral Codes? (Generate, Distribute & Track)
Shopify merchants can run creator affiliate programs through Shopify Collabs, which generates affiliate links and discount codes, tracks attributed sales, and manages commissions. For customer referrals, merchants can manually create a unique discount code for each referrer, add minimum-spend and usage limits, and track resulting orders through discount reports. Automated customer rewards, referral sharing, fraud controls, and advanced attribution generally require a dedicated referral app. A Shopify referral code is one of the cheapest acquisition channels most stores never use. I have set these up for stores doing 40 orders a month and stores doing 4,00, and the setup is far less technical than merchants expect. Here is how referral works in your admin right now, what processes need an app, and how to track whether any of it is making you money. What Is a Shopify referral code? A Shopify referral code is a discount code tied to one specific person, so you know exactly who sent each new customer. A generic code like SUMMER20 tells you nothing about who shared it. A referral code like SAM-15 tells you Sam brought that order in. A referral code can be implemented as a Shopify discount code, but referral platforms may use unique links, customer accounts, or tracking methods. The key difference is that a referral identifier connects the sale to a specific referrer. I will explain the three formats that get mixed up. Referral code. An alphanumeric string the shopper types at checkout. Works for podcasts, in-person events, WhatsApp, and anywhere a link cannot travel. Referral link. A unique URL that attributes visits or purchases to a referrer. A Shopify shareable discount link can automatically apply the discount, while referral apps may use cookies, URL parameters, account matching, or other attribution methods. Discount code. The broad category both of the above sit inside. Run both formats. Links convert better because there is no typing. If you are new to this, my walkthrough on how to create a discount code on Shopify covers the base settings you will need before any of this works. Does Shopify have a referral program? Shopify has no built-in customer-to-customer referral program where your buyers refer their friends. It does have two programs that reward people for referring new merchants to Shopify. One native app that handles affiliate-style referral codes for your store. Three separate things carry the word "referral" in this ecosystem, and merchants confuse them weekly: 1. The Shopify affiliate program This program is for creators, who refer new merchants to Shopify. Eligible affiliates can earn up to $150 USD for a qualified merchant who moves to a full-price Basic, Grow, or Advanced plan. The merchant must start a free trial within 30 days of the qualifying affiliate click, and Shopify currently allows up to 125 days from the start of the trial for the referral to become eligible. The minimum withdrawal balance is $10, reporting and payments are handled through Impact, and Shopify says applications are generally reviewed within five business days. 2. The Shopify partner program This program is for developers, designers, agencies, app companies, and other commerce professionals. Earnings vary by activity and may include merchant-referral revenue share, app or theme revenue, and service income. 3. Your own referral program This is where existing customers refer friends to your store. Shopify’s native discounts and store credit can support a small manual pilot. But an automated customer-to-customer referral program requires an app or custom development. The native tools for merchants Shopify Collabs Shopify Collabs is Shopify's own affiliate marketing app, and it generates unique discount codes and tracking links per creator, tracks the sales attributed to each one, and pays them out. It is available on every Shopify plan except Starter and Retail. Shopify does not charge a monthly Collabs subscription fee, but it currently charges a 2.9% processing fee on automatic commission payments. You can invite creators directly, run an open access program with an instant commission offer, or publish an application page on your online store. If you are eligible for Shopify Flow, you can wire Collabs into automated workflows. For the broader creator strategy, see my guide on finding influencers with Shopify Collabs for merchants. . Native store credit Store credit is a first-party feature in your admin, switched on by default. You issue credit from any customer profile. It applies automatically at checkout for signed-in customers. I see these four limits for this: It only works with new customer accounts. Only the full balance can be applied. Customers cannot spend part of it. The cap is under $15,000 USD per customer account. For stores created on or after May 12, 2025, third-party transaction fees apply to the portion of an order paid with store credit. Plus, stores using Shopify Payments are exempt. Bulk unique code generation Shopify supports bulk unique redeem codes through its Admin API and through third-party bulk-discount apps. In the standard Shopify Admin, merchants can create individual discount codes and export discount data. If you need hundreds or thousands of advocate-specific codes, I would advise using a bulk-discount app or a custom API workflow. How to generate Shopify referral codes (Manual method) Step 1: Choose a discount type Go to Shopify Admin > Discounts > Create discount, then select Amount off products or Amount off orders. Step 2: Create the referral code Under Method, select Discount code and enter a memorable code such as SAM20. Set the discount value, minimum purchase amount, and limit it to one use per customer. Step 3: Save and share Save the discount and send the code to the referrer. You can later track orders and sales generated through that code. Method 2: Shopify Collabs for creator and affiliate referrals Install Collabs. Build your brand profile, set your commission structure as a percentage or a flat amount, decide which products qualify, and publish. Codes and links generate per creator automatically. Attribution is handled by Shopify, so your revenue reporting stays simple. This is best for stores where creators, not customers, drive word of mouth. Method 3: A referral app Referral-app pricing varies more than the monthly subscription alone suggests. Compare order limits, advocate limits, referral revenue fees, fraud controls, integrations, and reward automation before choosing an app. I have compared the main options in detail in my roundup of the best Shopify referral apps in 2026. How to distribute Shopify referral codes Here’s how I distribute Shopify referral codes. Order confirmation page. Peak excitement and zero friction. One line and a copy button works here. Post-delivery email. Post-delivery email. Send it after customers have had enough time to experience the product. This may be seven to ten days for some products, but longer purchase and evaluation cycles may require different timing. Customer account page. Permanent place for the code so people can find it again without digging through email. Packaging insert with a QR code. Physical inserts convert well because the product is in their hands. My guide on creating Shopify QR codes covers the free native options. For email and SMS sequencing, my breakdown of Shopify marketing automation tools covers what to use at each store size.. How to track Shopify referral code performance Discount reports Go to Analytics > Reports, then look for sales by discount report. Shows orders, revenue, and average order value per discount. Compare referral-driven AOV against your store average. Four numbers I always watch: Participation rate. Percentage of customers who claim a code. Share rate. How many of those actually share it? Referral conversion rate. Percentage of referred visitors who buy. Referral CAC. Total rewards paid divided by referred orders. Compare it to your paid ad CAC directly. How to set rewards that do not make losses? Rewards that benefit the referred friend, or both participants, can outperform referrer-only incentives in some situations. Shared rewards will make the recommendation feel more helpful, but the best structure depends on your audience, margins, and product. A one-sided reward makes the referrer feel like they are profiting off a friend. For example, on a $60 order with a 55% gross margin, a 20% friend discount leaves approximately $21 in gross profit before the referrer reward and other costs. After assigning a $20 store-credit reward, the first order is close to break-even before payment fees, shipping, returns, app charges, and support costs. I set these three margin rules: Add a minimum order value so referrals cannot be redeemed on your cheapest SKU. Pay the referrer in store credit, not cash. The reward returns to you. Check your discount combination settings. Shopify lets codes stack with automatic discounts, and a stacked referral code plus a seasonal promo can wipe out a full order's margin. My guide on Shopify discount combinations covers how to set these rules safely. Start small and scale what works A Shopify referral program does not need $200 monthly software. The first thing I would do is to create ten manual codes for your ten best customers and watch the discount report for 30 days. If referred customers convert at a decent rate and your referral CAC beats your ad CAC, the case for a proper app makes itself. A simple referral setup with clear promotion and regular measurement can outperform a more expensive platform that customers rarely see or use. FAQs 1. How can Shopify users set up a referral program? Install a referral app from the Shopify App Store, then configure the user reward, incentive, eligibility rules, sharing methods and fraud controls. Shopify’s native discount tools can create promotional codes, but a referral app is required for unique referral links, automatic rewards, attribution and performance reporting. 2. Is there a referral code for Shopify? Shopify does not offer a referral code that gives every new merchant a discount on a Shopify plan. Approved Shopify Affiliates receive a unique referral link through the Shopify Affiliate Program, while merchants can create their own customer referral codes using Shopify Discounts or a referral app. 3. How to generate referral codes for Shopify? From the Shopify admin, go to Discounts, select Create discount, choose the discount type and enter or generate a code. Set the reward value, eligible products or customers, minimum purchase requirement, usage limit and expiry date. Use a referral app when every user needs a unique code and automated reward tracking. 4. Which is the best referral app for Shopify? ReferralCandy is a strong, dedicated option for referral and affiliate campaigns with attribution, tiered rewards, fraud protection and multiple reward types. Smile is another app that is better suited to merchants who want referrals combined with loyalty points and VIP tiers. 5. Does Shopify have a referral program? Yes. Shopify operates an Affiliate Program through which approved affiliates share unique links and earn commissions for qualified merchants. However, Shopify does not provide a built-in customer refer-a-friend program for individual stores, so merchants must use a referral app or manage codes manually through Shopify Discounts.
8 Min • 31 July 2026
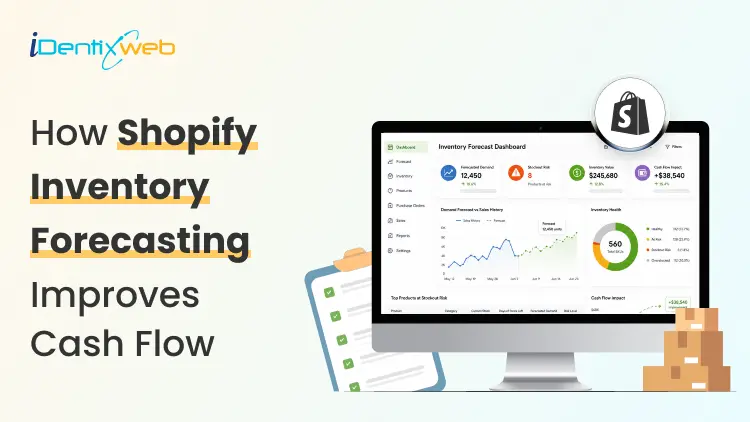
Complete Guide to Shopify Inventory Forecasting to Manage Cash Flow (+ Tools)
Shopify inventory forecasting is the process of estimating how much stock each product will need and when it should be reordered using sales history, supplier lead times, promotions, and current inventory levels. Accurate forecasting helps merchants avoid stockouts, reduce excess inventory, and keep more cash available for business expenses. Tools such as Sidekick, Prediko, Inventory Planner, and Assisty can automate inventory forecasting. If your ROI feels lower even when sales are good, your stock is usually the reason. Cash you've spent on inventory is cash you can't spend on ads, payroll, or the next order. Shopify inventory forecasting is working out how much stock you need and when to order it, so less of your money sits on a shelf. One thing worth knowing before anything else: Stocky, the free forecasting and purchase order app that came with Shopify POS Pro, stops working on August 31, 2026. If you order stock through Stocky, you've got a few weeks to sort out a replacement. What is Shopify inventory forecasting? Shopify inventory forecasting means predicting how many units of each product you'll sell over a future period. You use your sales history, supplier lead times, and whatever promotions you have planned. What you're after isn't the forecast itself. It's a list of purchase orders with dates and amounts against them. A forecast that never turns into an order hasn't done anything for you. Forecasting is really a cash question This is my philosophy: Stock is the biggest cheque you write and the slowest one to come back. You pay a deposit today, pay the balance six weeks later, pay duty when it lands, and only then do the units start selling. Every forecasting choice you make is a choice about how long your money is stuck. Two numbers tell you whether that's under control. Your cash conversion cycle The cash conversion cycle counts the days between paying your supplier and getting paid by your customer. CCC = Days Inventory Outstanding + Days Sales Outstanding − Days Payables Outstanding Days Inventory Outstanding is (Average inventory ÷ COGS) × 365. If you hold $120,000 of stock on average against $480,000 of annual COGS, that's 91 days. Days Sales Outstanding is quick for a normal Shopify store, since Shopify Payments in the US settles in about 2 to 5 business days. It climbs once you add wholesale on Net 30 or marketplaces with their own payout cycles. Days Payables Outstanding is how long your supplier lets you wait. On Net 30, that's 30. So: 91 + 3 − 30 = 64 days. Your money is tied up for a bit over two months on every dollar you put into stock. Most DTC brands land somewhere between 60 and 120 days, and under 60 is doing well. Pull these reports before you do anything else Go to Analytics > Reports and filter by Inventory. I look at four main reports here for forecasting. ABC product analysis grades every variant by how much revenue it brings in. A-grade products are the ones making up 80% of your revenue, B-grade the next 15%, C-grade the last 5%. It's worth knowing that the window is fixed for the last 28 days and you can't change it. If you sell seasonal products, run it at a few different points in the year instead of trusting one snapshot. Products by days of inventory remaining gives you days of stock left per variant, worked out from your average daily sales over the last 28 days. This is the best way to spot what's going to run out before your next delivery lands. Products by sell-through rate shows what share of available stock you sold in a period. There's about a two-day processing delay on it, so the newest data you can see is never today's. Month-end inventory value multiplies cost per item by ending quantity, which gives you your inventory cash position over time, and it's the number you need for the DIO calculation above. For a full walk-through of every report and what the columns mean, see my guide on how to pull a Shopify inventory report in 2026. How to do a Shopify inventory forecast? Clean up your sales history first Sales history and demand history aren't the same thing. Take out days when a product was out of stock, because zero sales that day tells you about your supply, not your demand. Check your product codes while you're in there. If one product exists under three different SKUs because of an old migration, you're splitting one demand pattern into three weak ones, and every forecast after that will be wrong. My guide on setting up SKUs in Shopify covers a naming system that survives growth. Split the catalogue with ABC Don't treat every product the same. Pull the ABC report and give each grade a different level of attention. A-grade products get looked at weekly and get tight reorder points. B-grade products get a monthly check. C-grade products get simple rules and a look every quarter. Create cash calendar Here’s something I do. Take each purchase order you're planning and put its payments on a calendar with real dates against them. An overseas order has four separate payments going out: the supplier deposit, often 30% up front, the balance when it ships, the freight, and then duty and customs when it lands. Lay twelve weeks out in a spreadsheet, one row per payment, and put your expected Shopify payouts in as money coming in. If any week goes red, you move an order, split it, or go back to your supplier about terms. Doing that once a month heads off nearly every cash crunch I see. Pre-orders flip the timing in your favour, since you're collecting money before you place the supplier order. You also get a real demand signal instead of a guess, which is worth almost as much. My walkthrough on setting up pre-orders on Shopify covers the setup and the apps. AI inventory forecasting on Shopify AI inventory forecasting on Shopify uses machine learning to find patterns across your sales history and outside signals that a spreadsheet formula would miss. It handles hundreds of products at once, retrains itself as new sales come in, and picks a different model per product without you telling it to. A model can spot that a product spikes three weeks after a particular campaign, or that two of your products eat into each other, without you knowing to look for it. Where I see it failing is bad data. Feed it sales history full of stockout periods, untracked variants and missing cost figures, and you'll get numbers that are wrong. Clean the inputs first. Sidekick sits in your admin. It can answer stock questions, flags what needs reordering and drafts the PO. It won't replace a proper demand planning tool if your forecasting is genuinely complicated. Inventory forecasting tools worth looking at in 2026 Prediko is a Shopify-native tool with SKU-level twelve-month forecasts, a buying table that tells you what to restock, a purchase order calendar and raw materials tracking. Pricing scales with your GMV from around $49 a month. Good fit for growing DTC brands. Inventory Planner This is a free-to-install app by Sage with usage-based pricing after that. It is strong on multi-location planning and automated replenishment. Cogsy This app is built around scenario modelling rather than one forecast. You can see where your stock lands under different growth assumptions. Assisty Assisty has AI forecasting and automated PO generation. Often the pick for people who want something that works without a long setup project. My guide to building a Shopify tech stack covers how the inventory category fits in your app stack. Where to start with forecasting in 2026 Shopify inventory forecasting gets much less complicated once you stop treating it as a math problem. Pull your ABC report and your days-of-stock report. Work out your cash conversion cycle. Redo safety stock on your ten biggest products. Most stores free up a decent chunk of money from that alone. FAQs 1. How to fix inventory not tracked in Shopify? Open Shopify Admin > Products, select the product or variant, and enable Track quantity in the Inventory section. Assign the correct stocking location, enter the available quantity, and save. For multiple products, use Products > Inventory or the bulk editor to enable tracking. 2. How do I add inventory to my Shopify store? Go to Products > Inventory, choose the relevant location, and enter the stock amount using Set to or Adjust by. You can also update quantities from an individual product or variant page, or import inventory in bulk using a CSV file. 3. Which is the best Shopify forecasting app? Prediko is currently a strong all-round option for growing Shopify brands, offering AI sales forecasting, purchase orders, inventory transfers, bundle planning, reports, and integrations with warehouses and 3PLs. Assisty is another great option with forecast demand with AI to predict future sales. 4. How much does Shopify forecasting cost? Shopify’s native demand-forecasting assistance through Sidekick costs nothing because Sidekick is included with Shopify plans. However, features and usage limits can vary. Dedicated forecasting apps cost extra; for example, Prediko currently starts at $49 per month, while simpler tools such as Assisty start at $19 per month. 5. Is Shopify good for inventory management? Yes. Shopify is suitable for most small and growing retailers. This is because it supports inventory tracking, location-based stock levels, adjustments, transfers, purchase orders, suppliers, sell-through reporting, and inventory-remaining insights.
10 Min • 27 August 2026
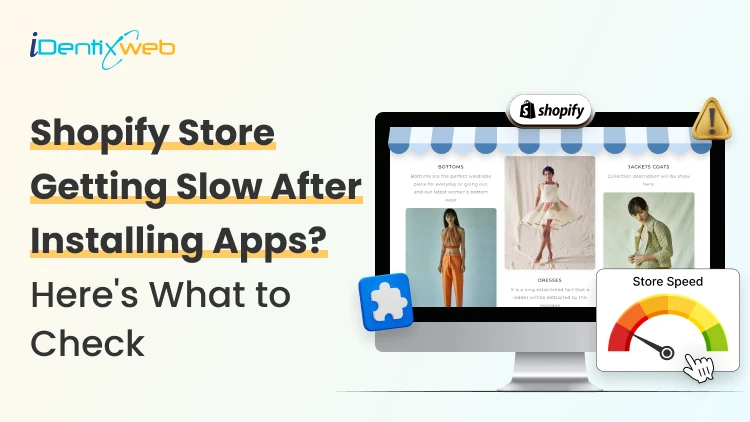
Is Your Shopify Store Slow After Installing Apps? Here’s What to Check
You may have experienced your Shopify store loading slowly just after you have installed a few apps. But owners need apps to run their store. Maybe the store needs product reviews, or they need upselling, a chatbot, a loyalty program, or an analytics app. Individually, each one solves a problem. But after a few installations, the store suddenly feels heavier. Product pages take longer to appear, buttons respond slowly, or content jumps around while loading. This is common when I audit Shopify stores, but I just don't immediately start deleting apps. If you're wondering why Shopify is so slow after adding apps, the first step is to identify what changed on the storefront. Shopify itself lists installed apps, theme code, and manually added third-party code among the major factors that can affect online-store performance. The right approach is to identify what is actually slowing the store, decide whether the app provides enough business value, and then optimize, or remove it. TL;DR: What should you check first? If a Shopify store became slow after installing apps, check: Whether the slowdown started at the same time as an app installation Which apps load JavaScript or CSS on the storefront Whether apps are loading on pages where they aren't needed Whether multiple apps perform the same function Whether app widgets are causing layout shifts Whether previously removed apps left legacy code in the theme There is no number on how many apps a merchant can use. I have seen stores with revenue > $1M use more than 20 apps. What matters is what those apps load and how efficiently they do it. First, I would confirm that the apps are the problem It's always easy to blame the newest app for a slow store. But a Shopify store can load slowly for several reasons at the same time. A theme update, new tracking pixel, oversized media, extra theme sections, or manually added JavaScript. Start with Shopify's own performance data. Go to: Shopify Admin → Online Store → Themes The Themes page includes a performance metric summary for the store's Core Web Vitals. More detailed performance reports are available under: You may not be able to see it if: Your online store is password-protected. The store does not yet have enough real visitor traffic to generate the metrics. You are trying to access the detailed reports without the required Reports staff permission. The detailed reports are available through: Shopify Admin → Analytics → Reports From there, you can search for: Largest Contentful Paint Interaction to Next Paint Cumulative Layout Shift Shopify's Web Performance reports can show performance over time, by page URL, and by page type. They also provide info on changes such as app installations, theme updates, and new code. This makes the report particularly useful when investigating a recent slowdown. One limitation is that this isn't instant monitoring. Shopify says Web Performance data can be delayed by up to 36 hours, so don't expect a change made five minutes ago to immediately appear in the real-user report. For a broader speed audit, my guide on how to speed up a Shopify store covers other common performance problems beyond apps. Know the three performance metrics that matter Shopify currently uses the same three Core Web Vitals Google focuses on: LCP, INP, and CLS. MetricWhat It MeasuresGood TargetWhat Apps Can AffectLCPHow quickly the main visible content loads≤ 2.5 secondsRender-blocking scripts, stylesheets, slow widgets, third-party resourcesINPHow quickly the page responds after interaction≤ 200 msHeavy JavaScript, long-running tasks, multiple interactive widgetsCLSHow much content unexpectedly shifts≤ 0.1Late-loading banners, reviews, popups, badges or other widgets You can check the target number by clicking each report I have mentioned earlier. Here’s my checklist on whether you feel Shopify app bloat in your current store. The complete checklist if you have Shopify App bloat 1. Separate the apps that load on the storefront or backend Not every Shopify app slows down the storefront. Some apps operate almost entirely inside Shopify Admin or in backend workflows. Others directly add content, JavaScript, CSS, tracking, popups, recommendations, reviews, or widgets to customer-facing pages. Start by separating installed apps into two groups: Storefront-impacting apps Examples of these apps include reviews, upsells, chat, personalization, recommendations, subscriptions, popup tools, search widgets, badges, analytics, and visual merchandising features. For example, Anua, a Korean Skincare brand, uses iCart, an upsell app, to show upselling products in their cart. Backend/admin apps Examples might include certain reporting, inventory, workflow, fulfillment, or administrative tools that don't need to render customer-facing code. This immediately narrows down where to investigate. 2. Look for too much JavaScript JavaScript is one of the first places I check if I feel too many apps are slowing down your store. Apps can use JavaScript for: Recommendations Sliders Popups Cart drawers Reviews Personalization Chat Analytics Event tracking Dynamic discounts Interactive widgets None of these features are bad, but Shopify states that poor INP is often caused by too much JavaScript coming from theme code, app code, third-party code, or tag managers. How to check it Open Chrome DevTools and inspect the Performance and Network panels. Look for: Long-running JavaScript tasks Unusually large script files The same third-party library loaded more than once If you notice these issues but the fixes involve editing theme code, it may be time to involve a developer. Small changes made without knowing how an app or theme works can sometimes affect store functionality or customer experience. A Shopify developer can help identify which scripts are necessary, remove unnecessary code safely, and optimize store performance. At Identixweb, we provide Shopify Speed Optimization Services to help merchants improve store performance without compromising the features their customers rely on. 3. Check whether apps load on pages where they aren't needed This is one of the most important checks I do. Imagine a product-review app. The full reviews widget may matter on product pages. But does all its JavaScript need to load on the homepage, blog articles, contact page, cart page, and every collection? The same question applies to: Product recommendations Size charts Wishlist tools Product badges Delivery widgets Cart tools Popup tools Ask your developer: Does this app load storefront assets globally or only where its functionality is used? That question can reveal a lot about how efficiently the app was built. 4. Review your app embeds Go into the Shopify Admin > Online Store > Edit Theme > App Embeds App embed blocks are commonly used for functionality such as: Chat bubbles Product badges Analytics Tracking SEO integrations Floating storefront elements You can activate or deactivate individual app embeds from the Theme Editor. Before disabling any app embed, check its features and how it affects customer experience, tracking, or store operations. Review the app name, understand its purpose, and confirm whether it is connected to tools like analytics. If you are unsure, test the change on a duplicate theme first instead of turning it off directly on your live store. An embed may power tracking, accessibility features, consent management, or another business-critical function. Instead, identify what each embed does and test changes individually. 5. Look for multiple apps doing the same job App overlap is the most common problem I encounter that slows down the store. For example, a store might have: An email app with a popup A separate popup app Each tool may have been added at a different point in the store's growth. For each installed app, document: Business purpose → feature actually used → storefront resources → monthly cost → overlapping apps Then decide whether one well-built tool could replace two or three separate apps. 6. Check whether an app is causing layout shifts Have you ever opened a product page and watched this happen? The title appears first, then the reviews widget loads, and after that a promotional bar appears. That is called a layout shift. Shopify considers a CLS of 0.1 or lower good. Late-loading app elements such as banners, reviews, badges, recommendations, and widgets can contribute to CLS when the page hasn't reserved enough space for them. Ask your developer to check apps that contribute to CLS. 7. Don't assume the app is the only problem Sometimes an app gets blamed because it was the most visible recent change. But Shopify identifies three major areas merchants should examine: Theme code Installed apps Manually added third-party code such as tag managers and tags. For example, you may install an app and simultaneously add a Meta pixel or add another analytics script through GTM. If speed drops, the app could be only one part of the problem. A safe way to audit Shopify apps Don't uninstall five apps and then check CoreWebVitals. Even if the score improves, you won't know which change caused it. Use this process instead. Step 1: Record a baseline Measure the CWV performance for: Homepage Collection page Popular product page Step 2: Back up your theme Duplicate the current theme before touching theme files or legacy app integrations. Step 3: Test one app at a time Where possible, disable an app embed or storefront feature individually. Keep everything else unchanged. Step 4: Run several tests This is what you want from your developer. Do not make a decision based on a single score. Shopify warns that a single Lighthouse run can vary by 5–10 points because of CPU and network conditions and recommends comparing median results from multiple runs. Step 5: Compare the right metric If the page loads slowly, investigate LCP. If clicks feel delayed, investigate INP. If widgets move content around, investigate CLS. Step 6: Remove or combine only after confirming the cause If an app provides little value, duplicates functionality, and creates measurable storefront overhead, then removal becomes a much easier business decision. Can't find which app is slowing your Shopify store? When multiple apps, theme changes, and third-party scripts are affecting your storefront, finding the exact cause of slow performance can be difficult. Identixweb’s Shopify Store Performance and Speed Optimization service helps identify performance bottlenecks, reduce unnecessary code and scripts, and improve storefront speed without removing functionality your store still needs. FAQs 1. Can installing too many Shopify apps make a store slower? Yes, particularly when an app adds customer-facing JavaScript, CSS, third-party requests, widgets, or tracking code. However, not every app affects the storefront, so the app's integration and resources matter more than simply whether it is installed. 2. What is a good Shopify speed score? Rather than relying on one speed score, merchants should monitor Shopify's Core Web Vitals. Shopify considers LCP of 2.5 seconds or less, INP of 200 ms or less, and CLS of 0.1 or less good performance thresholds. 3. How many Shopify apps are there? There isn't a useful universal number. A smaller number of poorly chosen apps will still create problems. Audit what each app loads, where it loads, and the value it provides instead of relying on app count alone. 4. How can I tell which Shopify app is slowing my store? Start with Shopify's Web Performance reports, then test the same homepage, product, and collection pages while disabling one storefront app feature or embed at a time. 5. Does uninstalling a Shopify app remove all its code? Not always. Older or manually integrated apps can leave theme changes behind. For apps built with Theme App Extensions, Shopify says that the app code is removed when the app is uninstalled.

Vineet Nair
June 4, 2025
1588 Views
Vineet Nair
November 5, 2025
532 Views
Vineet Nair
October 31, 2025
735 Views

Vineet Nair
October 28, 2025
774 Views
![Post-Purchase Upsell Pages [Examples + Tips For Conversion]](https://www.identixweb.com/wp-content/uploads/2025/10/14-10-Wed-Blog-Best-Shopify-Post-Purchase-Upsell-Examples.webp "Post-Purchase Upsell Pages [Examples + Tips For Conversion]")
Vineet Nair
October 16, 2025
726 Views

Vineet Nair
October 8, 2025
682 Views

Vineet Nair
July 22, 2025
1220 Views
![How to Do a Test Order on Shopify? The Easiest Methods [Updated]](https://www.identixweb.com/wp-content/uploads/2025/10/01-10-Wed-Blog-How-to-Place-a-Test-Order-on-Shopify_.webp "How to Do a Test Order on Shopify? The Easiest Methods [Updated]")
Vineet Nair
October 3, 2025
766 Views
Vineet Nair
September 25, 2025
836 Views
Vineet Nair
September 25, 2025
727 Views
Vineet Nair
September 24, 2025
726 Views
![Ecommerce Product Photography Tips: Boost Shopify Sales [2025]](https://www.identixweb.com/wp-content/uploads/2025/08/14-08-Thu-Blog-Ecommerce-Product-Photography-tips_-Boost-your-Shopify-sales.webp "Ecommerce Product Photography Tips: Boost Shopify Sales [2025]")
Vineet Nair
August 14, 2025
1098 Views