

Author: Sajini Annie John
Gather knowledge about the latest insights, updates, tips, and tricks in the Ecommerce industry.

5 Min • 20 March 2026
How Anua Unlocked 5X AOV Growth with iCart’s Smart Cart Features
delivery customization Challenges Solutions drive results Scale business delivery customization Challenges Solutions drive results Scale business delivery customization Challenges Solutions drive results Scale business delivery customization Challenges Solutions drive results Scale business Anua is a globally recognized Korean skincare brand known for its minimalist philosophy and focus on gentle yet effective formulations. Built on the idea of simplifying skincare routines, Anua develops products that deliver visible results while avoiding harsh or irritating components, making them suitable for sensitive skin types. Initially using a traditional full cart experience, Anua transitioned to iCart’s side cart solution in August 2025, to create a more seamless and engaging shopping journey. This shift allowed customers to easily explore complementary skincare products without disrupting their browsing flow, making it more intuitive to discover items that fit into a complete routine. By surfacing relevant recommendations directly within the cart, the brand enhanced product visibility across its range. Challenges Before implementing iCart’s side cart solution, Anua faced limitations with their existing full cart experience, which created friction in the customer journey. The traditional cart setup redirected users away from product pages, interrupting their browsing flow and reducing opportunities to explore additional products. As a skincare brand built around routines rather than single-item purchases, this made it difficult to effectively showcase complementary products and encourage customers to build complete regimens. Additionally, the lack of in-cart personalization and strategic upsell opportunities meant that customers were often unaware of related products that could enhance their skincare results. This limited the brand’s ability to increase average order value (AOV) and fully leverage its diverse product range. Anua needed a more dynamic and intuitive cart experience that could seamlessly introduce relevant recommendations while maintaining a smooth and engaging shopping journey. ❌ Cart Value Barriers Low average order value (AOV) due to single-item focus Most customers completed purchases with one primary product instead of building multi-step routines. Cart abandonment near shipping thresholds Customers were not clearly informed or motivated to reach free shipping or discount thresholds. Missed savings opportunities Customers were unaware of potential value in purchasing bundled routines or multiple complementary products. ❌ Absence of Progress-Based Incentives No free shipping or discount progress bar Customers were not motivated to increase their cart value due to lack of visible incentives. Missing tiered rewards system There were no structured milestones (e.g., “Spend more to unlock offers”), reducing upsell opportunities. ❌ Ineffective Cart UI/UX (Pre-Side Cart) Full-page cart disrupted shopping flowCustomers had to leave their browsing journey, increasing friction and drop-offs. No quick add/remove functionality Users couldn’t easily modify their cart or add suggested products without navigating away. Solution To overcome these challenges, Anua implemented iCart’s side cart solution to transform their traditional cart into a high-converting, interactive experience. By replacing the full-page cart with a seamless side cart, the brand ensured that customers could continue browsing while viewing their cart, significantly reducing friction in the shopping journey. Additionally, features like product recommendations & progress bars for free shipping and discounts motivated customers to increase their cart value. By combining personalization, incentive-driven messaging, and a user-friendly interface, Anua successfully turned their cart into a powerful revenue-driving touchpoint rather than just a checkout step. To maximize their cart effectiveness, they implemented two powerful features: ✅ Progress Bar with Multi-Reward Incentives Implemented a tiered progress bar to encourage higher cart value Customers are guided with a clear message like “Add $3.10 to unlock secret offer,” motivating them to continue adding products. Generated over $5M+ in revenue through incentive-driven cart progression Used product-based rewards to align with customer intent Instead of generic discounts, Anua incentivized purchases with relevant skincare items like Dark Spot Pads and mini serums. Built visual motivation for routine expansion As customers add products, they can clearly track progress toward unlocking multiple rewards, encouraging them to build a complete skincare routine. ✅ Product Recommendations Implemented “Frequently Bought Together” recommendations Customers adding a single product (e.g., toner) are shown complementary items like serums, moisturizers, or pads to complete their routine. Generated over 275K revenue through in-cart recommendations Encouraged full skincare regimen building Instead of isolated purchases, the cart suggests step-by-step product combinations aligned with common skincare routines. Increased product discovery at the final stage By surfacing relevant items directly in the cart, Anua ensured customers explore more of their catalog without leaving the checkout flow. Results Achieved in Last 180 Days 22932 Total Store Orders 45101 Total iCart Orders 5X iCart Generated AOV 65.70% Upsell Affected Conversion Rate These improvements reflect a clear shift in customer behavior on Anua’s store. Cart abandonment reduced as shoppers discovered complementary skincare products and felt encouraged to build complete routines. Engagement also increased, with customers interacting more with in-cart recommendations and exploring relevant product pairings. Results & Impact And...Results is Our Main Clarification By implementing iCart’s cart drawer, product recommendations, and progress bar, Anua transformed its cart into a high-performing conversion touchpoint. Shopping Experience Enhancement The improved cart experience encouraged customers to discover complementary products and understand the value of sustainable beauty routines. For instance, the clear presentation of subscription savings alongside one-time purchase options helped customers make more informed decisions about their long-term hair care needs. As Anua continues to optimize its cart experience, the brand is closely monitoring: Routine-based purchasing behavior - tracking how customers move from single items to multi-step regimens Engagement with in-cart recommendations - measuring interaction with suggested products Cart value progression - analyzing how incentives influence higher spending [related_cases_slider] Ready to Write Your Success Story? Try icart App Join successful businesses like Anua and Master your delivery scheduling Delight customers with precise timing Grow your special occasion orders Expand your delivery reach
Read Blog
10 Min • 27 August 2026
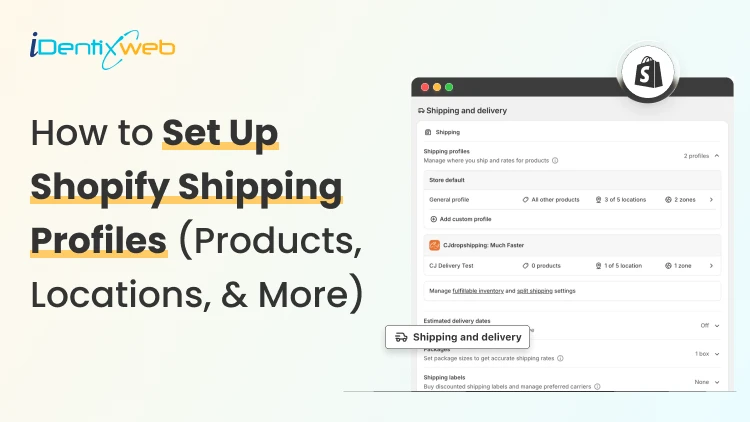
How to Set Up Shopify Shipping Profiles (Products, Locations, & More)
To set up a custom shipping profile in Shopify, go to Shopify Admin → Settings → Shipping and delivery → Shipping profiles → Add custom profile. Add the required products or variants, assign fulfillment locations, create shipping zones, and configure shipping rates based on your requirements. Custom shipping profiles help merchants manage different shipping rules for products like fragile, heavy, oversized, or region-specific items without affecting their entire catalog. Shipping gets complicated when you can't treat every product the same way. A T-shirt, glass vase, and 20-pound bag of pet food might all sit in the same Shopify store. But charging the same shipping rate for each can hurt your margins. Shopify shipping profiles solve this by grouping products with similar shipping needs. It controls where they ship from, where they can ship to, and what customers pay. This guide covers products, variants, fulfillment locations, shipping zones, rates, multiple warehouses, and the checkout issues merchants should test before going live. What Are Shopify Shipping Profiles? Shopify defines a shipping profile as a set of shipping rules for specific products and locations. Stores get a General shipping profile by default, while custom profiles handle products that need different rates. Shipping profileBest forWhat happensGeneral shipping profileProducts using the same shipping ratesProducts stay here unless moved to a custom profileCustom shipping profileFragile, oversized, heavy, or other special productsSelected products or variants get their own locations, zones, and rates Shopify currently allows up to 99 custom shipping profiles for stores using the shipping-profile system. A product or variant can belong to only one profile at a time. Adding it to another profile automatically removes it from the previous one. When do you need a custom shipping profile? You need a custom shipping profile when certain products need different shipping rules from the rest of your catalog. I will explain this better with a few examples below: Furniture or oversized products: Use a separate profile when these products need higher flat rates or special delivery charges. Fragile items: Create one when products such as glassware require extra packaging and higher shipping costs. Heavy products: Use a separate profile if shipping charges need to be calculated differently based on weight. Products sold only in selected regions: Use a separate profile when certain items should ship only to specific countries, states, or regions. Products with free shipping: Create a profile when only selected products should qualify for a $0 shipping rate. Products needing carrier-calculated rates: Use a separate profile when only certain products need live carrier rates instead of your standard flat rates. If most products follow the same shipping rules, keep them in the General shipping profile and create custom profiles only where there is a real difference in cost, location, or delivery requirement. What to prepare before setting up a shipping profile Before creating a profile, I normally map these four things. 1. Products Decide which products or variants genuinely need different shipping treatment. For example, a home decor store will keep cushions and small accessories in the General profile. They move large mirrors into a custom profile because they require protective packaging and higher shipping charges. 2. Fulfillment locations Check where the products are stocked and fulfilled. Locations can represent warehouses, retail stores, fulfillment partners, and other order origins. When a shipping profile is created, eligible online-fulfillment locations are added to it. Locations can share one location group when they use the same zones and rates, or be separated when shipping rules differ. 3. Shipping zones A shipping zone is a group of countries or regions that share shipping rates. You might create zones such as Domestic, Canada, Europe, or selected international countries. Want to sell internationally? Here’s my breakdown of international shipping on Shopify for merchants in 2026. 4. Shipping rates Shopify supports flat rates, order-value-based rates, weight-based rates, carrier or app-calculated rates, and free shipping. Shipping in Shopify can be complicated. Here are my top Shopify shipping strategies to increase sales in 2026. How to create a Shopify shipping profile step by step Step 1: Open Shipping and Delivery From the Shopify admin, go to: Settings > Shipping and delivery Under Shipping profiles, you will see the General profile and any existing custom profiles. Step 2: Create a custom shipping profile Click Add custom profile and enter a clear name, such as: Heavy Products Fragile Items Furniture Free Shipping Products US Warehouse Products Step 3: Add products or variants You can also see the Products section just below the Profile name section. A product or variant can belong to only one shipping profile at a time. This becomes especially useful when only certain variants need different shipping rules, while the rest of the product can stay in the General profile. For example, a merchant selling framed prints might keep the standard-size variants in the General profile. They will move only the oversized frame variant into a custom profile if it needs higher shipping charges, different packaging, or a different fulfillment method. Step 4: Configure fulfillment locations Review Fulfillment locations. If several warehouses should use the same zones and prices, keep them in the same location group. If one warehouse needs different rules, separate it. For example: New York: United States Each location group can have its own zones and rates. Step 5: Create shipping zones For each location group, click Add zone, name it, select the countries or regions, and click Done. For example, a US merchant may create a West Coast zone for California, Oregon, and Washington with a lower shipping rate. They may place Alaska and Hawaii in a separate zone because delivery there costs more. Separate zones help merchants charge rates that better reflect the actual cost of shipping to different regions. Build zones around actual delivery coverage and cost. If certain regions are significantly more expensive to serve, separate rates will be more practical. Step 6: Add shipping rates Inside each zone, click Add shipping option and choose the rate type. Flat rate: Charge one fixed amount, such as $7 for Standard Shipping. This works well when shipping costs are predictable. Order amount-based rate: Change shipping by cart value. A store could charge $8 below $50, $5 from $50 to $99.99, and offer free shipping from $100. Weight-based rate: Charge according to shipment weight. This suits food, hardware, liquids, bulk goods, and similar products. Make sure product weights are accurate, and your tiers cover the full expected weight range. Carrier or app-calculated rate: Let an eligible carrier or app calculate shipping from information such as weight, destination, and package details. Step 7: Save and test Click Save, then place test orders using realistic combinations: A product from the General profile A product from a custom profile Products from two profiles Products fulfilled from different locations Different domestic or international addresses Orders above and below free-shipping thresholds Free shipping can be a great tool to increase conversions. Here’s my complete guide to Shopify free shipping strategies for merchants. Need Help Configuring Your Shopify Shipping Settings? As product catalogs, fulfillment locations, shipping zones, and rate rules grow, managing everything accurately can become difficult. For example, a merchant may sell standard products from one warehouse, oversized items from another, and charge different rates for Alaska and Hawaii. If these rules are not configured properly, customers may see the wrong rate, duplicate charges, or no suitable shipping option at checkout. That’s where Identixweb can help. Our Shopify Store Settings Configuration service helps merchants configure complex shipping, payment, tax, and checkout settings so everything works correctly together. What happens when products come from different profiles? I get this question a lot. Under the current shipping-profile system, Shopify can combine shipping rates when an order contains products from different profiles or requires different location groups. Example: ProductProfile shipping rateT-shirt$4Fragile mug$7Possible combined charge$11 In this case, the customer may see an $11 shipping charge at checkout because Shopify is combining the applicable rates from both profiles. The setup may be technically correct, but the final charge can still feel high to the customer. That’s why merchants should test mixed-profile orders before going live, especially when customers commonly buy products from different profiles together. This helps confirm that the final shipping cost is reasonable and avoids unexpected checkout charges. Common Shopify shipping profile mistakes I see #1 Creating too many profiles This is the most common mistake I encounter with merchants. More profiles do not automatically improve shipping. Start with the General profile and add a custom profile only when a real cost, destination, or fulfillment difference exists. #2 Ignoring mixed-cart costs A rate that looks reasonable for one item but when the customer adds another item with a different profile, the shipping rates increase. Always test mixed carts before creating a profile. #3 Using inaccurate weights Weight-based and calculated rates depend on accurate product data. Incorrect weights can lead to inaccurate checkout charges. #4 Creating zones without checking markets A country appearing in a shipping zone is not enough if that country is not in an active market. Set up Shopify shipping profiles the right way A well-planned Shopify shipping profile helps merchants charge more accurate shipping rates without making fulfillment unnecessarily complicated. The key is to group products only when their shipping costs, destinations, or fulfillment requirements are genuinely different. Start simple, test mixed-product carts, review location-based rates, and update profiles whenever products, warehouses, or shipping costs change. A clean setup makes checkout easier for customers and shipping easier to manage as the store grows. FAQs 1. How to add products to a shipping profile in your Shopify store? Go to Settings > Shipping and delivery > Shipping profiles, open or create a custom profile, and select the products you want to add from the Products section. A product or variant can belong to only one shipping profile at a time, so adding it to a custom profile automatically removes it from its previous profile. 2. What is the difference between a general and custom shipping profile? The General shipping profile is Shopify's default profile and automatically applies to products that aren't assigned to a custom profile. A custom shipping profile is used when certain products need different shipping rates, zones, or fulfillment rules, such as fragile, heavy, or oversized items. 3. Can I offer free shipping for any selected products? Yes. To offer free shipping only on selected products, add those products to a custom shipping profile and create a flat shipping rate with the price set to $0 or enable free shipping for that rate. 4. Does shipping increase when customers buy two products in different shipping profiles? Yes. When products from different shipping profiles are purchased together, Shopify combines their applicable shipping rates and displays one total rate at checkout, which will make the final shipping charge higher. 5. Should I use flat or carrier-calculated shipping rates in Shopify? Use flat rates when shipping costs are predictable, and you want a simple, consistent checkout experience. Use carrier-calculated rates when costs vary significantly by destination, package weight, dimensions, or delivery speed.
11 Min • 15 September 2026
How to Migrate WooCommerce to Shopify in 2026 Without Losing Orders or SEO
Migrating from WooCommerce to Shopify can be done through Shopify’s Store Migration app, CSV imports, third-party migration tools, or a custom API setup. Products, customers, and selected order data can move, while themes, plugins, and URLs need rebuilding or redirecting. After migration, configure payments, shipping, taxes, and checkout, test orders and key store functions, and verify and monitor SEO. Moving from WooCommerce to Shopify involves more than transferring your products. You’ll also need to migrate customer and order data, recreate key store features, maintain important URLs, and make sure your search rankings are not affected during the move. If you're moving from WooCommerce to Shopify in 2026, keeping your existing store running while you prepare, migrate, and test the new Shopify store can help prevent data loss and launch-day issues. This guide walks through the migration process, with particular attention to products, customers, orders, functionality, redirects, and SEO. Why do store owners migrate from WooCommerce to Shopify? Most people we consult aren't unhappy with WooCommerce. It is a very capable e-commerce platform. They move because managing hosting, plugin updates, security, and ongoing maintenance becomes increasingly time-consuming. Shopify is a hosted platform, so hosting and much of the underlying maintenance are handled for you. Features such as Shop Pay, Shopify POS, and its app ecosystem can also simplify day-to-day operations. If you're still weighing it up, my WooCommerce vs Shopify guide walks you through the complete comparison. What moves when you migrate WooCommerce to Shopify Not everything in a WooCommerce store is migrated in the same way. Products, customers, and some order data can be transferred, while themes and plugins need to be rebuilt or replaced, and existing URLs need to be redirected. DataWhat happens during migrationProducts and variantsStore Migration app, CSV import, or a migration appCustomersCustomer CSV, Store Migration app, or a migration appOrdersMigration app or the Shopify API onlyReviewsA reviews app like Judge.me, Loox, or YotpoBlog posts and pagesMatrixify, or copied over by handCouponsA migration app, or rebuilt in DiscountsTheme and designRebuilt on a Shopify themePluginsReplaced with Shopify apps or native featuresURLsNew format, so you need 301 redirects What to do before you move from WooCommerce to Shopify Back up everything. Use your host's backup or a plugin like UpdraftPlus to perform a full data export. Record your URLs and traffic. Export your top landing pages from Google Search Console for the last 90 days. You'll need them for redirects. List every active plugin. These can become Shopify apps or native settings, depending on the functionality it was used for in your store. Check your product attributes. Shopify allows three options per product. Flag anything using four or more. Review and clean your data. Remove duplicate or outdated records where appropriate, review discontinued products, and standardize complicated variant names before importing your data. How to migrate from WooCommerce to Shopify step by step 1. Build your Shopify store Set up your Shopify store, but keep your WooCommerce store live while you work. You still need the old store for checking data, URLs, images, and functionality during the migration. Shopify lets you select WooCommerce during signup. It also creates a starter theme based on your existing store URL. The generated theme uses Dawn and recreates parts of your current storefront. 2. Decide what you are moving and how Make a list of everything that needs to move: products, variants, customers, historical orders, reviews, pages, blog content, discounts, and any other store data you still use. Then choose the migration method for each. Shopify's Store Migration app is currently in early access for certain stores and can import WooCommerce products from the original WooCommerce CSV. For everything else, you can use Shopify CSV imports where supported, a third-party migration tool like Cart2Cart or LitExtension, a custom API migration, or a Shopify migration agency. If you cannot manage the move, Identixweb can handle the migration for you. Our Shopify migration service helps move your store data, rebuild required functionality, map redirects, review SEO risks, and test the new Shopify store before launch. 3. Export and prepare your WooCommerce data WooCommerce has a built-in CSV exporter for products under Products > All Products > Export. You can choose the products, columns, categories, and whether to include custom metadata in the export. What happens next depends on your migration method. The Store Migration app will accept the WooCommerce product CSV without reformatting it. If you use Shopify's product CSV importer, the WooCommerce columns need to be mapped to Shopify's format first. For customers, export their data and format it using Shopify’s Customer CSV template. Import them through Shopify Admin > Customers > Import. Historical orders need a migration app such as Matrixify, LitExtension, or Ablestar WooCommerce Importer. This is because Shopify does not offer a native order CSV importer. 4. Migrate products, customers, and orders in that order Move your products first, customers second, and historical orders last. We recommend this sequence so imported orders can connect to the right products and customers. Validate each data set immediately after importing it rather than waiting until the entire migration is complete. After the product import, compare prices, SKUs, variants, inventory, weights, images, and descriptions against WooCommerce. Shopify specifically recommends reviewing product data after import because incorrect data like prices can affect the store immediately. 5. Rebuild your storefront and replace WooCommerce plugins Your WooCommerce theme does not become a Shopify theme, and your WordPress plugins do not become Shopify apps. Build the storefront on a Shopify theme and recreate the parts of your WooCommerce setup that customers actually use. Go through the plugin list you made earlier and match each important function with a Shopify feature, app, or custom solution. Don't migrate plugins one-to-one. Instead, identify what each WooCommerce plugin does and determine whether the same functionality can be handled by Shopify's native features, an app, or a custom solution. 6. Set up payments, shipping, taxes, and checkout Set up your locations, shipping zones and rates, payment provider, tax settings, checkout preferences, store policies, fulfillment process, and customer notifications. Don't assume your WooCommerce settings can simply be copied to Shopify. Review each payment, shipping, tax, checkout, and fulfillment setting based on how the new store will operate. 7. Testing Before launch, test the Shopify store from the customer's perspective. Place test orders, check successful and failed payments, refunds, cancellations, fulfillment, customer emails, navigation, search, forms, product variants, discount codes, and shipping rates. 8. Run a final data check and switch the domain If your WooCommerce store remained open during the migration, check for products, customers, and orders created after your first transfer. Compare record counts and spot-check important orders before you switch traffic to Shopify. Once the Shopify store is ready, connect or transfer your existing domain and make Shopify the live storefront. After the switch, test your old URLs again to make sure the redirects reach the correct Shopify pages rather than returning 404 errors. How to migrate products from WooCommerce to Shopify The best migration method depends on your catalog size, product complexity, and the data you need to preserve. You can use Shopify's supported migration options, CSV imports, a third-party migration tool, or an API-based migration. WooCommerce columnShopify columnNameTitleDescriptionBody (HTML)Attribute 1 name/value (s)Option1 Name / Option1 ValueSKUVariant SKURegular priceVariant PriceStockVariant Inventory QtyWeight (lbs)Variant Grams (multiply by 453.6)ImagesImage Src WooCommerce can hold several attribute values in one cell. Shopify wants one option value per row, so each variant needs its own line. Shopify also raised the cap to 2,048 variants per product, so catalogs with lots of sizes and colors fit easily now. The limit of three options per product didn't change. If a product uses four attributes, move the extras into product metafields or use a product options app. Watch your images too. Product images are imported from their WordPress URLs, so keep the old site online until the import finishes. Images inside descriptions still point at your WordPress server. Matrixify can move them into Shopify Files, or they'll break when you cancel hosting. How to migrate orders from WooCommerce to Shopify Shopify's native CSV import can't handle orders, and the Store Migration app skips them too. You'll need a migration app like Matrixify, LitExtension, Ablestar, or Cart2Cart, or a custom build on the Shopify API. Order history is worth moving. Your team keeps a full buying history for support, returns, and reporting. But the export can fool you. A few months ago, I was on a call with a store owner. He sells coffee gear and has run WooCommerce for about eight years. He wanted every order moved, and he'd already done the export himself. His file had around 1,900 orders. His dashboard showed more than 11,000. He assumed the export had timed out. His export plugin hadn't been updated in years and was still reading WooCommerce's old order tables. We dropped the plugin and pulled orders through the WooCommerce API with a migration app. The counts matched on the first run. We also talked about what he actually needed. Failed checkouts from earlier years weren't helping anyone. We completed and refunded orders from the last three years, kept his original order numbers, and archived a full export of the rest. Before the real import, we switched off staff order notifications. Otherwise, his inbox would have taken thousands of "new order" emails in one afternoon. A few rules I follow on every order migration: Filter by status and date. Decide which order statuses and date ranges you actually need before importing historical orders. Silence notifications first. Prevent staff from receiving thousands of new-order emails during the import. Account for guest orders. Guest shoppers may not exist as customer records in WooCommerce, so check how your chosen migration method handles customer information stored against guest orders. Plan for order numbers. Check how your migration method handles existing WooCommerce order numbers and how new Shopify order numbers will be generated. Protect your SEO with a 301 redirect map Your URLs will change, and there's no way around it. Shopify uses fixed paths, so a clean 301 redirect map is what protects your traffic. WooCommerce URLShopify URL/product/mug//products/mug/product-category/mugs//collections/mugs/about//pages/about/pourover//blogs/news/pourover Keep your product slugs identical to your Shopify handles, so each redirect is a simple prefix swap. Build the map from a site crawl plus your Search Console export. Import it in bulk under Content > Menus > View URL redirects. Cover blog posts and category pages, not just products. Missed blog URLs are the gap I see most often. After launch, submit your sitemap and watch Search Console for 404s. Migrate your store, not the issues A meaningful WooCommerce to Shopify migration is a chance to clean up old data, replace unnecessary plugins, and simplify your store setup. It also makes sure customers and search engines land where they should after the switch. If your store has years of order history, custom WooCommerce functionality, a large catalog, or organic traffic, treat the migration as a proper project. FAQs 1. How to migrate from WooCommerce to Shopify? Create your Shopify store, export and prepare your WooCommerce data, then migrate products, customers, and historical orders using Shopify’s supported import options or a migration app. After that, rebuild your storefront, replace WooCommerce plugins, configure payments and shipping, set up 301 redirects, test the store, and switch your domain to Shopify. 2. How to import products from WooCommerce to Shopify? Export your products from WooCommerce > Products > Export as a CSV file. You can import that file using Shopify’s Store Migration app, or reformat the data to Shopify’s product CSV structure and upload it through Shopify Admin > Products > Import. 3. Should I move from WooCommerce to Shopify? Consider moving to Shopify if you want a hosted ecommerce platform where hosting, maintenance, and the technical infrastructure are managed for you. If you depend heavily on WordPress, need backend customization, or want direct control over hosting and code, WooCommerce is a better fit. 4. How much will it cost to migrate my store from WooCommerce to Shopify? There is no fixed migration cost because it depends on your product count, customers, historical orders, functionality, design work, apps, and SEO requirements. DIY migrations can use CSV imports and migration tools at relatively low cost, while the charges of apps such as Matrixify and Ablestar depend on the data being migrated. 5. Can WooCommerce work together with Shopify? Yes, but WooCommerce and Shopify don't natively operate as one shared ecommerce backend. You can, for example, add Shopify Buy Buttons to a WordPress site or use third-party integrations to sync selected products, inventory, customers, or orders between the two platforms.
8 Min • 31 July 2026
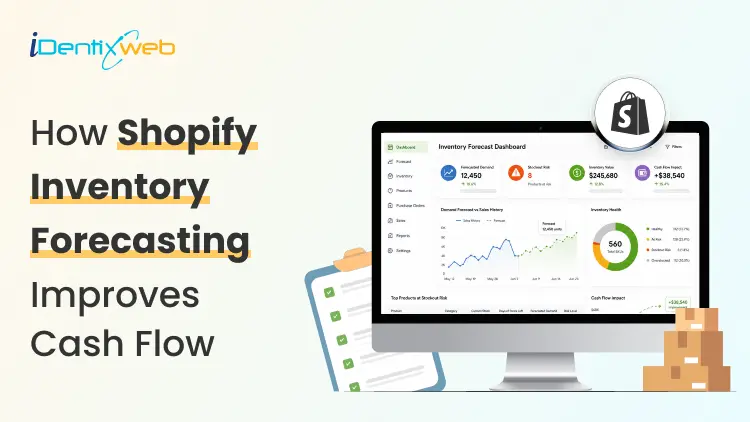
Complete Guide to Shopify Inventory Forecasting to Manage Cash Flow (+ Tools)
Shopify inventory forecasting is the process of estimating how much stock each product will need and when it should be reordered using sales history, supplier lead times, promotions, and current inventory levels. Accurate forecasting helps merchants avoid stockouts, reduce excess inventory, and keep more cash available for business expenses. Tools such as Sidekick, Prediko, Inventory Planner, and Assisty can automate inventory forecasting. If your ROI feels lower even when sales are good, your stock is usually the reason. Cash you've spent on inventory is cash you can't spend on ads, payroll, or the next order. Shopify inventory forecasting is working out how much stock you need and when to order it, so less of your money sits on a shelf. One thing worth knowing before anything else: Stocky, the free forecasting and purchase order app that came with Shopify POS Pro, stops working on August 31, 2026. If you order stock through Stocky, you've got a few weeks to sort out a replacement. What is Shopify inventory forecasting? Shopify inventory forecasting means predicting how many units of each product you'll sell over a future period. You use your sales history, supplier lead times, and whatever promotions you have planned. What you're after isn't the forecast itself. It's a list of purchase orders with dates and amounts against them. A forecast that never turns into an order hasn't done anything for you. Forecasting is really a cash question This is my philosophy: Stock is the biggest cheque you write and the slowest one to come back. You pay a deposit today, pay the balance six weeks later, pay duty when it lands, and only then do the units start selling. Every forecasting choice you make is a choice about how long your money is stuck. Two numbers tell you whether that's under control. Your cash conversion cycle The cash conversion cycle counts the days between paying your supplier and getting paid by your customer. CCC = Days Inventory Outstanding + Days Sales Outstanding − Days Payables Outstanding Days Inventory Outstanding is (Average inventory ÷ COGS) × 365. If you hold $120,000 of stock on average against $480,000 of annual COGS, that's 91 days. Days Sales Outstanding is quick for a normal Shopify store, since Shopify Payments in the US settles in about 2 to 5 business days. It climbs once you add wholesale on Net 30 or marketplaces with their own payout cycles. Days Payables Outstanding is how long your supplier lets you wait. On Net 30, that's 30. So: 91 + 3 − 30 = 64 days. Your money is tied up for a bit over two months on every dollar you put into stock. Most DTC brands land somewhere between 60 and 120 days, and under 60 is doing well. Pull these reports before you do anything else Go to Analytics > Reports and filter by Inventory. I look at four main reports here for forecasting. ABC product analysis grades every variant by how much revenue it brings in. A-grade products are the ones making up 80% of your revenue, B-grade the next 15%, C-grade the last 5%. It's worth knowing that the window is fixed for the last 28 days and you can't change it. If you sell seasonal products, run it at a few different points in the year instead of trusting one snapshot. Products by days of inventory remaining gives you days of stock left per variant, worked out from your average daily sales over the last 28 days. This is the best way to spot what's going to run out before your next delivery lands. Products by sell-through rate shows what share of available stock you sold in a period. There's about a two-day processing delay on it, so the newest data you can see is never today's. Month-end inventory value multiplies cost per item by ending quantity, which gives you your inventory cash position over time, and it's the number you need for the DIO calculation above. For a full walk-through of every report and what the columns mean, see my guide on how to pull a Shopify inventory report in 2026. How to do a Shopify inventory forecast? Clean up your sales history first Sales history and demand history aren't the same thing. Take out days when a product was out of stock, because zero sales that day tells you about your supply, not your demand. Check your product codes while you're in there. If one product exists under three different SKUs because of an old migration, you're splitting one demand pattern into three weak ones, and every forecast after that will be wrong. My guide on setting up SKUs in Shopify covers a naming system that survives growth. Split the catalogue with ABC Don't treat every product the same. Pull the ABC report and give each grade a different level of attention. A-grade products get looked at weekly and get tight reorder points. B-grade products get a monthly check. C-grade products get simple rules and a look every quarter. Create cash calendar Here’s something I do. Take each purchase order you're planning and put its payments on a calendar with real dates against them. An overseas order has four separate payments going out: the supplier deposit, often 30% up front, the balance when it ships, the freight, and then duty and customs when it lands. Lay twelve weeks out in a spreadsheet, one row per payment, and put your expected Shopify payouts in as money coming in. If any week goes red, you move an order, split it, or go back to your supplier about terms. Doing that once a month heads off nearly every cash crunch I see. Pre-orders flip the timing in your favour, since you're collecting money before you place the supplier order. You also get a real demand signal instead of a guess, which is worth almost as much. My walkthrough on setting up pre-orders on Shopify covers the setup and the apps. AI inventory forecasting on Shopify AI inventory forecasting on Shopify uses machine learning to find patterns across your sales history and outside signals that a spreadsheet formula would miss. It handles hundreds of products at once, retrains itself as new sales come in, and picks a different model per product without you telling it to. A model can spot that a product spikes three weeks after a particular campaign, or that two of your products eat into each other, without you knowing to look for it. Where I see it failing is bad data. Feed it sales history full of stockout periods, untracked variants and missing cost figures, and you'll get numbers that are wrong. Clean the inputs first. Sidekick sits in your admin. It can answer stock questions, flags what needs reordering and drafts the PO. It won't replace a proper demand planning tool if your forecasting is genuinely complicated. Inventory forecasting tools worth looking at in 2026 Prediko is a Shopify-native tool with SKU-level twelve-month forecasts, a buying table that tells you what to restock, a purchase order calendar and raw materials tracking. Pricing scales with your GMV from around $49 a month. Good fit for growing DTC brands. Inventory Planner This is a free-to-install app by Sage with usage-based pricing after that. It is strong on multi-location planning and automated replenishment. Cogsy This app is built around scenario modelling rather than one forecast. You can see where your stock lands under different growth assumptions. Assisty Assisty has AI forecasting and automated PO generation. Often the pick for people who want something that works without a long setup project. My guide to building a Shopify tech stack covers how the inventory category fits in your app stack. Where to start with forecasting in 2026 Shopify inventory forecasting gets much less complicated once you stop treating it as a math problem. Pull your ABC report and your days-of-stock report. Work out your cash conversion cycle. Redo safety stock on your ten biggest products. Most stores free up a decent chunk of money from that alone. FAQs 1. How to fix inventory not tracked in Shopify? Open Shopify Admin > Products, select the product or variant, and enable Track quantity in the Inventory section. Assign the correct stocking location, enter the available quantity, and save. For multiple products, use Products > Inventory or the bulk editor to enable tracking. 2. How do I add inventory to my Shopify store? Go to Products > Inventory, choose the relevant location, and enter the stock amount using Set to or Adjust by. You can also update quantities from an individual product or variant page, or import inventory in bulk using a CSV file. 3. Which is the best Shopify forecasting app? Prediko is currently a strong all-round option for growing Shopify brands, offering AI sales forecasting, purchase orders, inventory transfers, bundle planning, reports, and integrations with warehouses and 3PLs. Assisty is another great option with forecast demand with AI to predict future sales. 4. How much does Shopify forecasting cost? Shopify’s native demand-forecasting assistance through Sidekick costs nothing because Sidekick is included with Shopify plans. However, features and usage limits can vary. Dedicated forecasting apps cost extra; for example, Prediko currently starts at $49 per month, while simpler tools such as Assisty start at $19 per month. 5. Is Shopify good for inventory management? Yes. Shopify is suitable for most small and growing retailers. This is because it supports inventory tracking, location-based stock levels, adjustments, transfers, purchase orders, suppliers, sell-through reporting, and inventory-remaining insights.
Sajini Annie John
August 11, 2023
5926 Views

Sajini Annie John
July 26, 2023
6670 Views
Sajini Annie John
July 19, 2023
7176 Views
Sajini Annie John
July 12, 2023
6094 Views
Sajini Annie John
June 23, 2023
7337 Views

Sajini Annie John
June 22, 2023
6083 Views
![How Avanchy increased 73% of revenue in 30 days from iCart [Case Study]](https://www.identixweb.com/wp-content/uploads/2023/09/How-Avanchy-increased-73-of-revenue-in-30-days-from-iCart.png "How Avanchy increased 73% of revenue in 30 days from iCart [Case Study]")
Sajini Annie John
June 5, 2023
5867 Views

Sajini Annie John
May 22, 2023
7743 Views

Sajini Annie John
April 21, 2023
6374 Views

Sajini Annie John
March 10, 2023
7238 Views

Sajini Annie John
March 3, 2023
6662 Views
Sajini Annie John
January 19, 2023
5783 Views