

Shopify Help Articles
Gather knowledge about the latest insights, updates, tips, and tricks in the Ecommerce industry.
5 Min • 29 April 2026
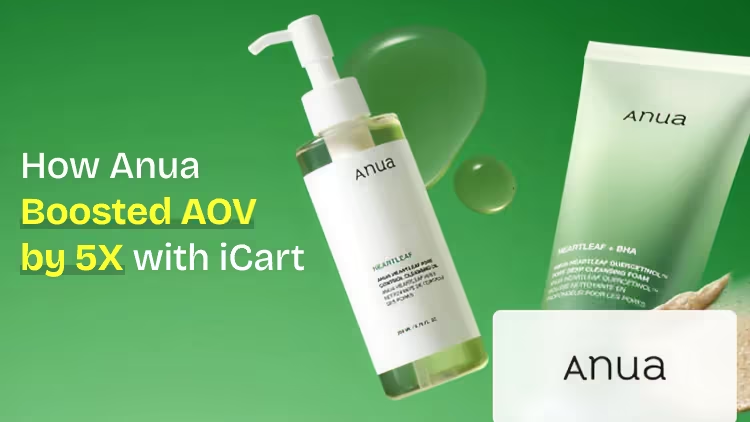
How Anua Unlocked 5X AOV Growth with iCart’s Smart Cart Features
delivery customization Challenges Solutions drive results Scale business delivery customization Challenges Solutions drive results Scale business delivery customization Challenges Solutions drive results Scale business delivery customization Challenges Solutions drive results Scale business Anua is a globally recognized Korean skincare brand known for its minimalist philosophy and focus on gentle yet effective formulations. Built on the idea of simplifying skincare routines, Anua develops products that deliver visible results while avoiding harsh or irritating components, making them suitable for sensitive skin types. Initially using a traditional full cart experience, Anua transitioned to iCart’s side cart solution in August 2025, to create a more seamless and engaging shopping journey. This shift allowed customers to easily explore complementary skincare products without disrupting their browsing flow, making it more intuitive to discover items that fit into a complete routine. By surfacing relevant recommendations directly within the cart, the brand enhanced product visibility across its range. Challenges Before implementing iCart’s side cart solution, Anua faced limitations with their existing full cart experience, which created friction in the customer journey. The traditional cart setup redirected users away from product pages, interrupting their browsing flow and reducing opportunities to explore additional products. As a skincare brand built around routines rather than single-item purchases, this made it difficult to effectively showcase complementary products and encourage customers to build complete regimens. Additionally, the lack of in-cart personalization and strategic upsell opportunities meant that customers were often unaware of related products that could enhance their skincare results. This limited the brand’s ability to increase average order value (AOV) and fully leverage its diverse product range. Anua needed a more dynamic and intuitive cart experience that could seamlessly introduce relevant recommendations while maintaining a smooth and engaging shopping journey. ❌ Cart Value Barriers Low average order value (AOV) due to single-item focus Most customers completed purchases with one primary product instead of building multi-step routines. Cart abandonment near shipping thresholds Customers were not clearly informed or motivated to reach free shipping or discount thresholds. Missed savings opportunities Customers were unaware of potential value in purchasing bundled routines or multiple complementary products. ❌ Absence of Progress-Based Incentives No free shipping or discount progress bar Customers were not motivated to increase their cart value due to lack of visible incentives. Missing tiered rewards system There were no structured milestones (e.g., “Spend more to unlock offers”), reducing upsell opportunities. ❌ Ineffective Cart UI/UX (Pre-Side Cart) Full-page cart disrupted shopping flowCustomers had to leave their browsing journey, increasing friction and drop-offs. No quick add/remove functionality Users couldn’t easily modify their cart or add suggested products without navigating away. Solution To overcome these challenges, Anua implemented iCart’s side cart solution to transform their traditional cart into a high-converting, interactive experience. By replacing the full-page cart with a seamless side cart, the brand ensured that customers could continue browsing while viewing their cart, significantly reducing friction in the shopping journey. Additionally, features like product recommendations & progress bars for free shipping and discounts motivated customers to increase their cart value. By combining personalization, incentive-driven messaging, and a user-friendly interface, Anua successfully turned their cart into a powerful revenue-driving touchpoint rather than just a checkout step. To maximize their cart effectiveness, they implemented two powerful features: ✅ Progress Bar with Multi-Reward Incentives Implemented a tiered progress bar to encourage higher cart value Customers are guided with a clear message like “Add $3.10 to unlock secret offer,” motivating them to continue adding products. Generated over $5M+ in revenue through incentive-driven cart progression Used product-based rewards to align with customer intent Instead of generic discounts, Anua incentivized purchases with relevant skincare items like Dark Spot Pads and mini serums. Built visual motivation for routine expansion As customers add products, they can clearly track progress toward unlocking multiple rewards, encouraging them to build a complete skincare routine. ✅ Product Recommendations Implemented “Frequently Bought Together” recommendations Customers adding a single product (e.g., toner) are shown complementary items like serums, moisturizers, or pads to complete their routine. Generated over 275K revenue through in-cart recommendations Encouraged full skincare regimen building Instead of isolated purchases, the cart suggests step-by-step product combinations aligned with common skincare routines. Increased product discovery at the final stage By surfacing relevant items directly in the cart, Anua ensured customers explore more of their catalog without leaving the checkout flow. Results Achieved in Last 180 Days 22932 Total Store Orders 45101 Total iCart Orders 5X iCart Generated AOV 65.70% Upsell Affected Conversion Rate These improvements reflect a clear shift in customer behavior on Anua’s store. Cart abandonment reduced as shoppers discovered complementary skincare products and felt encouraged to build complete routines. Engagement also increased, with customers interacting more with in-cart recommendations and exploring relevant product pairings. Results & Impact And...Results is Our Main Clarification By implementing iCart’s cart drawer, product recommendations, and progress bar, Anua transformed its cart into a high-performing conversion touchpoint. Shopping Experience Enhancement The improved cart experience encouraged customers to discover complementary products and understand the value of sustainable beauty routines. For instance, the clear presentation of subscription savings alongside one-time purchase options helped customers make more informed decisions about their long-term hair care needs. As Anua continues to optimize its cart experience, the brand is closely monitoring: Routine-based purchasing behavior - tracking how customers move from single items to multi-step regimens Engagement with in-cart recommendations - measuring interaction with suggested products Cart value progression - analyzing how incentives influence higher spending [related_cases_slider] Ready to Write Your Success Story? Try icart App Join successful businesses like Anua and Master your delivery scheduling Delight customers with precise timing Grow your special occasion orders Expand your delivery reach
Read Blog
8 Min • 11 July 2026
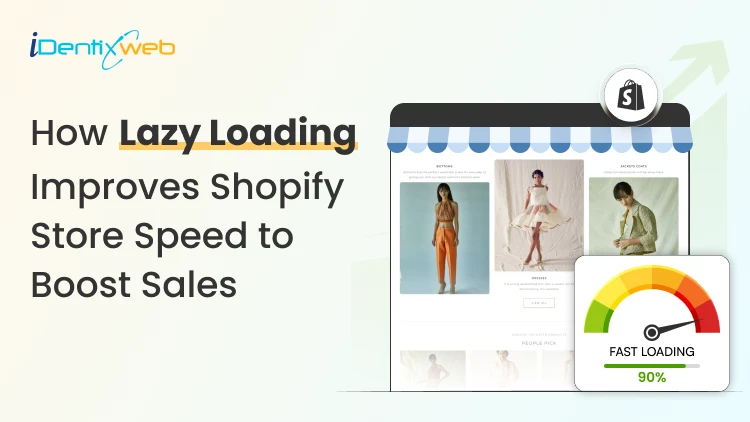
How to Enable Shopify Lazy Load (2026 Step-by-Step Guide)
Images are always the heaviest thing on a Shopify page. Loading every one of them the moment a page opens is what affects the store’s speed. Shopify lazy load is the fix. It tells the browser to download images only as a shopper scrolls toward them. The first screen loads fast, and your visitors stop staring at a blank layout. I have helped design enough Shopify stores to know the mistakes owners make during optimization. I will walk you through the whole thing the way I actually do it. You will learn what lazy loading is, how to check what your theme already does, and how to enable lazy loading in your store. What is lazy loading? Lazy loading is a technique that delays loading images, videos, and other heavy files until they are about to appear on screen. Instead of fetching every image the instant a page opens, the browser downloads only what a visitor can see, then pulls in the rest as they scroll. Less to download up front means a faster store speed and lower data usage, which matters most on mobile. When a page loads, the browser reads the HTML and queues every <img> tag for download. Grabbing all of them at once slows everything down. Lazy loading tells the browser to hold off on the images below the fold, the ones a shopper cannot see yet. One thing worth knowing is that you no longer need to be technical to enable lazy loading. But there are a few things I do before I add lazy loading in the store. First, check if your Shopify theme already lazy loads Most themes built on Online Store 2.0, including Dawn, Craft, Sense, and Refresh, ship with lazy loading on below-the-fold images by default. Adding it again on top duplicates the attribute. Here is the 20-second check I do: Open a collection or product page that has images below the fold. Right-click any image you have to scroll to reach, then click Inspect. Look at the <img> tag in the panel that opens. If you see lazyload and you did not add it yourself, your theme already handles it. Here's how I checked if lazy loading is enabled in the Shopify store, Houseplant. So if your theme is modern and you have already added lazy load, leave it alone. If you are on an older theme or building custom sections, here’s how you can set it up. How to set up Shopify lazy load in your theme? If your theme does not lazy load, or you are editing custom sections, you add the loading="lazy" attribute to the image tags in your Liquid files. The best method in 2026 is to render images with Shopify's image_tag filter, which handles lazy loading, responsive sizing, and dimensions for you. Whatever route you take, duplicate your theme first, so you have a safe rollback if something breaks. Go to Online Store > Themes, click Actions next to your live theme, and choose Duplicate. Work on this copy. To enable lazy loading in Shopify across the whole store, you edit the theme's section and snippet files. Go to Online Store > Themes > Actions > Edit code, then search your files for <img. Common places to look: snippets/card-product.liquid for the product cards used across collections and recommendations sections/featured-collection.liquid for homepage product rows sections/main-collection-product-grid.liquid for collection page grids Add loading="lazy" to the image tags that render below-the-fold content, then save and preview. For example: <img src="{{ section.settings.image | image_url: width: 800 }}" loading="lazy" alt="Product Image"> Pair lazy loading with correctly sized files too. My Shopify image size guide covers the dimensions that keep files light. Which images should you lazy load? The one rule that matters most: do not lazy load anything a shopper sees the instant the page opens. Below are the images you should definitely add the lazy load attribute. Product gallery images Recommended and recently viewed products Blog body images Footer images and badges Lazy loading and Core Web Vitals in 2026 Core Web Vitals are Google’s way of measuring how fast, stable, and responsive your Shopify store feels to visitors. Google currently measures three main Core Web Vitals: 1. Largest Contentful Paint (LCP) LCP measures how quickly the main content at the top of the page appears. This is often your hero banner, product image, or large heading. A good LCP score is under 2.5 seconds. Your main hero image should not be lazy-loaded because customers need to see it immediately. Instead, load the hero image normally and lazy-load images farther down the page. 2. Cumulative Layout Shift (CLS) CLS measures whether content unexpectedly moves while the page is loading. A good CLS score is under 0.1. For example, a customer may try to tap a product button, but an image suddenly loads above it and pushes the button downward. This creates a frustrating shopping experience. 3. Interaction to Next Paint (INP) INP measures how quickly your store responds after a customer clicks, taps, or interacts with something. A good INP score is under 200 milliseconds. Check your scores by visiting ‘pagespeed.web.dev’ and entering your store URL. What this means for your Shopify store Lazy loading works best when you: Load hero images and other above-the-fold content immediately. Lazy-load product images and content farther down the page. Add width and height values to prevent layout movement. Avoid loading too many large images at the same time. Test important pages after making changes. In my experience, collection pages often benefit the most because they usually contain many product images. Do you need a lazy load Shopify app? For images alone, you usually do not need an app. Native browser lazy loading works everywhere, and Shopify's image_tag filter applies it for you. Where a lazy load Shopify app earns its place is in bundling. The good ones compress files, add video facades, defer non-critical scripts, and fix Core Web Vitals. This is useful if you do not want to touch code. If you are weighing options, my guide on top Shopify tools for growth combines image optimization with speed fixes. My honest take after doing this for a living: reach for native lazy loading first, add a well-reviewed speed app only if you need the extra features. If you do want apps for this. I would recommend 3 that I have worked with. 1. Tiny SEO Speed Image Optimizer Tiny SEO offers lazy loading alongside image compression, resizing, alt-text optimization, broken-link management, and other SEO tools. It is a suitable option for merchants looking for an all-in-one image and store optimization app. 2. Avada AI SEO Suite Optimizer Avada combines lazy loading with image optimization, code minification, SEO audits, structured data, and redirects. It can be useful for merchants who want to improve both store speed and technical SEO from one dashboard. 3. WEBP Image Optimizer+Speed SEO This app compresses images, converts JPG and PNG files to WebP, and provides built-in lazy loading. It is worth considering if large image files are the main reason your product or collection pages load slowly. How to test that lazy loading is working Start with DevTools: Open a page with below-the-fold images, right-click, and choose Inspect. Go to the Network tab and, if you like, filter by Img. Refresh the page and scroll slowly from the top. If image requests fire as you scroll instead of all at once, lazy loading is working. I tested it on Netlfix.shop, which is Netflix’s merch store built on Shopify Get Shopify lazy load right Get lazy load in your Shopify store right by letting your theme and the image_tag filter handle the media. Check what your theme already does before you write a single line of code, test with DevTools and PageSpeed Insights. Reach for an app or a developer when you genuinely need more than images handled. FAQs 1. Does Shopify lazy load images by default? Most modern Online Store 2.0 themes apply loading="lazy" to below-the-fold images automatically. Older themes may not. To confirm, right-click an image you have to scroll to see, choose Inspect, and check the <img> tag for loading="lazy". 2. How to lazy load images in Shopify? Shopify themes usually support lazy loading through the loading="lazy" attribute or the Shopify image_tag Liquid filter. To add lazy loading manually, go to Shopify Admin → Online Store → Themes → … → Edit code, open the relevant section or snippet, and find the image code. Add loading="lazy" to a standard image tag—<img src="image.jpg" loading="lazy" width="800" height="600">—or use Shopify Liquid: {{ image | image_url: width: 800 | image_tag: loading: 'lazy' }} 3. What is lazy loading? Lazy loading is a technique that delays loading images and other media until they are close to appearing on the customer’s screen. It reduces the amount of content loaded initially, helping Shopify pages open faster and use less bandwidth. 4. Which is the best lazy load Shopify app? Tiny SEO Speed Image Optimizer is one of the best lazy-loading apps for Shopify because it combines smart lazy loading with image compression, resizing, alt-text optimization, and other speed features.
8 Min • 29 July 2026
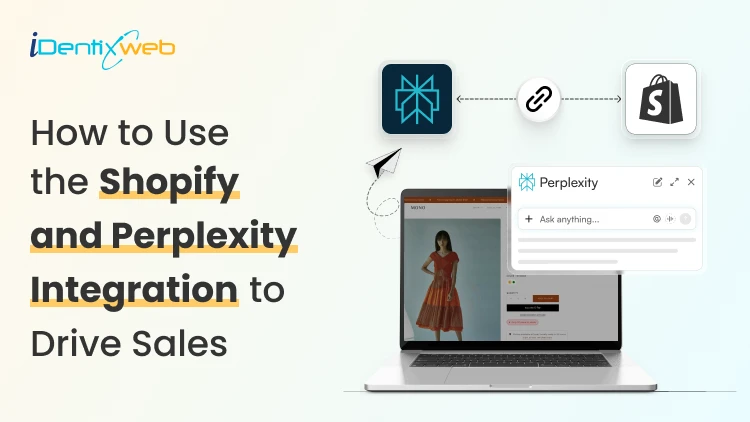
How to Use the Shopify and Perplexity Integration to Drive Sales?
Buyers have stopped going to Google and searching for products to buy. They ask Perplexity and other AI platforms one question and buy whatever it recommends. The Perplexity Computer Shopify connection now works in two directions: Your catalog can appear inside Perplexity answers, Perplexity Computer can run store tasks on your behalf. Most merchants have set up neither, which is exactly why I’m adding this guide. What does the Shopify and Perplexity integration mean? Perplexity and Shopify connect in two separate ways. One is a sales channel. The other is an agent that works inside your store data. The sales channel side is Perplexity Shopping. Your product data reaches Perplexity through Shopify Catalog, and shoppers see products with images, pricing, and review summaries inside the answer. The agent side is Perplexity Computer. Computer connects to hundreds of tools, and Shopify is one of them. You give it a task in plain language, it breaks the job into subtasks across multiple models, and it delivers finished work. How does Perplexity decide which products to recommend? Perplexity pulls product data from retailer feeds, merchant sites, and reviews, then builds its answer. For Shopify merchants, Shopify Catalog automatically syncs your product data to connected AI platforms, including Perplexity, ChatGPT, and Google AI Mode. Product information is more important. If a SKU has no GTIN, a vague description, and four reviews, Perplexity has almost nothing to work with, and it will favour a competitor with complete data. I look for three signals. Structured product data. Product identifiers, Google product category, materials, dimensions, and accurate price and availability. Review depth. Perplexity summarizes pros and cons from customer reviews. Contextual descriptions. A spec list tells the model what the product is made of. A description that names the buyer and the use case tells it who the product is for. Shopify’s own insight says that AI-referred shoppers convert at almost 50% higher rate than organic. Set up the Perplexity and Shopify connection step by step 1. Run an agentic readiness check Shopify has a free tool to check if your product page is ready for AI-selling. Do an agentic readiness check first. 2. Confirm Shopify Catalog is populated Catalog is the delivery mechanism. It syndicates whatever sits in your product records, so incomplete records travel straight into AI answers as incomplete records. 3. Open Agentic Storefronts in your Shopify admin Catalog makes products discoverable. Go to Settings > Sales Channels, and review each AI channel individually. Agentic has been rolled out for merchants this year. 4. Add Perplexity Make Perplexity a sales channel in Agentic. You can also add other AI platforms like Copilot and ChatGPT. 5. Let AI crawlers through Check robots.txt and any bot-blocking rules in your CDN or security app. Blocking AI crawlers will impact your sales significantly when customers are searching for your product on AI platforms. 6. Test with real buyer prompts Pick fifteen questions your customers actually ask, run them in Perplexity, and note where you appear and where a competitor does. I do this every week for stores that I’m working for. Manual testing gives you ground truth that no dashboard provides yet. If you are working through the same setup for OpenAI's ecosystem, my ChatGPT Shopify integration guide covers Instant Checkout and the merchant application side in detail. Optimize your Shopify store for AI search engines like Perplexity and SearchGPT The work that helps you optimize your Shopify store for AI search engines like Perplexity and SearchGPT is the same, which is the good news. Start with product pages. Replace generic claims with specifics a model can extract: who it suits, what problem it solves, what size or spec range it covers, and how it compares to the obvious alternative. Add a short FAQ block to product and collection pages, with the question as a heading and the answer in two or three sentences. Mark it up with an FAQ schema. Collection pages deserve real text. A collection with a title and nothing else gives Perplexity no reason to understand your products. Write a minimum of 150 words explaining what belongs in the collection and who buys from it. In my experience in 2026, comparison content is the strongest lever most stores ignore. Buying guides, category comparisons, and honest product versus product pages match the exact shape of questions people bring to AI search. My full walkthrough on answer engine optimization for Shopify stores breaks down the schema types, FAQ patterns, and topical clusters worth building first. What does the Perplexity Computer Shopify connector do for merchants? The Perplexity Computer Shopify connector gives an agent read and write access to your store data. You enable it once from the Connectors panel and complete OAuth. Computer treats work as tasks rather than chats. You describe an outcome, it plans the subtasks, routes each one to a suitable model, and hands back a finished deliverable. Tasks can run on a schedule whether or not your laptop is open. Here are the five tasks I always set up first: Weekly catalog gap audit. Ask it to list every product missing a GTIN, product category, or description longer than a set word count. An updated catalog is the biggest factor in AI visibility. Bulk description rewrites. Feed it your brand voice rules and let it draft AI-readable descriptions for your products. Review everything before publishing. Competitor price and positioning monitoring. Set a recurring task that checks competitors and flags where you are underperforming. Review mining. Have it read recent reviews, add the common reviews together, and turn them into FAQ entries for the matching product pages. Monday morning report. Orders, refunds, stock risks, and the best-sellers, delivered as a document before you open the admin. Turn High-Intent AI Traffic Into Bigger Orders Visitors arriving from AI search platforms are often ready to buy, making the cart the perfect place to increase order value. Most carts only show products... iCart can show revenue-boosting offers. Try Free Till 100 Orders iCart Cart Drawer Cart Upsell helps you convert that intent with relevant upsells, product bundles, and free-shipping progress bars built directly into the cart. Measure whether Perplexity is actually driving sales I track these four things for Perplexity and any other AI platforms when it comes to tracking sales. Citation rate. Your appearance counts across your fifteen test prompts, checked monthly. Referral sessions from perplexity.ai in GA4, segmented separately from other AI referrers. PayPal Instant Buy orders, reconciled against your Shopify revenue so nothing goes uncounted. Catalog completeness, as a percentage of SKUs with full required fields. It is the leading indicator for everything above. Movement in citation rate usually shows up thirty to sixty days after catalog fixes land. Judge the channel on that timeline, not on week two. Where to start this week Perplexity Computer for Shopify work pays off fastest when you focus on what you want. Run the readiness check, fix your best-sellers, add it as a sales channel, and set one recurring Computer task to update your catalogue. The merchants who benefit from AI recommendations right now are the ones whose product data is clean when the channel opens. FAQs 1. What is the Perplexity Computer Shopify connector? The Perplexity Computer Shopify connector is an integration that lets Perplexity's agent platform read and act on your Shopify store data. You enable it from the Connectors panel in Computer. Once connected, you can assign store tasks such as auditing product data, drafting descriptions, or generating sales reports. 2. What is the price of Perplexity Computer to run a Shopify store? The Computer is available to Perplexity Pro, Max, and Enterprise subscribers. Pro subscribers receive full access, while Max subscribers get monthly credits and higher spend limits. Pro is priced at $20/month, and Max costs $200/month. 3. How is optimizing for Perplexity different from optimizing for ChatGPT or SearchGPT? The underlying work overlaps almost entirely. Complete structured data, genuine reviews, contextual descriptions, and FAQ content improve visibility across Perplexity, ChatGPT, and Google AI Mode. The differences sit in checkout infrastructure and opt-in requirements, not in content strategy. 4. How long before the Shopify and Perplexity integration shows results? Expect thirty to sixty days between catalog improvements and a measurable change in citation rate. Feed syndication is fast, but AI engines need time to re-crawl, re-evaluate, and accumulate review signals before they start recommending a store consistently. 5. Can Perplexity Computer make changes to my store without approval? It can if you grant write scope and do not require confirmation. Configure Computer to check in before executing write actions, start with read-only reporting tasks, and expand permissions only after you trust the output.
6 Min • 1 July 2026
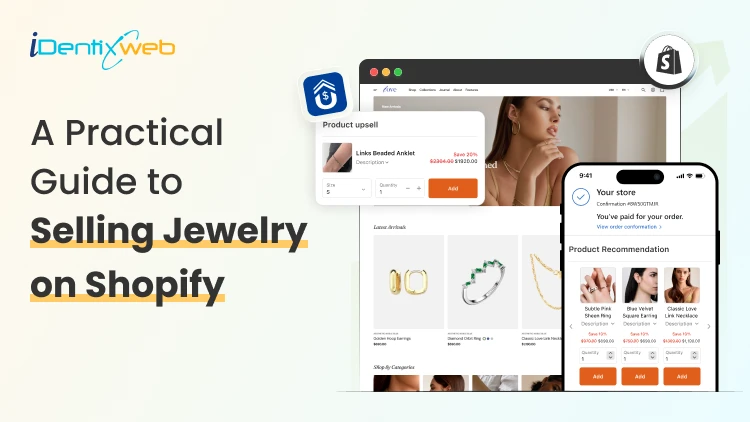
A Practical Guide to Selling Jewelry on Shopify: Upsells & Post Purchase Tricks
Selling Jewelry on Shopify is one of the most practical ways to turn a creative product into a scalable online business. Jewelry is visual, emotional, gift-friendly, and highly personal, which makes it a strong category for ecommerce. But at the same time, jewelry buyers need trust before they purchase. They want clear product images, metal details, size guidance, return policies, secure checkout, and a shopping experience that feels premium. In this guide, we will cover the complete process of Selling Jewelry on Shopify, including store setup, product presentation, marketing, upsells, and post-purchase tricks that can help you get more value from every order. How to sell jewelry on Shopify Step 1: Choose a Clear Jewelry Niche Most competitor blogs start with niche selection, and for good reason. Shopify’s own jewelry business guide also lists finding a niche, researching trends, defining the brand, sourcing products, taking product photos, building the store, marketing, and scaling as core steps. Your niche helps customers understand why they should buy from you instead of another store. A general jewelry store can work, but a focused brand is easier to position. You can build your niche around: Minimal everyday jewelry Premium gold-plated jewelry Handmade or artisan jewelry Bridal and engagement jewelry Personalized name necklaces Men’s bracelets and chains Spiritual, cultural, or zodiac jewelry Affordable luxury jewelry Stackable rings and bracelets Gift-ready jewelry for birthdays, anniversaries, and weddings Many Shopify jewelry stores perform better when they sell around a lifestyle, not just a product. For example, instead of saying “We sell rings,” your brand can say “Everyday stackable rings for modern women.” That instantly creates a clearer customer image. Step 2: Build a Brand That Feels Trustworthy Jewelry is not an impulse product for every customer. Some products may be affordable, but buyers still care about quality, material, packaging, skin safety, durability, and returns. Your brand identity should answer these concerns before the customer asks. Create a strong brand foundation with: A clear brand story Consistent logo, colors, and typography Premium product photography Detailed product descriptions Easy-to-find policies Customer reviews Gift packaging details Care instructions Authentic product videos For jewelry Shopify stores, trust is part of the design. A clean homepage, elegant product cards, visible reviews, and a simple navigation structure can make the store feel more premium. Your brand should also define what makes your jewelry different. Is it handmade? Tarnish-resistant? Waterproof? Customizable? Ethically sourced? Gift-ready? Designed for daily wear? These details help customers justify the purchase. Step 3: Select the Right Shopify Theme Competitor blogs often include theme recommendations because jewelry stores depend heavily on visuals. A good theme should make your products feel premium without slowing down the site. BOGOS also includes themes, product media, collections, apps, homepage optimization, marketing, store examples, and FAQs in its Shopify jewelry guide structure. When choosing a Shopify theme for a jewelry store, look for: Large product image support Mobile-first product pages Quick view option Video support Product filtering Collection-focused layout Lookbook or lifestyle image sections Sticky add-to-cart Recently viewed products Cross-sell sections Fast loading speed If you are just starting, Dawn can work well as a free theme. For premium jewelry brands, choose a theme with stronger visual storytelling, editorial sections, and better collection layouts. The best Shopify jewelry stores do not overload the homepage. They guide customers through clear sections like new arrivals, bestsellers, gifts under a certain price, personalized jewelry, and occasion-based collections. Step 4: Create Product Pages That Sell Your product page is where trust and desire meet. Nivoda’s guide on Shopify jewelry sales recommends rich product descriptions that go beyond basic specs and include craftsmanship, stone quality, carat weight, origin, and care instructions to support both SEO and buyer confidence. For Selling Jewelry on Shopify, every product page should include: Product name with material or style Clear pricing Multiple high-quality images Short product benefit summary Metal, stone, plating, size, and weight details Size guide Care instructions Shipping and return details Warranty or guarantee information Customer reviews Gift packaging details Related products A weak product description says: “This is a gold necklace for women.” A stronger description says: “Designed for everyday layering, this 18k gold-plated necklace adds a minimal shine to workwear, party outfits, and casual looks. Its lightweight chain makes it comfortable for daily wear, while the gift-ready packaging makes it a thoughtful choice for birthdays and anniversaries.” The second version gives style, usage, occasion, and gifting value. That is what helps customers imagine the product in their life. Step 5: Organize Collections Around Buying Intent Do not create collections only by product type. Jewelry shoppers often search by occasion, price, material, and recipient. Useful collection ideas include: Rings Necklaces Earrings Bracelets Anklets Personalized jewelry Gifts for her Gifts for him Wedding jewelry Minimal jewelry Gold jewelry Silver jewelry Jewelry under $50 New arrivals Bestsellers Stackable sets This type of collection structure helps both users and SEO. It also gives you more opportunities to create targeted landing pages for paid ads and email campaigns. Step 6: Use Post-Purchase Tricks That Feel Natural Post-purchase upsells work because the customer has already trusted your brand. They have completed the hardest step: placing the first order. Now you can offer something that improves their purchase. Shopify’s developer documentation notes that thank you and order status pages appear at the end of checkout and can be customized using checkout UI extensions. Here are some post-purchase tricks for jewelry Shopify stores: 1. Offer Matching Products If someone buys earrings, offer the necklace from the same collection. If someone buys a pendant, offer the matching chain. 2. Promote Gift Packaging Jewelry is often bought as a gift. Offer premium packaging, greeting cards, or custom notes after purchase. 3. Add Jewelry Care Products Offer polishing cloths, storage boxes, anti-tarnish pouches, or cleaning kits. 4. Use Limited-Time Offers Carefully Countdown timers can work, but avoid making the offer feel cheap. Use wording like “Add this matching piece before your order is packed.” 5. Offer a Second Piece at a Small Discount For stackable rings or bracelets, offer a second piece with a small discount. This works well because stacking jewelry looks better in pairs or sets. 6. Promote Bestsellers If the original product does not have a perfect match, recommend a bestseller from the same price range. These small offers can turn a single-product order into a larger order without interrupting checkout. Use SellMore to Increase AOV After Checkout Once a customer buys jewelry, the buying journey does not have to end. This is where SellMore Post Purchase Upsell can be useful for Shopify merchants who want to increase average order value without disturbing the original checkout flow. SellMore helps merchants show upsell offers on pages such as the post-purchase page, thank you page, order status page, and checkout page for Shopify Plus stores. Sell More After Every Sale Show irresistible one-click post purchase upsells at the right moment that converts.
Sajini Annie John
11 Min • 17 August 2026
5915 Views
Sajini Annie John
11 Min • 5 August 2026
7892 Views
Sajini Annie John
10 Min • 24 September 2026
7820 Views
![How to Find Influencers and Increase Sales with Shopify Collabs [Updated 2026]](https://www.identixweb.com/wp-content/uploads/2022/12/How-Shopify-Collabs-Work_-Cost-Eligibility-More.webp "How to Find Influencers and Increase Sales with Shopify Collabs [Updated 2026]")
Sajini Annie John
11 Min • 9 July 2026
11864 Views
![The Ultimate Shopify Migration Guide From an Expert [Updated 2026 Steps]](https://www.identixweb.com/wp-content/uploads/2022/04/The-Ultimate-Shopify-Migration-Guide.webp "The Ultimate Shopify Migration Guide From an Expert [Updated 2026 Steps]")
Sajini Annie John
9 Min • 3 July 2026
7469 Views
Sajini Annie John
9 Min • 13 August 2026
7512 Views
![How to Display Estimated Delivery Date in Shopify Store [Just 3 Simple Steps]](https://www.identixweb.com/wp-content/uploads/2021/06/How-to-Display-Estimated-Delivery-Date-in-Shopify.webp "How to Display Estimated Delivery Date in Shopify Store [Just 3 Simple Steps]")
Sagarika Das
4 Min • 10 August 2026
20591 Views
Sajini Annie John
9 Min • 21 July 2026
8663 Views