




To launch a Shopify store in 2026, start a free trial at shopify.com, answer the short setup questions, and create your Shopify account. Add your products, customize a theme (Horizon is now the default), and set up payments, shipping, taxes, and store policies. Place a test order, connect your domain, pick a plan, and click Launch store to switch your store from private to public. After launch, open Sales channels > Agentic to confirm your products can be discovered in AI shopping channels like ChatGPT and Microsoft Copilot.
Planning to create a Shopify store? Then you have come to the right place.
Shopify is a complete E-commerce platform that allows you to start and manage your business.
Shopify offers services to create your own website and use its cart to sell and manage your products. It also provides access to the admin panel, from where you can add products, process orders, and much more.
This Shopify store setup guide follows the actual 2026 setup process inside the Shopify admin, from creating your account to taking your first real order.
A lot has changed:
- The free trial is 3 days.
- Horizon replaced Dawn as the default theme.
- The old storefront password is now called private mode.
- Menus moved to a new spot in the admin.
- New stores can sell inside AI chats.
Follow the steps in order, and a store with a small catalog can be ready to launch in a few days.
Why choose Shopify?
An online store should be accessible, flexible, and easy to use. Shopify comes with all these features. You can easily sell your products in different channels, including AI channels like ChatGPT.
No need to worry about coding
Shopify does not feel complicated at all. If you are a non-technical user, then Shopify is the right platform to start your business.
It comes with a wide range of themes that allow you to create a beautiful and attractive storefront without coding or design experience.
Customer Support
Shopify support runs 24/7, but the channel depends on your plan. Basic and Grow include 24/7 live chat, Advanced gets enhanced live chat, and Plus adds priority 24/7 phone support.
Mobile Responsive
For most stores, phones bring in the majority of traffic, so mobile design comes first. Every theme in the Shopify Theme Store is responsive, and the theme editor lets you preview desktop, tablet, and mobile layouts before you publish.
Checkout is built for small screens, and Shop Pay gives returning shoppers one-tap checkout. You can also edit your store from the Shopify mobile app, which now has Sidekick built in. To see your own device split after launch, check the sessions reports in Analytics.
The Shopify App Store
The Shopify App Store covers almost any feature your theme doesn't include, from product reviews and delivery date pickers to cart upsells and subscriptions.
My advice for a new store: install an app only when it solves a problem you can name.
Each app can add scripts that slow your storefront, and troubleshooting 20 apps during launch week is painful.
What to Prepare Before You Set Up a New Shopify Store
- Your product list. A title, price, and at least one good photo for each product. Products without an image or with a $0 price aren't eligible for Shopify Catalog, which feeds AI shopping channels.
- A store name and domain. Pick two or three backup names and check that the matching domain is available.
- Business details. Your business address (Shopify won't let you launch without it), tax registration numbers if you have them, and a support email.
- Payout details. A business bank account and identity documents. Shopify Payments asks for business, banking, and identity details during setup.
- Policy basics. Your return window, shipping times, and the countries you ship to.
- A logo and brand colors. A clean text logo is fine for launch.
On a call with a customer who wanted to open a Shopify store, we focused on where to begin. I suggested starting with the basics: what they wanted to sell, where they would deliver, and what information shoppers would need before buying. Those decisions would give us a clearer direction for the storefront.
From there, I broke the setup into smaller tasks: prepare the products, choose a theme, configure payments and shipping, and test the purchase process. My advice was to work through one decision at a time. A store becomes much easier to plan when you know what needs to be ready before launch.

From there, I broke the setup into smaller tasks: prepare the products, choose a theme, configure payments and shipping, and test the purchase process.
My advice was to work through one decision at a time. A store becomes much easier to plan when you know what needs to be ready before launch.
From a Store Idea to a Shopify Setup Plan
On a call with a customer who wanted to open a Shopify store, we focused on where to begin.
I suggested starting with the basics: what they wanted to sell, where they would deliver, and what information shoppers would need before buying. Those decisions would give us a clearer direction for the storefront.
How to Launch a Shopify Store in 2026: Step-by-Step Setup Process
Step 1: Start Your Free Trial to Create Your Shopify Account
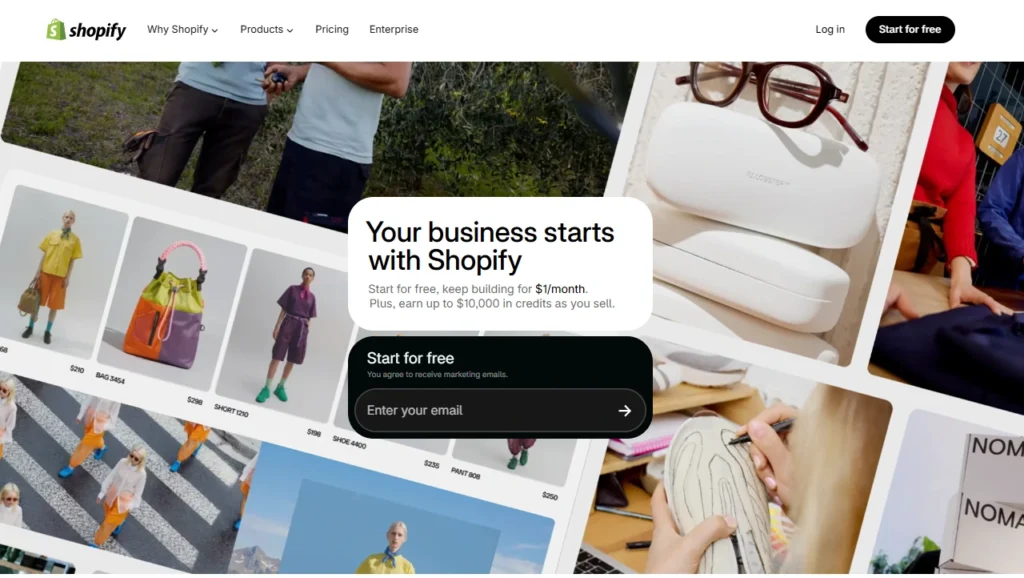
Click here to go to the free trial page, enter your email address, and click Start free trial.
No credit card is needed for the trial. In the US, the current offer is 3 days free, then $1/month for your first 3 months on the Basic, Grow, or Advanced plan.
Step 2: Add Your Business Details
Go to Settings > General and enter your store name, contact email, business information, and address.
Check your store currency, time zone, unit system, and default weight unit before adding products. These settings affect product pricing, reporting, and shipping calculations.
Use accurate business information, especially when setting up payments. Your payment provider may need to verify it against your documents.
Step 3: Choose a Shopify plan
Open Settings > Plan and compare the plans available for your location. Choose based on your staff access, shipping, and selling requirements.
A paid plan is required to test a payment gateway and launch your store. If you select one during the free trial, subscription charges begin after the trial ends.
Review the billing cycle carefully. Annual billing charges the full year upfront, even when pricing is displayed as a monthly equivalent.
Step 4: Choose and customize your theme
Go to Online Store and customize your default theme, add another free theme, or try a paid theme before purchasing it. Paid themes must be purchased before publishing.
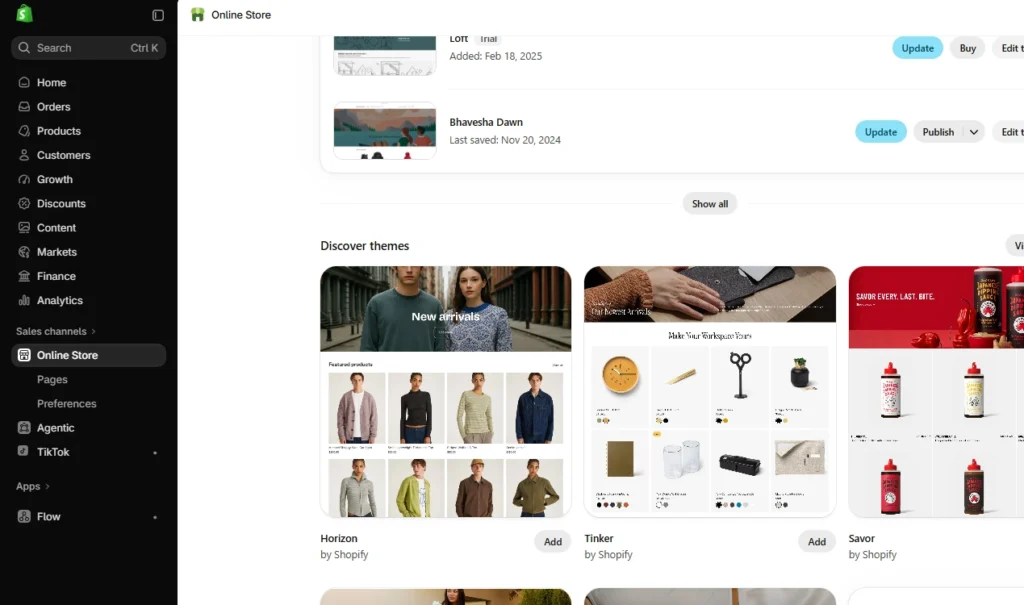
Add your logo, brand colors, fonts, homepage sections, and product page layouts. Preview the design on mobile and desktop.
I’d prioritize clear product information and easy navigation before adding decorative sections. Sidekick can help with setup questions and product copy, but review its suggestions before using them.
Step 5: Add products and collections
Go to Products > Add product and complete the details shoppers need:
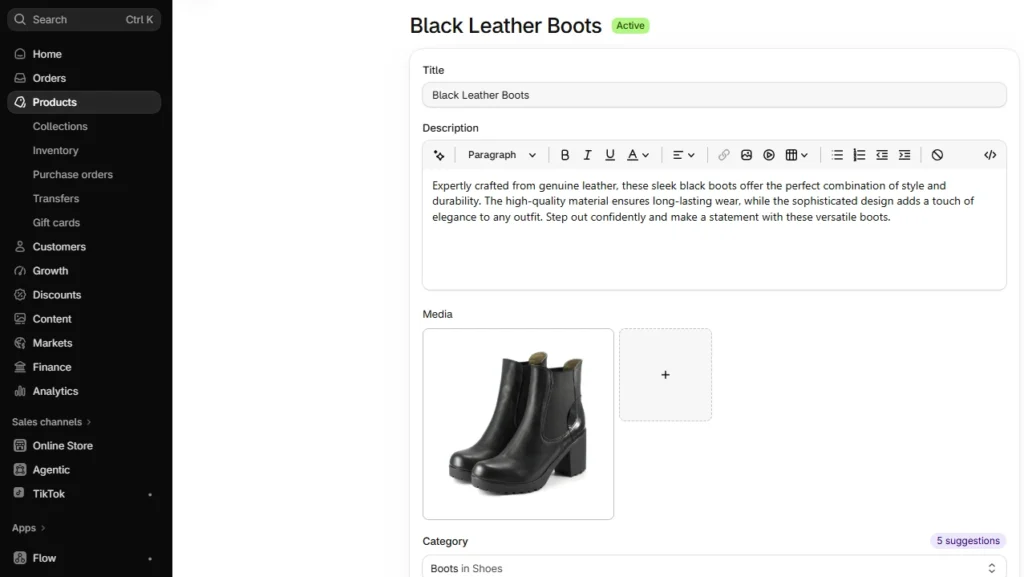
- Title and description: Explain the product, its benefits, and important specifications.
- Images: Use clear photos showing the product and relevant details.
- Category: Select the appropriate standard product category.
- Pricing: Add your selling price and optional compare-at price.
- Inventory: Enter SKUs, quantities, and inventory locations where relevant.
- Shipping: Add accurate weights for physical products.
- Variants: Include options such as size or color.
- Search engine listing: Review the page title, meta description, and URL handle.
Step 6: Create pages, policies, and navigation
Add About, Contact, and any useful FAQ pages. Under Settings > Policies, prepare your return or refund policy, privacy policy, terms of service, and shipping policy.
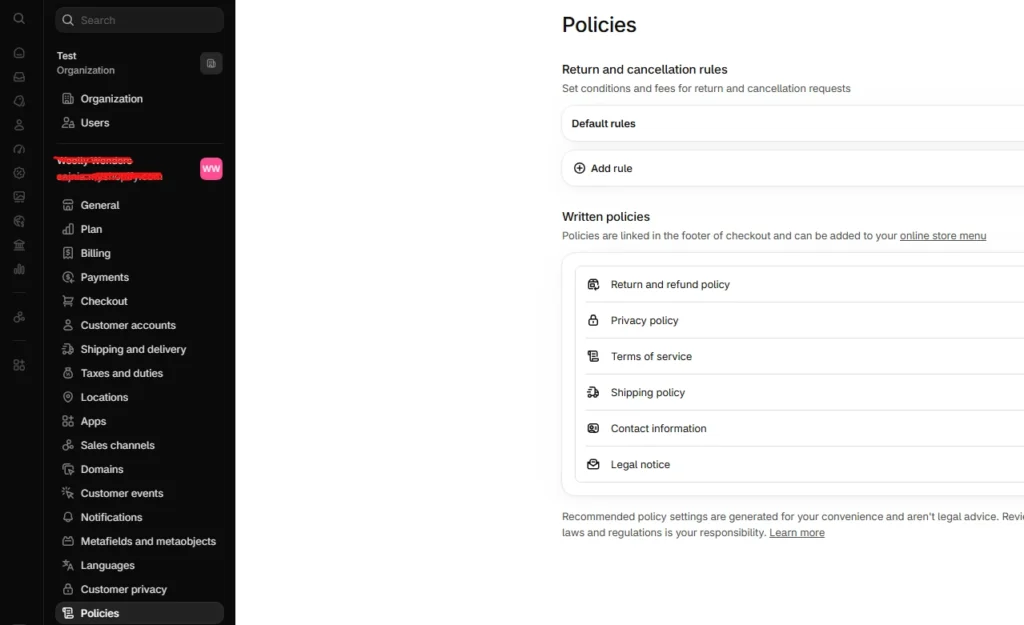
Edit generated templates to reflect your business practices, including return windows and delivery expectations.
Go to Content > Menus and link your main collections and important pages. Put policy and support links in the footer. Keep menu labels simple and check that every link opens the correct destination.
Step 7: Configure shipping and taxes
For physical products, open Settings > Shipping and delivery. Set your shipping destinations, rates, packages, and delivery options.
Add the places you store or fulfill inventory under Settings > Locations. Make sure products have stock assigned to the appropriate locations.
Review Settings > Taxes and duties and configure collection according to your registrations and selling regions. Shopify’s calculations do not replace your responsibility to confirm tax requirements.
Test addresses in your target regions to check shipping availability and charges.
Step 8: Set up payments
Go to Settings > Payments. If your business qualifies for Shopify Payments, complete the required business and identity verification, enable two-step authentication, and connect your payout bank account.
If Shopify Payments is unavailable or unsuitable, choose a supported third-party provider. Review its processing charges and any additional Shopify transaction fees.
Add manual payment methods, such as bank transfer or cash on delivery, only if you can manage those orders reliably.
Step 9: Review checkout and notifications
Under Settings > Checkout, review customer contact requirements, address fields, and marketing consent options. Apply your branding through the checkout and accounts editor.
Decide how customers should sign in under Settings > Customer accounts.
Open Settings > Notifications and review order confirmation, shipping, and refund emails. Add your logo and brand colors, and check the contact information.
Only install apps needed for launch. Review their charges and setup requirements before enabling them.
Step 10: Place test orders
After choosing a paid plan, test the purchase process from product selection through order confirmation.
For Shopify Payments, go to Settings > Payments > Manage and enable test mode. Use Shopify’s documented test card details, rather than your own card.
For other providers, use their testing tools or Shopify’s Test payment gateway.
Check shipping charges, taxes, discounts, inventory updates, and confirmation emails. Review the experience on mobile too.
Deactivate test mode and restore your live payment provider before launching. Simulated test transactions do not appear in payouts or reports.
Step 11: Connect your domain and launch
Go to Settings > Domains to buy a domain through Shopify or connect one you already own. Confirm your chosen domain is set as the primary domain and loads securely.
Complete a final check of products, links, payments, shipping, and contact details.
When ready, click Launch store from the admin Home page or Online Store. You can also make the store public through Online Store > Preferences > Store access.
After launch, visit your public domain and check the storefront again before sending customers to it.
Tips for creating a successful Shopify store in 2026
- Launch with fewer, finished products. Ten complete product pages with real photos, clear specs, and delivery times beat 100 thin ones. Complete listings also qualify for Shopify Catalog.
- Turn on abandoned checkout recovery. It's included on every plan. Set up the automation under Marketing > Automations before your first ad goes live.
- Make checkout fast on mobile. Keep Shop Pay and other accelerated checkouts on. Shop Pay was used for 32% of orders on Shopify over Black Friday Cyber Monday 2025.
- Show delivery dates and a free shipping threshold. Put delivery estimates on product pages and the free shipping minimum in your announcement bar, so shoppers don't hit surprises at checkout.
- Raise order value from the cart. A cart drawer with relevant add-ons and a progress bar toward free shipping is one of the simplest ways to lift average order value.
- Keep the store fast. Remove apps you don't use and compress images before you upload them.
- Capture emails from day one. Add a signup form with a first-order offer, and collect marketing consent at checkout and customer sign-in.
- Add an AI sales associate. Shopify Inbox can now answer shopper questions and recommend products right on your storefront.
- Review your numbers every week. In Analytics, track sessions, conversion rate, average order value, and orders by channel, including AI channels. Shopify's daily insights flag the trends worth acting on.
- Let AI shoppers test your store. Shopify's SimGym runs AI-simulated shoppers through your theme and suggests improvements before you spend money on ads.
Ready to launch your Shopify store?
Launching a Shopify store in 2026 comes down to doing the steps in the right order.
Set up your business details > pick a plan > customize your theme > add your products > sort out policies > shipping, taxes, and payments > place a test order before you click launch store.
My advice is to launch with a small, finished catalog instead of waiting for everything to feel perfect. Once real shoppers start visiting, you can improve the store every week.
If you would rather not handle the technical parts on your own, get a free consultation from Identixweb's Shopify store setup services.
Our team takes care of theme setup, product listings, payment setup, testing, and launch support, so you can focus on your products and your customers.
FAQs
1. How do I create a Shopify store?
Start a Shopify free trial, create your account, and add your business details, products, and theme. Configure navigation, policies, payments, shipping, and taxes, then choose a paid plan and place test orders. Once everything works and payment test mode is off, click Launch store to make your storefront public.
2. Can AI create a Shopify store?
Yes, Shopify’s AI website builder can generate a starting storefront from a description of your business, while Sidekick can help with content and setup. Treat the generated store as a first draft: review its design and product information, then configure payments, shipping, policies, and checkout before launching.
3. Can I create multiple Shopify stores with a single account?
Yes, you can use the same email address to access multiple Shopify stores and switch between them through the admin’s store switcher. On standard plans, each store needs its own subscription and configuration; Shopify Plus uses a separate expansion-store arrangement.
4. Can I build a Shopify store for free?
You can start building your store during Shopify’s free trial, but you need to select a paid plan to launch and test a payment gateway. Subscription charges begin when the free trial ends, and trial duration or promotional pricing can vary by location and eligibility. Paid themes, apps, and custom domains may add separate costs.
5. How long does it take to create a Shopify store?
As a practical estimate, a basic storefront can take a few hours if your product content, images, and branding are ready. I’d allow several days for a small store’s complete setup and testing, with more time for large catalogs, custom development, integrations, or payment verification. Your launch date should depend on a working purchase process, rather than the design alone.

About the author
Sajini Annie John
Meet Sajini, a seasoned technical content writer with a passion for e-commerce and expertise in Shopify. She is committed to helping online businesses to thrive through the power of well-crafted content.