Overview
Once you’ve successfully installed the SellMore – Post Purchase Upsell app, you’ll land on the Dashboard — your central hub to manage post-purchase offers, funnels, and templates. This guide walks you through each section on the dashboard so you can understand and manage everything with ease.
SellMore’s Post-Purchase Offers Are Currently Disabled
If you’re seeing a yellow banner at the top of the dashboard, it means your post-purchase offers aren’t yet active. To start using SellMore:
- Click Open checkout settings to select SellMore as your post-purchase app in Shopify’s settings.
- Then, click Verify setup to confirm it’s correctly set up.

App Status
This section lets you enable or disable the app.
- If the app is disabled, you’ll see an Enable button. Click it to activate SellMore.
- Once the app is enabled, this option moves to the Settings page (not visible on the dashboard anymore).

Funnel
Funnels help you show targeted post-purchase offers based on different Shopify pages.
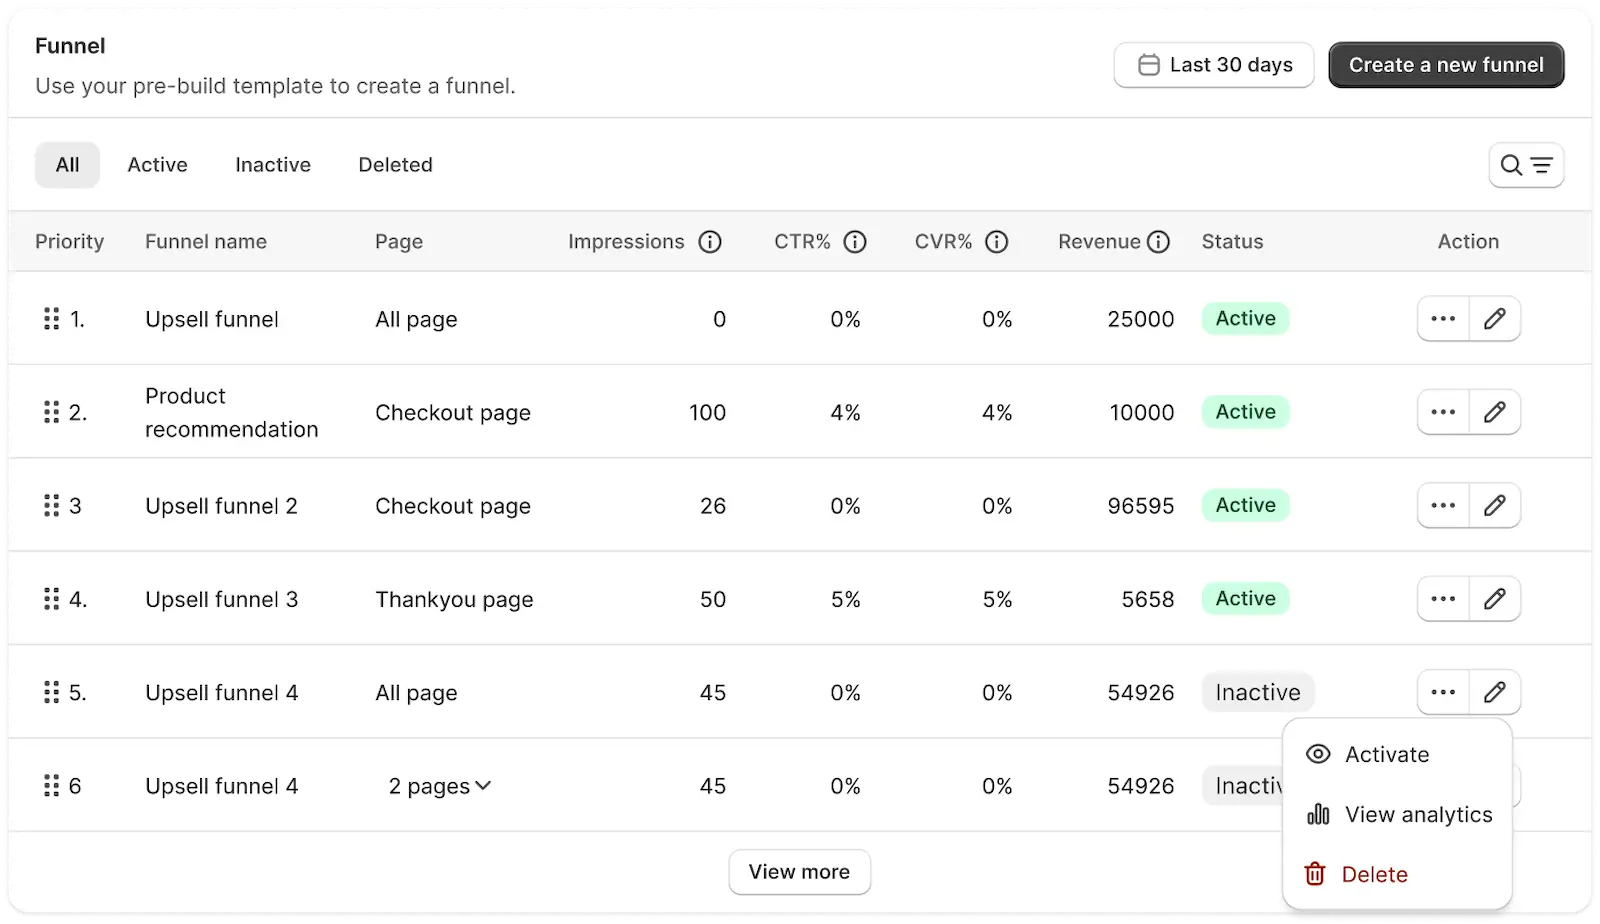
In this section, you can:
- View all existing funnels.
- Create new funnels using the Create a new funnel button.
- Filter data by date range (Today, Yesterday, Last 7 days, Last 30 days, This Month, Last Month, or Custom).
- Use tabs to switch between All, Active, Inactive, or Deleted funnels.
- Use the search bar to quickly find any funnel by name.
Funnel table explained:
| Column | Description |
|---|---|
| Priority | Set the order in which funnels are shown. Drag to reorder. |
| Funnel Name | The name you’ve given the funnel. |
| Page | Shows which page the funnel targets (e.g., Checkout, Post Purchase 1, etc). |
| Impressions | Number of times the funnel was shown to customers. |
| CTR% | Click-through rate – percentage of users who clicked the offer. |
| CVR% | Conversion rate – percentage of users who accepted the offer. |
| Revenue | Sales generated from this funnel. |
| Status | Shows whether the funnel is active or inactive. |
| Action | Options to Edit, View Analytics, Delete, or Activate/Deactivate the funnel. |
For more detailed setup options, check the Funnel Editor Guide.
Template
Templates allow you to configure widgets for specific pages. You can build and reuse templates for faster setup.
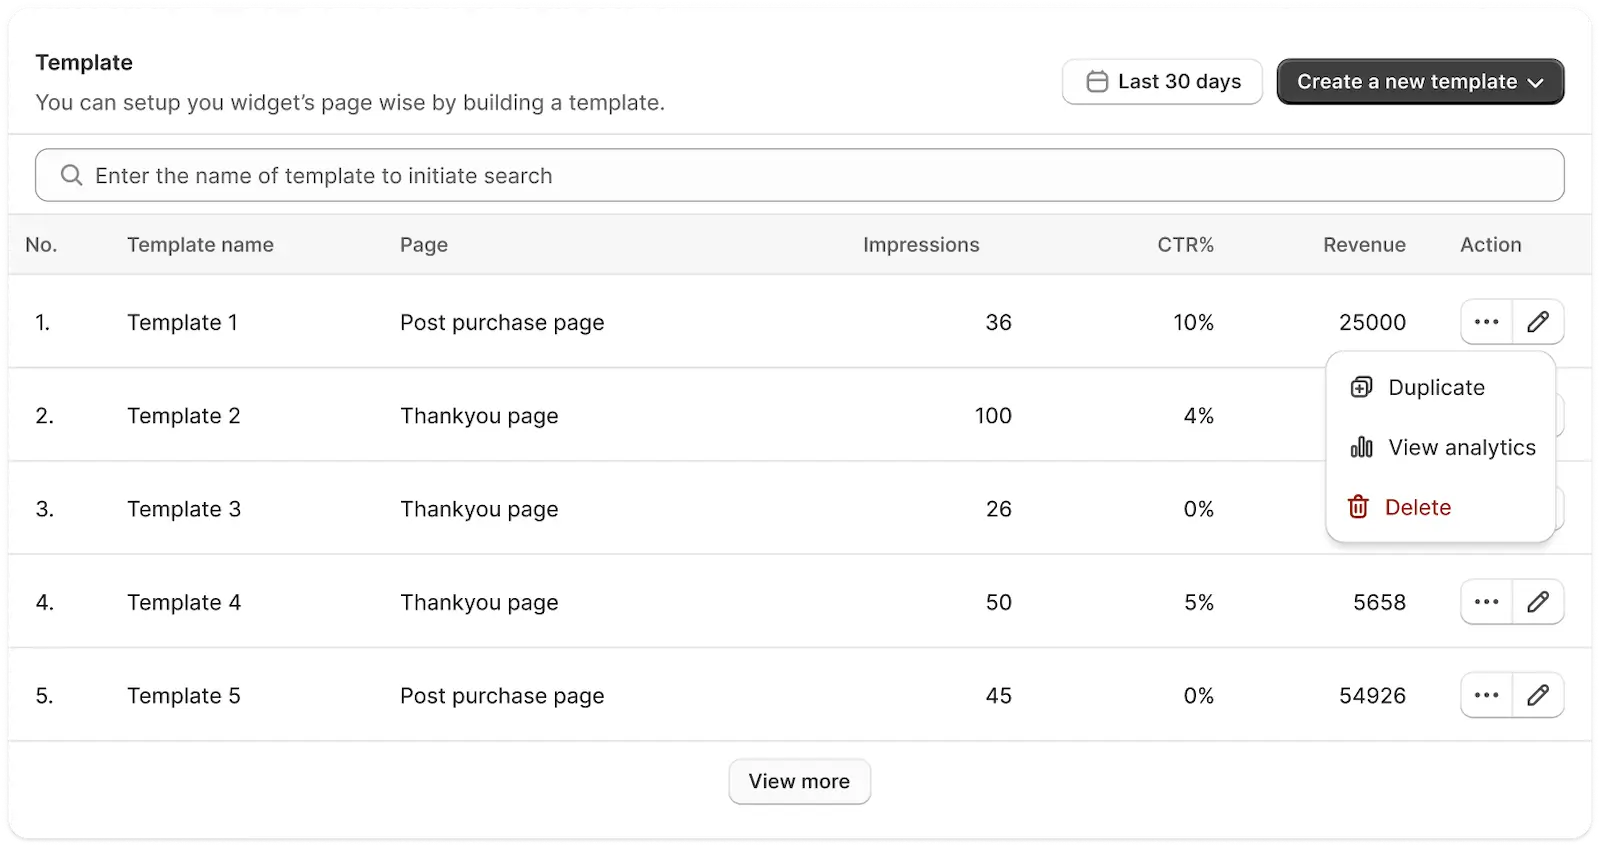
In this section, you can:
- View all your saved templates.
- Create new ones by clicking Create a new template.
- Choose the page type when creating a new template (e.g., Checkout page, Thank You page, etc.).
- Filter by date range (Today, Yesterday, Last 7 days, Last 30 days, This Month, Last Month, or Custom).
- Use the search bar to find templates by name.
Template bable explained:
| Column | Description |
|---|---|
| No. | Serial number of the template in the list. |
| Template Name | Name of the template. |
| Page | Which page this template is built for. |
| Impressions | Number of times this template was shown to users. |
| CTR% | Click-through rate – how often users interacted with the offer. |
| Revenue | Sales generated from this specific template. |
| Action | Options to Duplicate, View Analytics, Delete, or Edit the template. |
To learn more, visit our Template Editor Guide.
Summary
The Dashboard is your main control panel in SellMore. From enabling the app and verifying post-purchase setup, to managing funnels and templates — everything starts here. Be sure to activate SellMore in your Shopify post-purchase settings to start boosting your revenue!
Need helps?
If you have any questions or need help setting things up, feel free to email us or live chat with our support team — we’re always here to assist you!