The Create Template feature in the Sellmore app allows you to design and customize different pages in your Shopify store using checkout page, post purchase page, thank you page, order status page. This enables you to enhance customer experience and boost sales by adding elements like Upsell Widgets, Product Recommendations, and Product Bundles, along with discount settings for those widgets.
Steps to Create a Template
1. Go to your Shopify Admin.
2. Open the Sellmore app and navigate to the Dashboard page.
3. Go to the Template section.
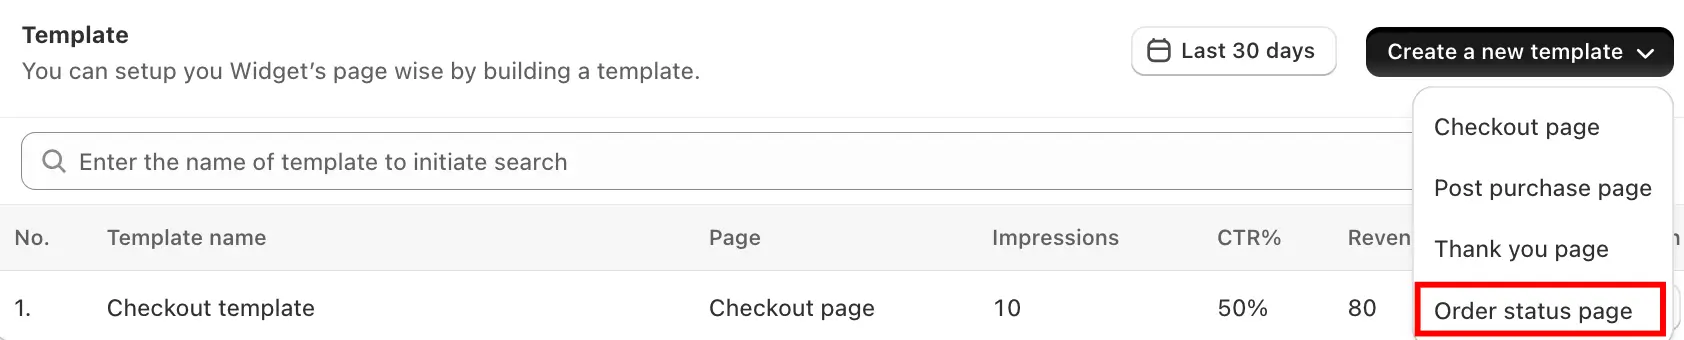
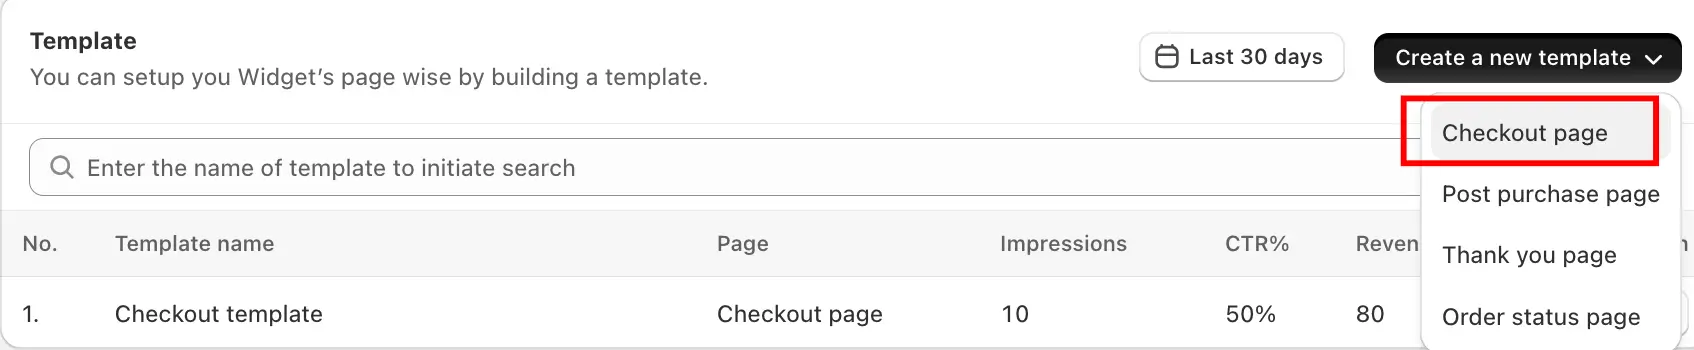
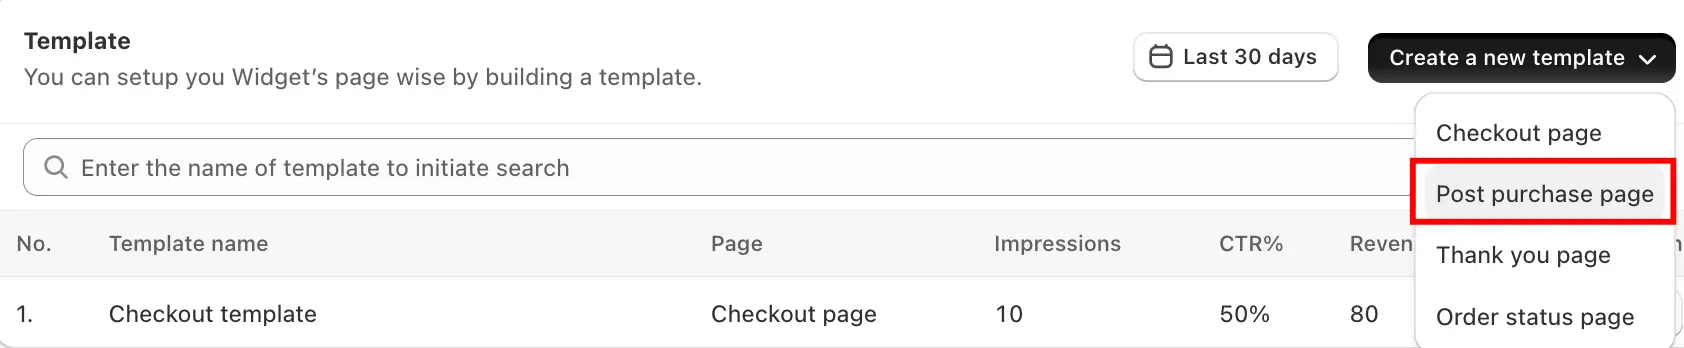
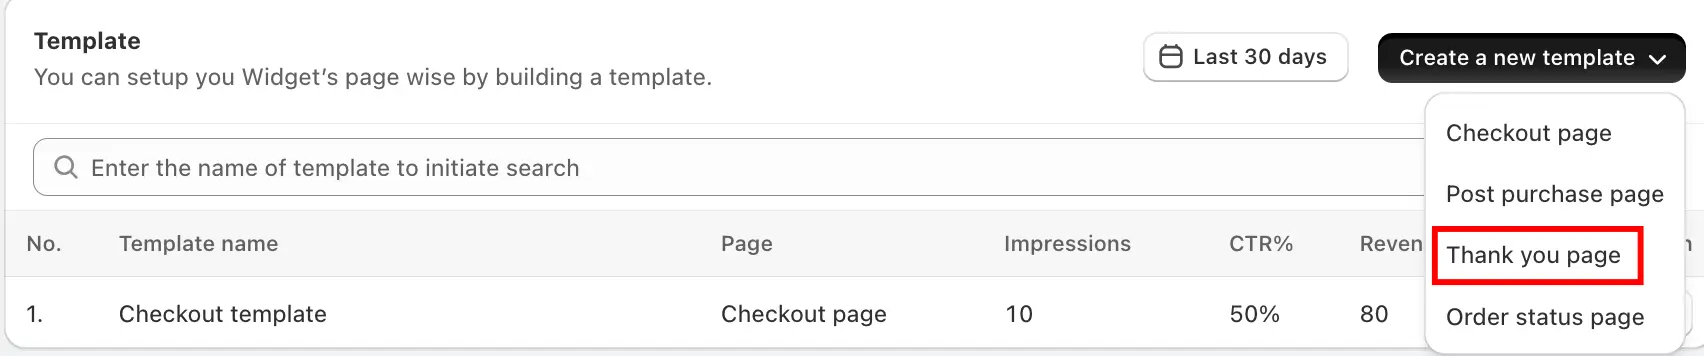
4. Click Create a New Template.
Templates you can create For
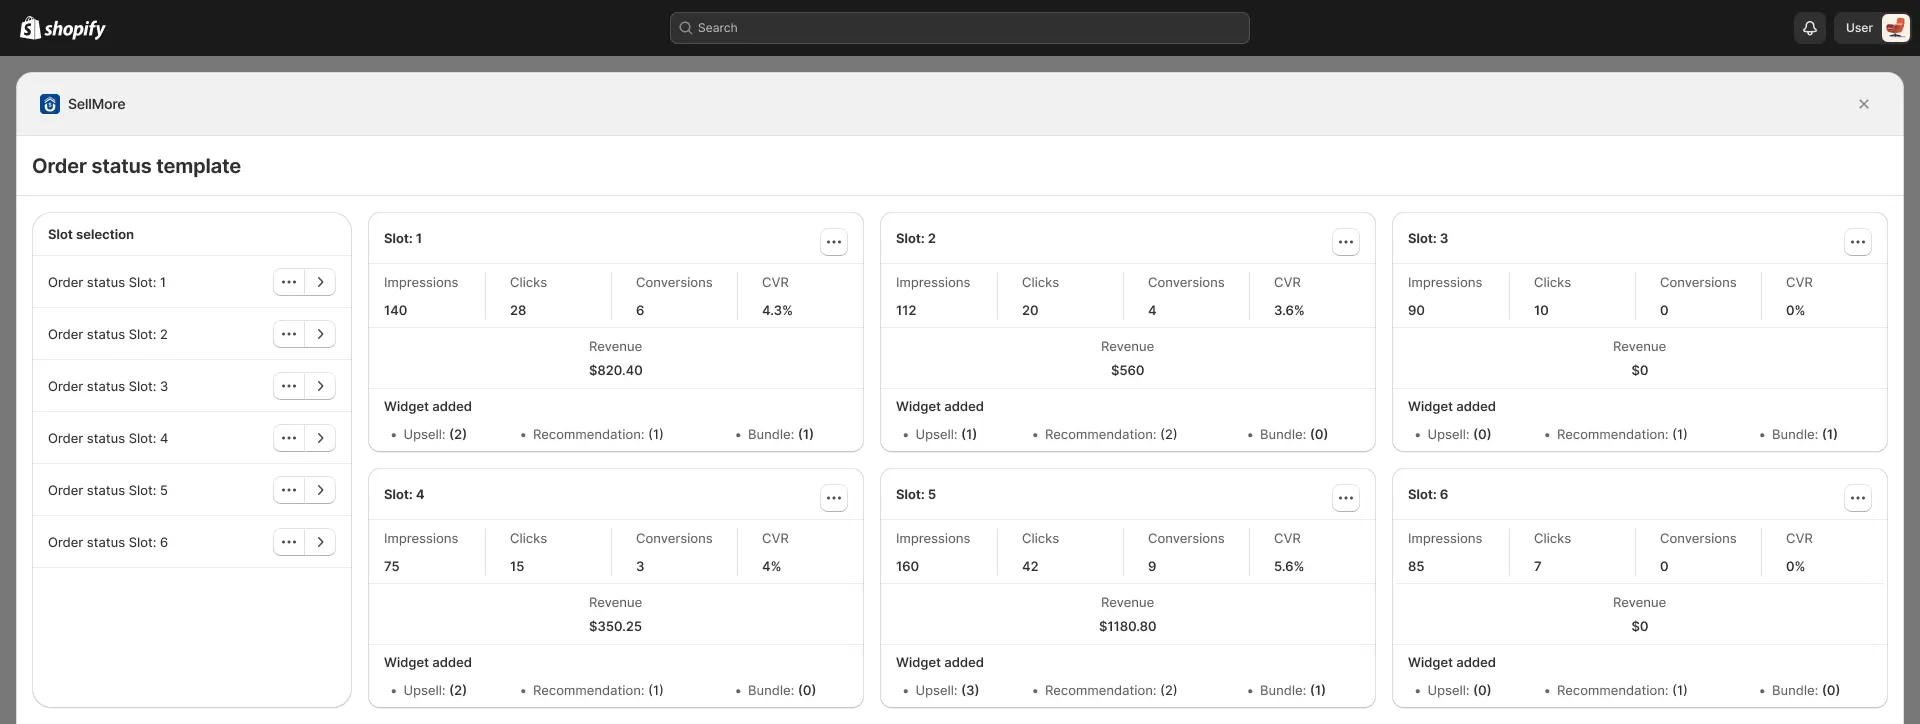
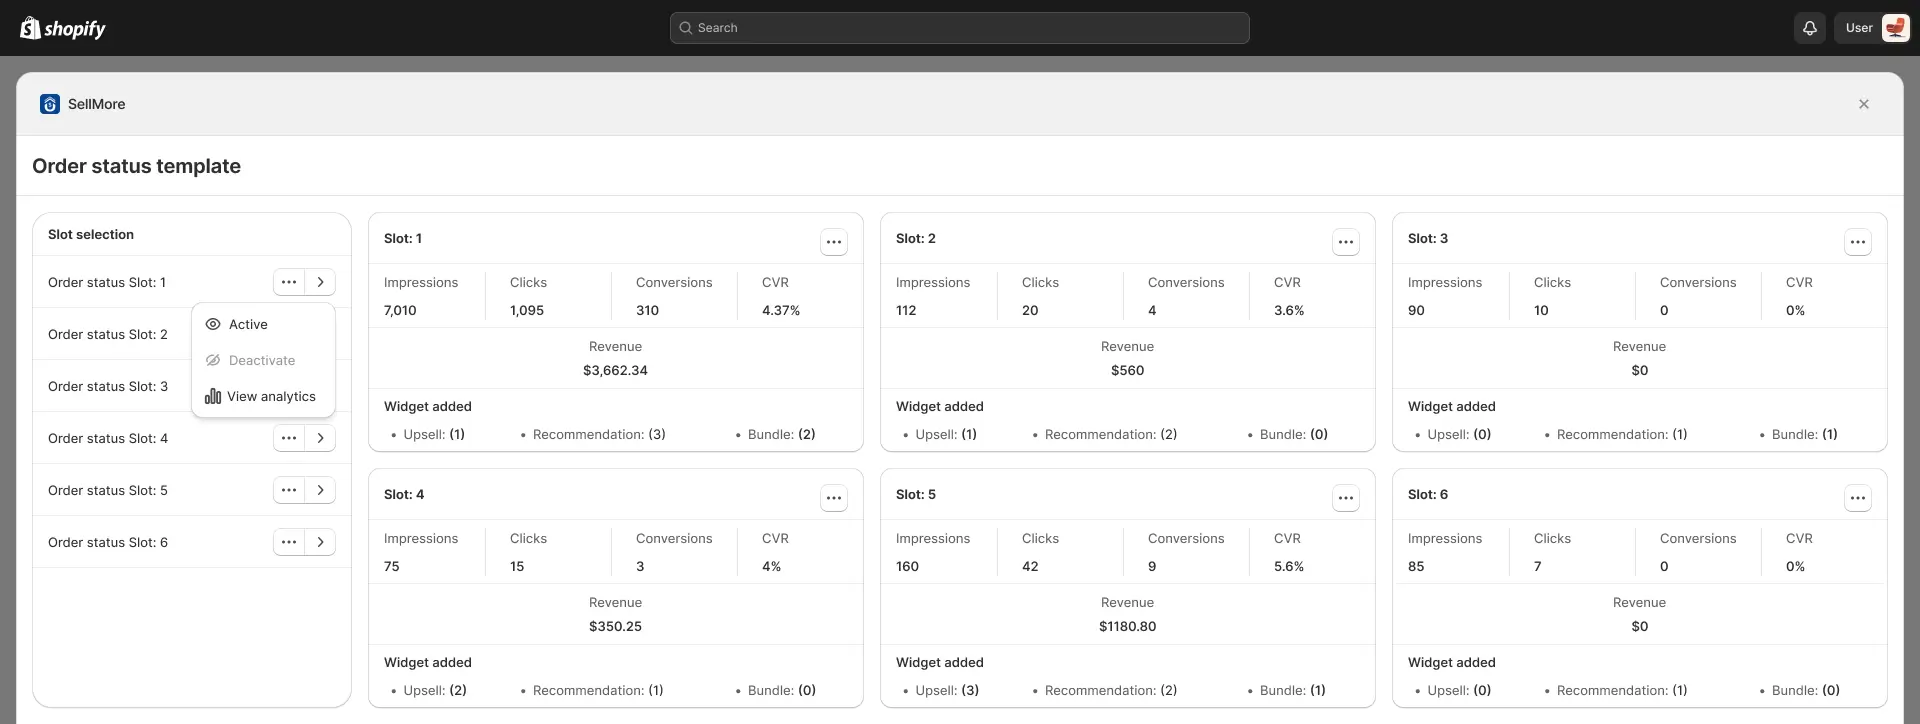
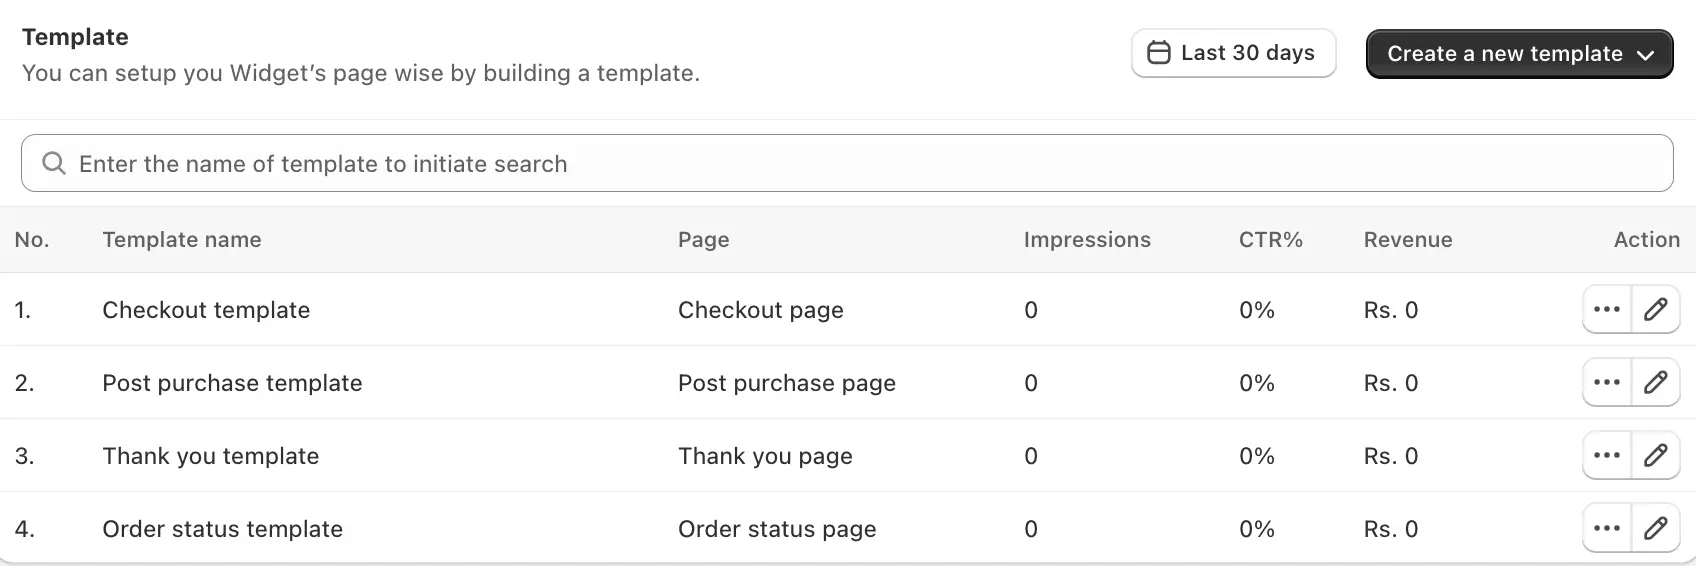
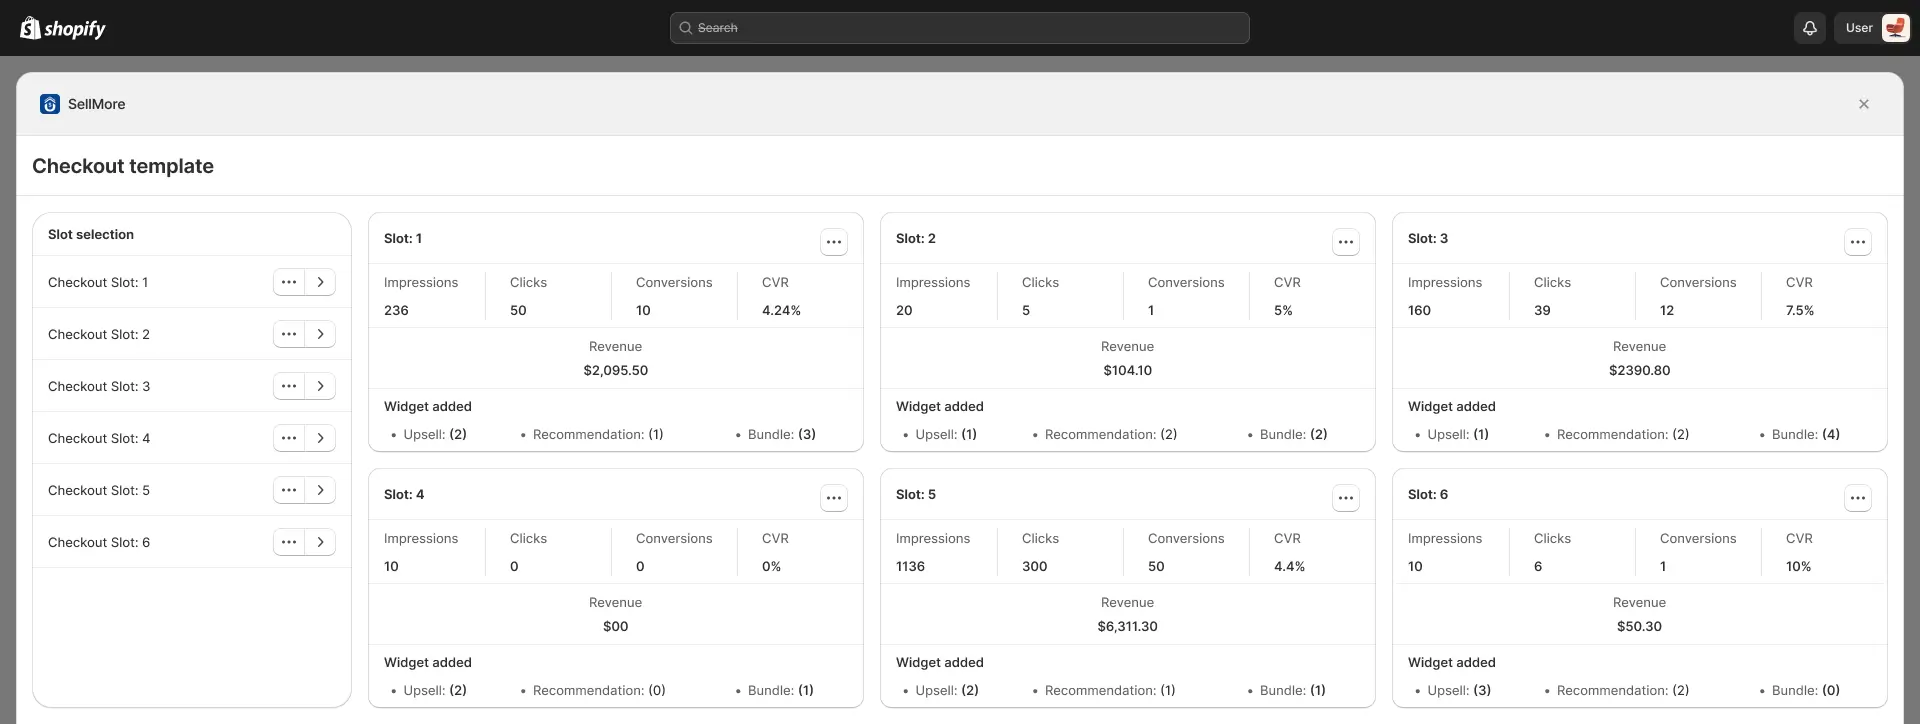
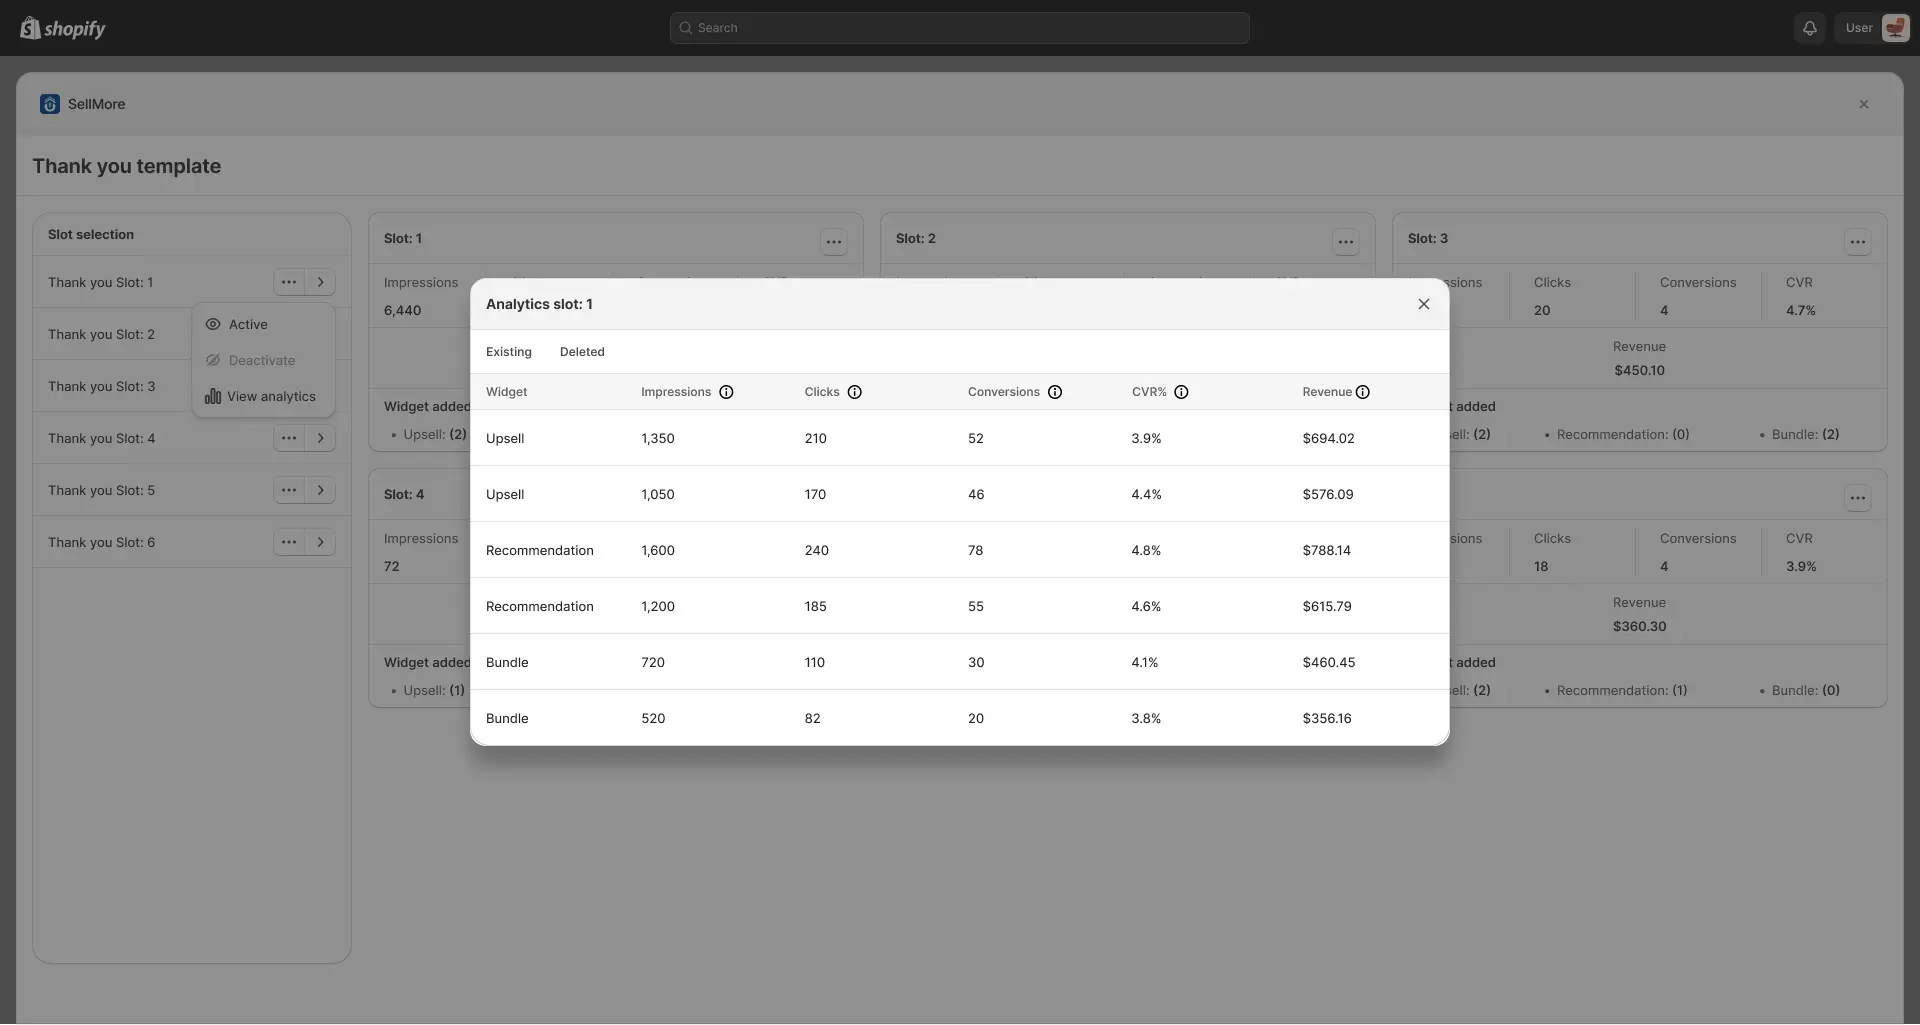
You can create templates for the Checkout Page, Thank You Page, Post-Purchase Page, and Order Status Page. After creating a template, you will be redirected to the Slot Selection page for the Checkout, Thank You, and Order Status pages. SellMore offers six slots, each representing a specific position on these pages where your offer can be shown. You can choose one of these slots to display your offer. This page also provides analytics for each slot, so you can review performance and select the position that works best. For the Order Status Page, you don’t need to select a slot—you can directly create a template.
Once you have selected a slot, you will be taken to the Widget Page. Here, you can add different types of widgets such as the Product Upsell Widget, Product Recommendation Widget, and Product Bundle Widget. You can also assign multiple widgets to the same page so they appear together in that page. For the Order Status Page, you are redirected directly to the Widget Page, where you can add widgets as per your choice to display offers on that specific page.
After creating your widgets, you need to insert the selected slot into your store’s page so the widget is visible to customers. This is done through Shopify’s Theme Editor. SellMore provides an ‘Open Theme Editor’ button on the Widget Page, which takes you directly to the Shopify Theme Editor.
In the Theme Editor, place the chosen slot in your desired location on the specific page. This ensures that your funnel appears exactly where you want it, allowing you to display upsells, recommendations, or bundles to customers at the point of purchase.
You can also view the analytics of each slot on the Checkout, Thank You, Order Status, and Post-Purchase page templates. Slots can be activated or deactivated individually, and you can track the analytics of each widgets.
Checkout Page
In the SellMore Shopify app, you can create templates for the checkout page to display sales funnels. To do this, select the “Checkout Page” option while creating the template. You can create a funnel, and after creating the funnel, you can create a template. After that, all the widgets you’ve added will show up on this page.


Post Purchase Page
In the SellMore Shopify app, you can display a funnel on the post-purchase page by selecting the ‘Post Purchase Page’ option while creating your template. This post-purchase page appears right after checkout and before the thank-you page.
Thank You Page
You can display a funnel on the thank you page by selecting the “Thank You Page” option when creating a new template. This allows you to show targeted offers right after a customer completes their purchase.


Order Status Page
You can display a funnel on the order status page by selecting the “Order Status Page” option when creating a new template. This feature allows you to present special offers, recommendations, or bundles when customers check the status of their order.