
Are you struggling to add size variants to your Shopify store? You’re not alone. Many online merchants face this challenge, but it doesn’t have to be complicated. In this guide, we’ll walk you through the process of adding size options to your products, ensuring a smooth shopping experience for your customers and boosting your store’s potential for higher conversions.
Let’s get started and make sure your store is set up for success with the right size options.
Benefits of Setting Up Size Options in Your Shopify Store
Before we dive into the technical steps of adding product sizes in Shopify, it's important first to understand why this is crucial for your business.
Enhanced Customer Engagement: Offering size options ensures that customers can easily find products that fit them, encouraging return visits and fostering loyalty.
Time-Saving for Order Packing: Providing size charts and options helps streamline order packing, reducing wait times and increasing operational efficiency.
Improved Customer Satisfaction: Offering the right size options boosts customer satisfaction, which is crucial for building trust and increasing repeat business.
Positive Brand Image: A clear size chart and easy size selection process reflect positively on your brand, enhancing its reputation for professionalism and customer care.
Increased Sales Potential: By making it easier for customers to find their ideal size, you’re likely to see higher conversions and fewer abandoned carts.
How to Add Sizes on Shopify With Steps
Here are several methods to add sizes to Shopify. Choose the one that suits your store’s needs the best.
Method 1: Add Sizes to a New Product
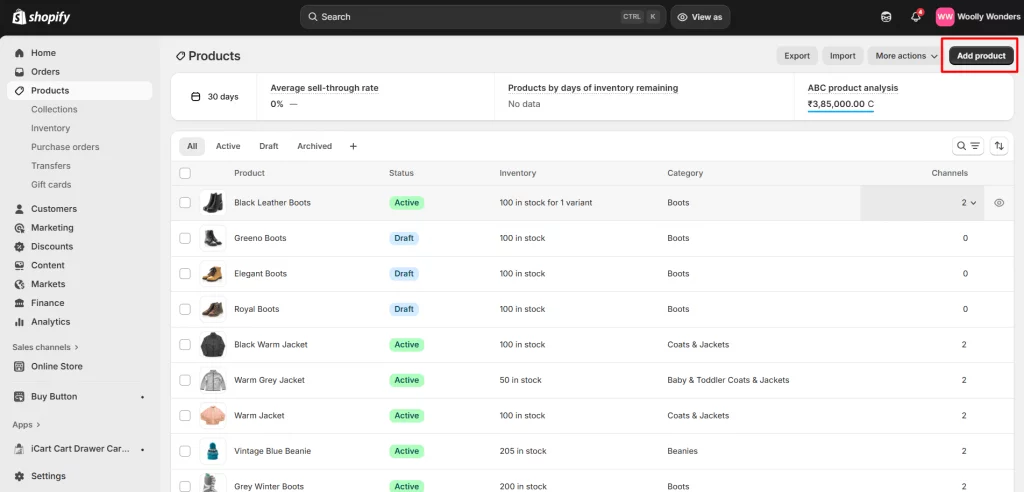
1. In your Shopify admin, go to Products.
2. Click Add product and fill in the basic details.
3. In the Variants section, check the box This product has options, like size or color.
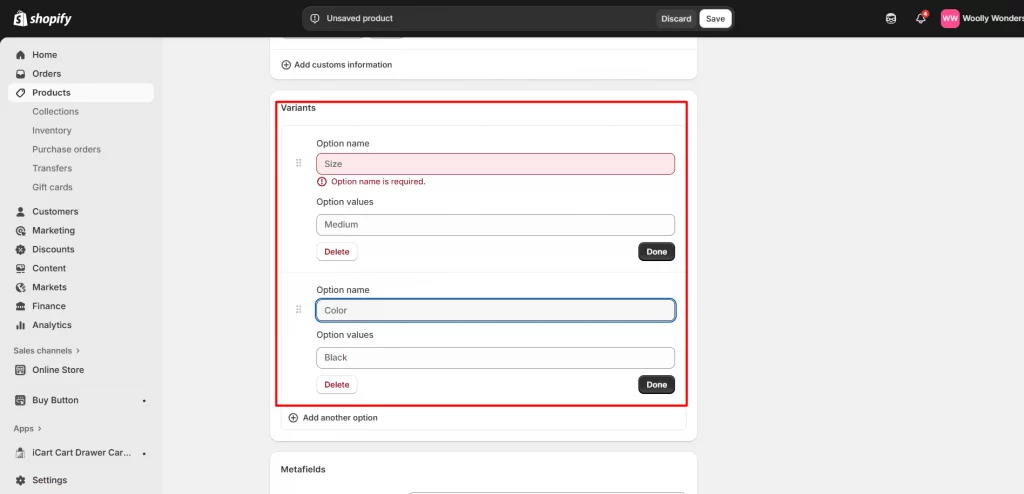
4. For the Option name, enter Size.
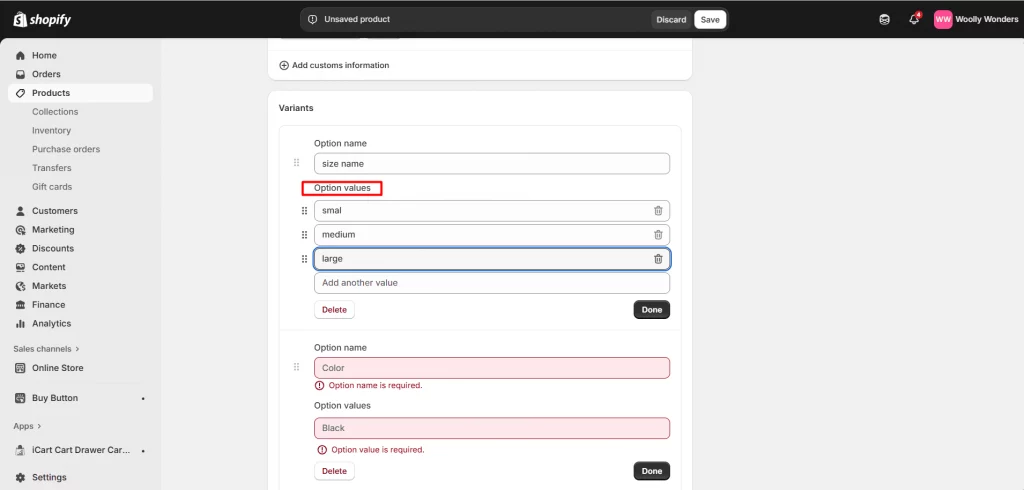
5. For Option values, type your sizes separated by commas, for example: XS, S, M, L, XL.
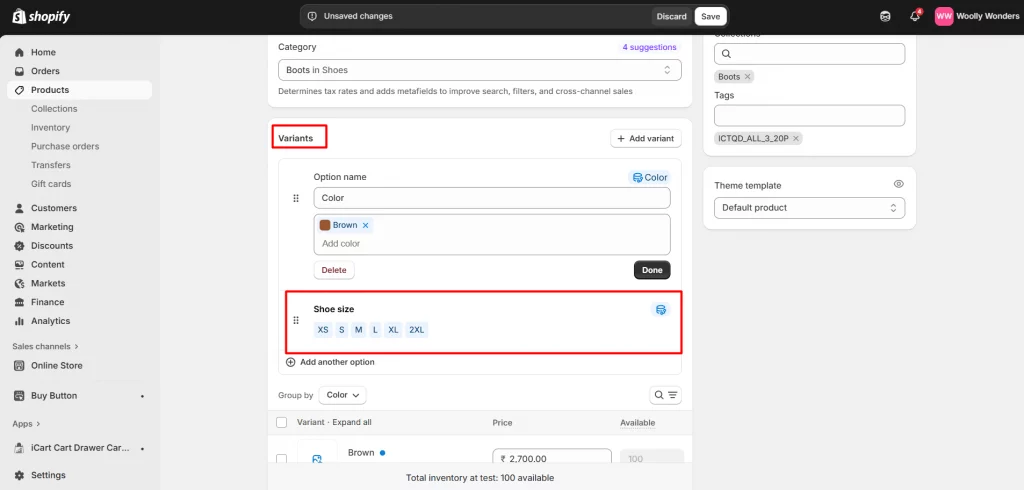
6. Click Add another option to add Color, Material, or Style.
7. Shopify supports up to 3 options per product. Shopify will generate variant combinations from your option values.
8. Use the variants table to update Price, Compare-at price, SKU, Barcode, and Inventory per size.
9. Uncheck or delete any variant you do not want to sell.
10. Click Save to publish your changes.
Method 2: Add Sizes or Variants for Existing Product
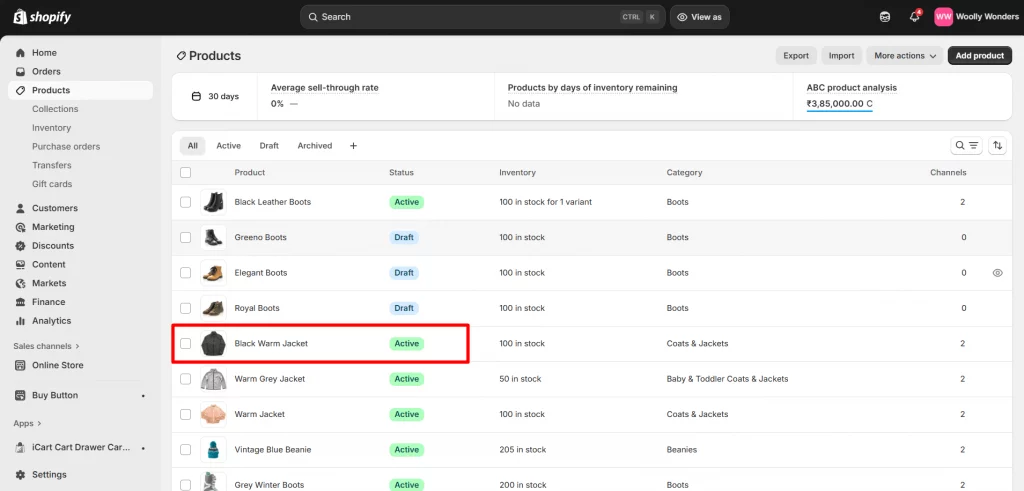
1. Go to Products and click the product you want to update.
2. In Variants, check This product has options, like size or color.
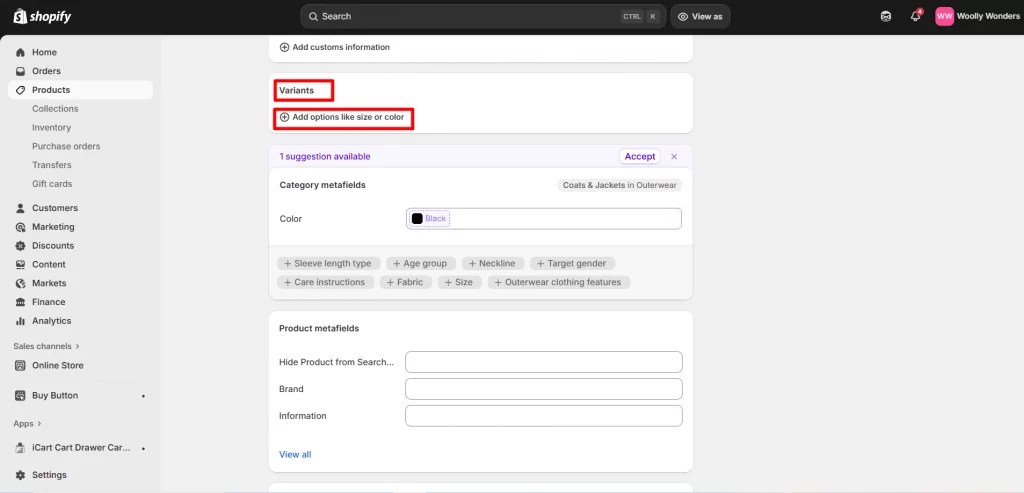
3. Set the Option name to Size.
4. Enter Option values such as S, M, L, XL separated by commas.
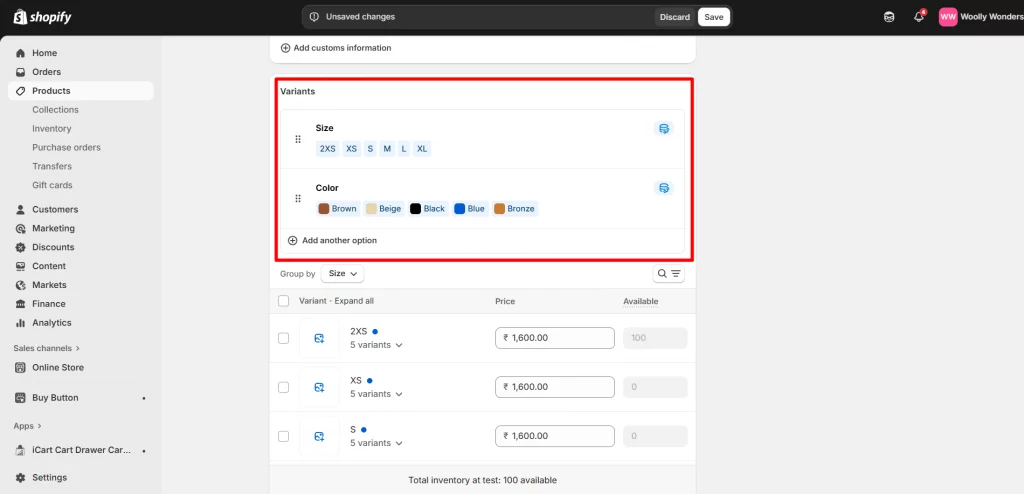
5. Click Add another option for things like Color.
6. Remember the limit is 3 options.
7. Edit Price, SKU, Barcode, Inventory, and Images for each size.
8. Remove variants you no longer want to sell.
6. Click Save.
Optional But Recommended: Add a Size
Link a Shopify Size Chart
- Create a Page called Size Chart with your measurements.
- Add a link like View size chart in the product description.
- For advanced placement, you can use a metafield or a theme block that shows a size chart per product.
Optimize Shopify Image Sizes
- Use consistent, square images for variants so size and color options look uniform.
- Aim for high-resolution images (for example, 2048 × 2048 px) and compress them for faster load times.
- Keep the same aspect ratio across all variant images to avoid layout shifts.
Conclusion: Optimize Your Shopify Store with Product Sizes
Adding sizes on Shopify is essential for providing a smooth and positive shopping experience. Creating individual size options improves order accuracy, boosts customer satisfaction, and streamlines the ordering process. While setting this up may seem time-consuming initially, it will save you effort and reduce errors in the long run.
By anticipating your customers’ needs and addressing common sizing issues upfront, you ensure each purchase goes smoothly. Setting up sizes on Shopify helps you deliver the best shopping experience possible, and that’s exactly what every store owner should aim for.
As Shopify experts, we can help you set up size variants, size charts, and optimized product listings to maximize conversions and customer satisfaction. Get in touch with us to make your Shopify store more efficient and customer-friendly!
FAQs: How to Add Sizes of Products on Shopify
1. Can I add a size chart to my Shopify product page?
Yes. You can upload a size chart image, create a table in the product description, or use a Shopify app to show dynamic size charts for each product.
2. Do I need separate SKUs for each size?
It’s recommended. Each size variant can have its own SKU, price, and inventory, making it easier to manage stock and fulfill orders.
3. How can I show different images for each size?
Shopify allows you to upload variant-specific images. Assign images to each size variant so customers can see the correct product view.
4. Will adding sizes affect my product page layout?
No. Shopify automatically adjusts the size dropdown or selector in the product page layout, keeping the page clean and user-friendly.
5. Can I update sizes after creating a product?
Yes. You can edit the variants section anytime to add, remove, or update sizes without affecting existing orders.


![District Shopify Theme Review: Pros, Cons, & Features [2026] District Shopify Theme Review: Pros, Cons, & Features [2026]](https://www.identixweb.com/wp-content/uploads/2025/12/25-12-Thu-Blog-District-Shopify-Theme-Review-Pros-Cons-Rating.webp)


About the author
Bhavesha Ghatode
Explore Content with Bhavesha, a passionate and dedicated technical content writer with a keen understanding of e-commerce trends. She is committed to sharing valuable insights, practical assets, and the latest trends that can help businesses thrive in a competitive environment.