
Creating custom pages for your Shopify store is just as important as adding products. Pages like About Us, FAQ, Shipping Policy, and Contact help build trust, share useful information, and create a smoother shopping experience.
The best part is? Shopify makes it super easy to add these pages with no technical skills required! Even if you’re starting with a Shopify blank store page, you can quickly turn it into a professional-looking store by adding the right pages.
In this guide, we’ll walk you step by step through how to create a new page in Shopify.
What Are Shopify Pages?
Shopify pages are static content areas that live alongside your product and collection pages. They serve different purposes: some tell your brand story, others provide essential policies, while some are purely designed to drive conversions.
Unlike product pages (which are generated automatically when you add products), pages like About, Contact, or FAQ must be created manually in your Shopify admin.
Why Shopify Pages Matter
Shopify makes sure every store comes with responsive, ready-to-use page templates. That means even if you’re new to ecommerce, you already have all the building blocks to create a complete website.
Here’s why they’re valuable:
- Instant Access: No coding required, everything is ready inside Shopify admin.
- Responsive Design: Pages adapt to mobile, tablet, and desktop automatically.
- Customizable: Change layouts, fonts, and colors through the theme editor.
- SEO-Friendly: Each page comes with fields for search engine optimization.
With the right mix of pages, your store looks professional, builds trust, and guides customers smoothly toward checkout.
Types of Shopify Pages for Your Store
You can create many types of pages in Shopify, and each serves a unique purpose. Together, they improve user experience, provide information, and build customer trust.
Here are the most common ones:
| Shopify Page Type | Description |
| Homepage | The first impression of your store, showcasing products and branding. |
| Collection Pages | Group products into categories for easier browsing. |
| Product Pages | Highlight individual products with details, images, and pricing. |
| About Us Page | Share your brand story and values to connect with customers. |
| Blog Pages | Publish content that educates or inspires shoppers. |
| Contact Us Page | Give customers a way to reach you easily. |
| Checkout Pages | Where customers complete their purchases securely. |
| Password Page | Protect your store while it’s under construction or invite-only. |
| Landing Pages | Create focused pages for campaigns or promotions. |
| Promotion Pages | Highlight special deals, discounts, or seasonal offers. |
| FAQ Page | Answer common customer questions to save time and build trust. |
| Policy Pages | Clearly state shipping, return, privacy, and other store policies. |
| Blog List Pages | Display all your blog articles in one place. |
| Login/Account Pages | Let customers access their accounts and order history. |
Creating a new page in Shopify is simple and doesn’t require any technical skills. Whether you need an About Us, FAQ, Contact, or Policy page, you can set it up in just a few clicks. Follow these steps:
Step-by-Step: How to Add a Pages in Shopify
Step 1: Log in to Your Shopify Admin
Go to Shopify.com and sign in with your account details. Once logged in, you’ll land on the Admin Dashboard, where you can manage your store.

Step 2: Go to Online Store > Pages
From the left-hand navigation menu, select:
Online Store → Pages
This section lists all your store pages. If you’re just starting, the list may be empty, but you’ll soon add your first page.
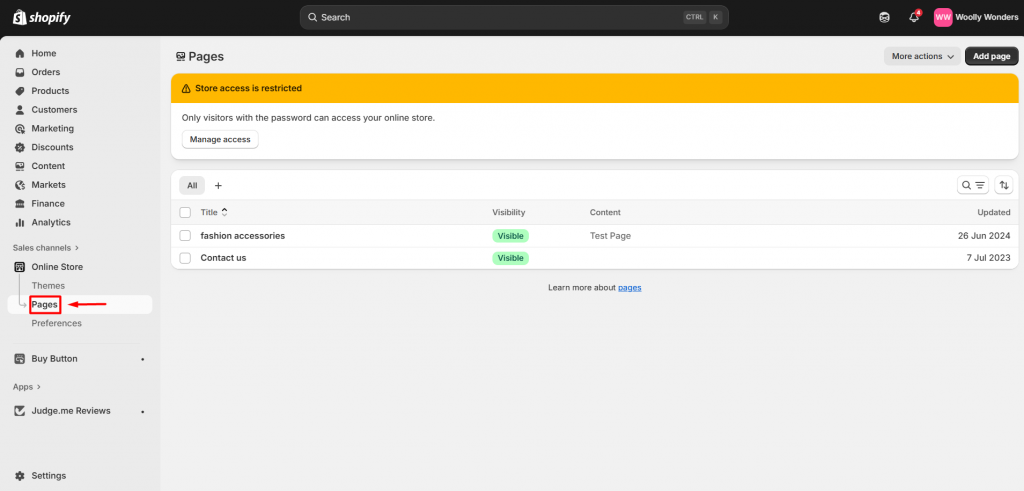
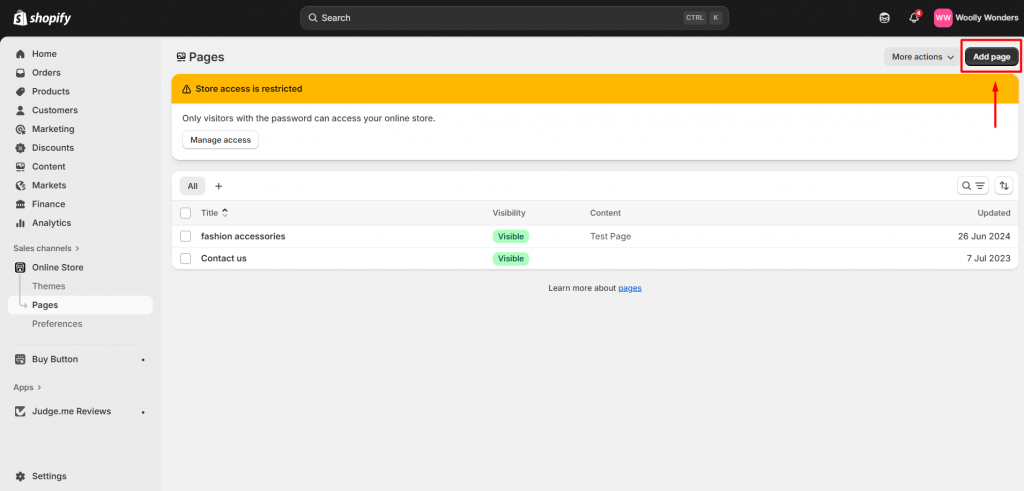
Step 3: Click on “Add Page”
In the top right corner, click the Add Page button. This opens the page editor, where you can design your new page.
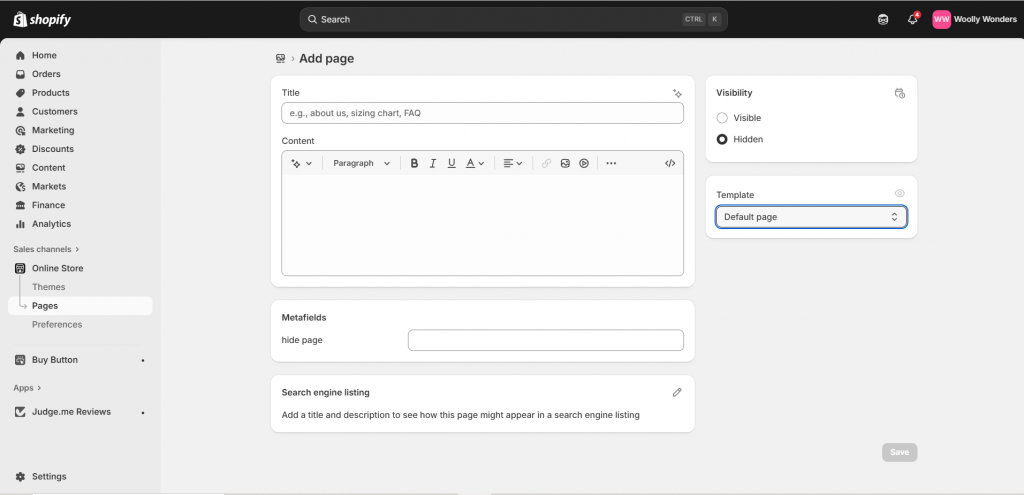
Step 4: Enter Page Title and Content
Now it’s time to add details:
- Page Title – The name of the page (e.g., Our Story, Shipping Policy).
- Content Area – Use the editor to add text, images, videos, links, or lists.
The editor also includes formatting tools to add headings, bold text, or even HTML code for advanced customization.
Step 5: Optimize for SEO (Optional but Recommended)
How to Get Your Shopify Page on the First Page of Google? These steps help your page rank better on Google and makes it more appealing in search results.
Scroll down to the Search Engine Listing Preview and click Edit Website SEO. Here you can:
- Add a unique Meta Title
- Write a clear, engaging Meta Description
- Customize the URL handle
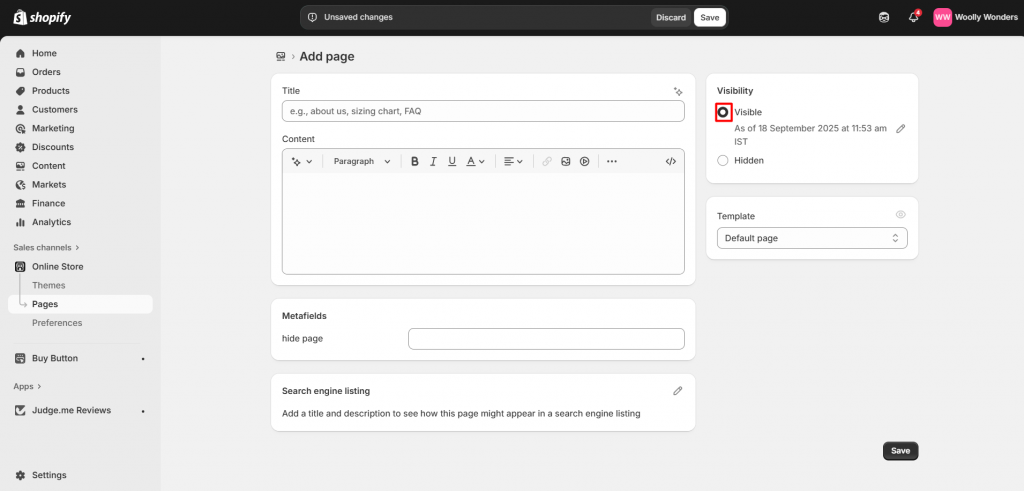
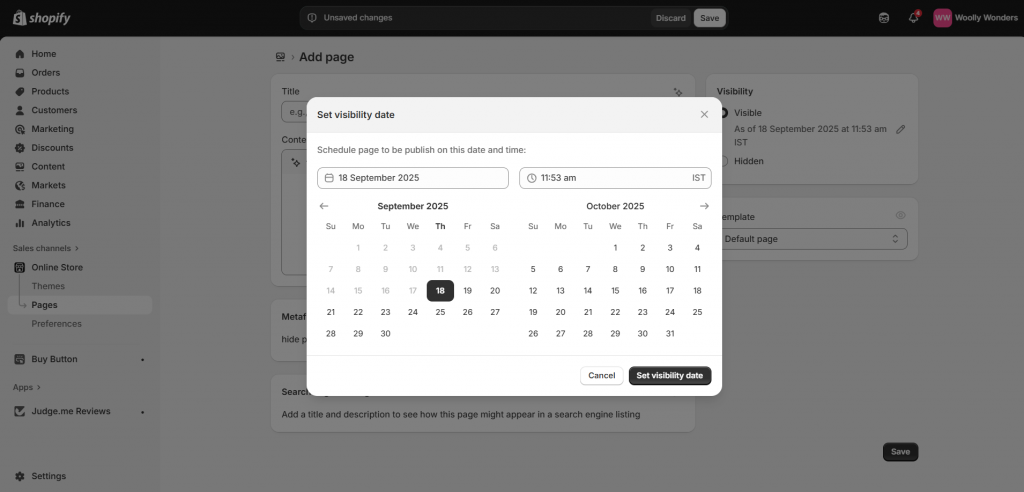
Step 6: Adjust Page Visibility
On the right side of the editor, you’ll see Visibility settings:
- Visible – Publish the page immediately.
- Hidden – Save it as a draft for later.
- Schedule – Choose a date and time for it to go live automatically.
Step 7: Save Your Page
Once you’re satisfied, click the Save button. Your new page will now be live or scheduled based on your settings.
How to Customize Shopify Pages
You have main options to customize Shopify pages:
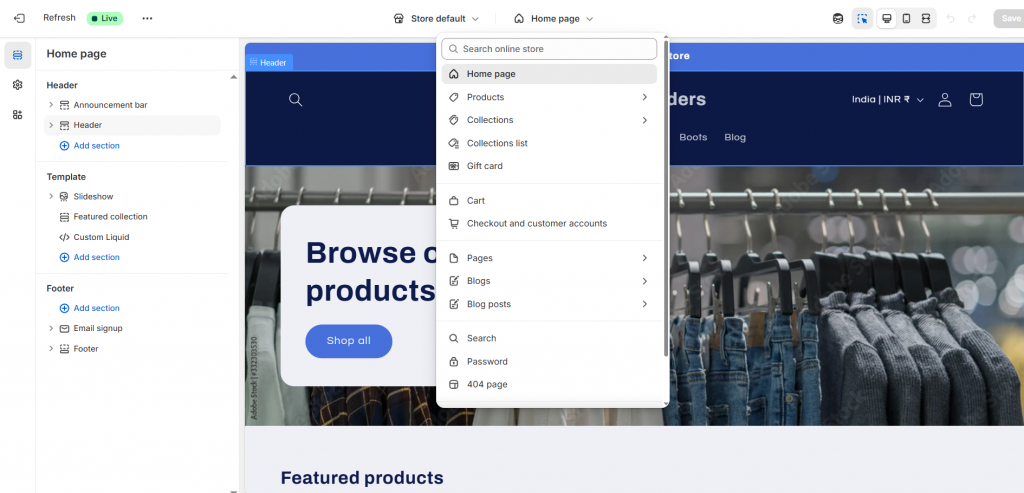
1. Using Shopify Themes
- Go to Online Store > Themes > Customize.
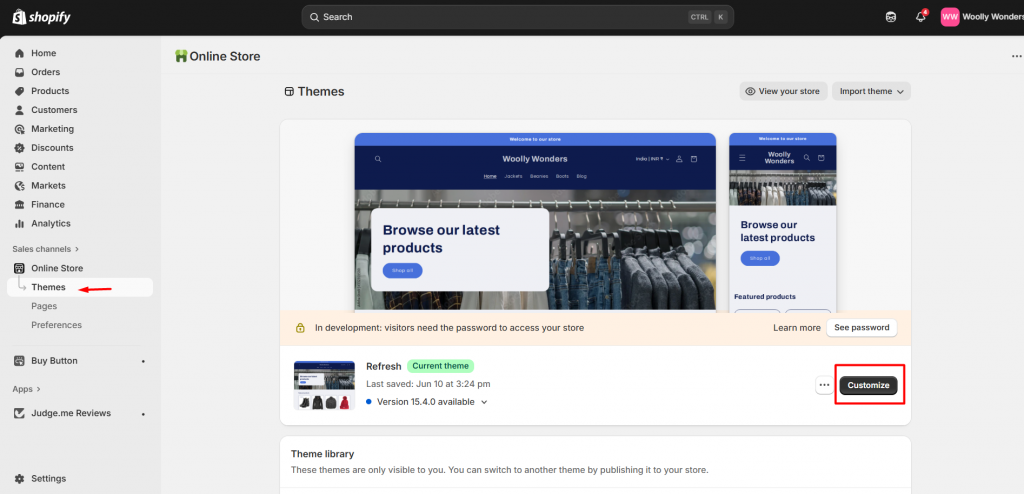
- Use the Theme Editor to change layout, text, and design.
- Shopify’s free and paid themes offer different levels of flexibility.
2. Editing the Code (Advanced)
- Go to Online Store > Themes > Actions > Edit Code.
- Modify page templates directly (requires coding knowledge).
Wrapping Up: Enhance Your Store with Powerful Pages
Creating custom pages in your Shopify store is more than just an add-on it’s an essential step toward building credibility, guiding shoppers smoothly, and addressing their questions upfront. Pages like About Us, Contact, FAQs, and Policies work together to provide a seamless shopping journey that keeps customers coming back.
As a Shopify Expert, we help you create professional pages that build trust and improve customer experience.From About Us and FAQs to custom landing pages, we design them to match your brand perfectly. Let us craft the right pages to elevate your Shopify store and boost conversions.
FAQs
1. How many pages can I create in Shopify?
There’s no strict limit you can create as many pages as your store needs, such as About Us, FAQs, policies, or landing pages. However, it’s best to keep your navigation simple and user-friendly.
2. Can I delete pages in Shopify?
Yes. Go to Online Store → Pages, open the page you want to remove, and click Delete Page. Keep in mind that deleted pages can’t be recovered unless you recreate them.
3. How do I edit page SEO in Shopify?
Open the page in your Shopify admin and scroll to Search Engine Listing Preview. Click Edit Website SEO to update the meta title, description, and URL handle.
4. How to optimize a Shopify product page?
Focus on clear product titles, keyword-rich descriptions, quality images, reviews, and fast loading speed. A well-optimized page improves both SEO and conversions.
5. How to make sub pages in shopify?
You can’t create true sub-pages in Shopify, but you can organize pages under dropdown menus in your navigation. Go to Online Store → Navigation → Main Menu, add your page, then drag it under another menu item to create a “sub-page” effect.




About the author
Bhavesha Ghatode
Explore Content with Bhavesha, a passionate and dedicated technical content writer with a keen understanding of e-commerce trends. She is committed to sharing valuable insights, practical assets, and the latest trends that can help businesses thrive in a competitive environment.