You can build a zone using postal codes, and add product-based conditions to the same zone. This means you can set a shipping price for a specific postal code range, and then narrow it down further to a specific product, product type, or product tag.
This guide walks you through the full zone creation process, including the new condition options.
Access the Create Zone feature
- Open your Rates by Zipcode iWeb app dashboard.
- Find the Add Zone option in the dashboard menu and click on it.
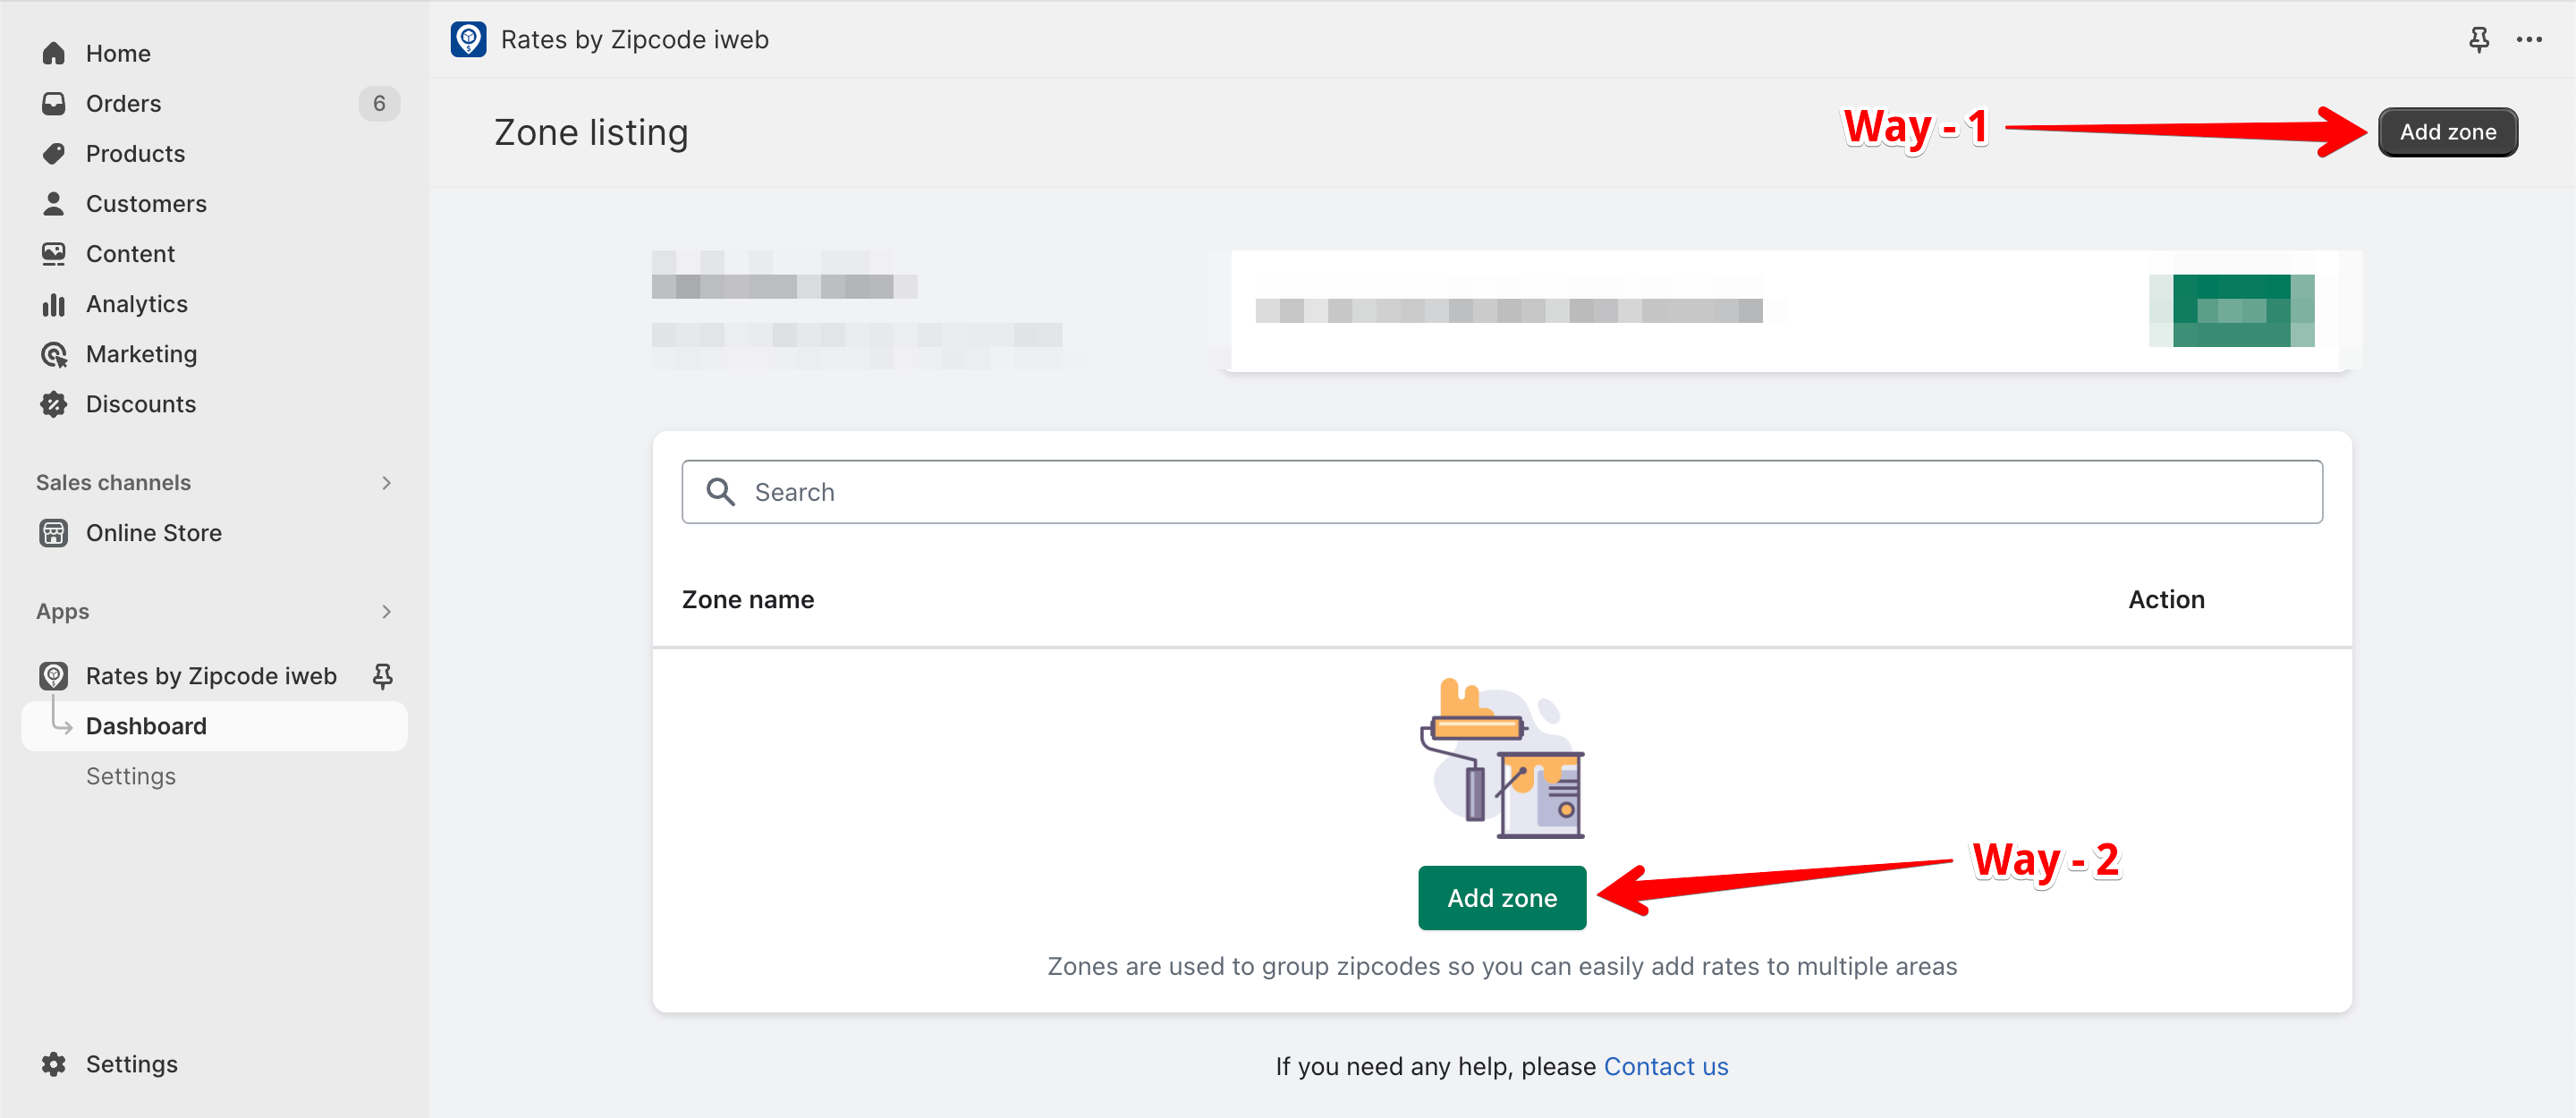
After you click Add Zone, you will see the zone details form. Let’s go through each part of it.
Enter zone details
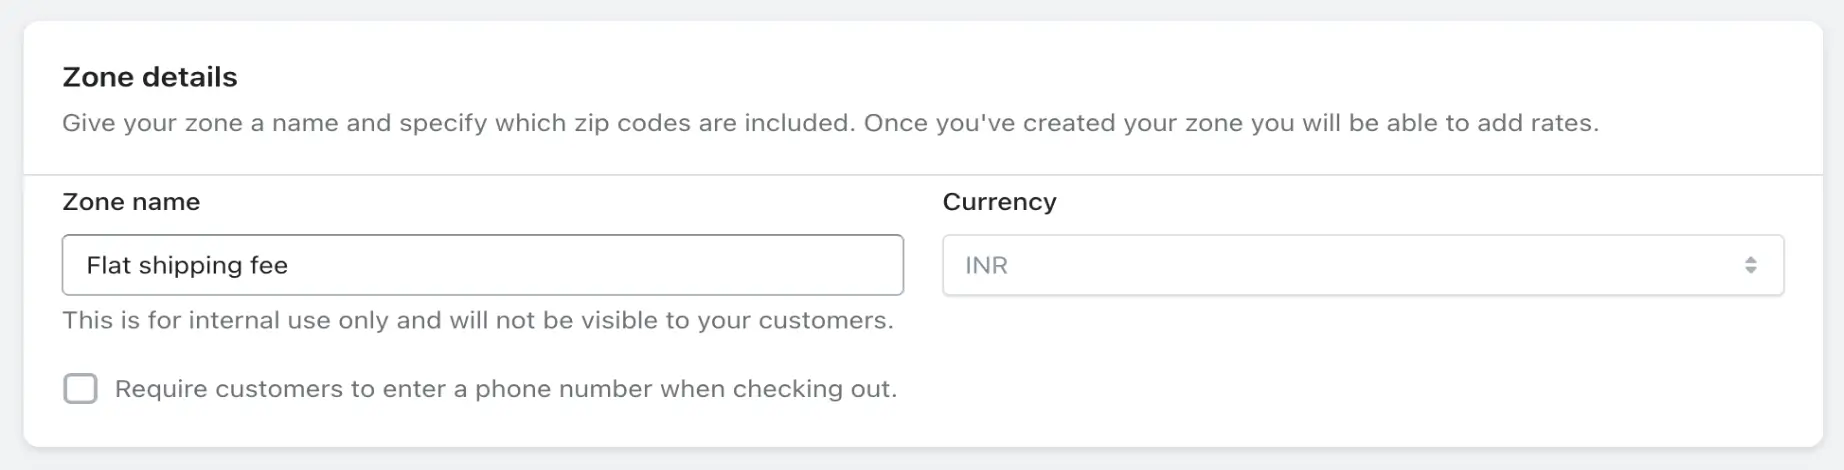
Zone Details
Zone Name Text
Give your zone a name, like “Flat Shipping Fee” or “International Zone.” This name is only for your own reference. Your customers will never see it.
Currency Dropdown
Your store’s currency shows up here automatically, so you do not need to change anything.
Require phone number Checkbox
Turn this on if you want customers in this zone to enter a phone number at checkout. This helps you reach out to them about their order if needed.
Set up conditions
This is where the new update comes in. Conditions decide exactly when a shipping price should apply. You can now combine a postal code range with product-level rules, all in the same zone.
Match type Radio
All
Every condition you set up below must be true. Only then does the shipping price apply.
Any
If even one of the conditions below matches, the shipping price applies.
Not all
The shipping price applies only when none of the conditions below match.
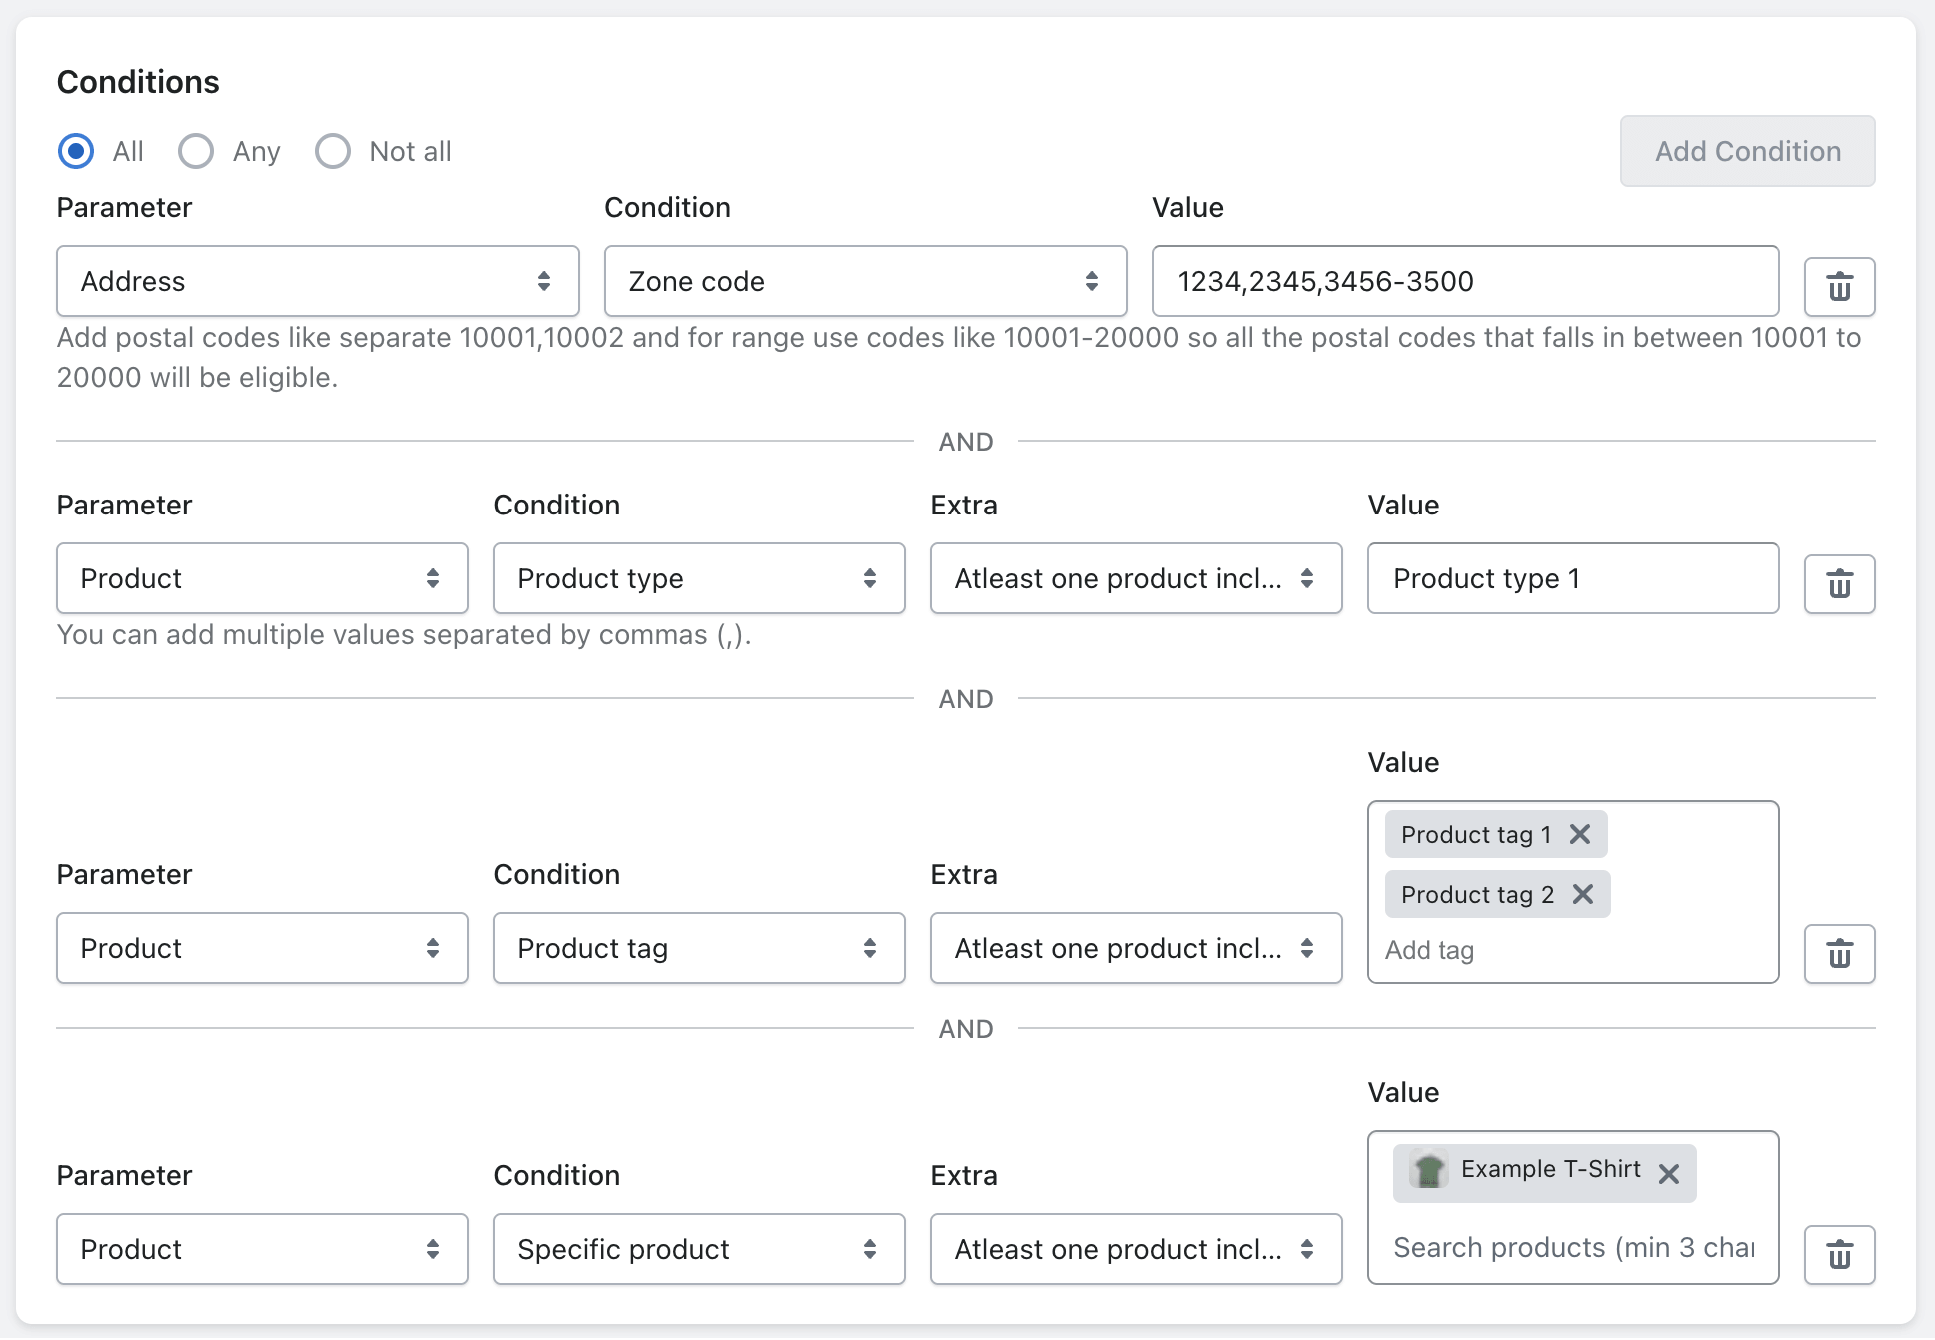
Address condition Parameter
Address → Zone Code Text
Select Address as the parameter and Zone code as the condition. Then, add the postal codes you want to include in this zone.
You can add single codes separated by commas, like 1234, 2345. You can also add a range, like 3456-3500, to include every postal code that falls in between.
Product condition
Click Add Condition to bring in a product-based rule alongside your postal codes. Under Parameter, choose Product, and then pick one of these three conditions.
Extra Dropdown
Once you pick a product condition, choose how the Value field should be checked using the Extra dropdown.
At least one product include
The condition matches if the order has at least one product from your Value list.
At least one product exclude
The condition matches if the order does not have even one product from your Value list.
All products include
The condition matches only when every product in your Value list is present in the order.
All products exclude
The condition matches only when none of the products in your Value list are present in the order.
All the conditions you add to a zone are always combined with AND logic. There is no OR option between conditions inside a single zone.
Review and save
Check the zone name, currency, postal codes, and every condition you have added. Once everything looks right, click Create Zone.
Set up rates for your zone
After you save the zone, you can create shipping rates for it. You can set rates based on order value or order weight.
Order value rate
Set a minimum and maximum cart value, then enter the rate that applies within that range.
Order weight rate
Set a minimum and maximum order weight, then enter the rate for that weight range.
Common use cases
Flat fee for one product in a region
You want postal code 1234 to get a flat shipping fee, but only when the order has Product ABC. Add an Address condition for 1234, then a Product condition for Specific Product ABC, and set Match type to “All.”
Exclude fragile items from a Zone
You want a zone’s rate to skip any order containing a “Fragile” tagged product. Add a Product Tag condition with “Fragile” and set Extra to “At least one product exclude.”
Category-wide shipping rule
You sell furniture and want a separate shipping price for the whole “Furniture” product type, no matter the postal code. Add a Product Type condition for “Furniture” and set Match type to “Any.”
Tips & best practices
2. Use “All” for tightly targeted rules — this is the best choice when you want a postal code and a product to match together.
3. Test with a sample order — after saving your zone, place a test order that matches your conditions to confirm the rate applies as expected.
4. Keep condition lists short — a focused list of products or tags in the Value field is easier to manage and update later.