Hide Payment & Shipping iWeb on your Shopify store’s checkout page can greatly improve the user experience. The “Hide/Delete” rules in the Hide Payment & Shipping iWeb Shopify app enable you to hide or delete specific payment methods under various conditions. This guide will walk you through creating, managing, and understanding these rules.
Overview
Hide/Delete rules serve a critical purpose—they allow you to control which payment methods are visible to customers during the checkout process. These rules can be used to hide or delete specific payment options based on conditions you define.
Creating Your First Hide/Delete Rule
If you haven’t created any hide/delete rules before or if you’re visiting this section for the first time, you’ll see an option to “Add Rules”. This is your starting point for creating custom hide/delete rules.

Managing Existing Rules
If you’ve already created hide/delete rules, you’ll find a list displaying all the rules you’ve created. This list provides important details for each rule, including the title, status (enabled or disabled), creation date, update date, and action options.
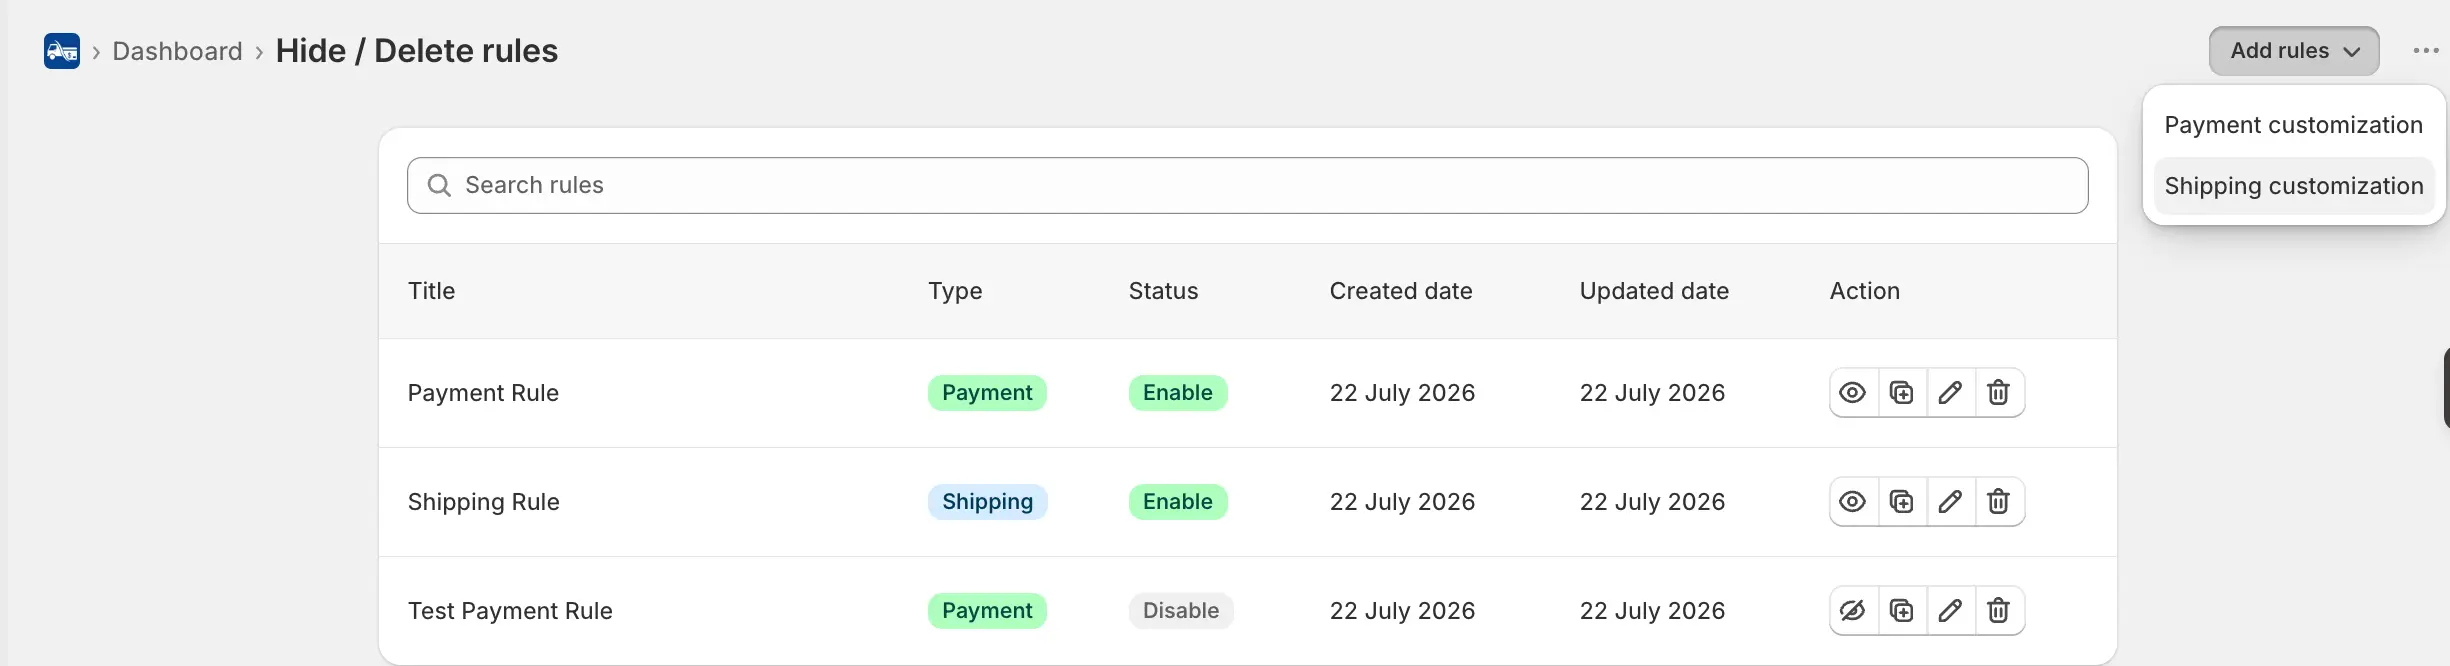
Understanding Rule Actions
Enable/Disable: You can toggle the status of each rule to enable or disable it. An enabled rule is active and will apply its conditions, while a disabled rule is inactive and will not affect payment methods.
Copy: This action allows you to duplicate an existing rule, making it easy to create similar rules with minor adjustments.
Edit: Clicking “Edit” lets you modify the conditions, name, or any other settings of a rule that you’ve created.
Delete: Use the “Delete” action to remove a rule permanently from your list of hide/delete rules.
Creating a New Hide/Delete Rule
To create a new hide/delete rule, follow these steps:
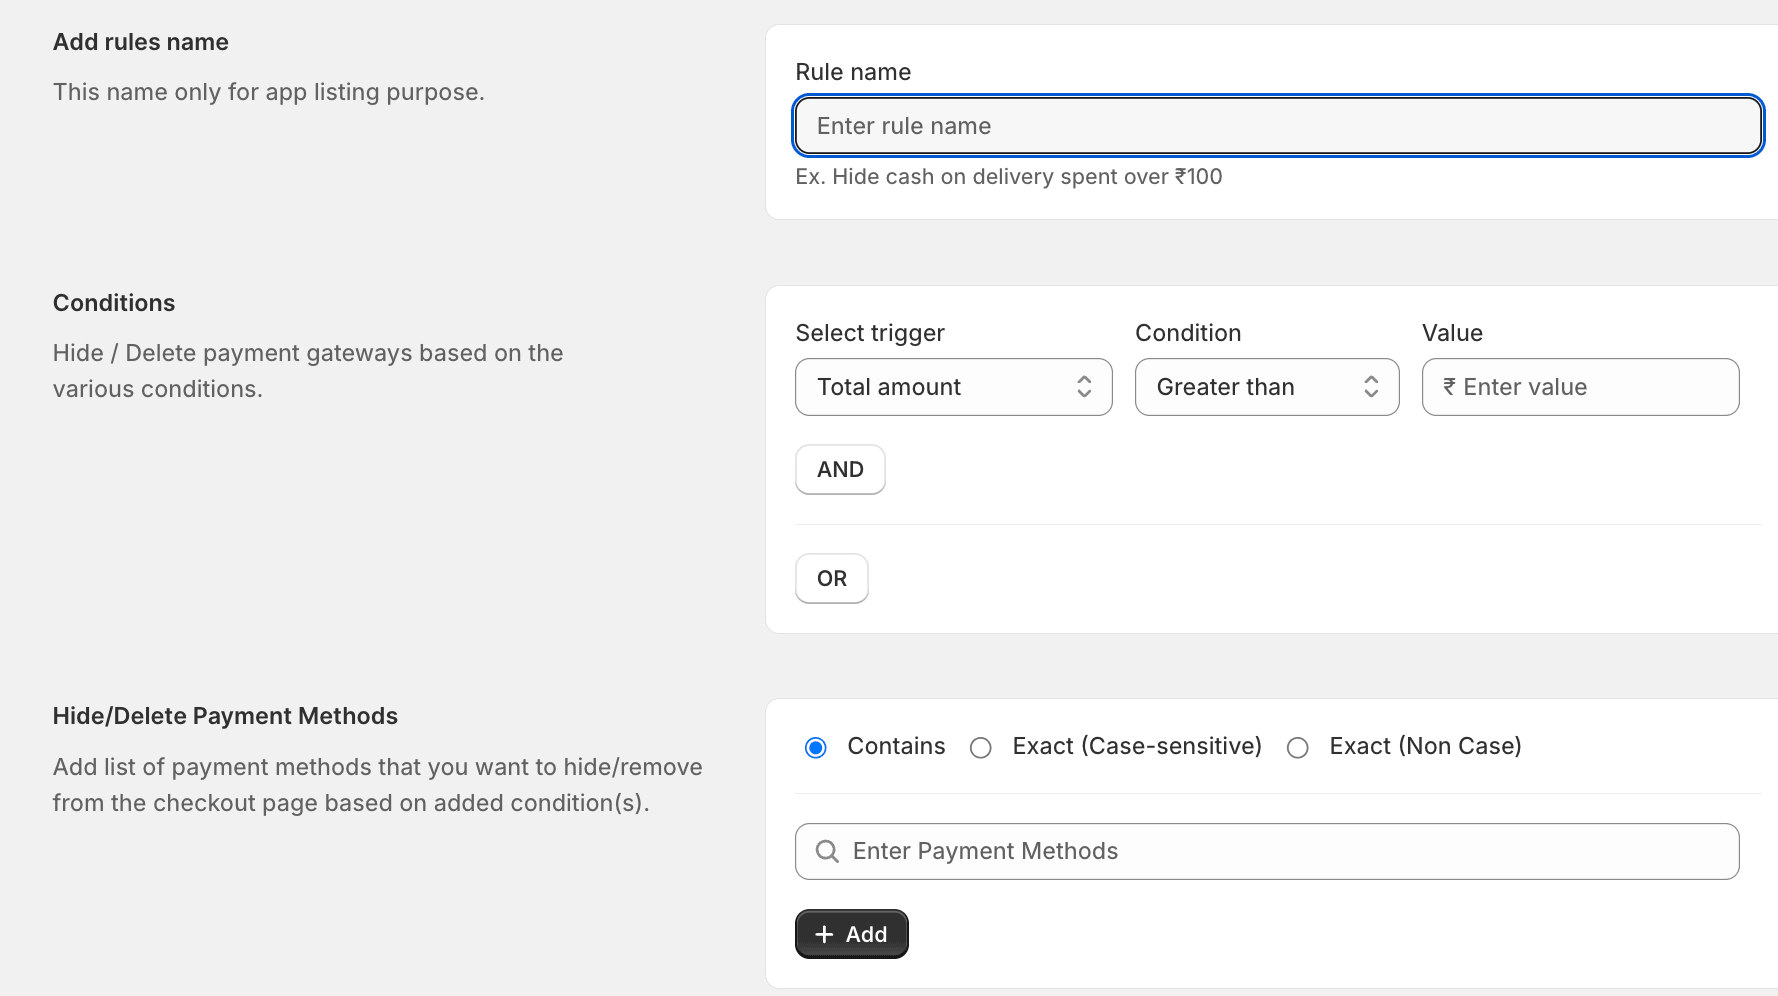
Add Rule Name
Give your rule a meaningful name to help identify its purpose. This name should provide a clear indication of what the rule does.
Conditions
Next, you’ll set the conditions that trigger the rule. Conditions determine when the rule activates and hides or deletes payment methods.
Select Trigger
Choose from various trigger options, depending on your requirements. Triggers can include specific cart contents, customer details, order attributes, product characteristics, location, or delivery/shipping options.

Conditions
Define the conditions using operators like “greater than,” “less than,” “equals to,” “not equals to,” and “between.”
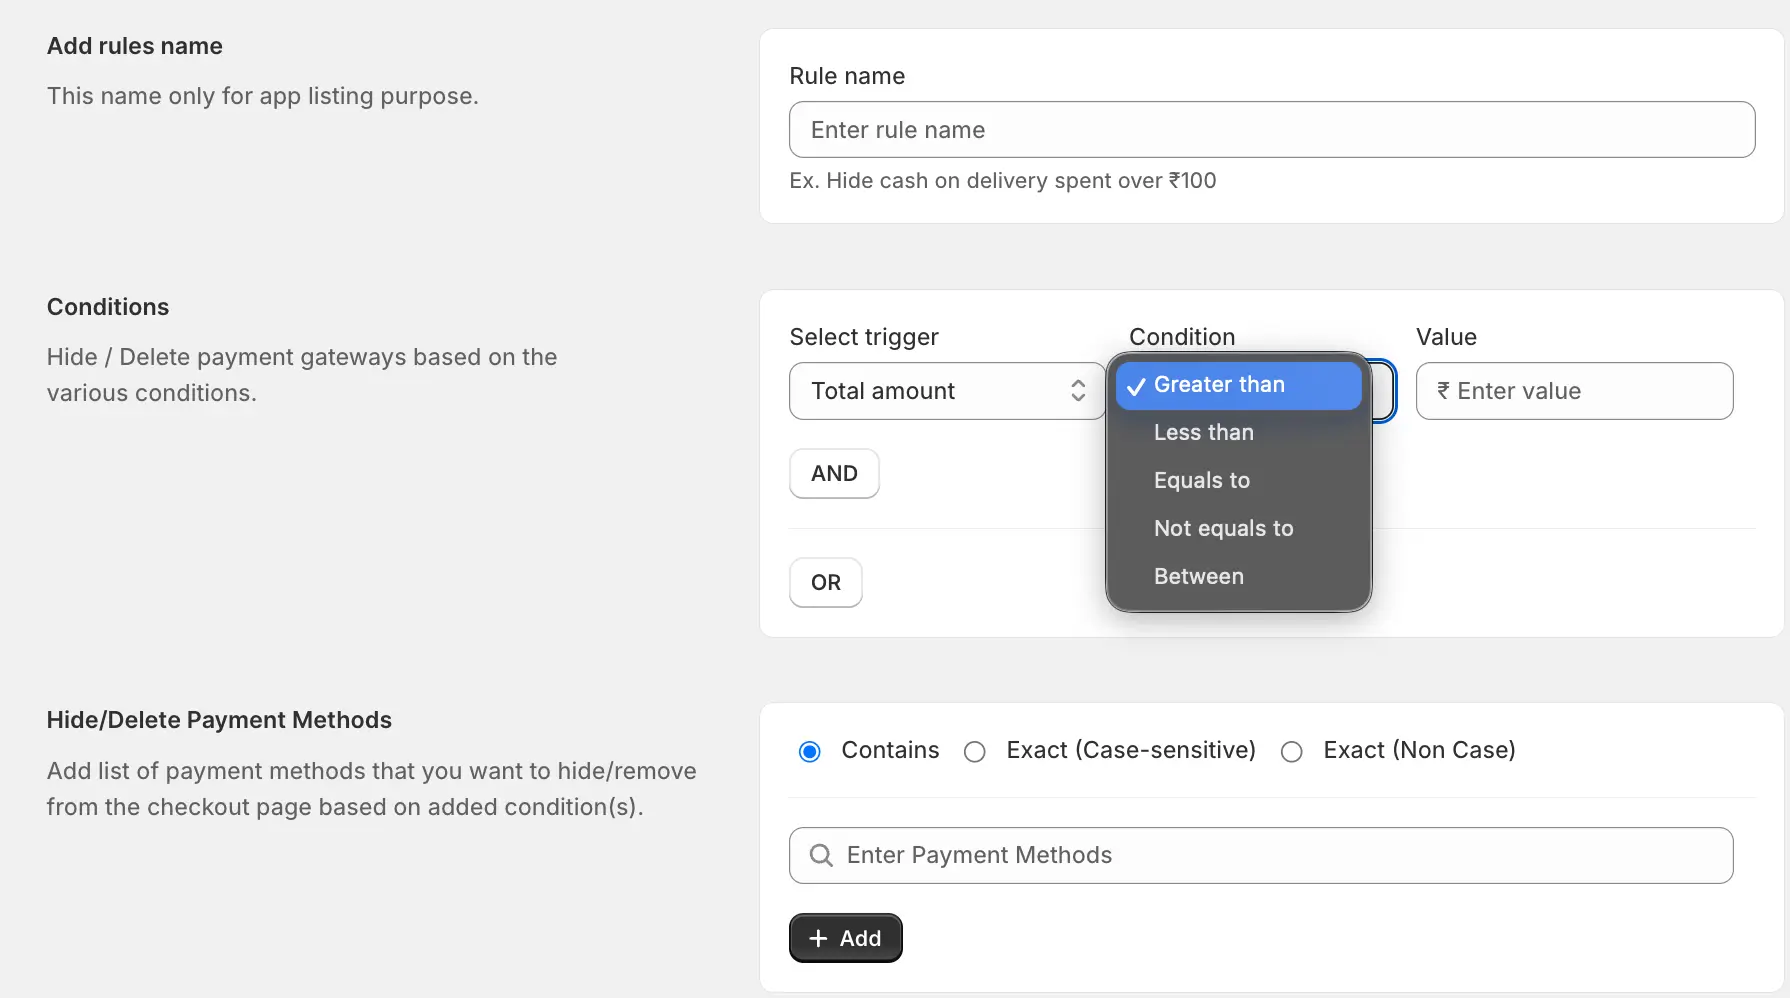
Value
Specify the values that must be met for the condition to trigger the rule.
Note: You can merge conditions using “AND” and “OR” to create complex rule sets.
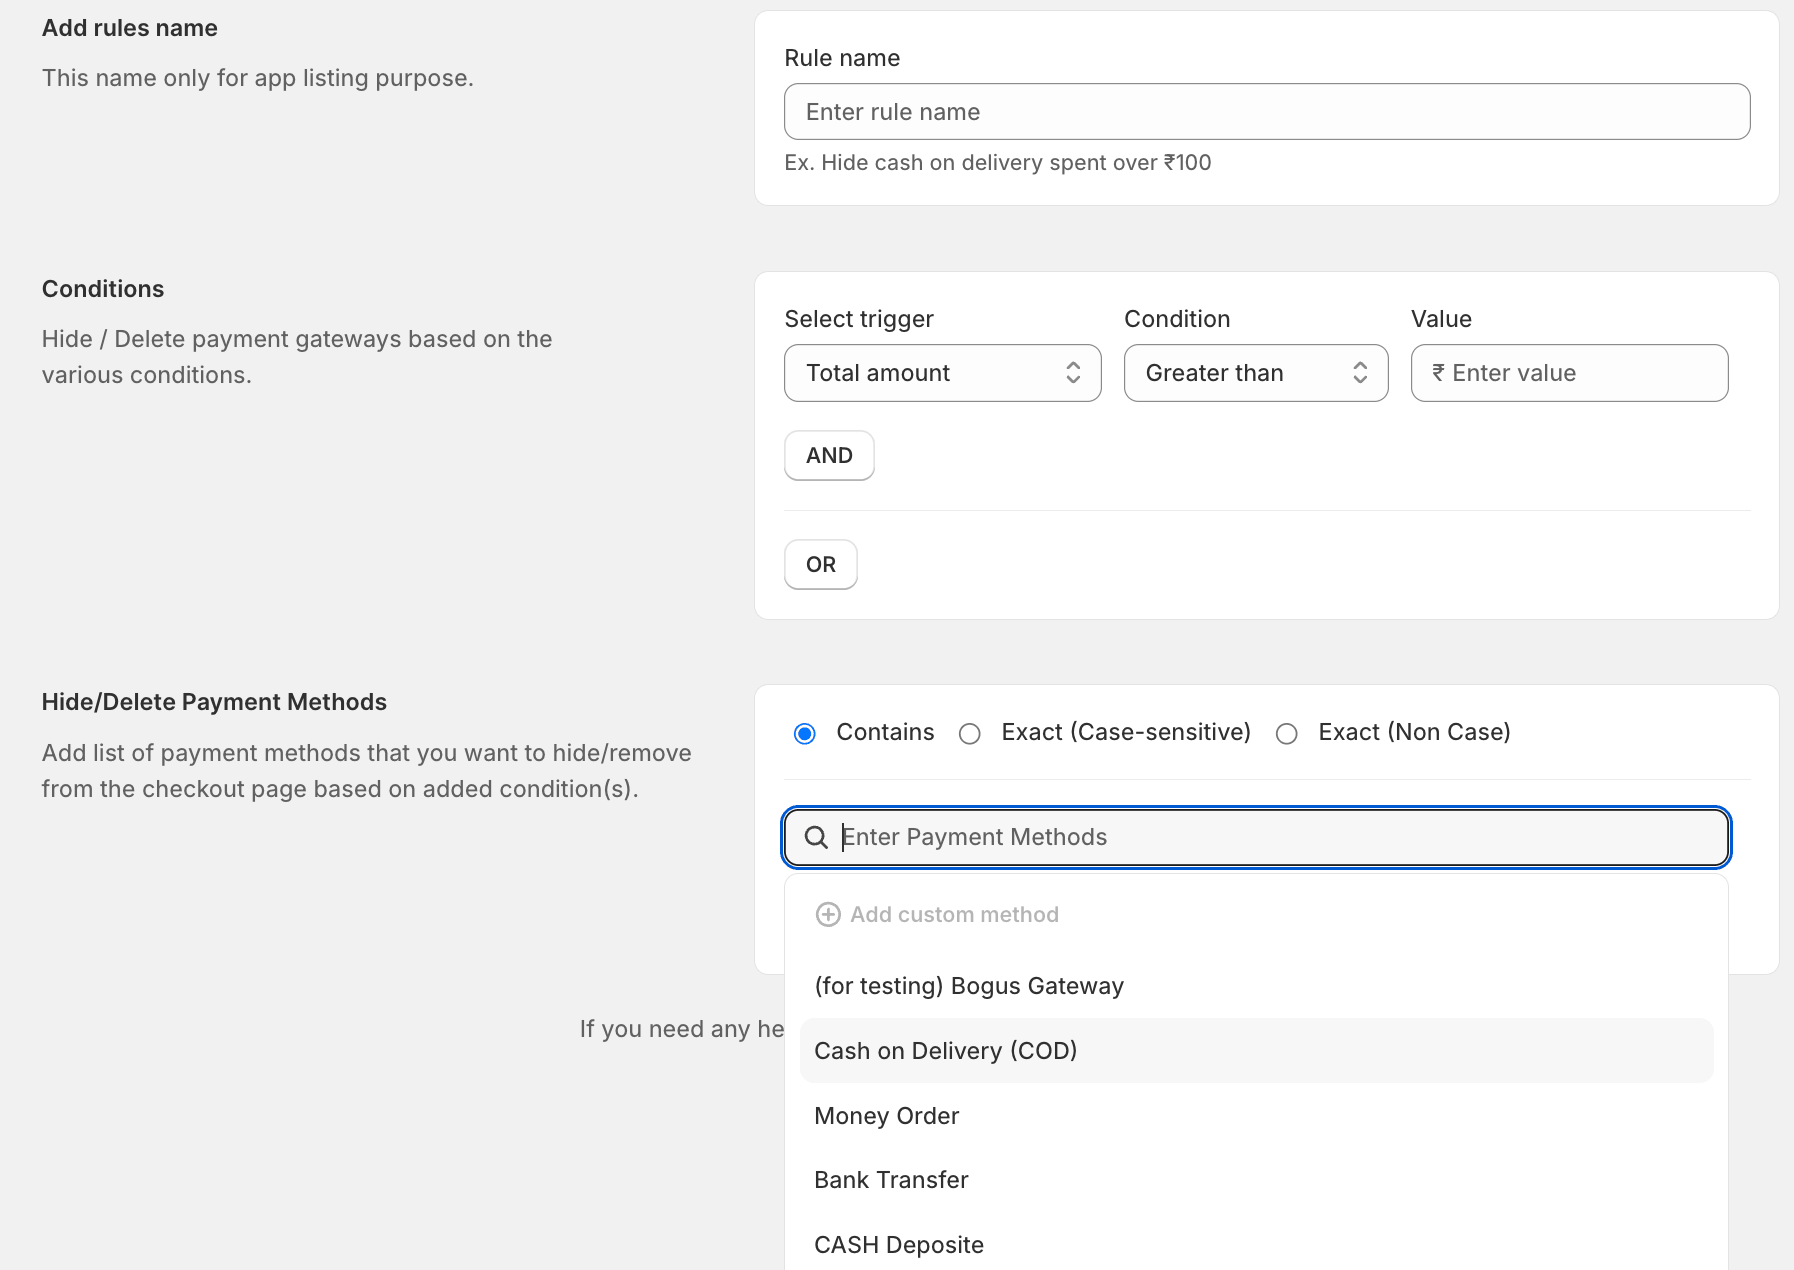
Allowed Payment Methods
Here, you can add a list of payment method titles that should be allowed when this rule is active. You have options for specifying matching methods:
- Contains
- Exact (Case-sensitive)
- Exact (Non-Case)
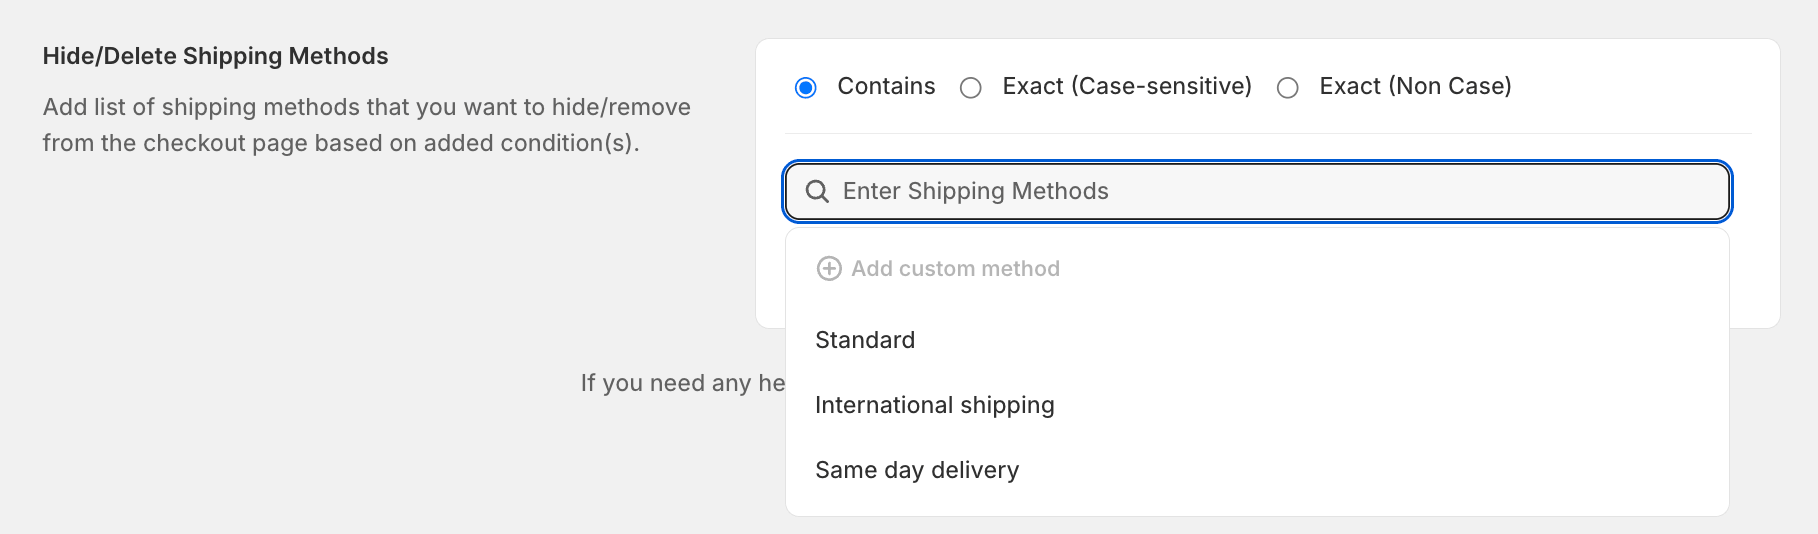
Allowed Shipping Methods
Here, you can add a list of shipping method titles that should be allowed when this rule is active. You have options for specifying matching methods:
- Contains
- Exact (Case-sensitive)
- Exact (Non-Case)
With these steps, you can create, manage, and customize hide/delete rules within the Hide Payment & Shipping iWeb Shopify app. These rules allow you to tailor the payment method options presented to your customers, providing a smoother and more personalized checkout experience.