Overview
The Blog Metafields feature in the All in One Metafields Shopify app allows merchants to add custom fields to their blog posts, making it easier to store additional information such as SEO metadata, extra content, or any other specific data needed for blog customization. This feature offers flexibility and enhances the blog’s functionality, allowing store owners to manage content beyond Shopify’s default capabilities.
Steps to Add Metafields to a Blog
To add metafields to your blog posts using the All in One Metafields app, follow these steps:
- Login to your Shopify store.
- Click on the “Apps” menu in your Shopify admin panel.
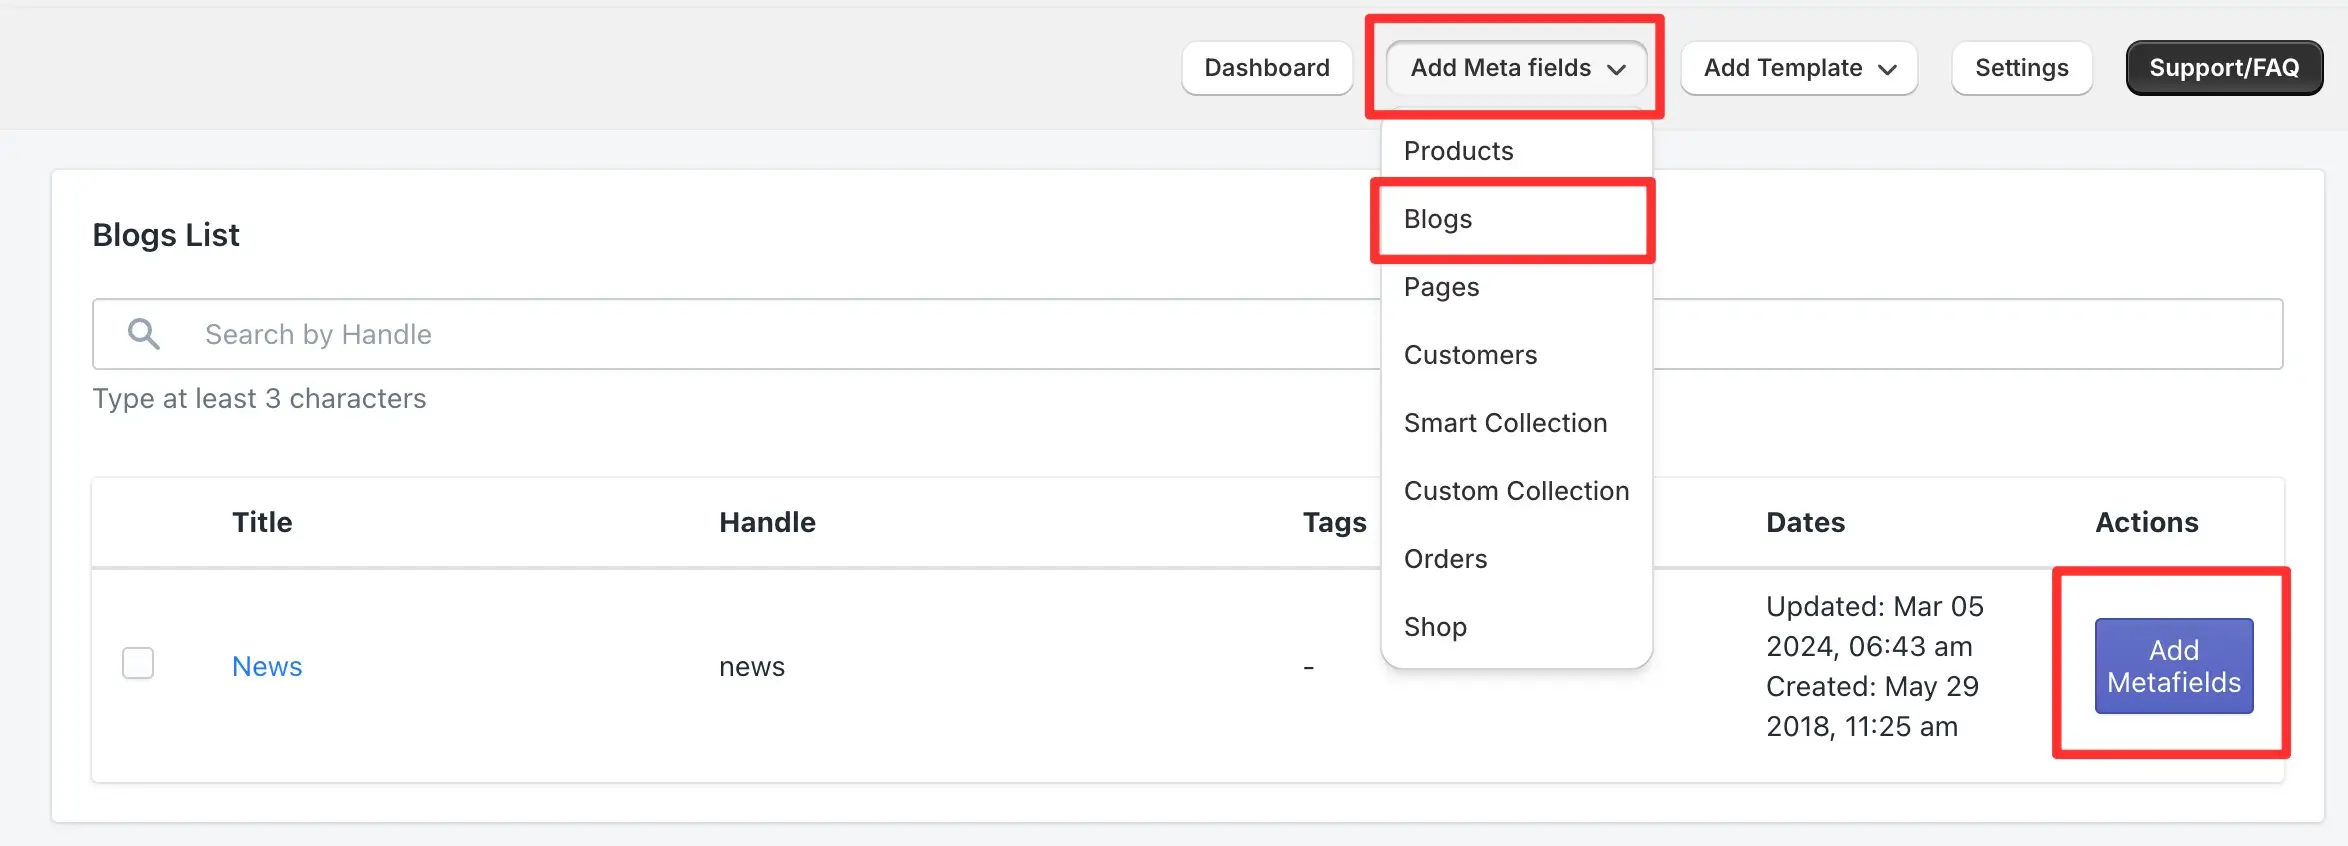
- Select the “All in One Metafields” app from the list of installed apps.
- Click on the “Add Metafields” dropdown, and select Blogs.
- From the list of blogs, locate the blog to which you want to add metafields and click the “Add Metafield” button under the Action column.
- Add the necessary metafields for the selected blog, and customize them according to your needs.
How to Enable Metafields in the Blog Theme
Once you’ve added the metafields, you need to enable them in your theme to display them on the blog page. Follow these steps to achieve that:
➝ Login to your Shopify store if not already logged in.
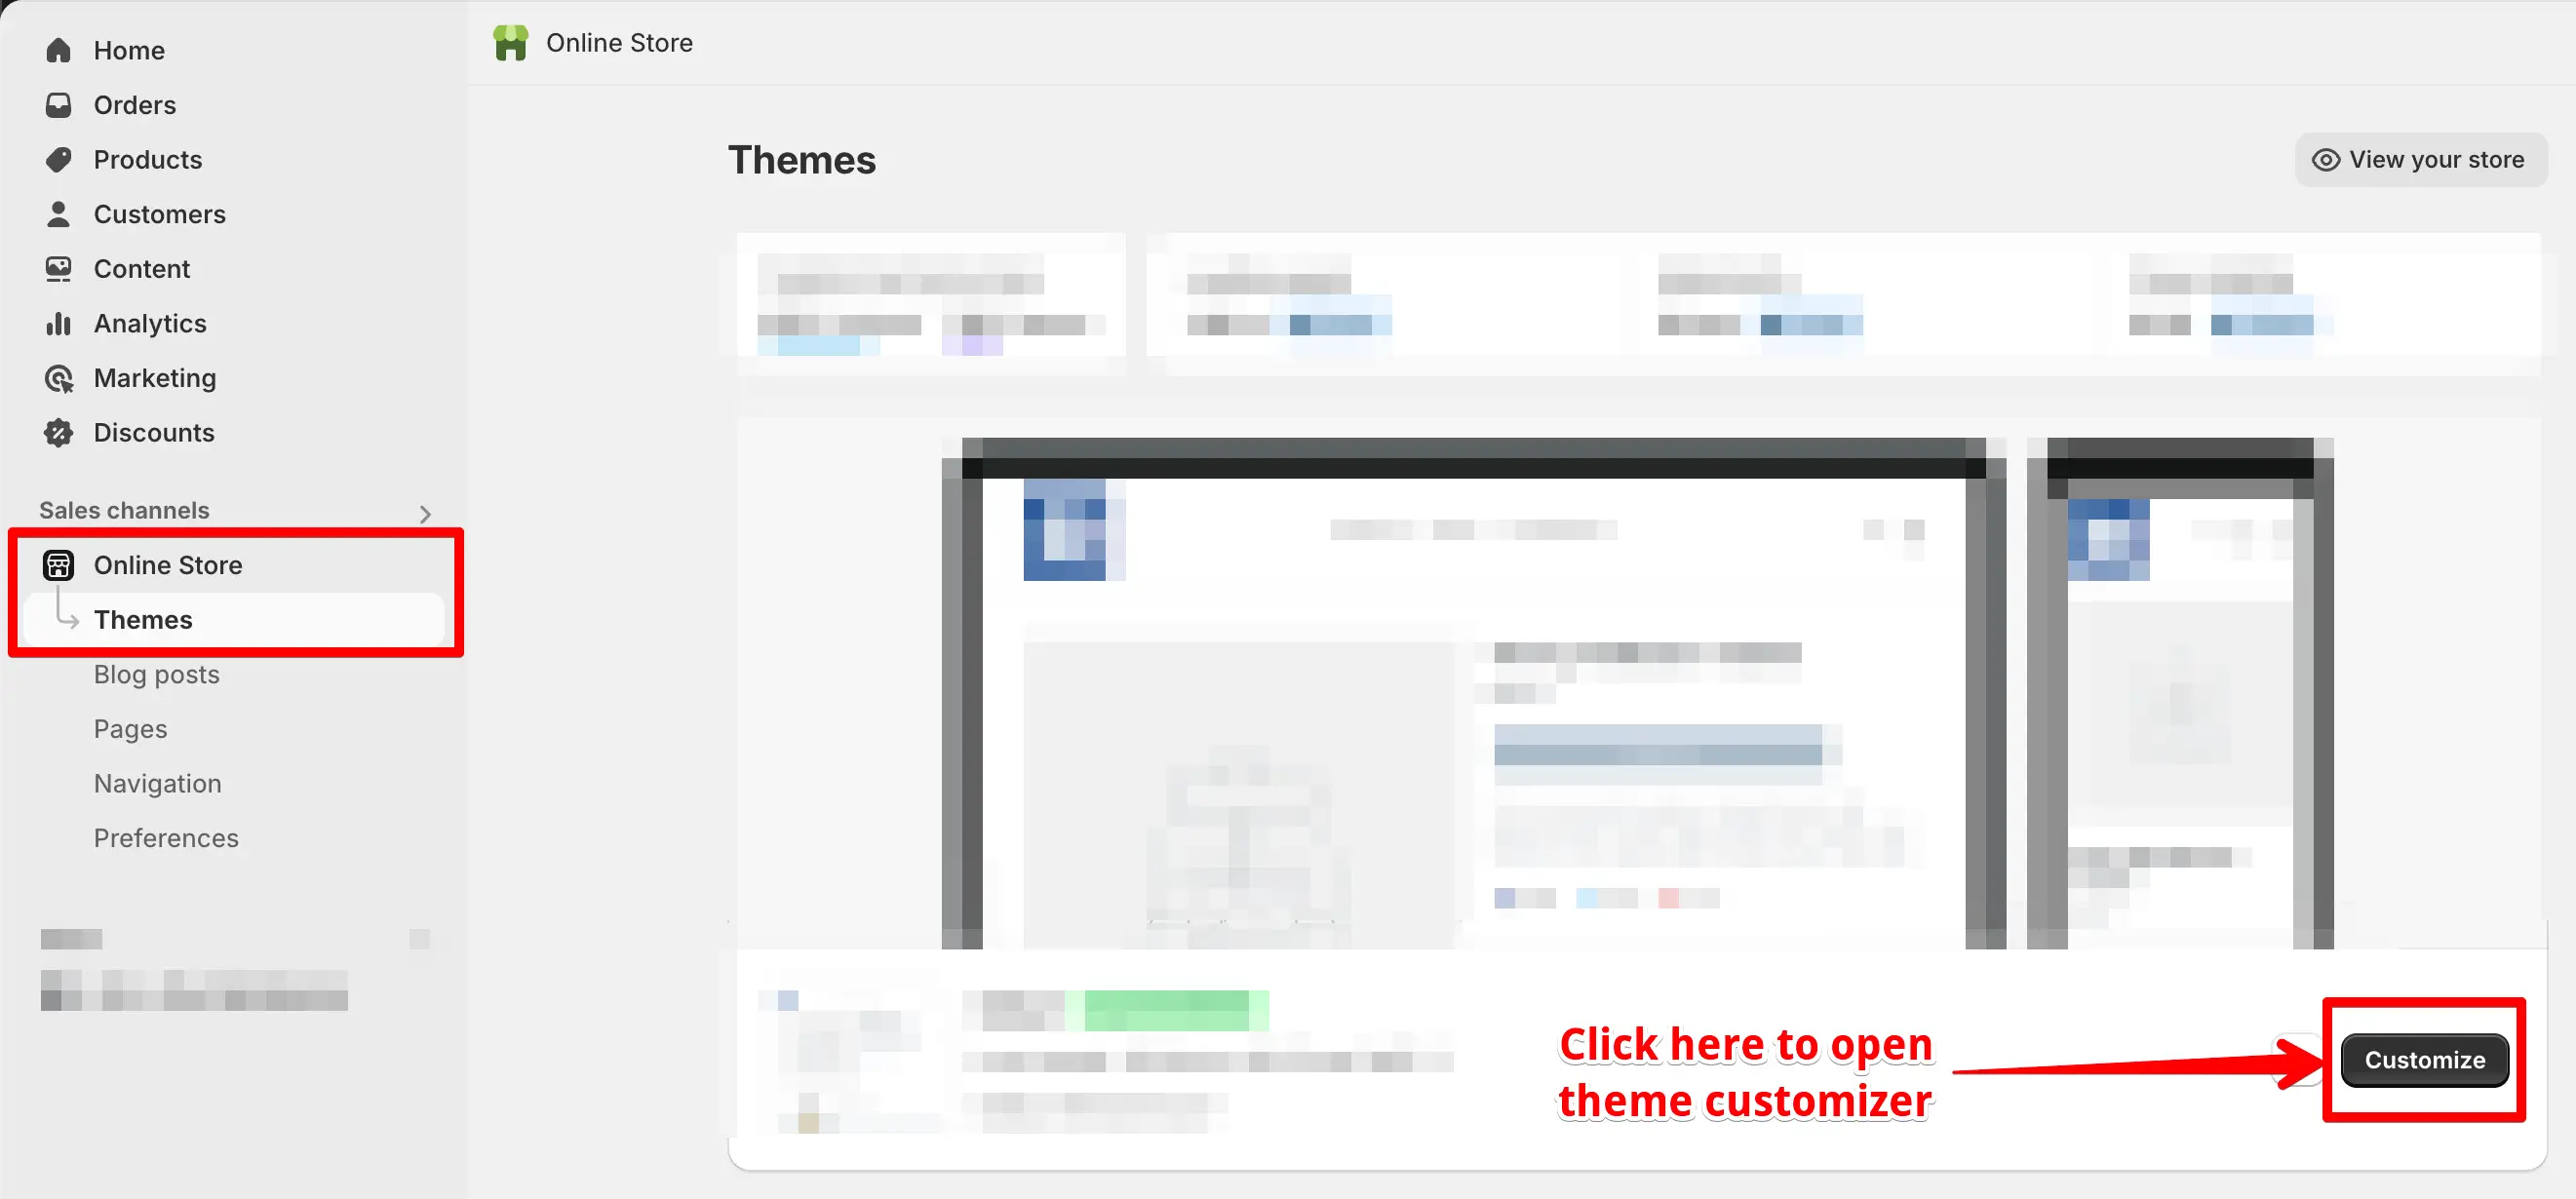
➝ In the admin panel, click on “Online Store” from the main menu.
➝ Click the “Customize” button next to your published theme.
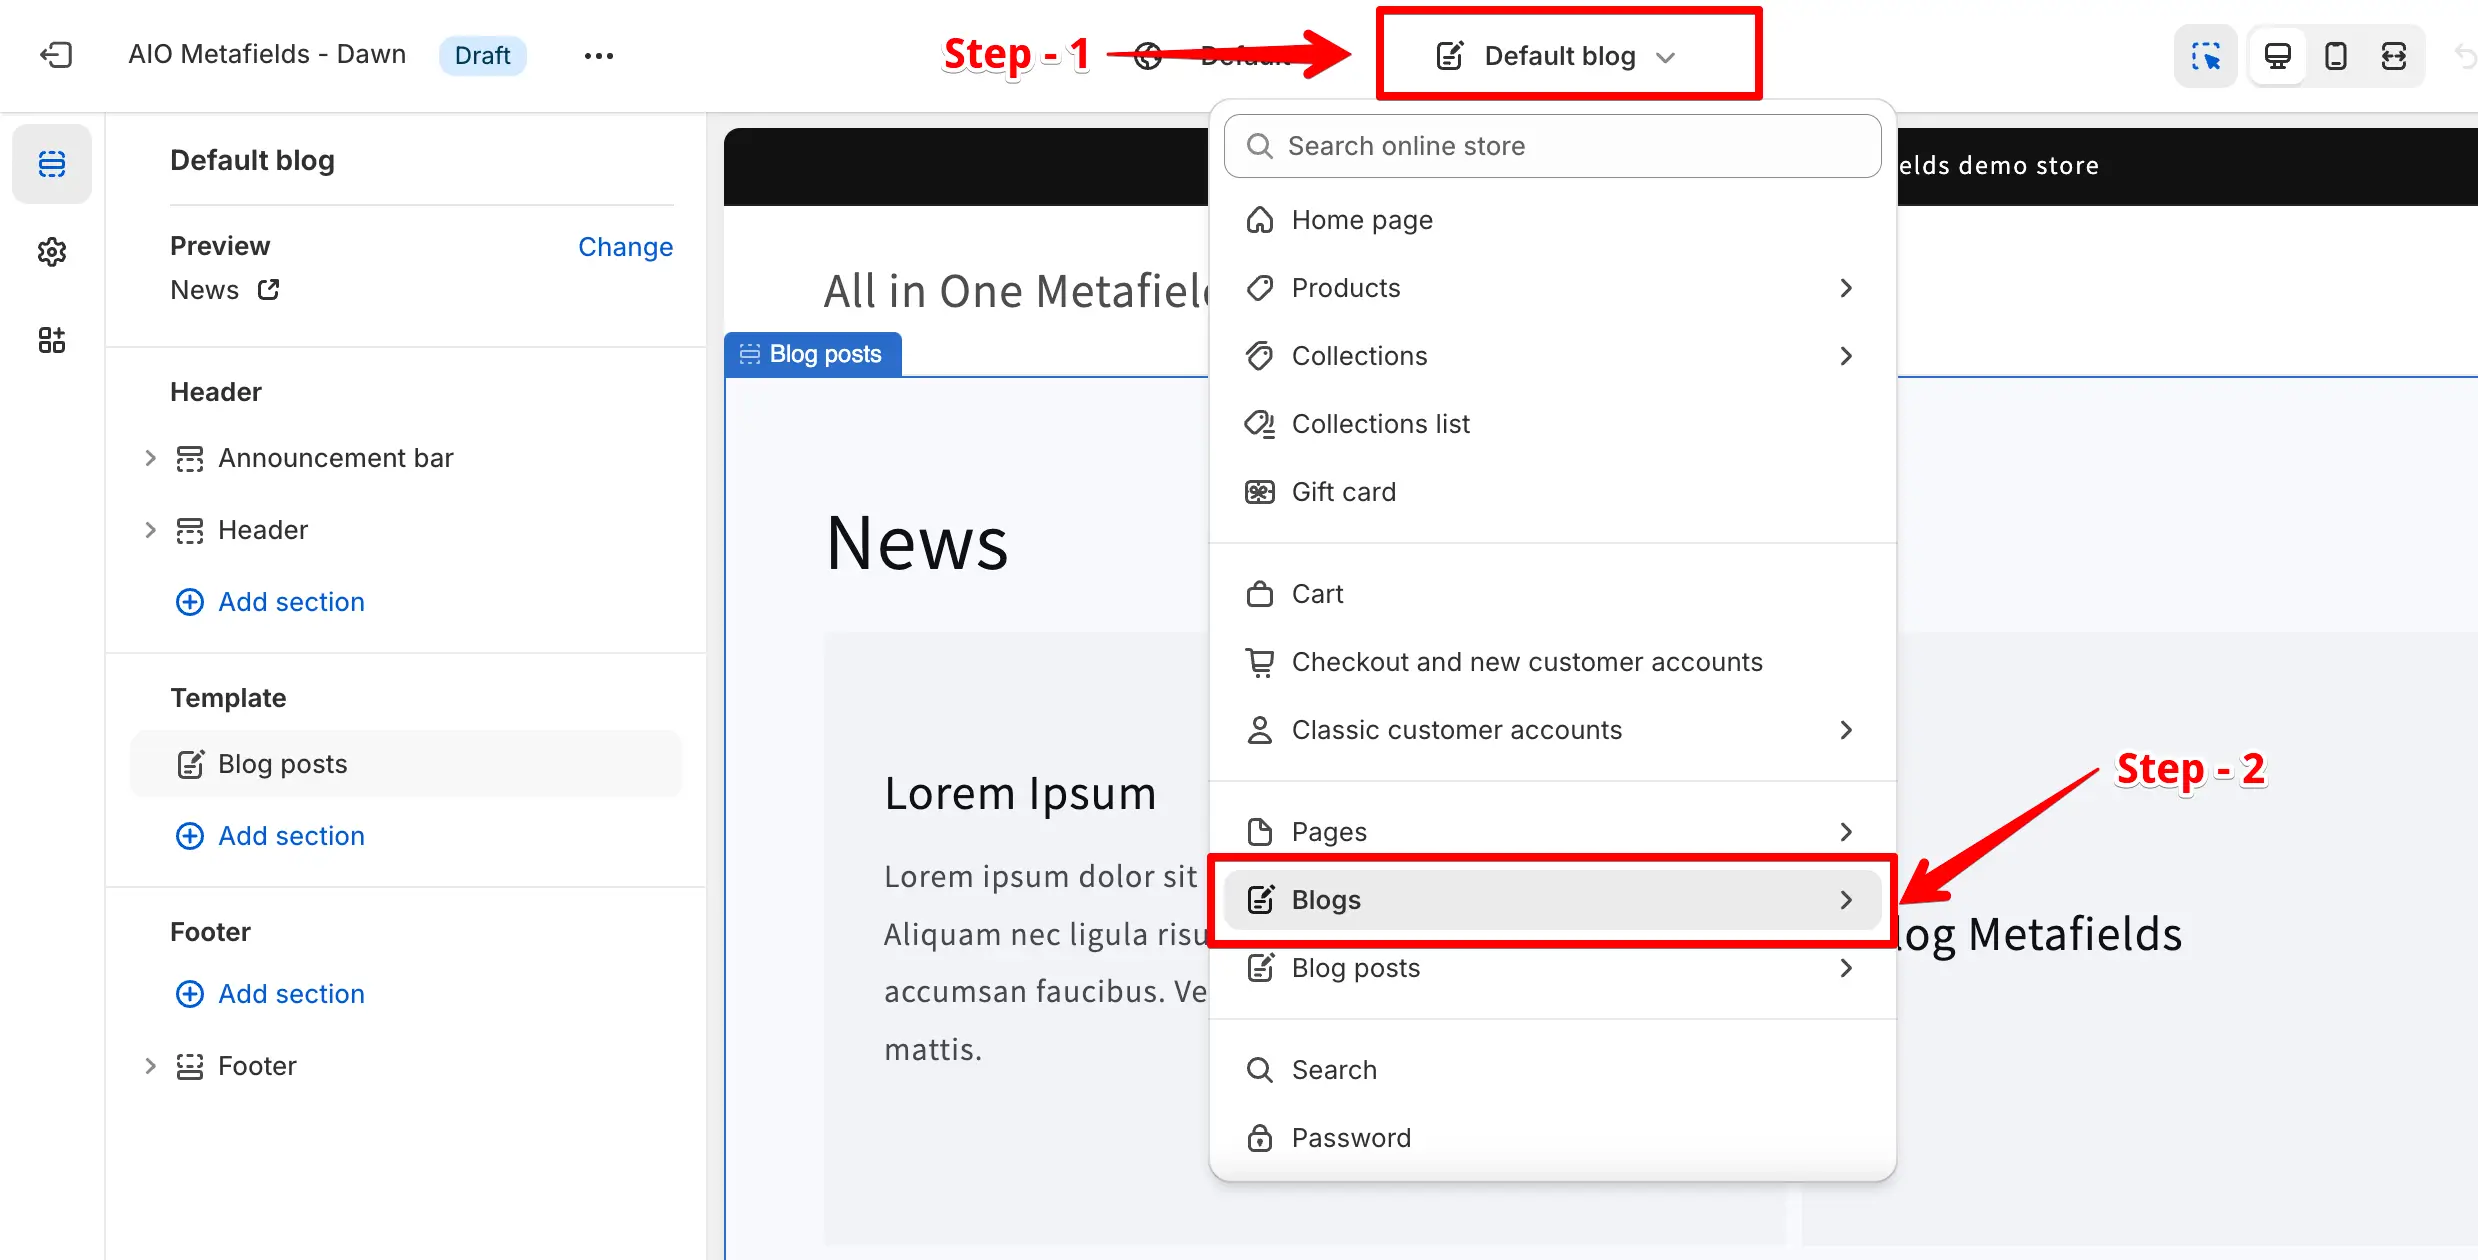
➝ From the top-center dropdown, navigate to “Blogs > Default Blog” to customize the blog template. Click on “Add Section” in the left panel.
➝ Navigate to the “Apps” tab, and select the “Blog Metafields” app block.
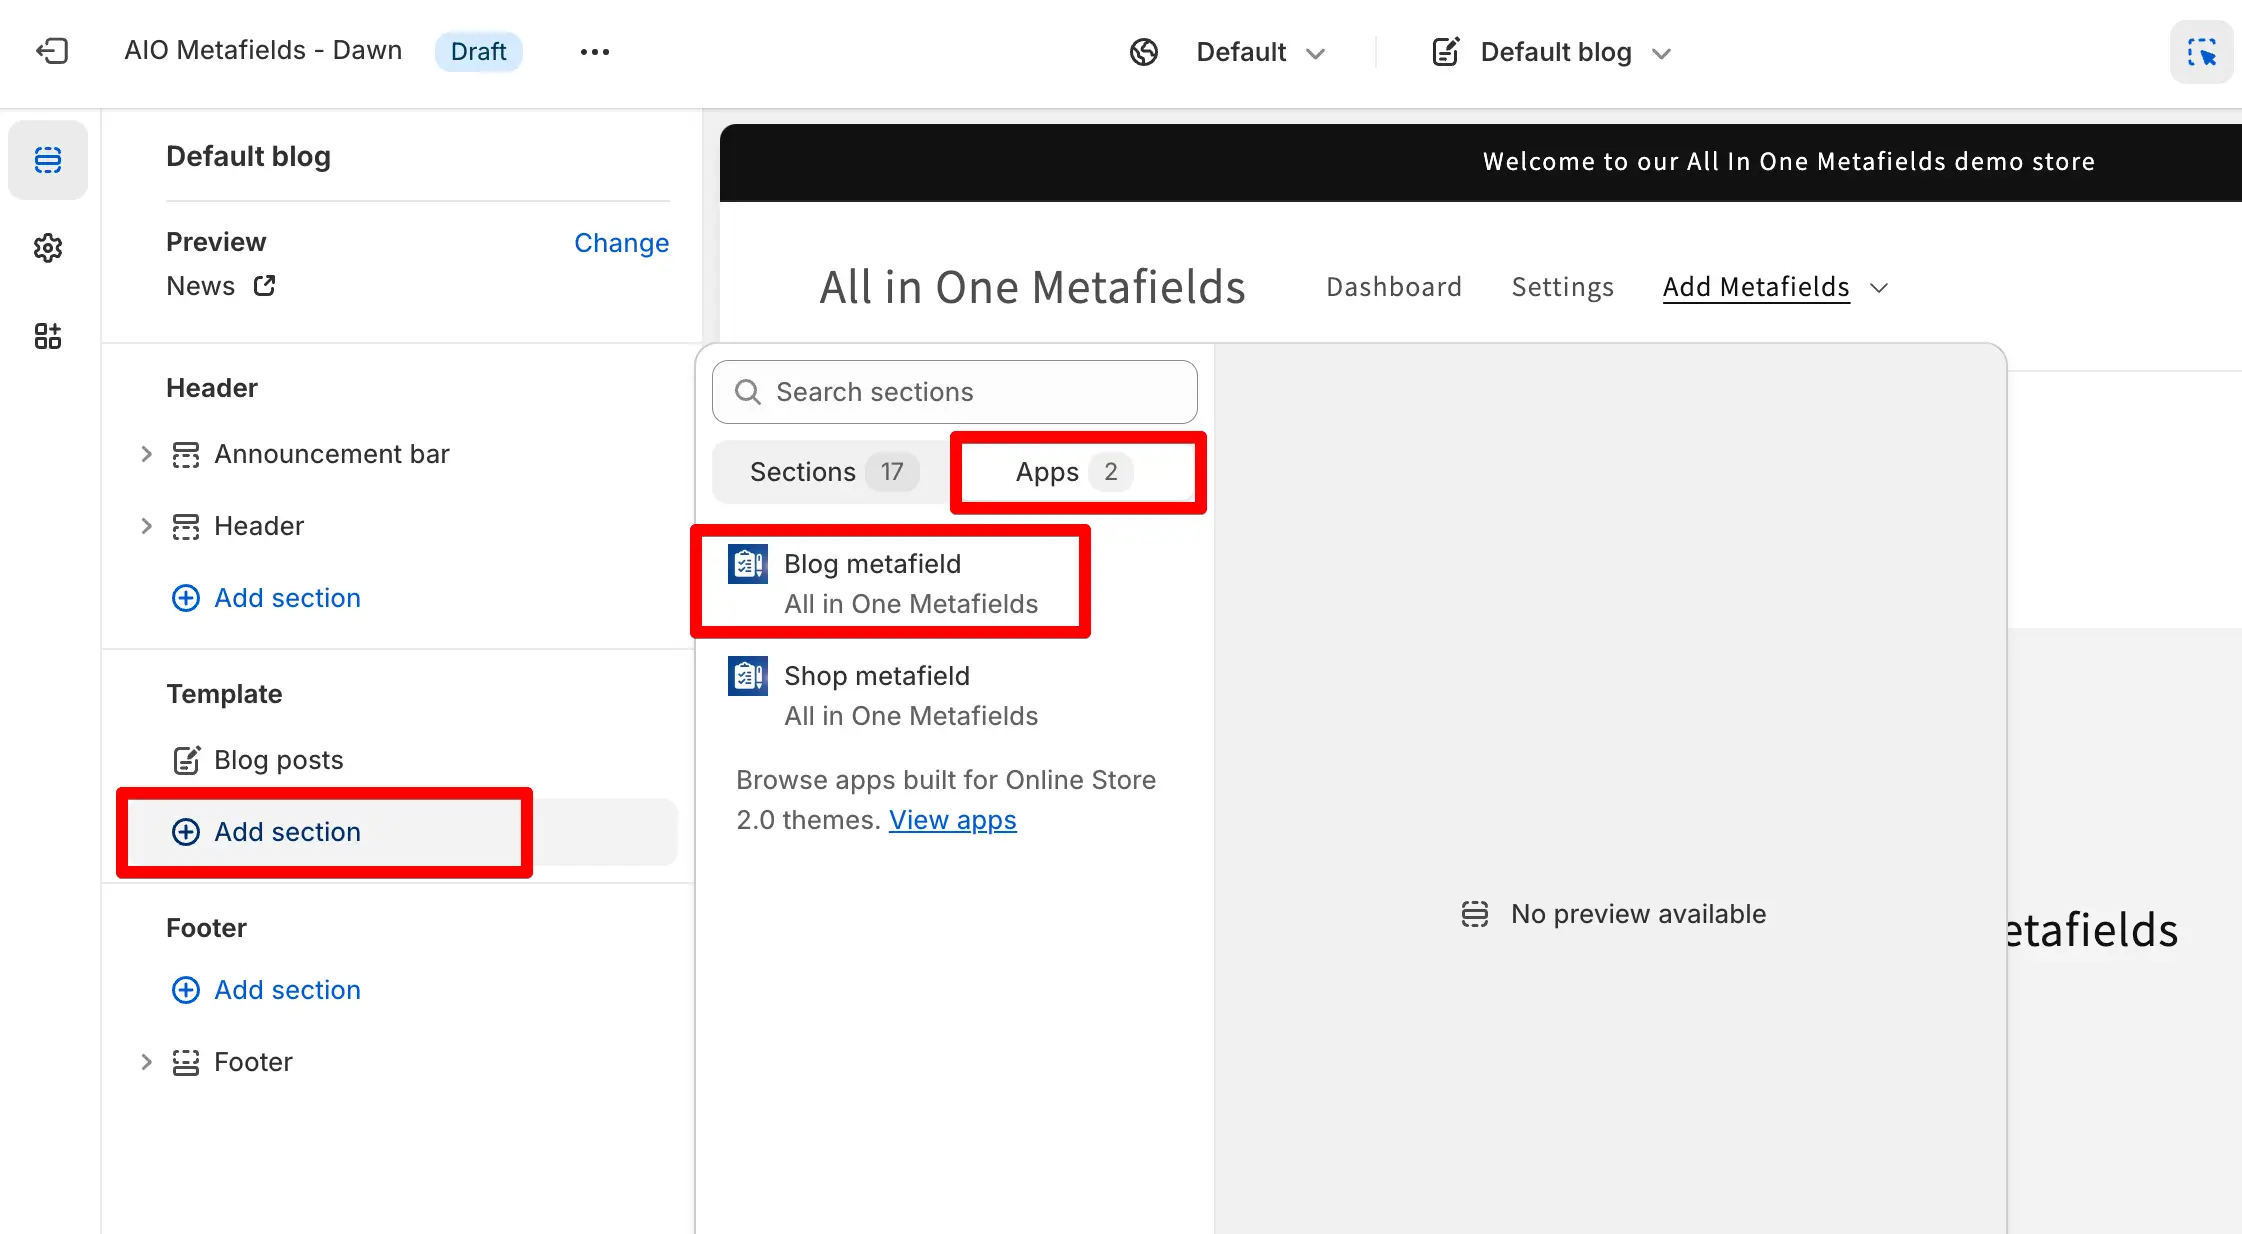
➝ Click “Save” to apply the changes to your blog page.
After following these steps, the metafields you added will be displayed on your blog page. If you encounter any issues or have further questions, feel free to contact our support team through our live chat widget or by emailing us at [email protected]. We’re here to help!