


Are you in search of a guide to get started with Advance Reorder in your store? Here is the complete guide that gives you step-by-step instructions from installation to the customization of Advance Reorder - Repeat Order.
How to install Advance Reorder in your store?
For quick and easy installation follow the below steps:
Step 1: From the Shopify app store browse the app and open the page of the app, now you will see a button called “Add app” as shown in the screenshot below. Click on it.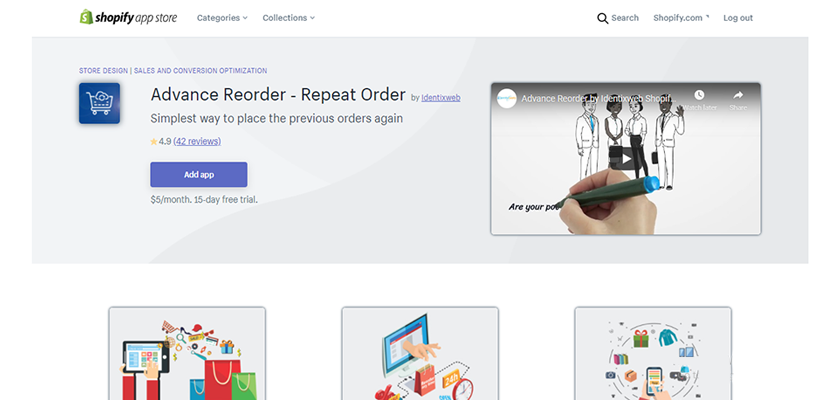
Step 2: After clicking on the above step if you are not logged in to your store then a popup will appear to enter your store URL. After login in to your store, you will be redirected to a page as shown below. Read the lines detailing the access you will grant from Advance Reorder, and click on the “Install app” button.
Step 3: After the above step, you can start your free trial by clicking on the “Start free trial” button. And now you can activate the app in your store by clicking on the “Enable” button as shown in the screenshot below.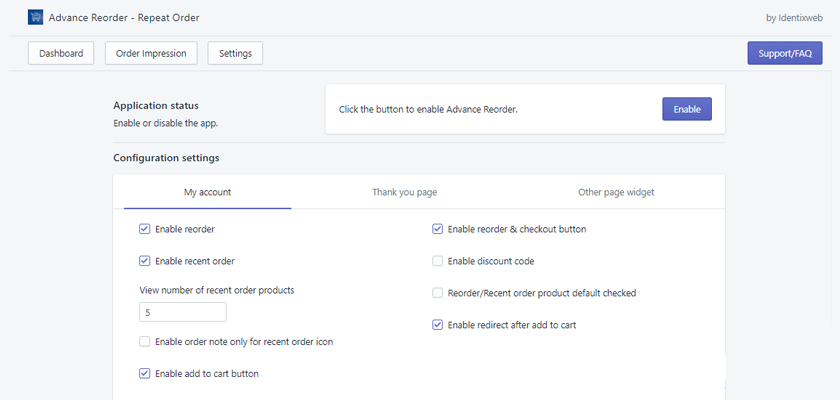
Step 4: Congratulations, so here you have finished the installation process of Advance Reorder in your store. Now it’s time for customization. Customization is really simple with Advance Reorder. Let’s jump into it step-by-step.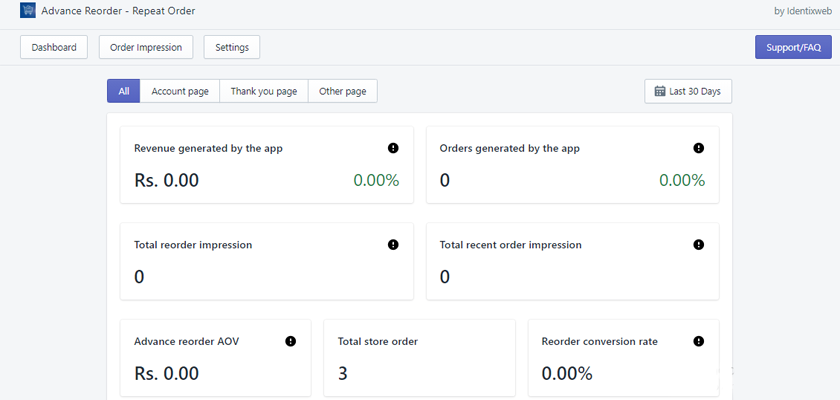
As seen in the screenshot above you may find 3 buttons dashboard, order impression, and settings. While clicking on the dashboard you will see the above screen which will show you the analytics like:
- Revenue generated by the app
- Orders generated by the app
- Total reorder impression
- Total recent order impression
- Advance reorder AOV
- Total store order
- Reorder conversion rate
The next button is the order impression. By clicking on this button you can view the order impression summary. With the help of the calendar given there, you can change the date, and days accordingly, and view the order impression summary. There are 3 types of filters you will see below. Reorder type, customer name, and date.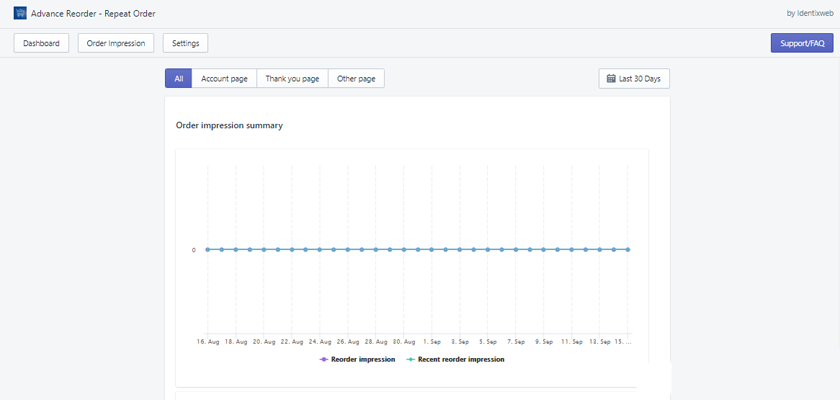
Now here comes the main button i.e settings which you can see from the screenshot below.
Under settings, you can find configuration settings inside which you may get 3 options, and the same in style settings also.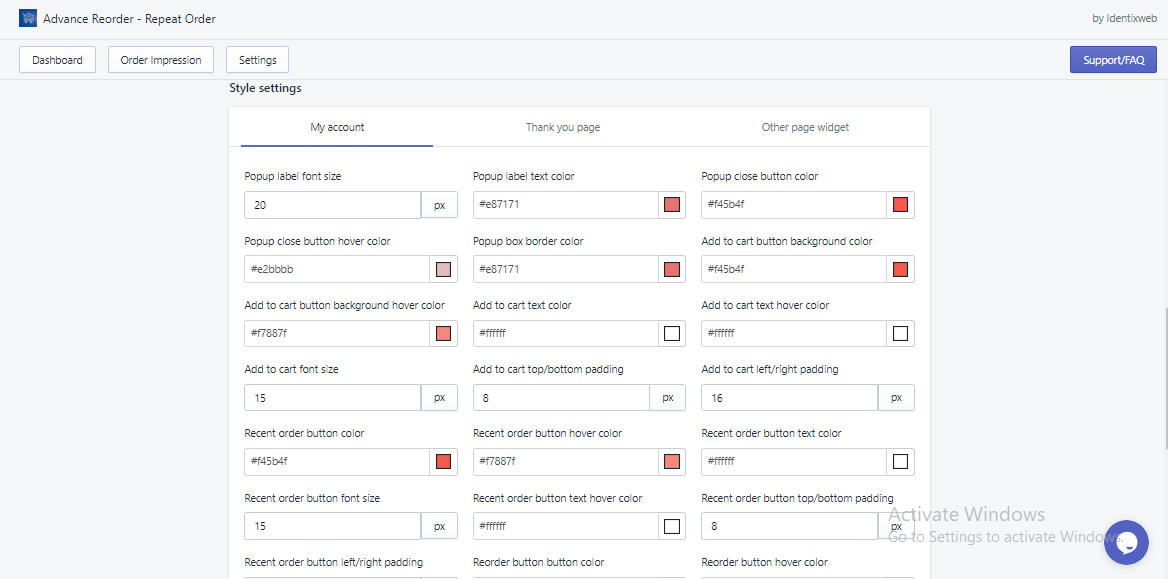
- My account
In this option, you can enable or disable reorder related settings, change the text from text settings, enable or disable discount coupons, reorder button type and text, and style settings. These all options are similar in the “other page widget” also.
- Thank you page
Basically as in “my account” option here also the options are almost the same.
- Other page widget
Under this option you can edit widget font size, title text color, add to cart text color, add to cart hover color, add to cart button background hover color, buy now button text color, buy now text hover color, buy now button background hover color, product title text color, discount message font size, and discount message text color.
Note: To know more deeply about the functionality and customization related queries about the app you can check the FAQ of the app.


")


About the author
Sajini Annie John
Meet Sajini, a seasoned technical content writer with a passion for e-commerce and expertise in Shopify. She is committed to helping online businesses to thrive through the power of well-crafted content.