


After Shopify introduced online store 2.0, everyone is excited about the Dawn Theme. You might be wondering, “There are already tons of themes available for your online store in the Shopify theme store. So why did Dawn come into the picture?”
Let’s learn more about this theme and discover how you can enhance the shopping experience for your site visitors using Shopify Dwan Theme.
Dawn Theme Shopify: All About an Introduction
The “Dawn Theme Shopify” is specially built for better performance, flexibility, and ease of use. The best thing about Shopify Dawn is that it utilizes all the new features available in online store 2.0, which was announced at Shopify Unite 2021.
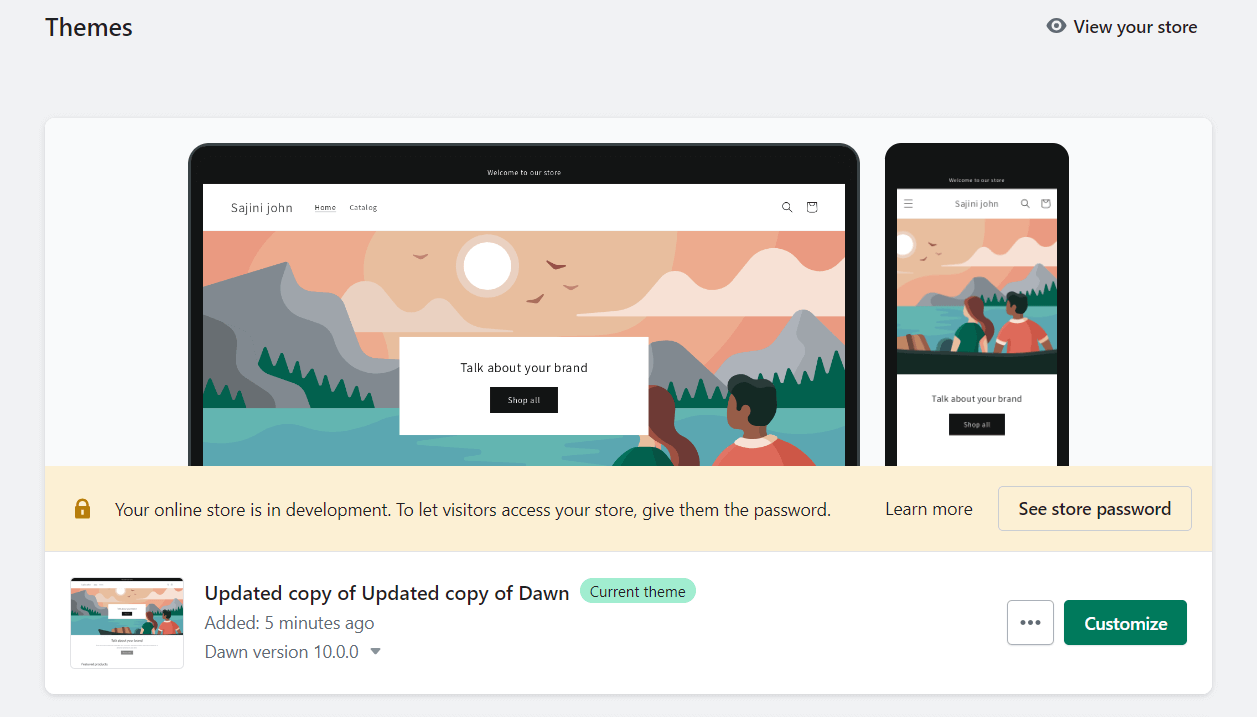
After replacing the debut theme, Shopify Dawn will become the default theme for newly created Shopify stores. This indicates that something is inspiring about this theme. Until now, Debut has been one of the most widely used themes. If you are already a Debut theme user, you might be excited to know which theme is better.
Add a Conversion-Optimized Cart Drawer to Dawn for Free
Customizing Dawn to add in-cart upsells manually means hours of theme code editing. iCart Cart Drawer Cart Upsell drops all of those features into your Dawn theme with no code.
It works as a sticky cart drawer, popup, or a full cart page (your choice), and adds AI-powered product upsells, multi-tier progress bars, BOGO offers, volume discounts, and free-gift triggers directly to your cart experience. Dawn's design language stays intact. iCart's drag-and-drop editor matches your colors and fonts automatically.
What Are the Key Features of Dawn Theme Shopify?
Let’s explore the fantastic features of the Shopify dawn theme:
An Open Source Theme
Shopify 2.0 Dawn theme is the first open-source Shopify design open source theme. It is built with semantic markup with HTML and CSS to create great experiences on all browsers.
So if you want to give your Shopify store a new design, then Dawn is the best theme for you. Yes, you can customize it and make it more attractive for your customers by adding useful and fully-featured Shopify apps like iCart Cart Drawer Cart Upsell to give better shopping options.
Offers Better Performance
When we say about, we mostly mean it by speed. The dawn theme is 35% faster in loading websites than the Debut theme - the best theme of Shopify themes. It automatically removes all the unnecessary or unused scripts or codes from the theme templates. Therefore it loads faster when compared to other themes.
If you choose the dawn theme for your store then you automatically choose better performance for your store visitors.
Easy to Use
The sections are made global in Online Store 2.0. Therefore, not only the homepage, if you want to customize your product page, blog page, collection page, or any page, you can easily do that. Using metafields, Shopify makes it easy for you to manage your content.
More Flexible
The App block lets you move the app anywhere on the page without touching the theme files. Besides, the section and blocks offer great flexibility to your store design and content. You can now connect the dynamic data source to your store using Shopify metafields.
Stellar Made for Dawn to Solve Delivery Scheduling
For florists, bakeries, food brands, gift shops, and grocery stores Dawn alone doesn't solve the delivery scheduling problem.
Losing orders because buyers want flexible delivery?
A simple calendar at checkout fixes that.
Start Your Free PlanStellar Delivery Date & Pickup fills the gap. It adds a styled date picker, time slot selector, and pickup option directly to your Dawn-themed product pages without touching theme code.
Florists, bakeries, and food sellers running Dawn typically see a 20–30% drop in pre-purchase abandonment after installing Stellar.
What's New in Dawn Theme Shopify Editor
We will explore Dawn's editor. If your store uses a different version of the Dawn theme, the options and editor layout mentioned in this guide may vary. If you have not updated your version yet, it’s time to update and take advantage of the newly launched features of the theme. As you can see, I am ready to start our journey with the Dawn theme editor. Let’s get started!
By clicking on the Customize button, you would be able to enter the theme editor.
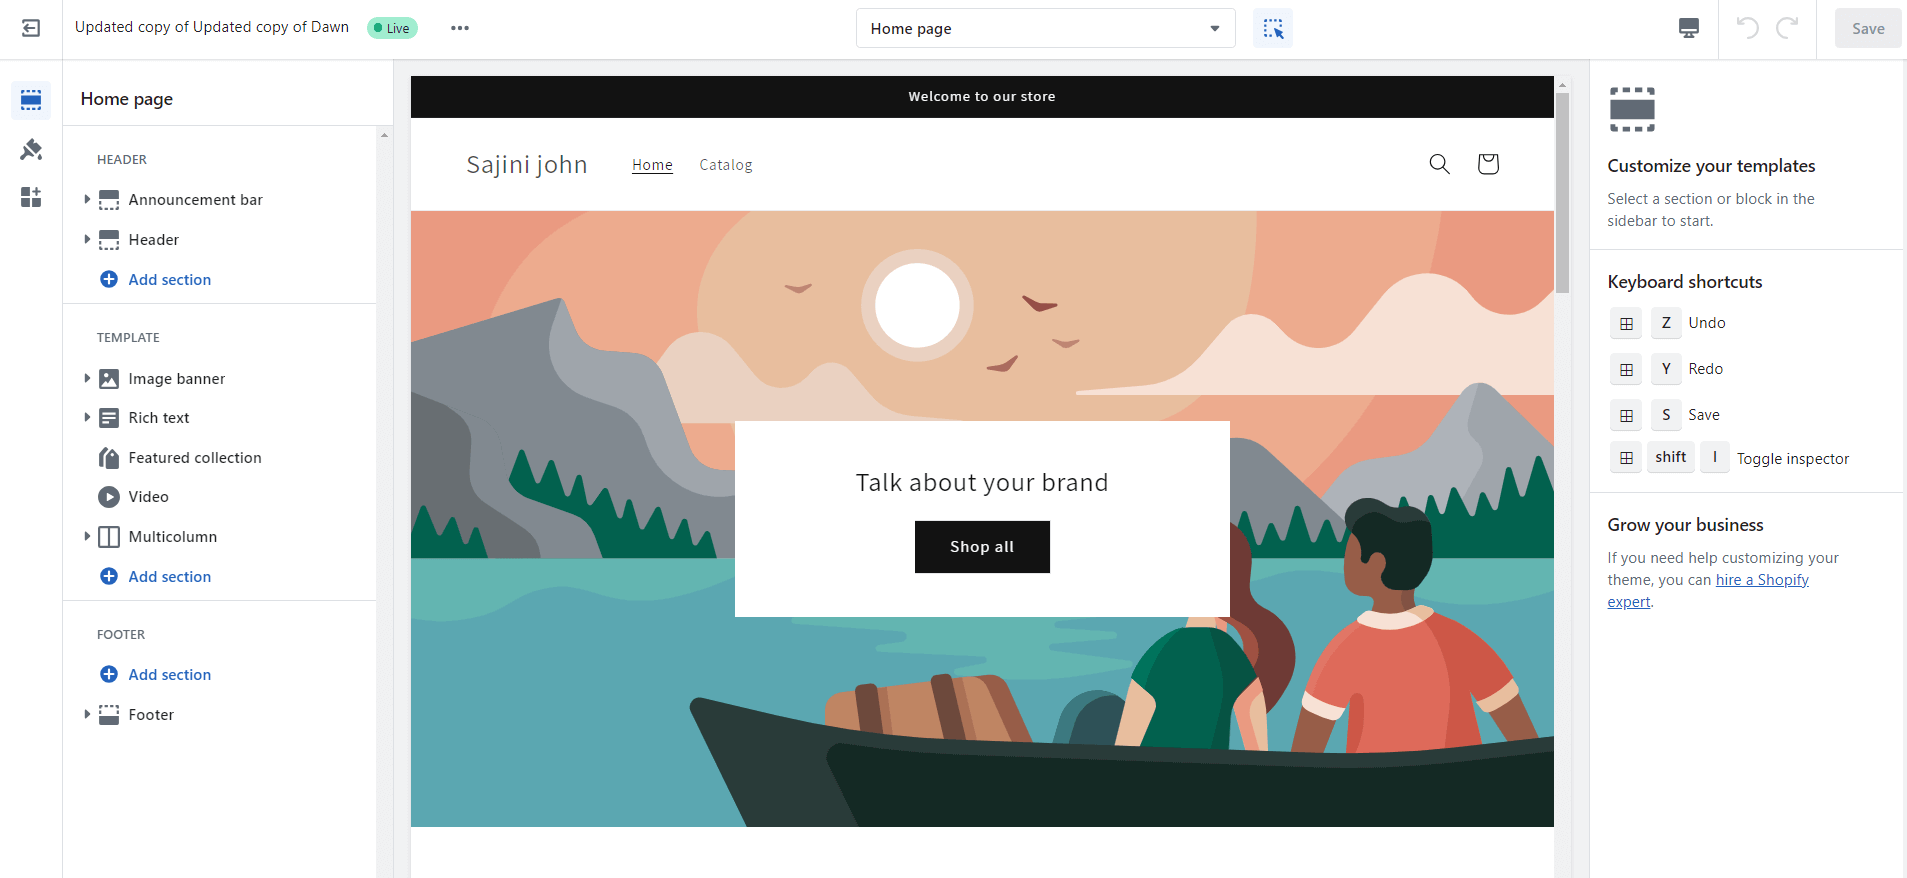
Here, you can witness a drastic change in the template editor of the dawn theme.
The Dawn theme template editor is categorized into 3 parts:
Left Panel
The left panel displays the layout or structure that reflects the sequence of sections on your store page. Here, you can quickly locate each section on the page and add sections or blocks (inside the sections) whenever needed.
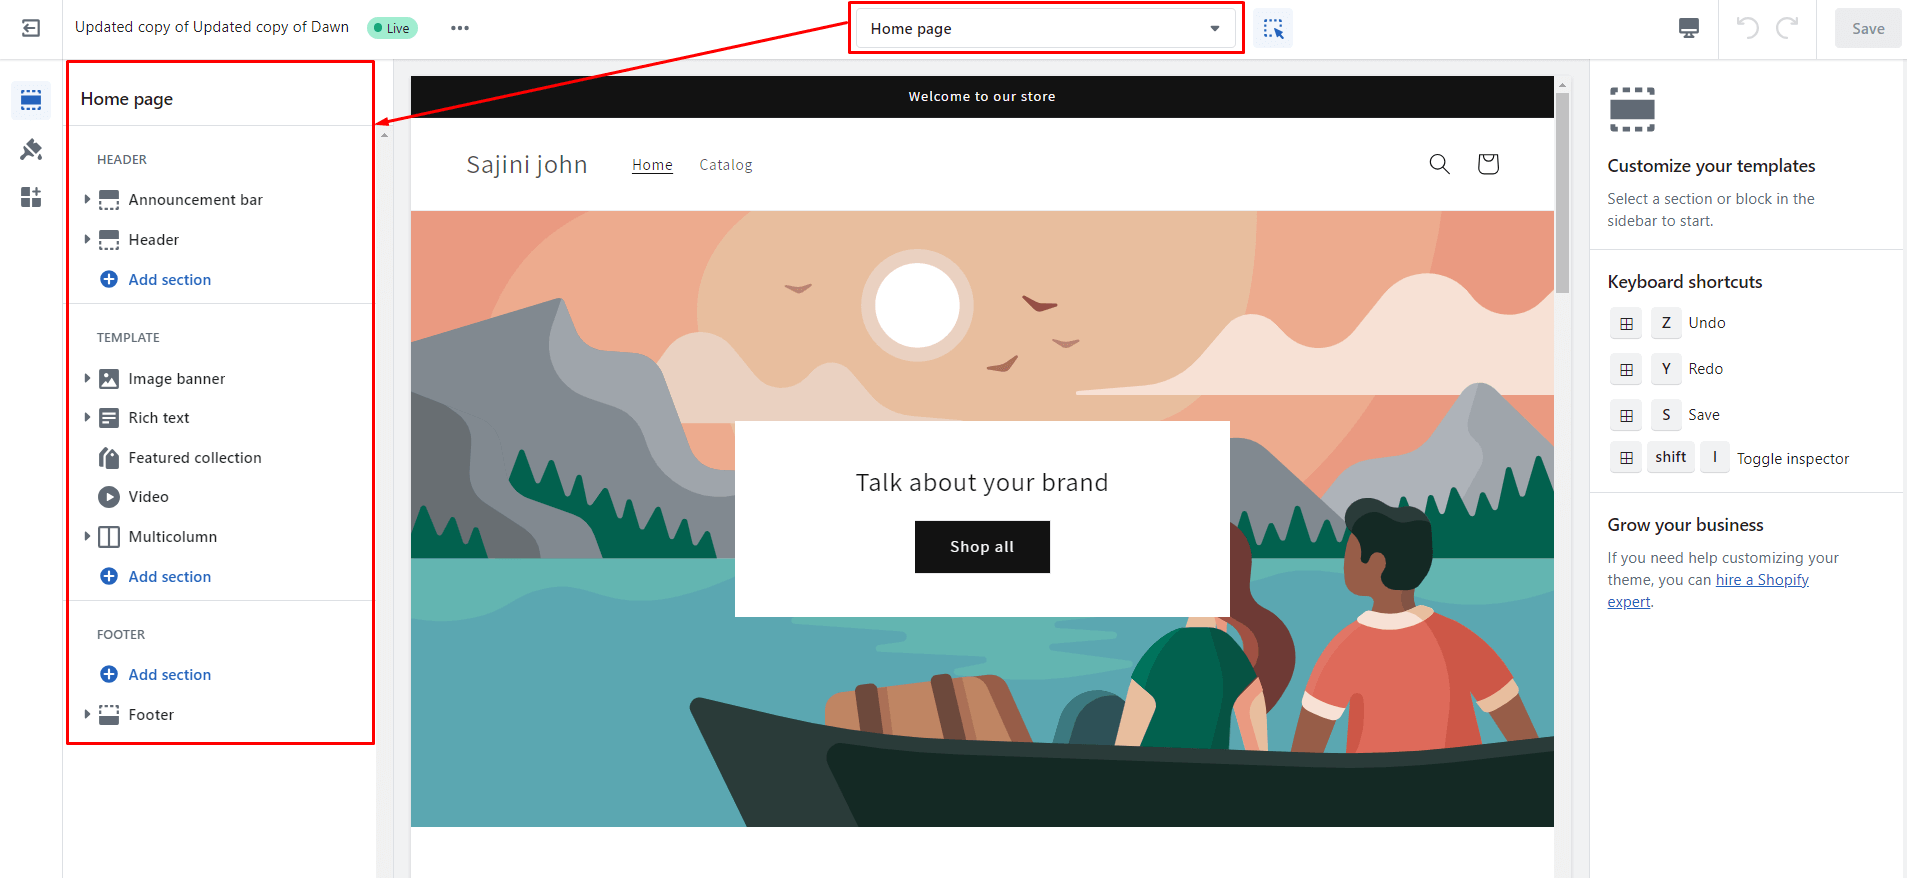
By default, it shows the layout of the homepage. You can change the template using the drop-down menu above the preview section.
Preview Section
The theme template editor offers the preview section with three different preview options:
(1) Mobile
(2) Desktop
(3) Full-screen.

Right Panel
It is the place where you actually customize your store or theme template. When you select any section in the left panel, all the options under that section will appear on the right panel.
Dawn Theme Shopify Customization
I know your goal is to get listed among the top 10 Shopify stores or the 10 best eCommerce websites. To achieve this, you must explore every corner of the theme template editor and experiment with your creativity.
Before customizing the theme, let’s examine the page templates already available in Dawn.
Pre-requisites:
- Create pages: About us, FAQ, Terms of use, Blog (optional).
- Add Products to your store.
- Add some collections and add products to them.
- Main menu: Link the main categories to the menus and the FAQ page. I would suggest you remove the Home menu.
- Footer menu: Link About us, Contact, Terms of use, Blog pages to footer menus. You can also link the collections here.
Template Pages
To open the list of page templates, click on the templates drop-down list above the preview.
- Home page
- Product
- Collections
- Collections list
- Pages
- Blogs
- Blog Posts
- Cart
- Checkout
- Contact
- Classic customer accounts
- Others Pages
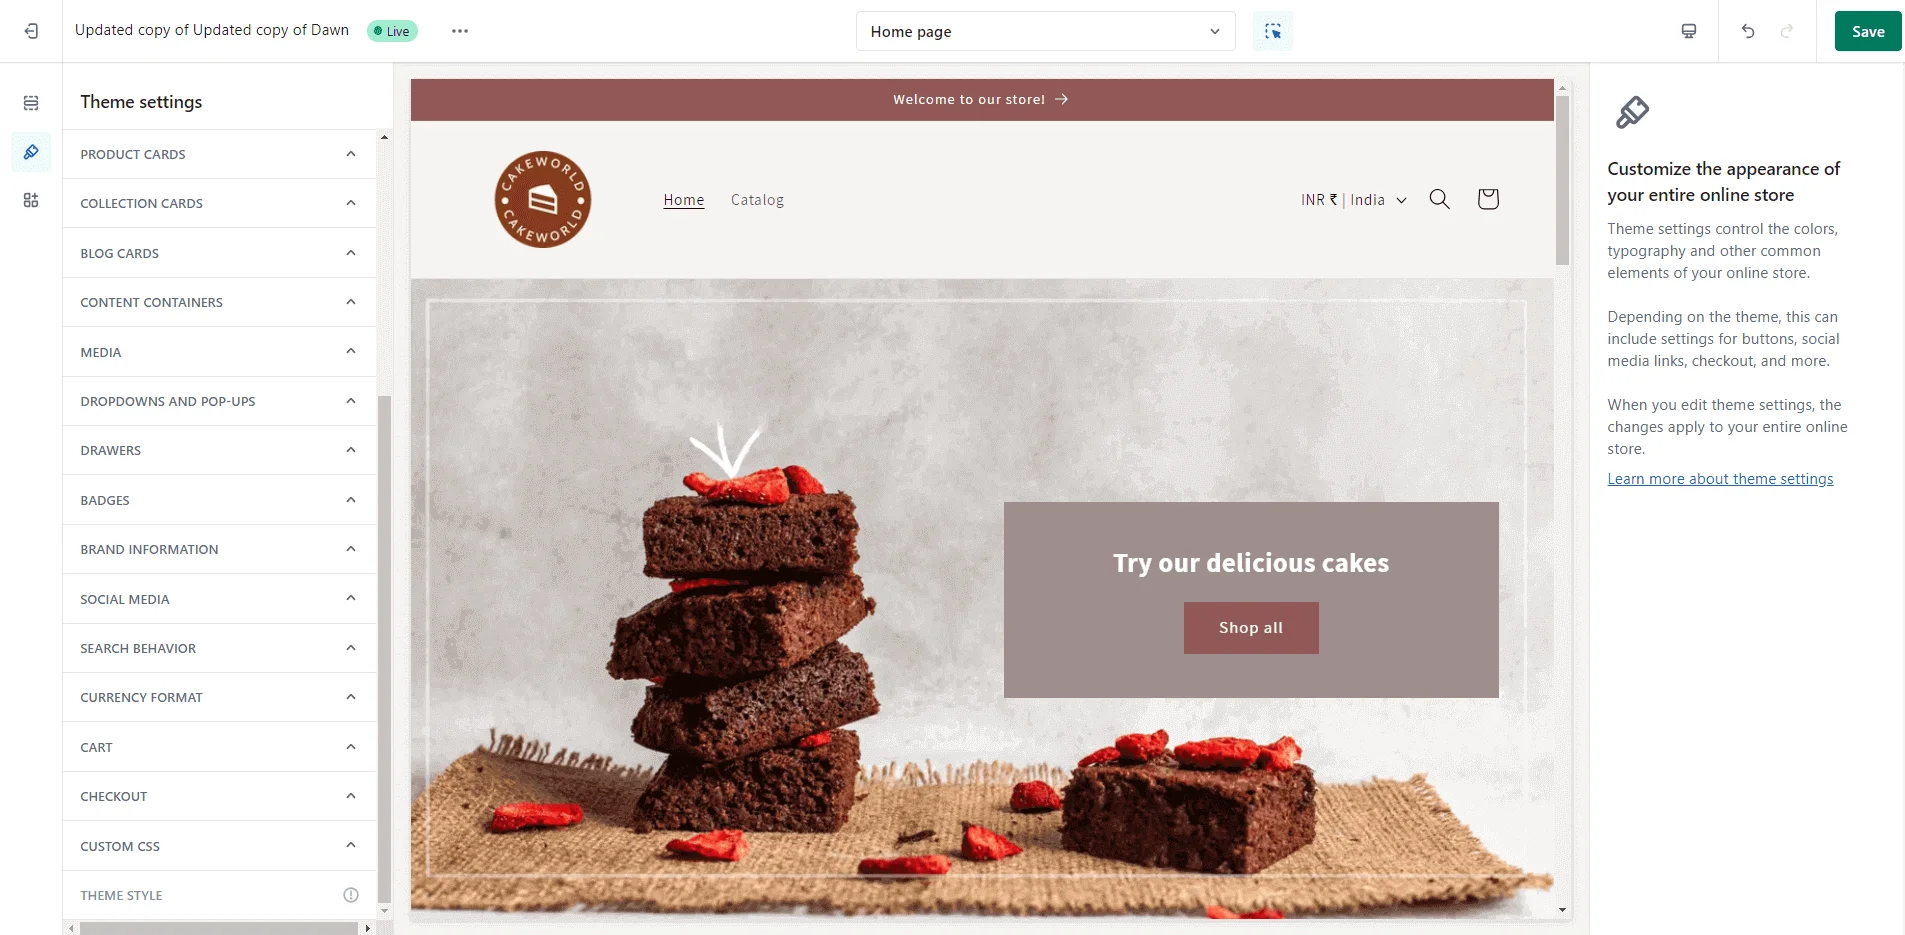
Dawn theme Shopify: All About the Home Page
The homepage creates the first impression of your store. Therefore, it requires more focus.
Let’s start step-by-step customization:
Announcement Bar
The announcement bar is designed to greet site visitors with an enticing offer that inspires them to purchase. The new theme updates of Online Store 2.0 allow you to add multiple announcement bars to your store.
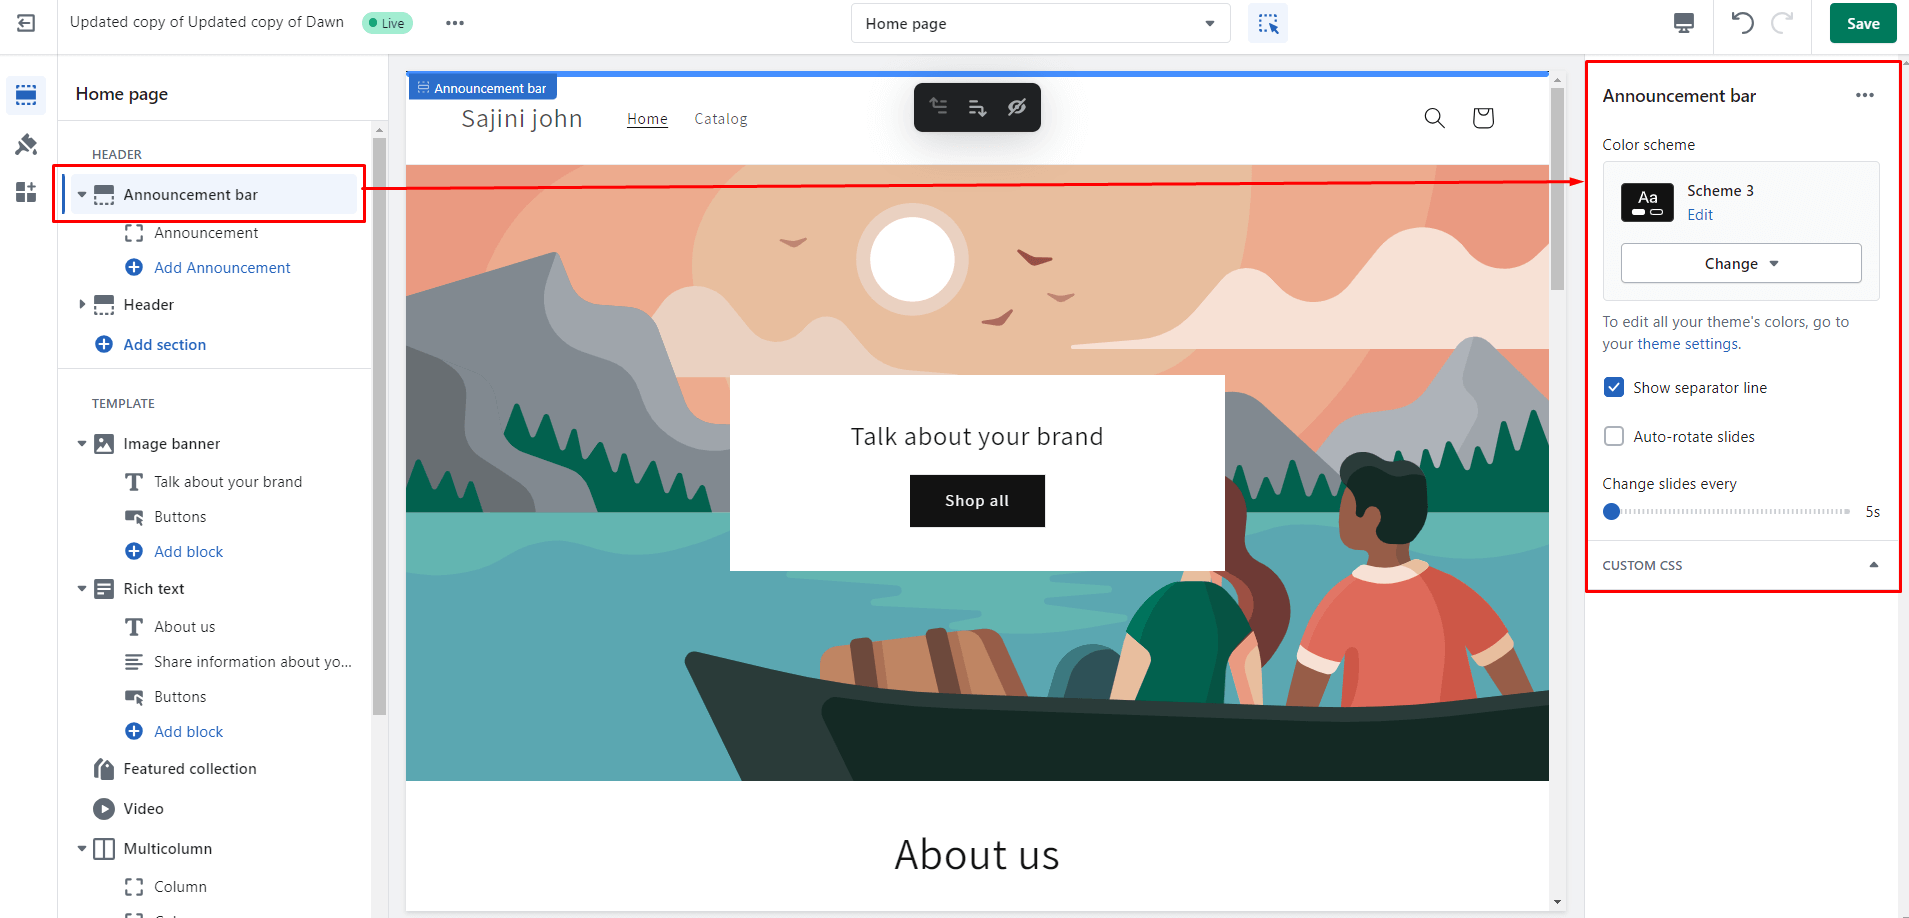
How to Customize the Announcement Bar section: Steps to Follow
1. Click the arrow beside the Announcement Bar on the left panel.
2. Select the Announcement Bar and set the color scheme, and adjust the necessary settings using the available options for the announcement bar.
3. You can also use Custom CSS to add styles to this section.
To further customize the announcement bar, follow these steps:
1. Click on the inner option of the announcement bar and go to the right panel.
2. Enter the announcement text and an optional link.
3. (Optional) Click on "Add Announcement" to create a new announcement bar.
4. Save the button once you’re done with the changes.
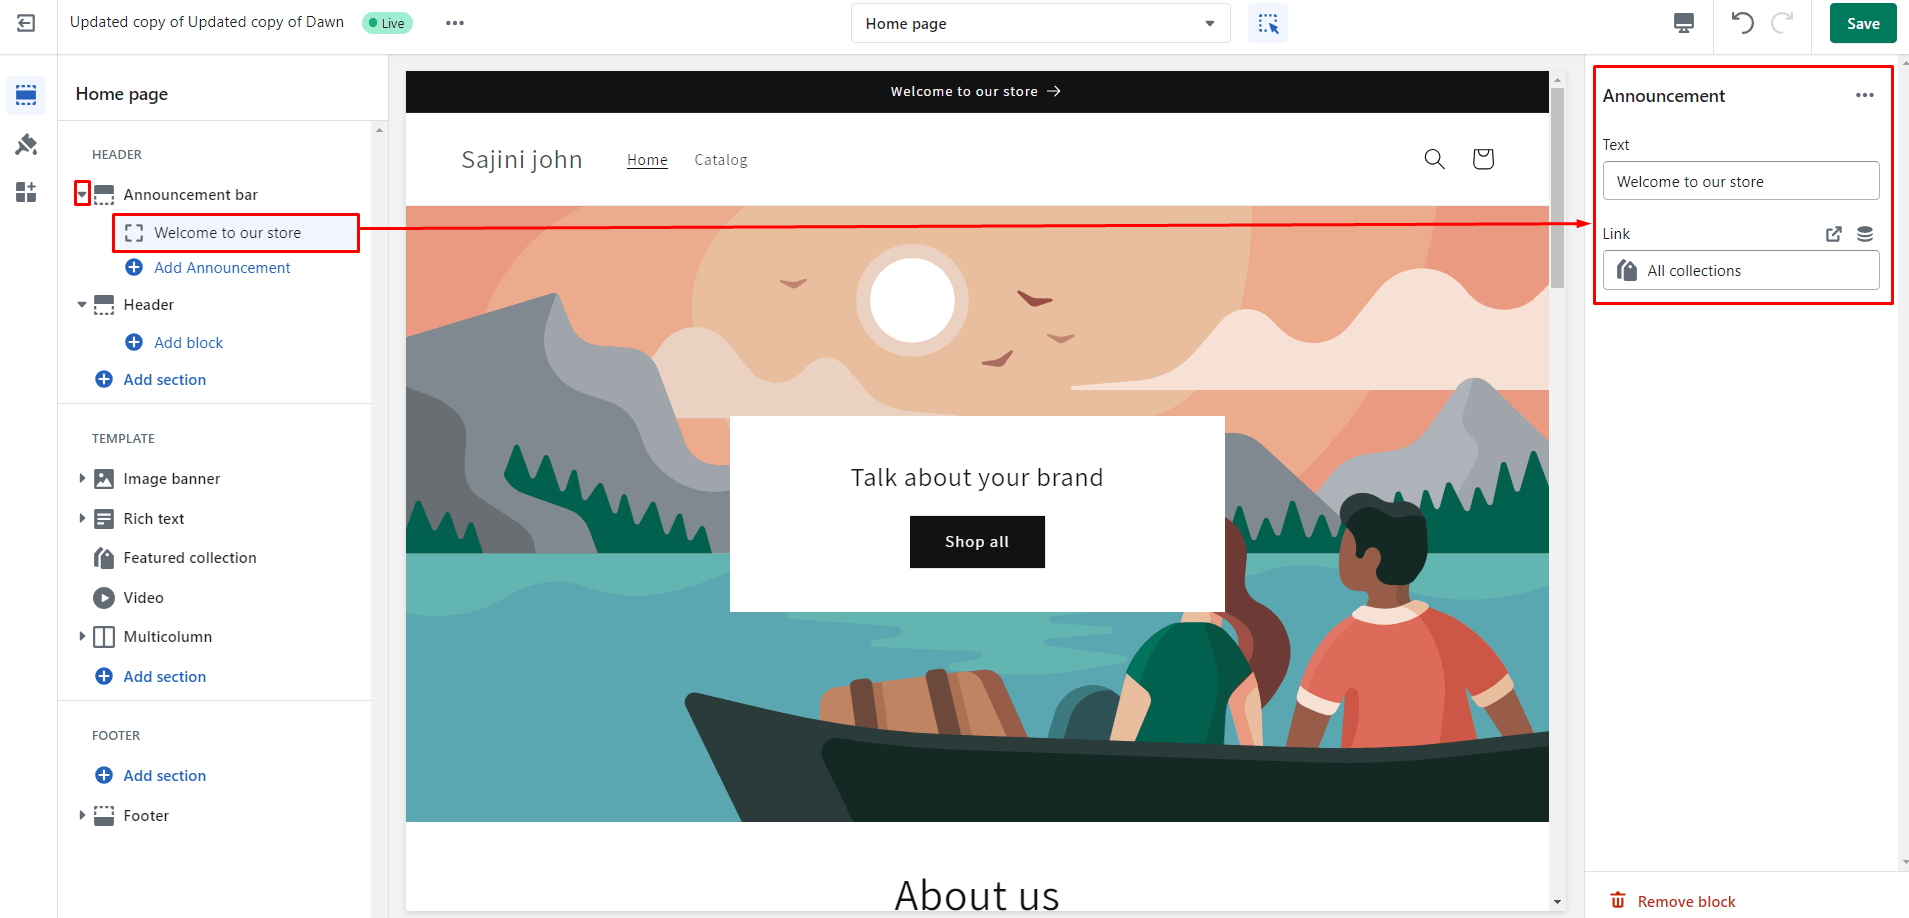
You can create up to 12 announcement bars according to your requirements and enable or disable them by clicking on the eye icon beside the announcement, depending on the offer you want to show to your visitors.
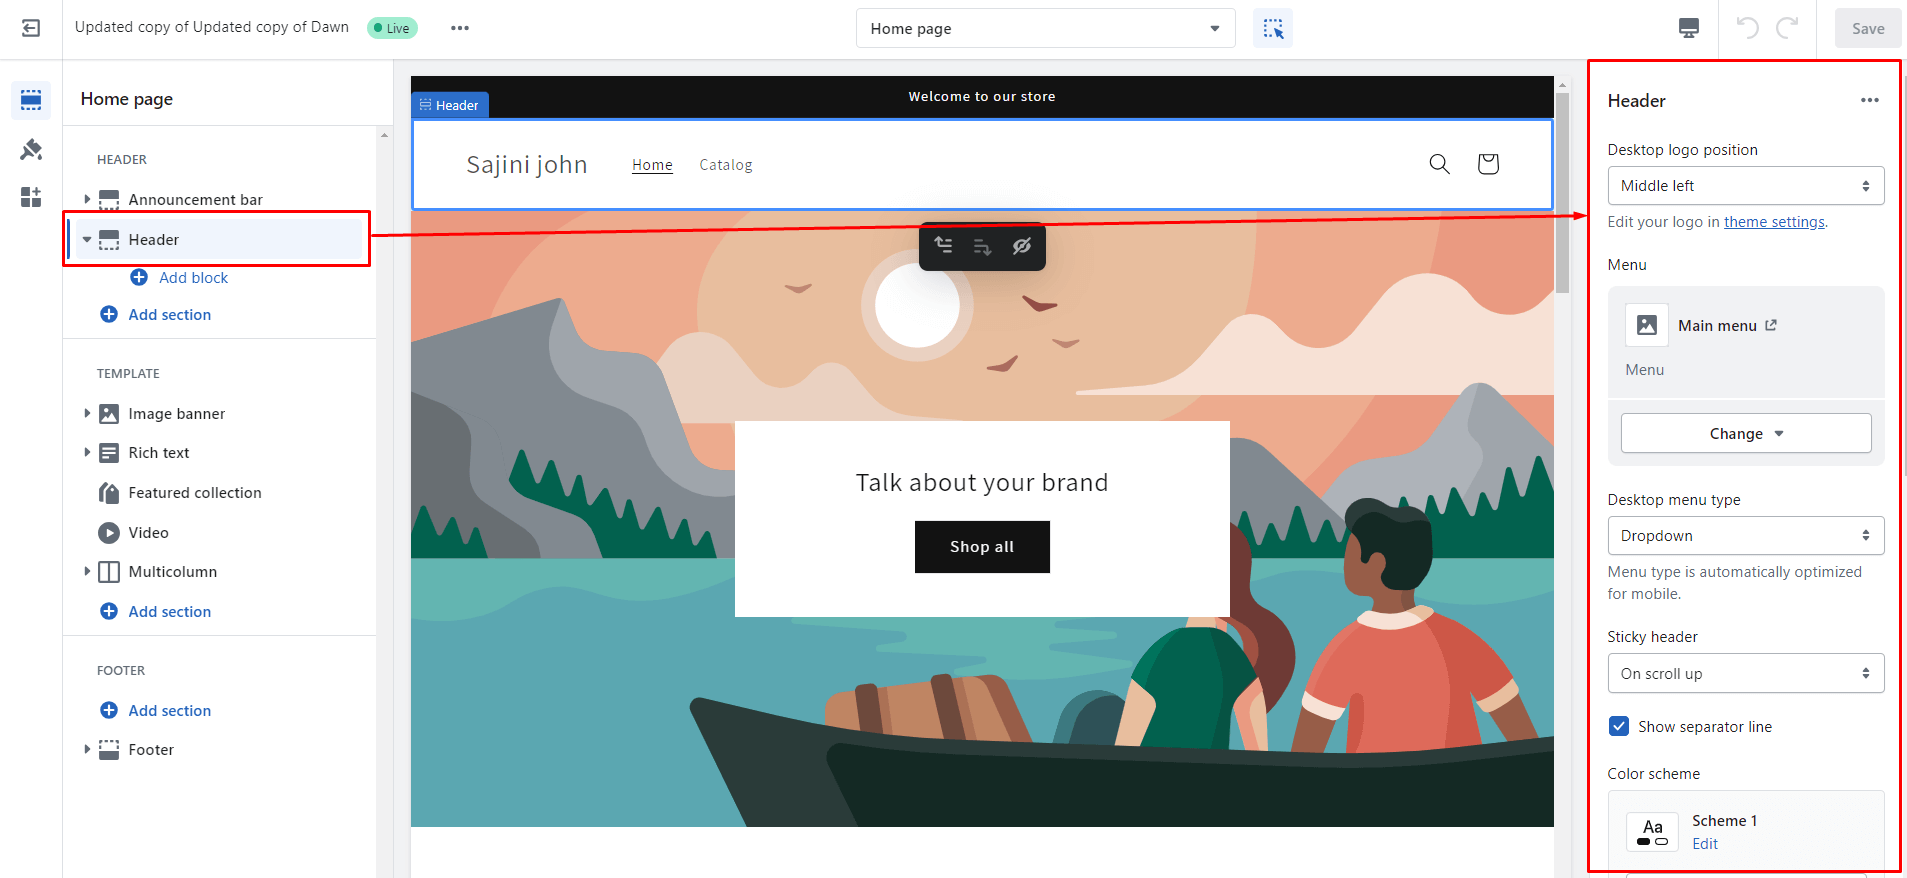
Header
The header section is a tiny space including the store name or logo and important links to other pages on your store. Therefore, make sure to add main links and organize them precisely.
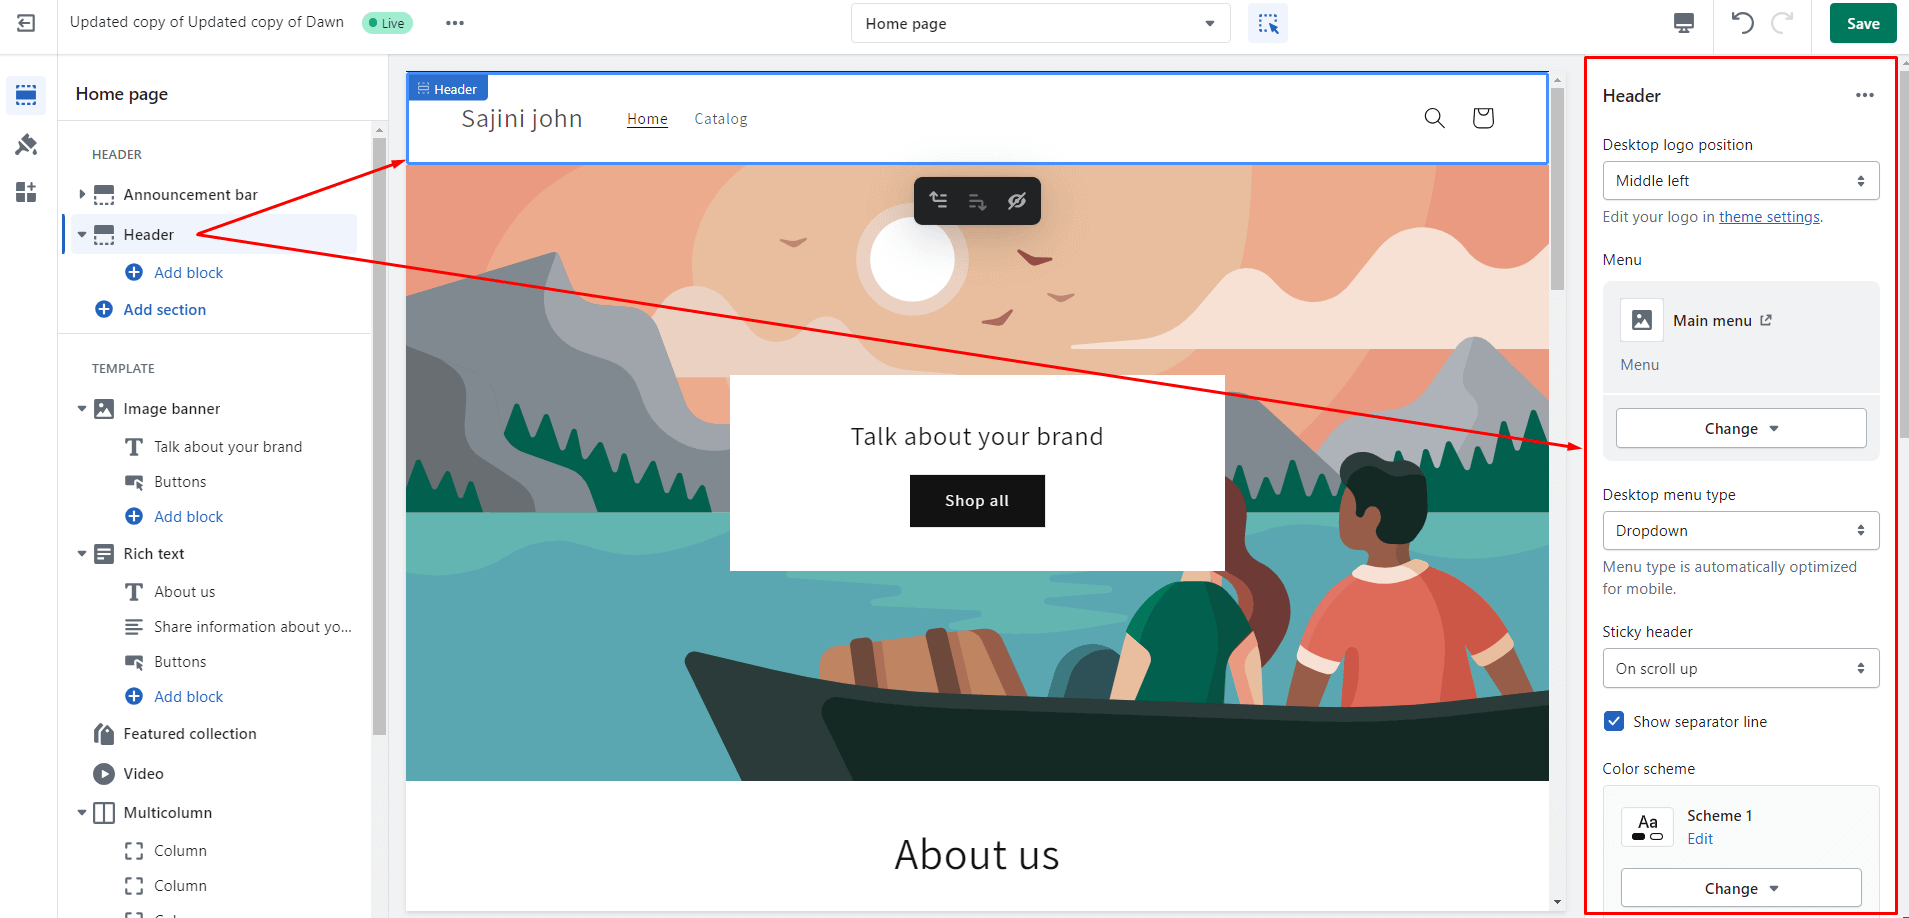
How to Customize the Header Section: Steps to Follow
1. Choose one of the four available options for positioning your logo.
2. Go to the theme settings to upload your logo image. This will replace the store name text with the picture.
3. Click the "Select" menu to customize and create drop-down menus if needed.
4. Select the sticky option to keep the header visible on the screen as users scroll.
5. If you want to display a separator line, keep the "Show separator line" option enabled.
6. Select the color scheme that best matches your store's branding.
7. Activate the option to show your website in different languages for various countries.
8. Adjust the logo position for the mobile layout.
9. Fine-tune the spacing and section padding to ensure a polished look.
10. Click the Save button to apply your customizations.
Note: You can skip the text or button in the Image banner section.
I have modified the header section. Here’s how it will look:
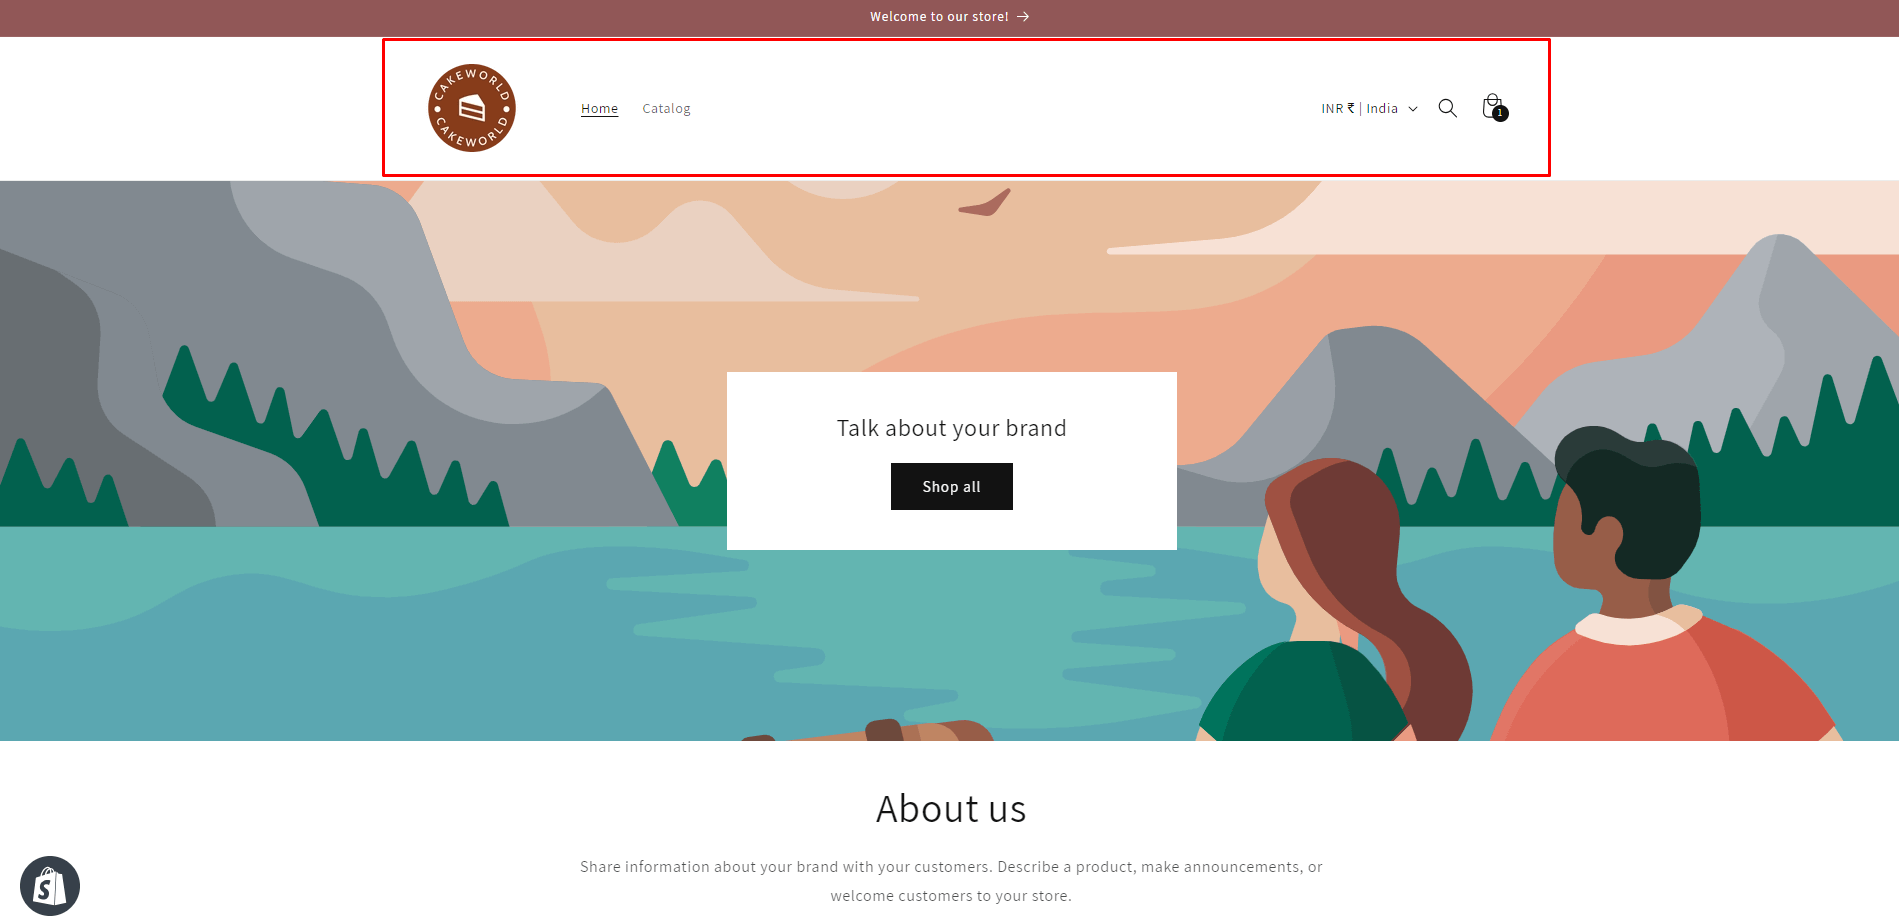
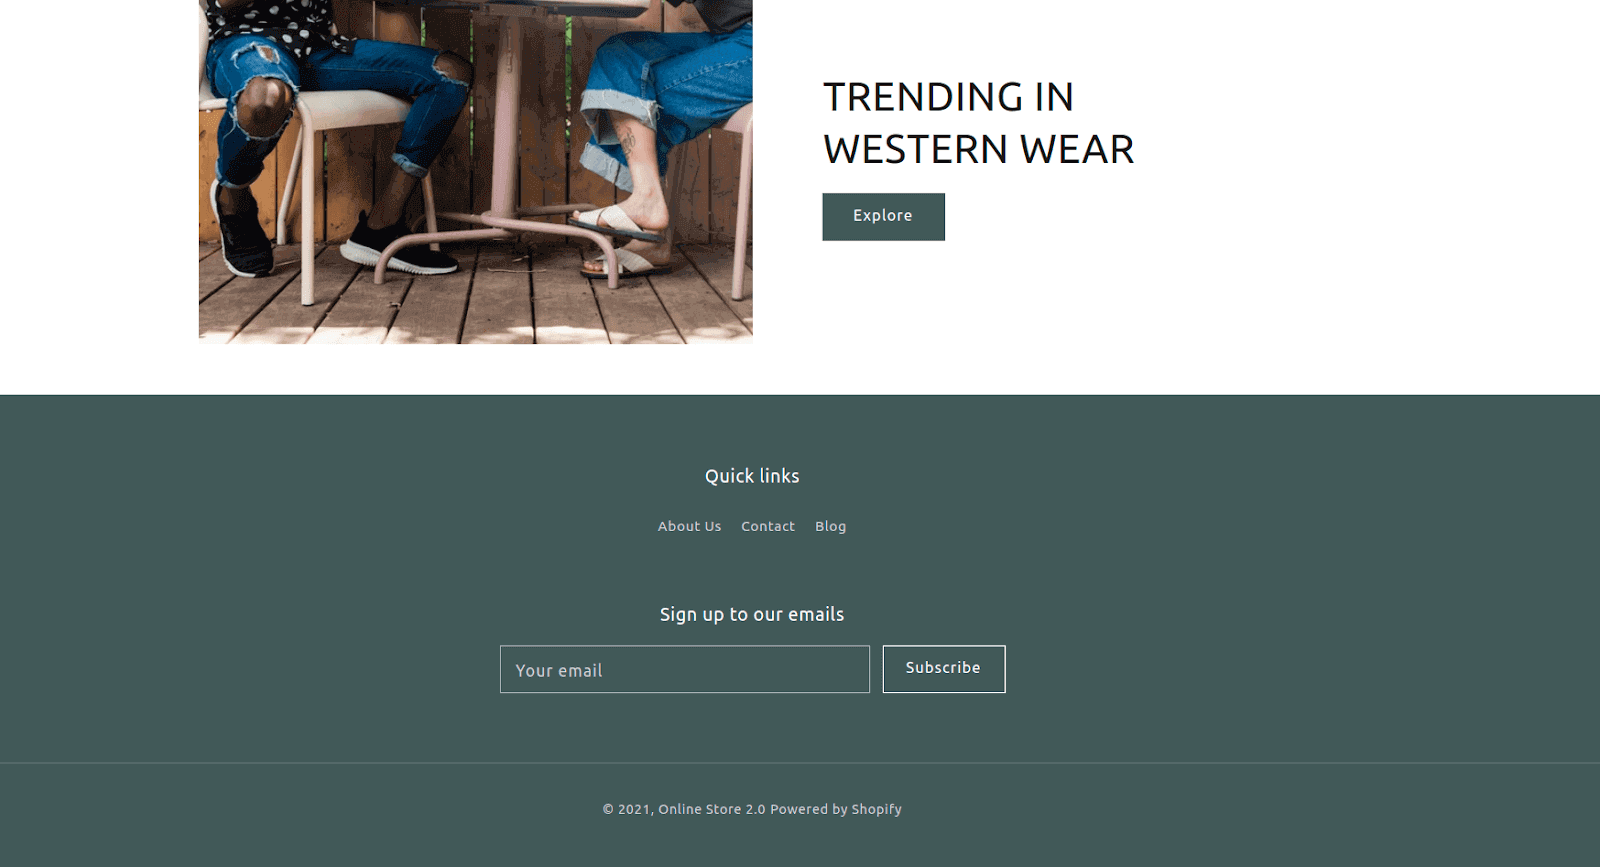
Image Banner
This section helps you show the big picture of your brand to your customers. Dawn theme shopify theme enhances the banner's impact by allowing you to add multiple images to a single image banner.
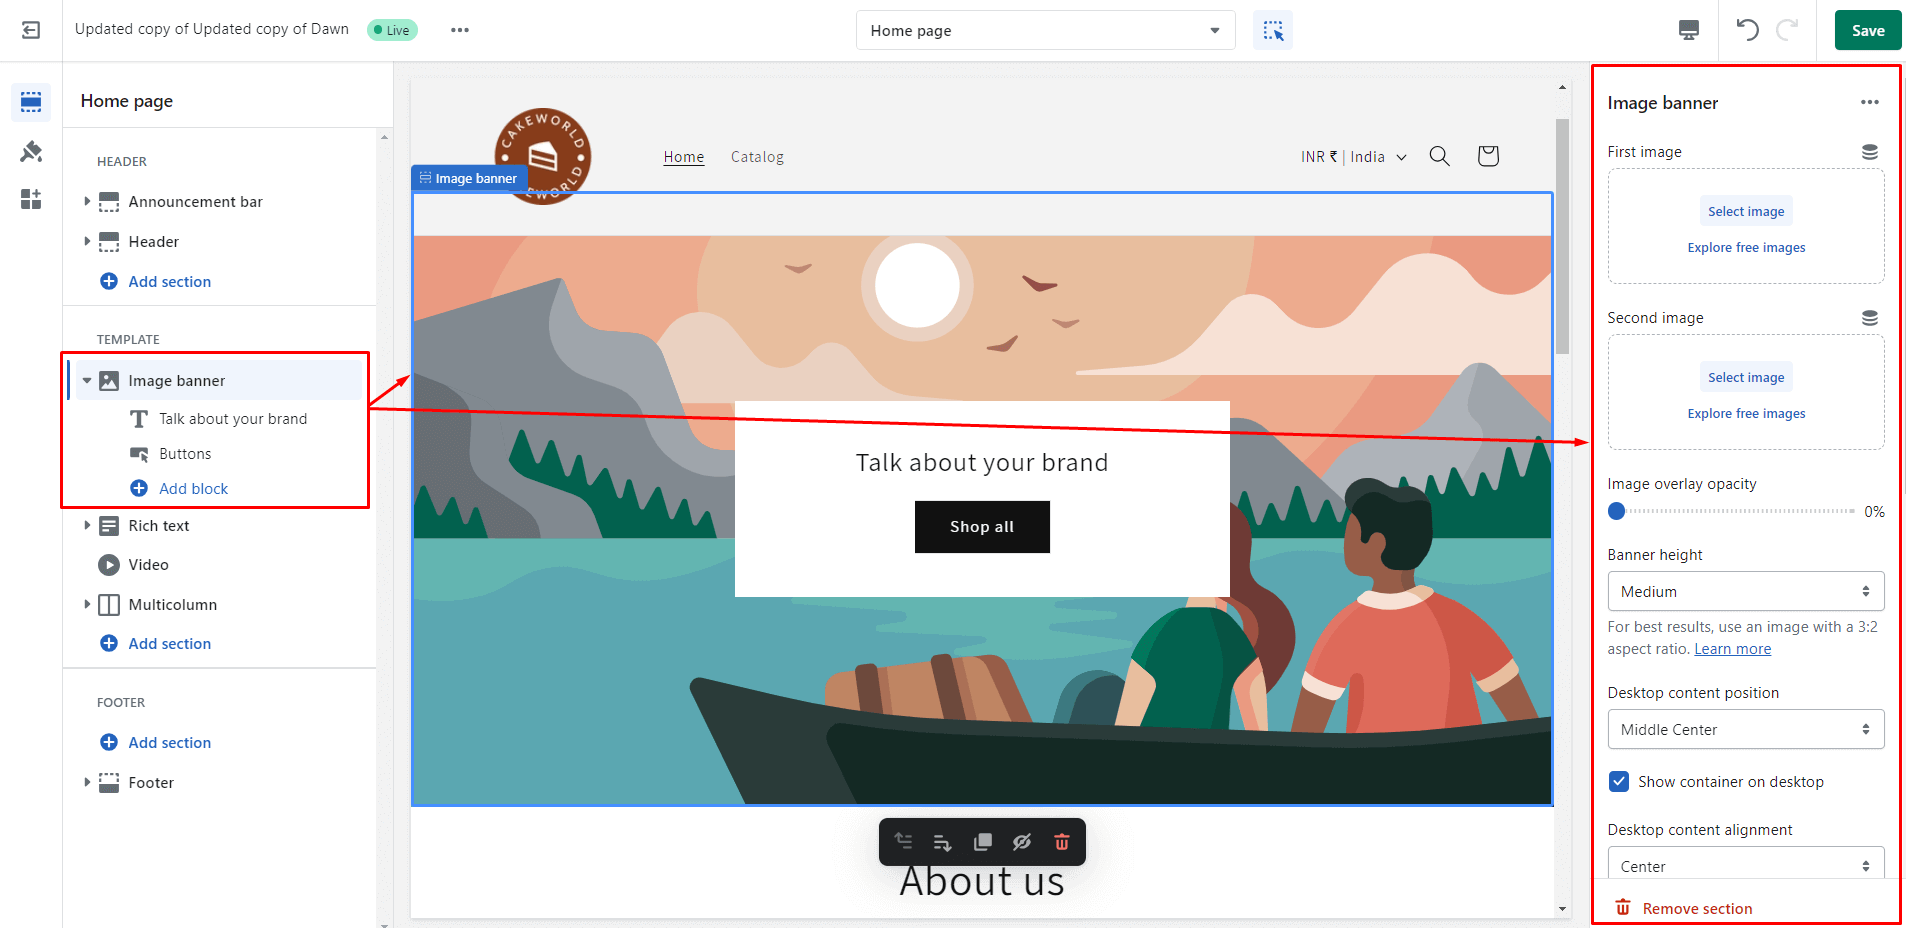
You can also add multiple Image Banners to your site. The image banner size of 1600 x 1050 px can work better with the desktop.
Steps to customize the Image Banner Section:
You can also add multiple image banners to your site. An image banner size of 1600 x 1050 px works well for desktop displays.
How to Customize the Banner Section: Steps to Follow
1. Click the "Select Image" button to upload the first image for the banner.
2. If desired, add a second image to the banner (optional).
3. Adjust the opacity of the image overlay as needed.
4. Check the "Adapt section height to the first image size" option if you want the section height to match the size of the first image.
5. Adjust the text position for desktop and enable "Show container" if you want to display it.
6. Customize the content position and color scheme for desktop view.
7. Apply animation effects to the image if desired.
8. Adjust the content alignment for mobile view.
9. Click on the heading under the image banner in the left panel and set the heading in the right panel.
10. Update the text in the image banner section as needed.
11. If desired, click the "Add Block" button to include additional text blocks.
12. Save button to apply your customizations.
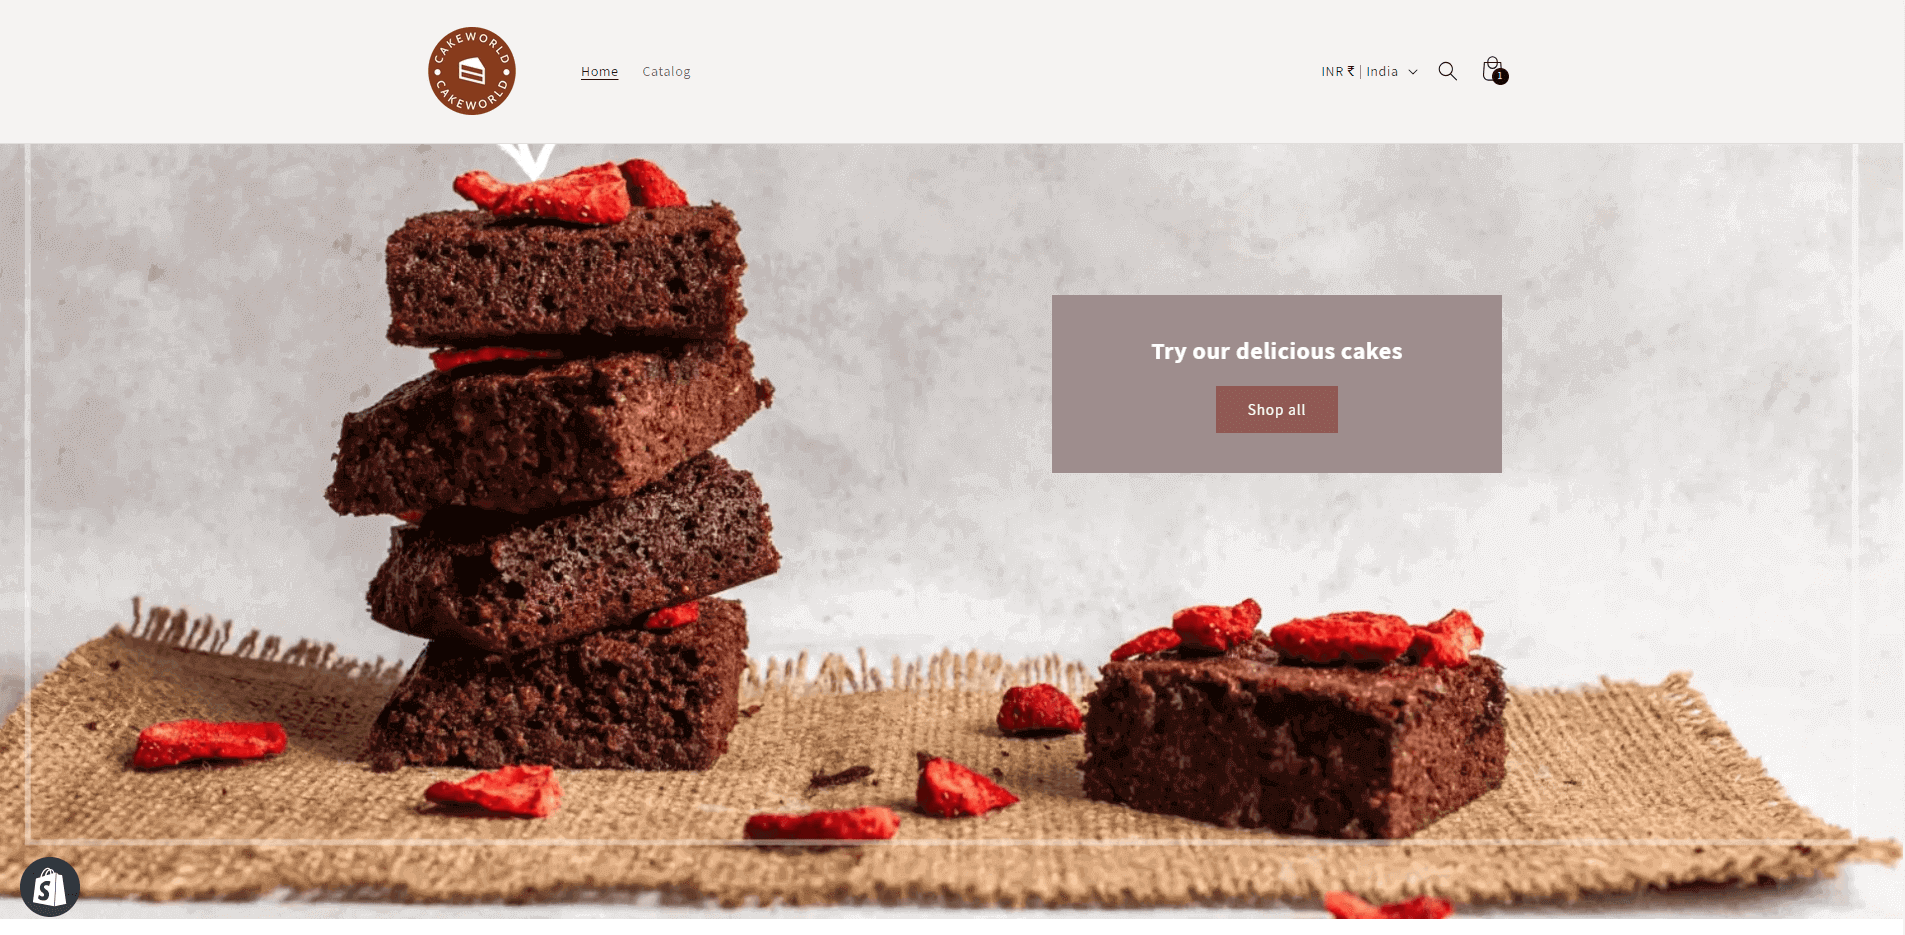
Let’s see how the image banner looks:
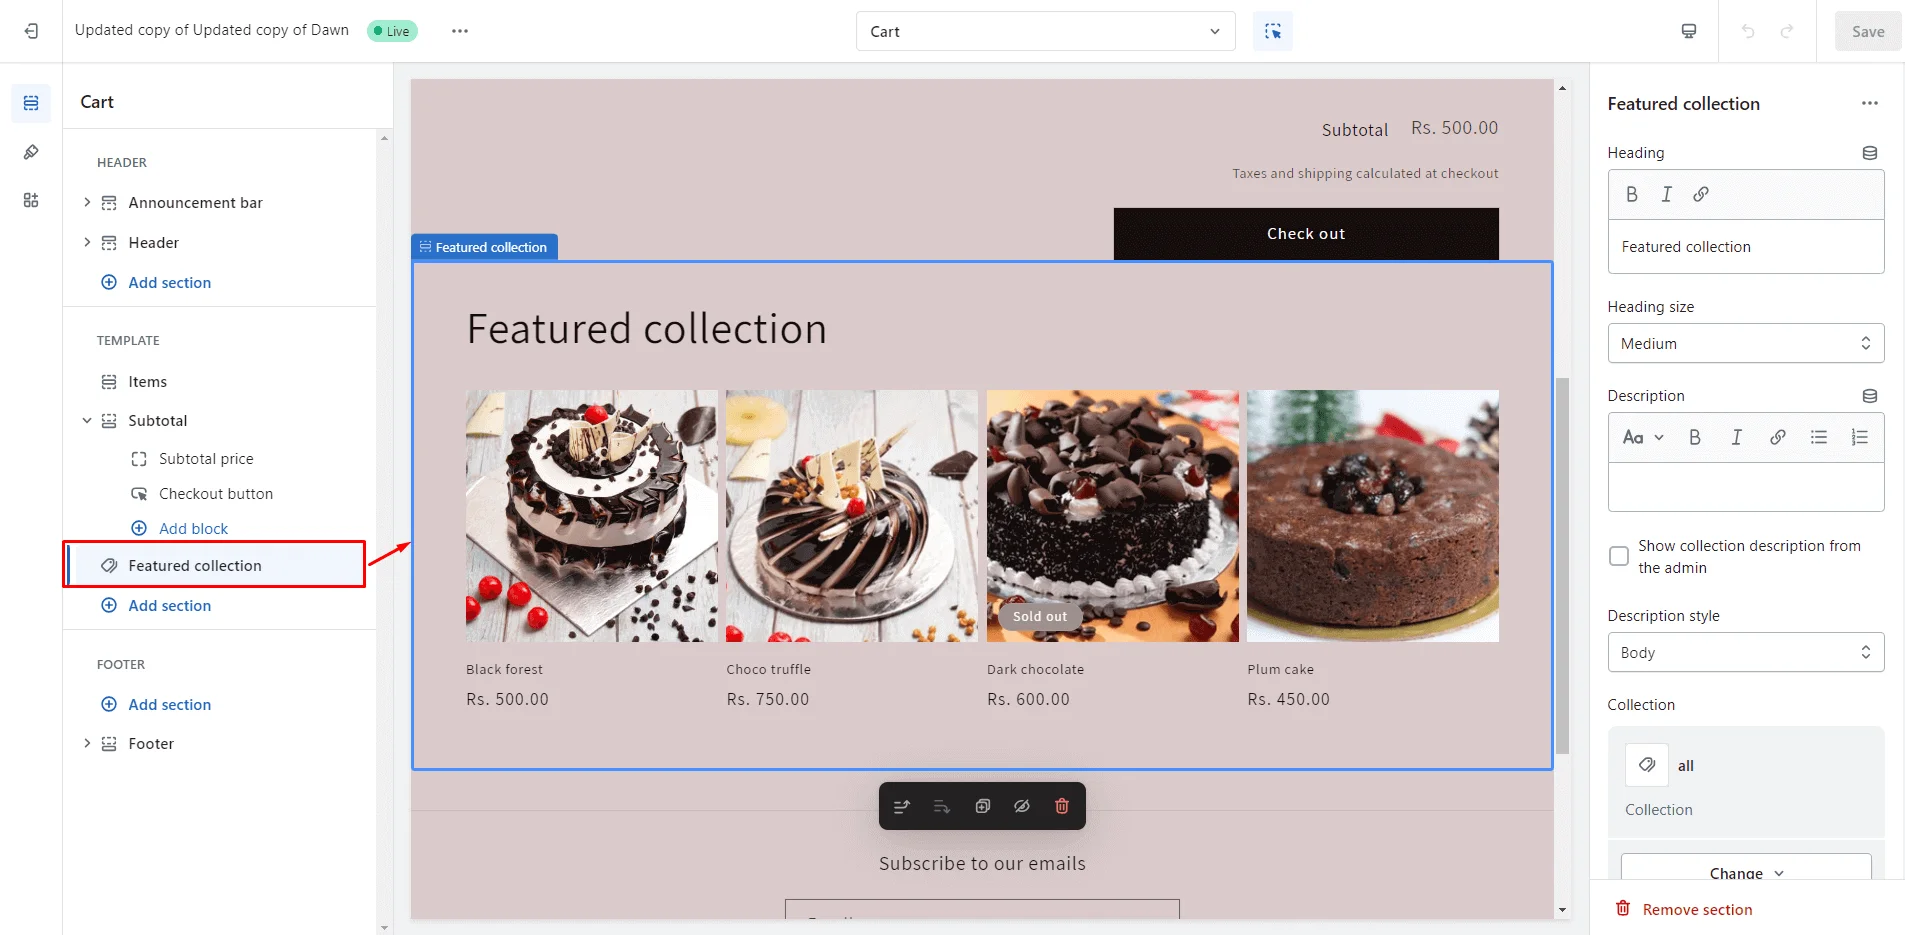
Featured Collection
The Featured Collection section helps us to showcase the best or trending products to the store visitors. You can also use it to show product collections.
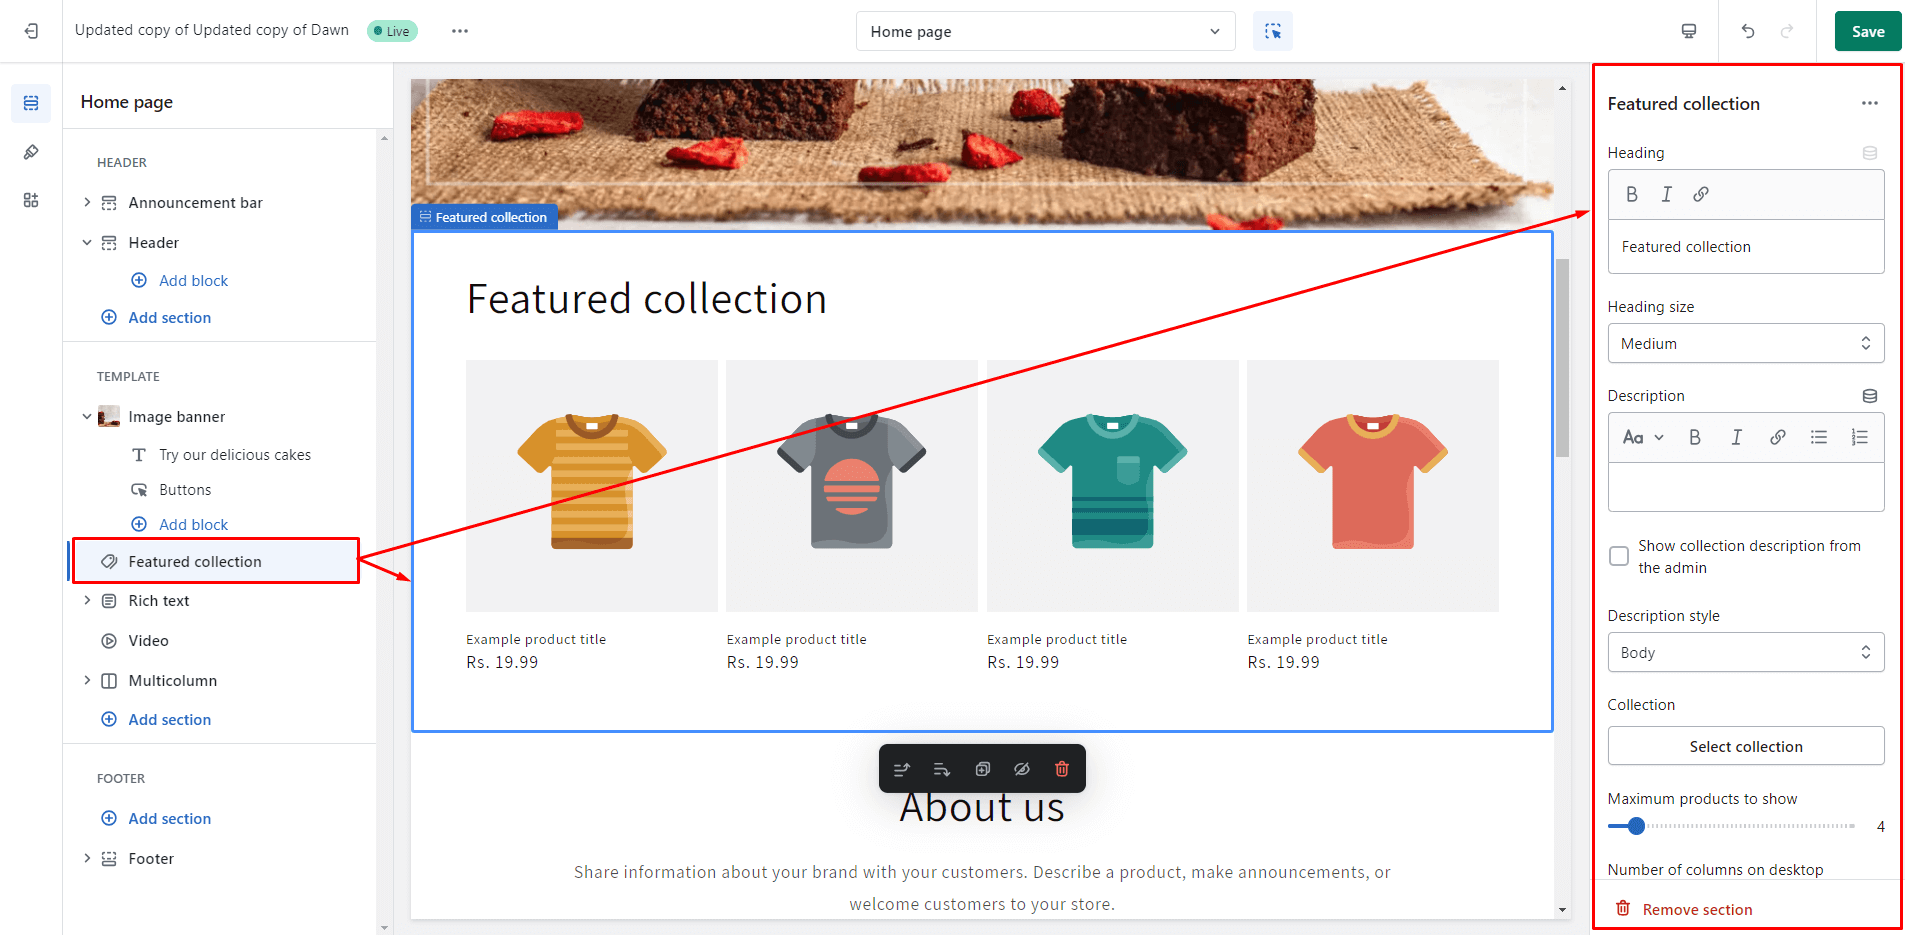
How to customize the features collection section: steps to follow
1. Update the heading to reflect the specific collection if desired.
2. Choose the size of the heading to fit your design.
3. Include a description for the featured collection section.
4. Toggle "Show collection from the admin" to make the collection visible.
5. Customize the style of the description text.
6. Choose the collection to display related products in the section.
7. Specify the number of products to show, with a maximum limit of 25.
8. Choose the number of product columns to display on the desktop, up to 5 columns.
9. Enable the option to make products full-width, if desired.
10. If the collection has more products, enable the “View All” button to display all products when clicked.
11. Turn on the carousel feature for desktop view if you want a sliding product display.
12. Select a color scheme for the featured collection section.
13. Adjust settings for the product card, including image ratio and shape.
14. Enable the "Show second image on hover" option to change the image when users hover over the product.
15. Check the option to display vendor information on the products.
16. Enable the option to show product ratings if desired.
17. Enable the quick add button option for faster product additions.
18. Choose the number of product columns to display on mobile, with a maximum of 2 columns.
19. Check the "Enable swipe on mobile" option to allow users to swipe through products in mobile view instead of scrolling.
20. Fine-tune the padding for the section to fit your design needs.
21. Save button to apply your customizations.
Let’s check the output-
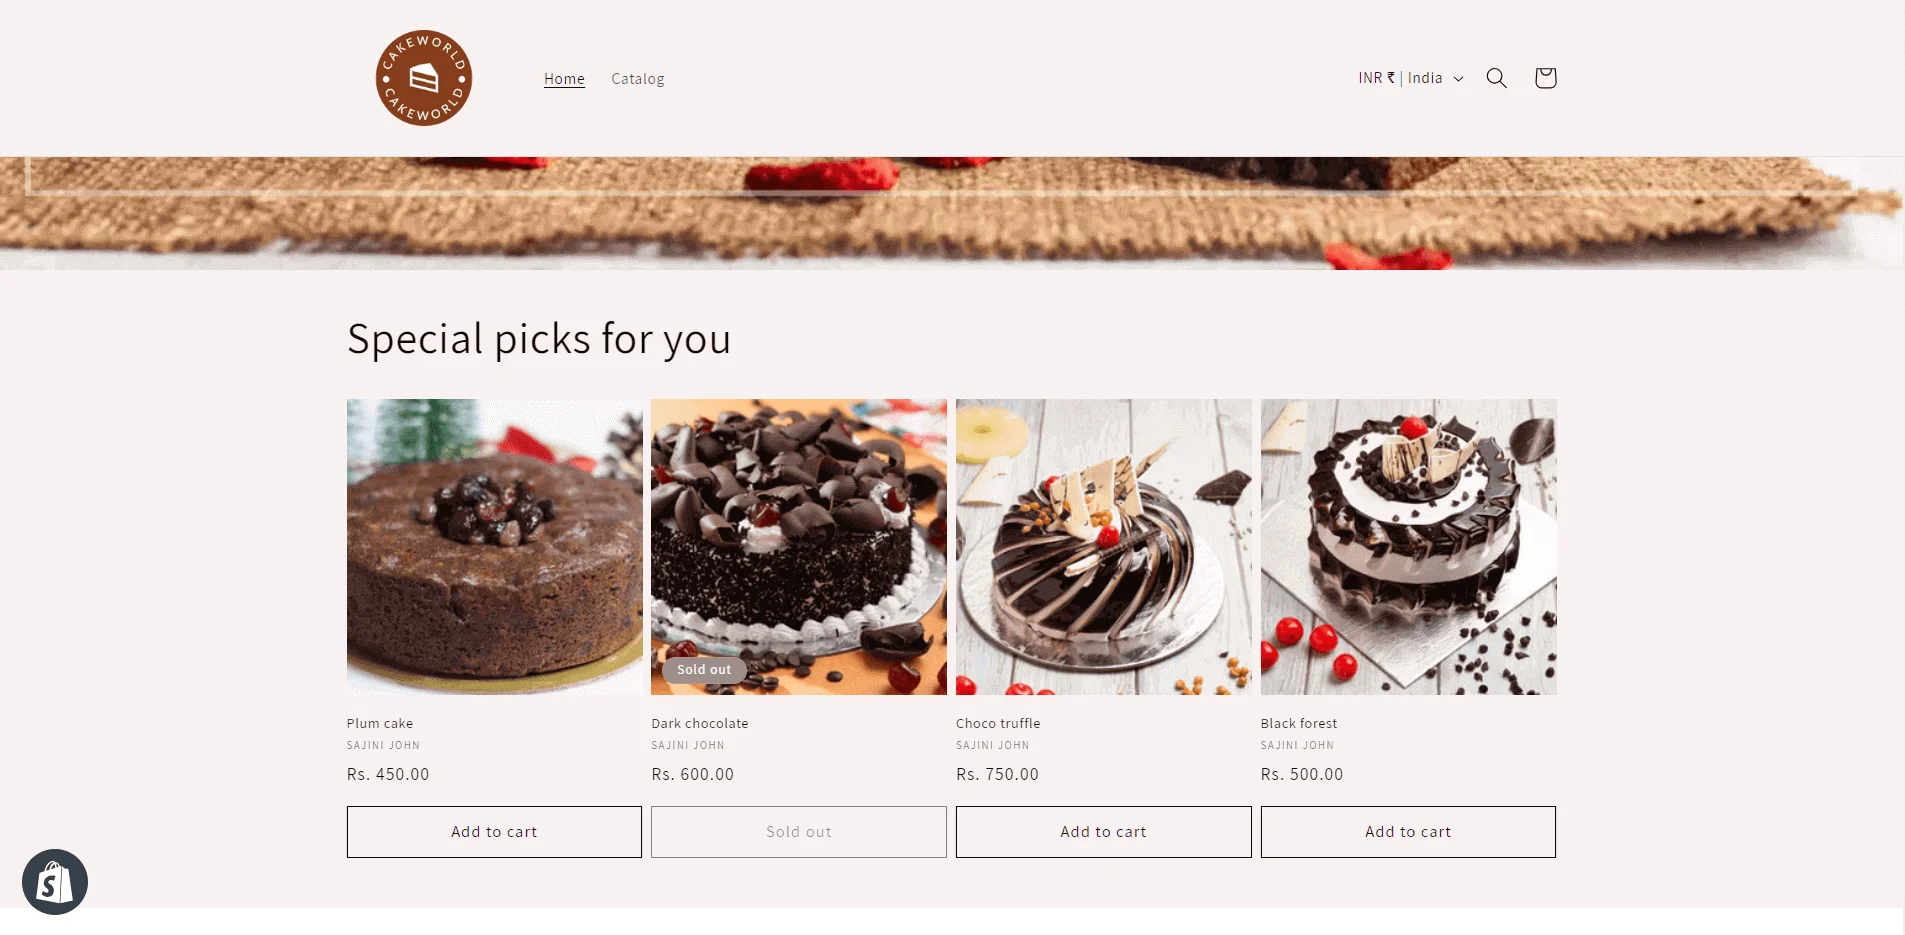
Image with text
This section can help you to make your store informative for your customers. You can describe something about your brand or new product category, etc.
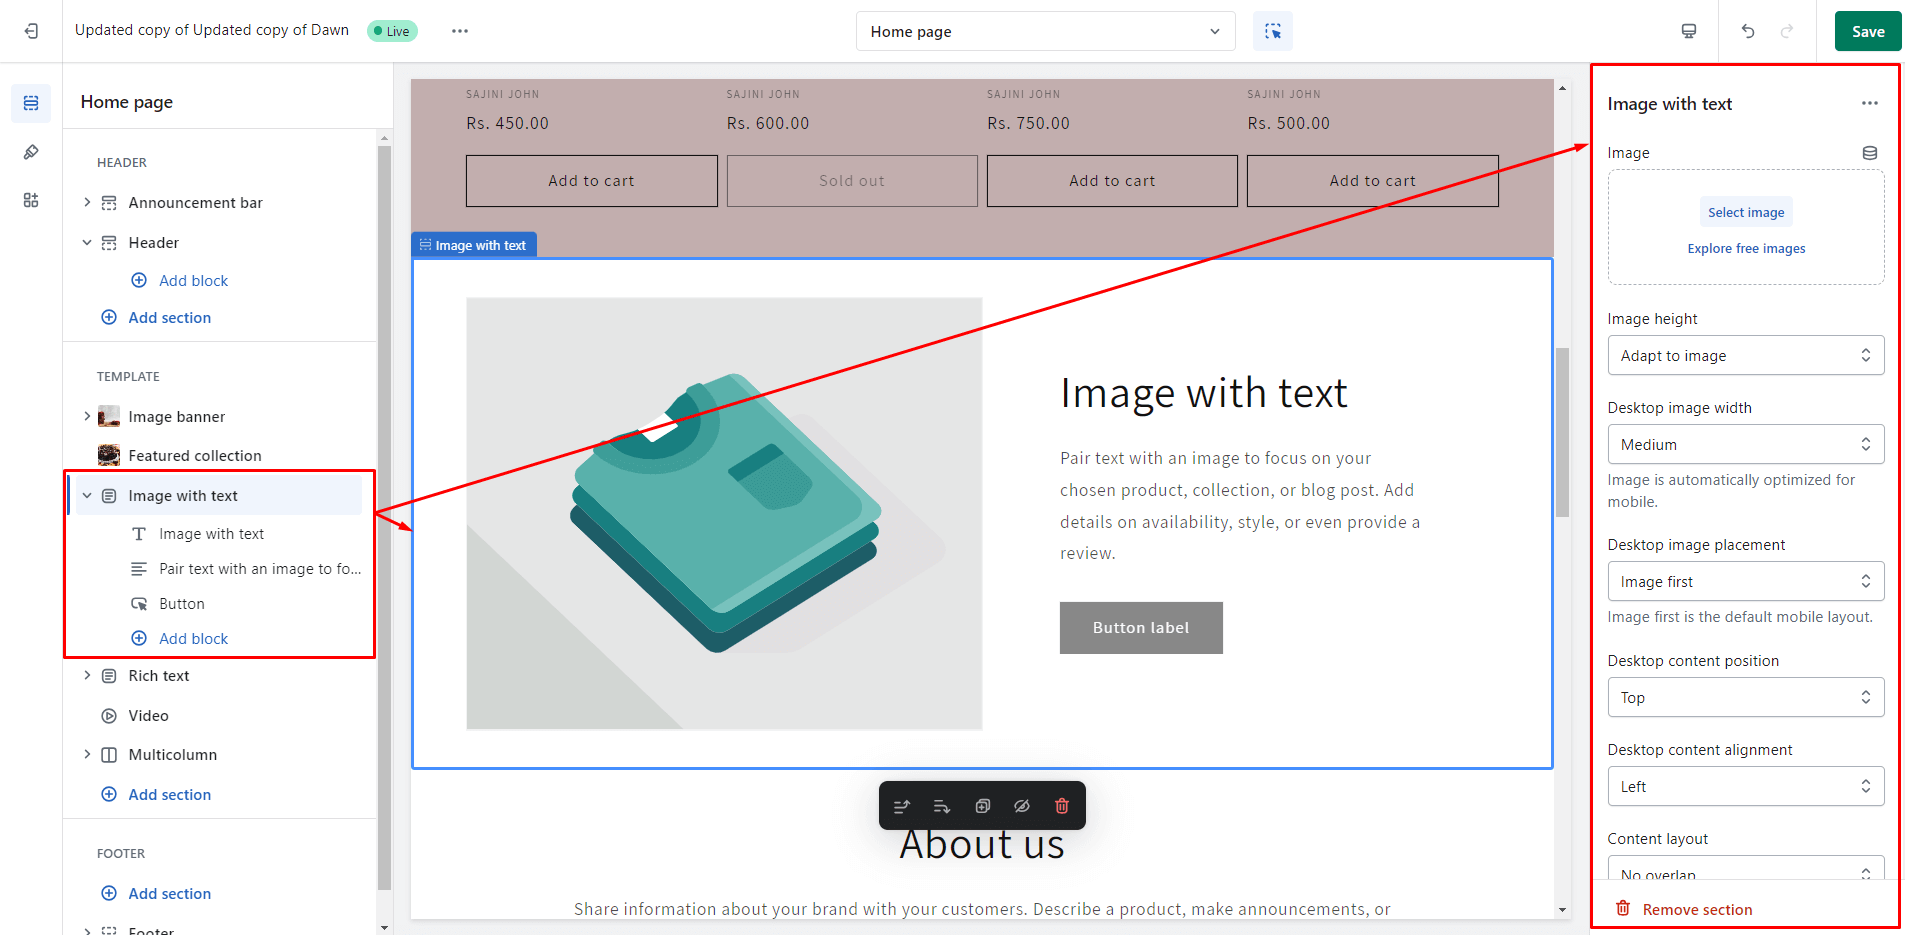
Steps to customize the Image with text Section:
1. Click the Image with text section on the left panel.
2. Go to the right panel and add the image in the section by clicking the Select image button.
3. Set the image height, width, and position.
4. Select the content position you want to show in desktop or mobile.
5. Set the content layout and add the color scheme you want to give for the section.
6. You can add image animation to make your section more impressive.
7. Set the content alignment for the mobile layout.
8. Adjust the section padding
9. Click on the Save button to save the changes.
Note: You can skip the text or button in the Image with text.
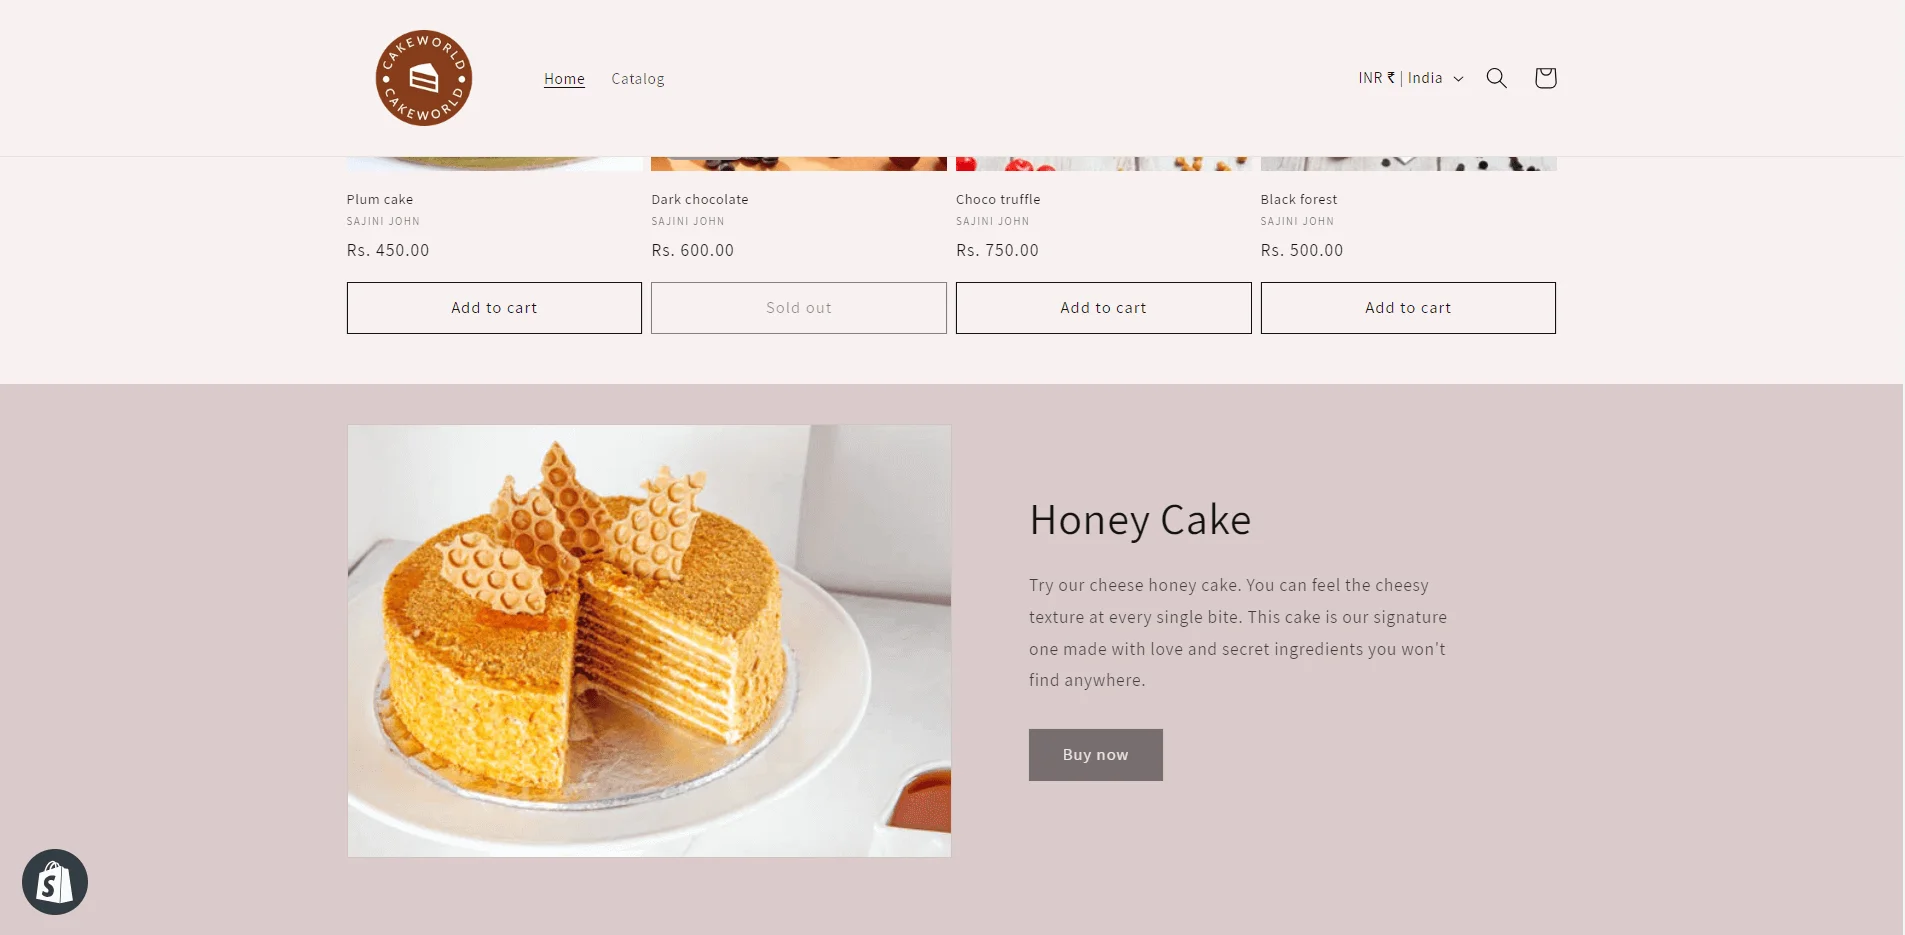
Let’s check the output of the image with the text section:
Footer
The footer section is part of your site, providing a consistent place for important links and information. Adding key links here improves navigation and helps visitors easily access critical pages such as contact information, privacy policies, and site maps.
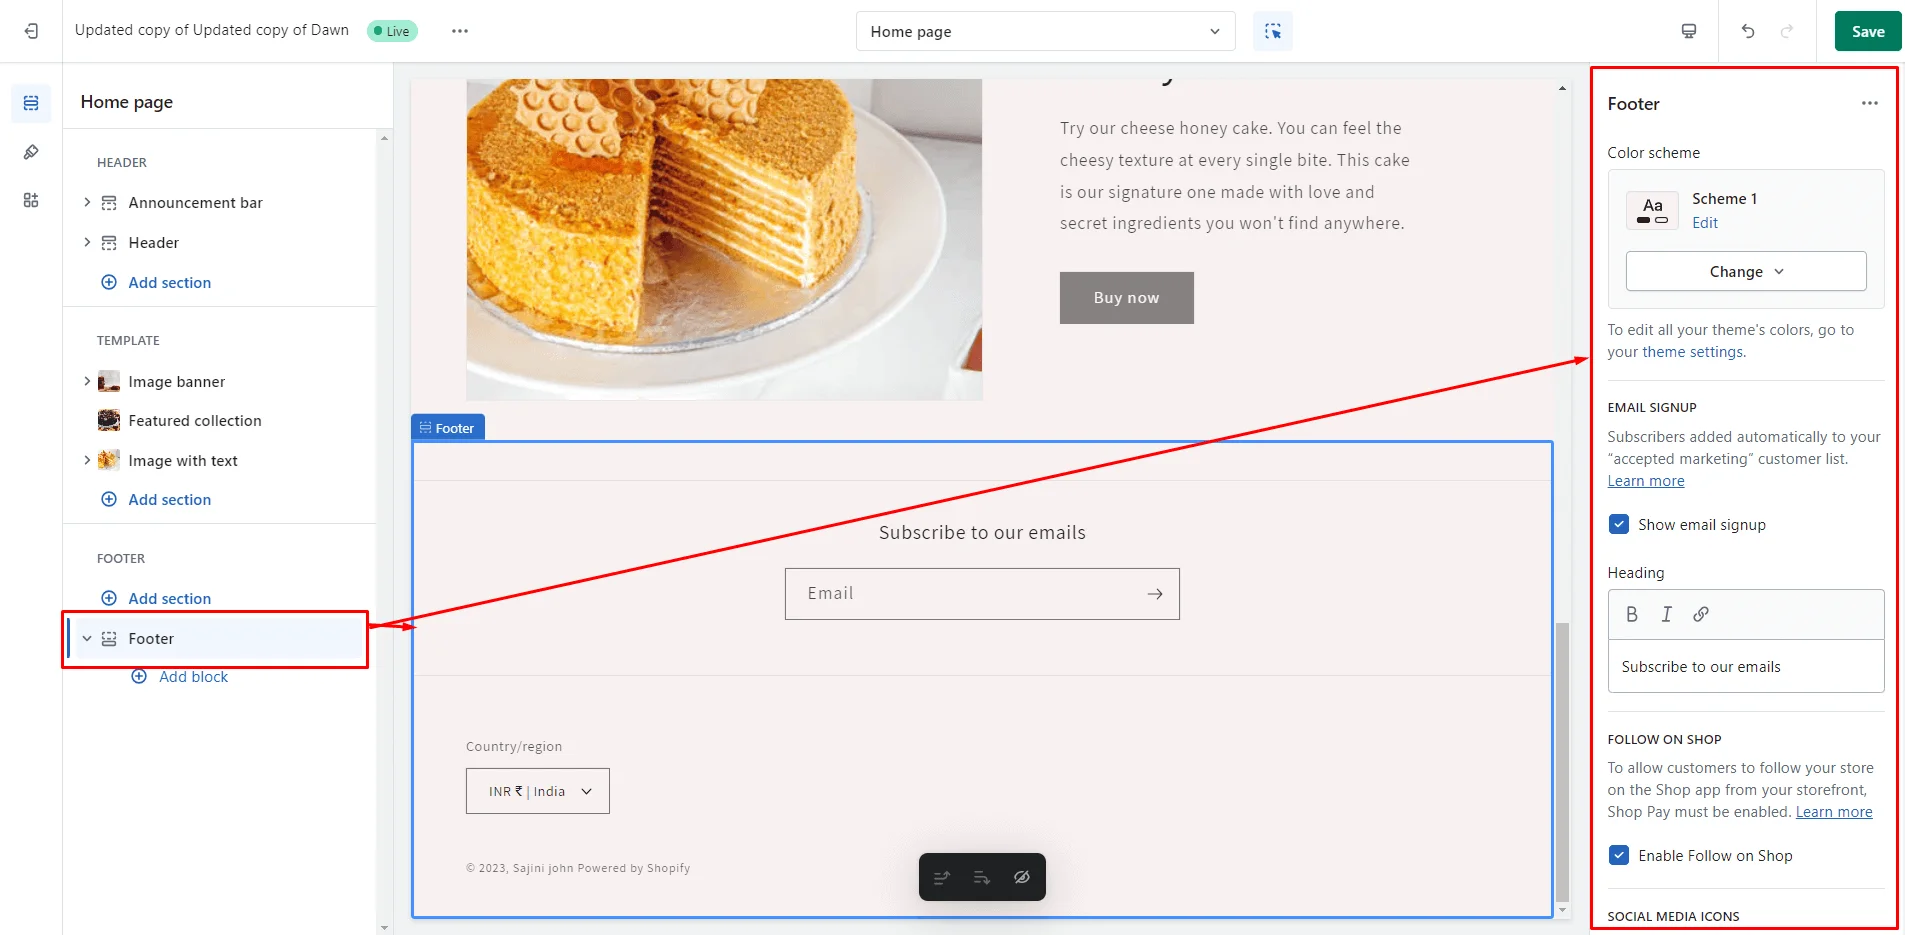
How to customize the footer section: steps to follow
1. Select the Color Scheme: Choose a suitable color scheme for your store's footer.
2. Keep the "Show email signup" option checked if you want customers to subscribe to newsletters and promotional emails.
3. Enable the "Follow on Shop" option to allow customers to follow your store on the Shop app from your storefront.
4. If you have social media accounts, enable the "Show social media icons" option to display them in the footer. To add social media accounts, go to Theme Settings > Social Media.
5. Keep the "Enable country/region selector" option checked to let visitors choose their region.
6. Enable the language selector to allow visitors to choose their preferred language.
7. Enable the "Show payment icons" option to display all payment icons added to your store.
8. Add links to your privacy policy if applicable.
9. Fine-tune the spacing and section padding to fit your design needs.
10. Save button to apply your customizations.
This is how I have customized the footer section of my store.
We have explored the default sections included in the Dawn theme Shopify homepage. You can add more sections anywhere in your store using the “Add Section” option.
Let’s explore all the theme sections available in the Shopify Dawn theme.
Dawn theme Shopify: Theme Sections
When you click "Add Section" in the left panel of the theme editor, you'll find a variety of theme sections available for your store. These include Featured Collections, Featured Products, Collection Lists, rich text, Images with Text, Image Banners, Slideshows, Collages, Multicolumns, Multirows, Collapsible Content, Email Signups, Contact Forms, Videos, Blog Posts, Custom Liquids, and Pages.
These theme sections are accessible across all store pages, thanks to Shopify’s Online Store 2.0!
Product Pages in Dawn Theme Shopify
Shopify’s default product page is quite impressive as it consists of almost everything you may want to have on your product page. In case you need a different layout, you can create your own using the Create template option.
As shown in the image above, two additional sections are available beyond the Home page. Here’s a detailed look at these sections:
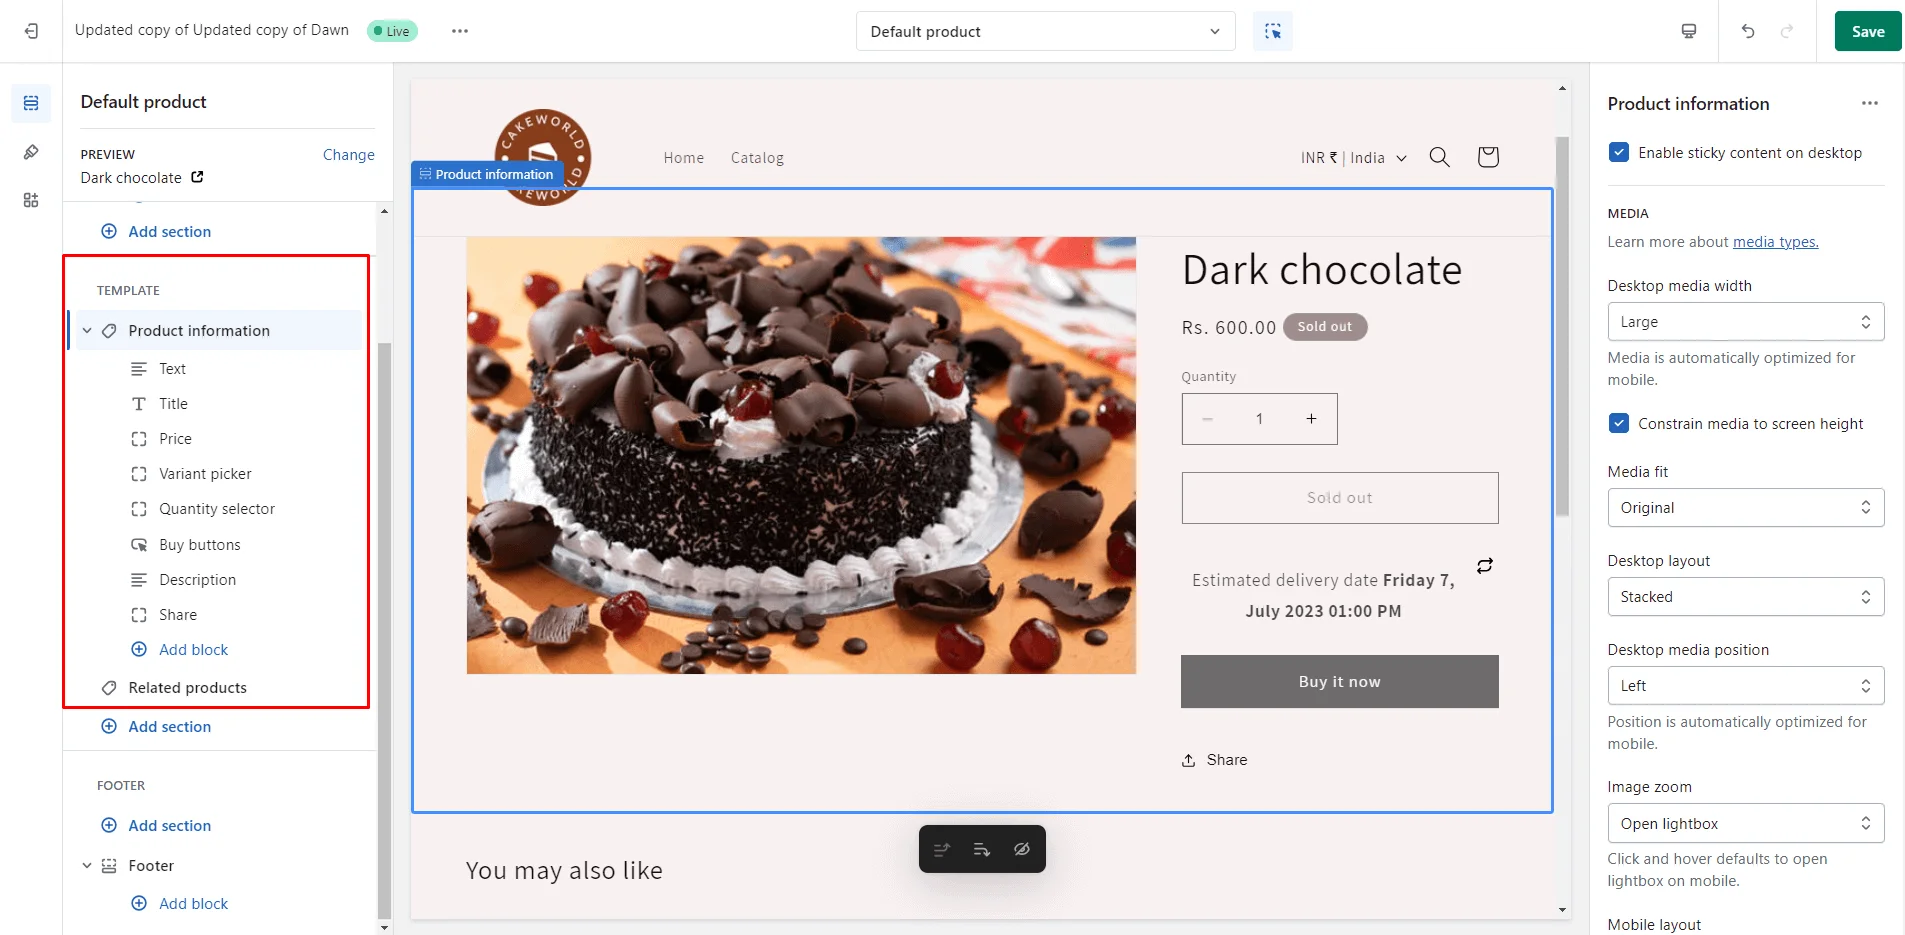
Product Information
This section gives you all access to the product block so that you can easily choose which block to show and where to show it without editing the code.
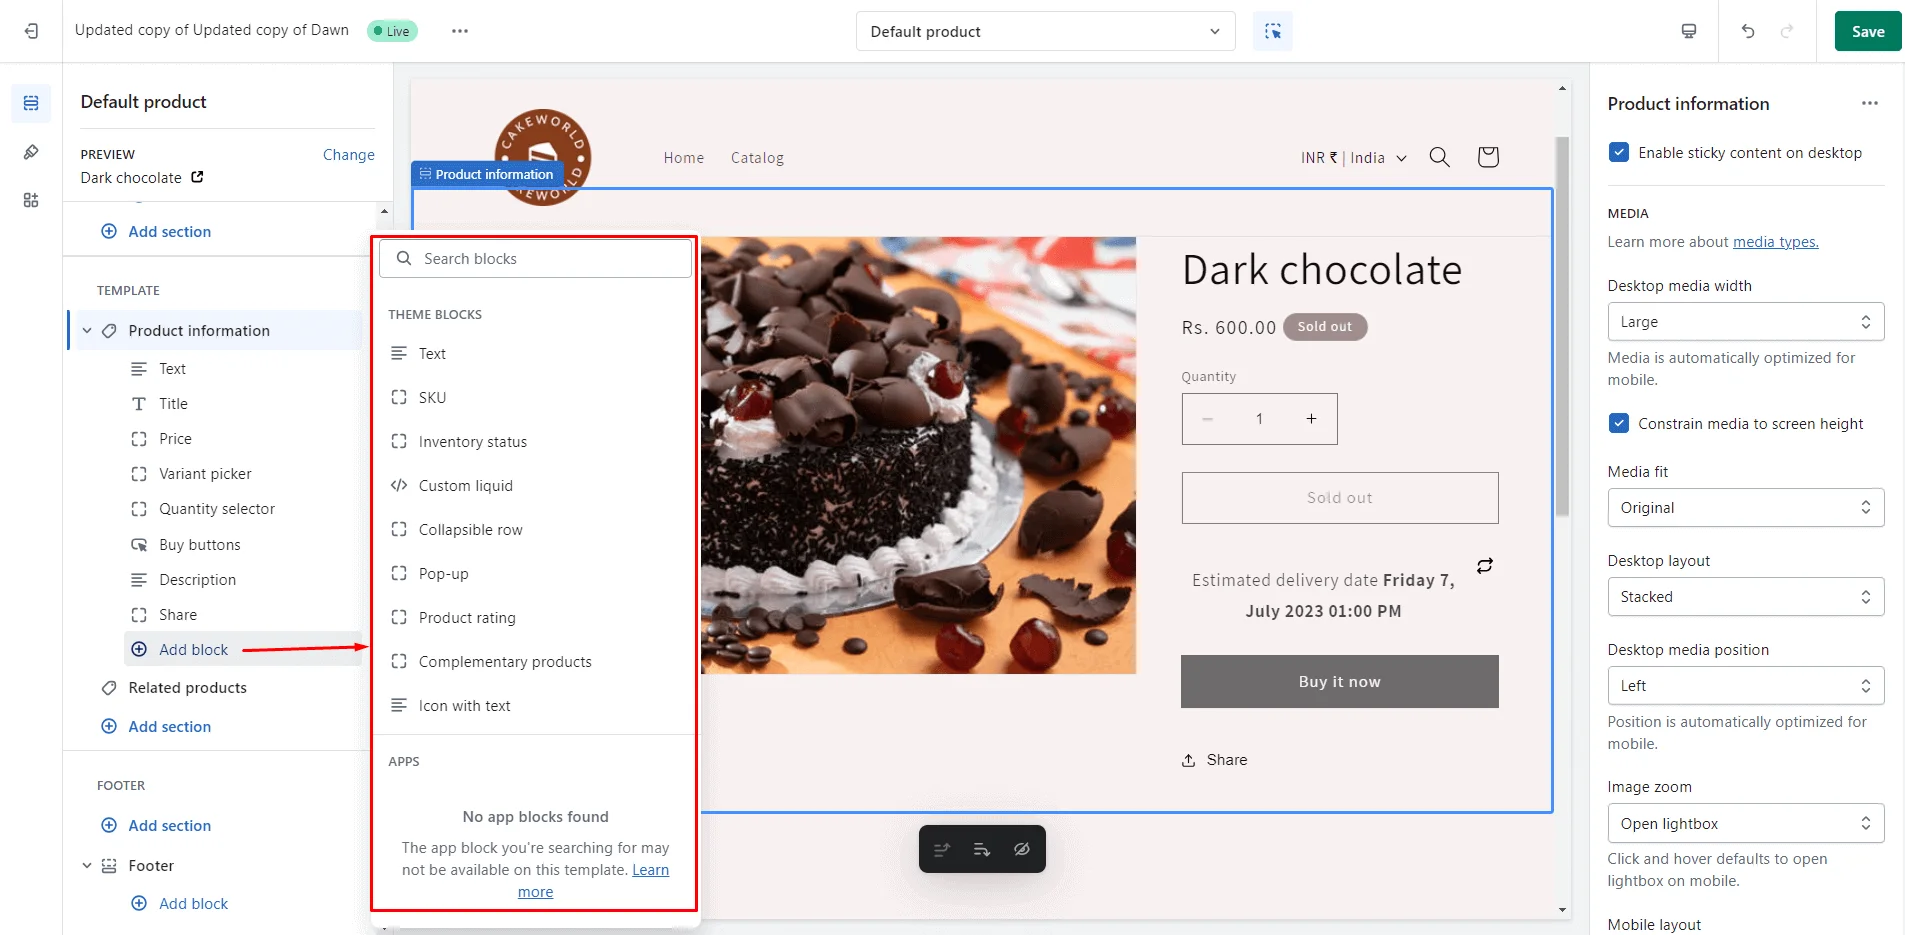
You can add three more blocks to this section by clicking the Add block option.
Related products
This block allows you to show related products to the visitors when they explore any product.
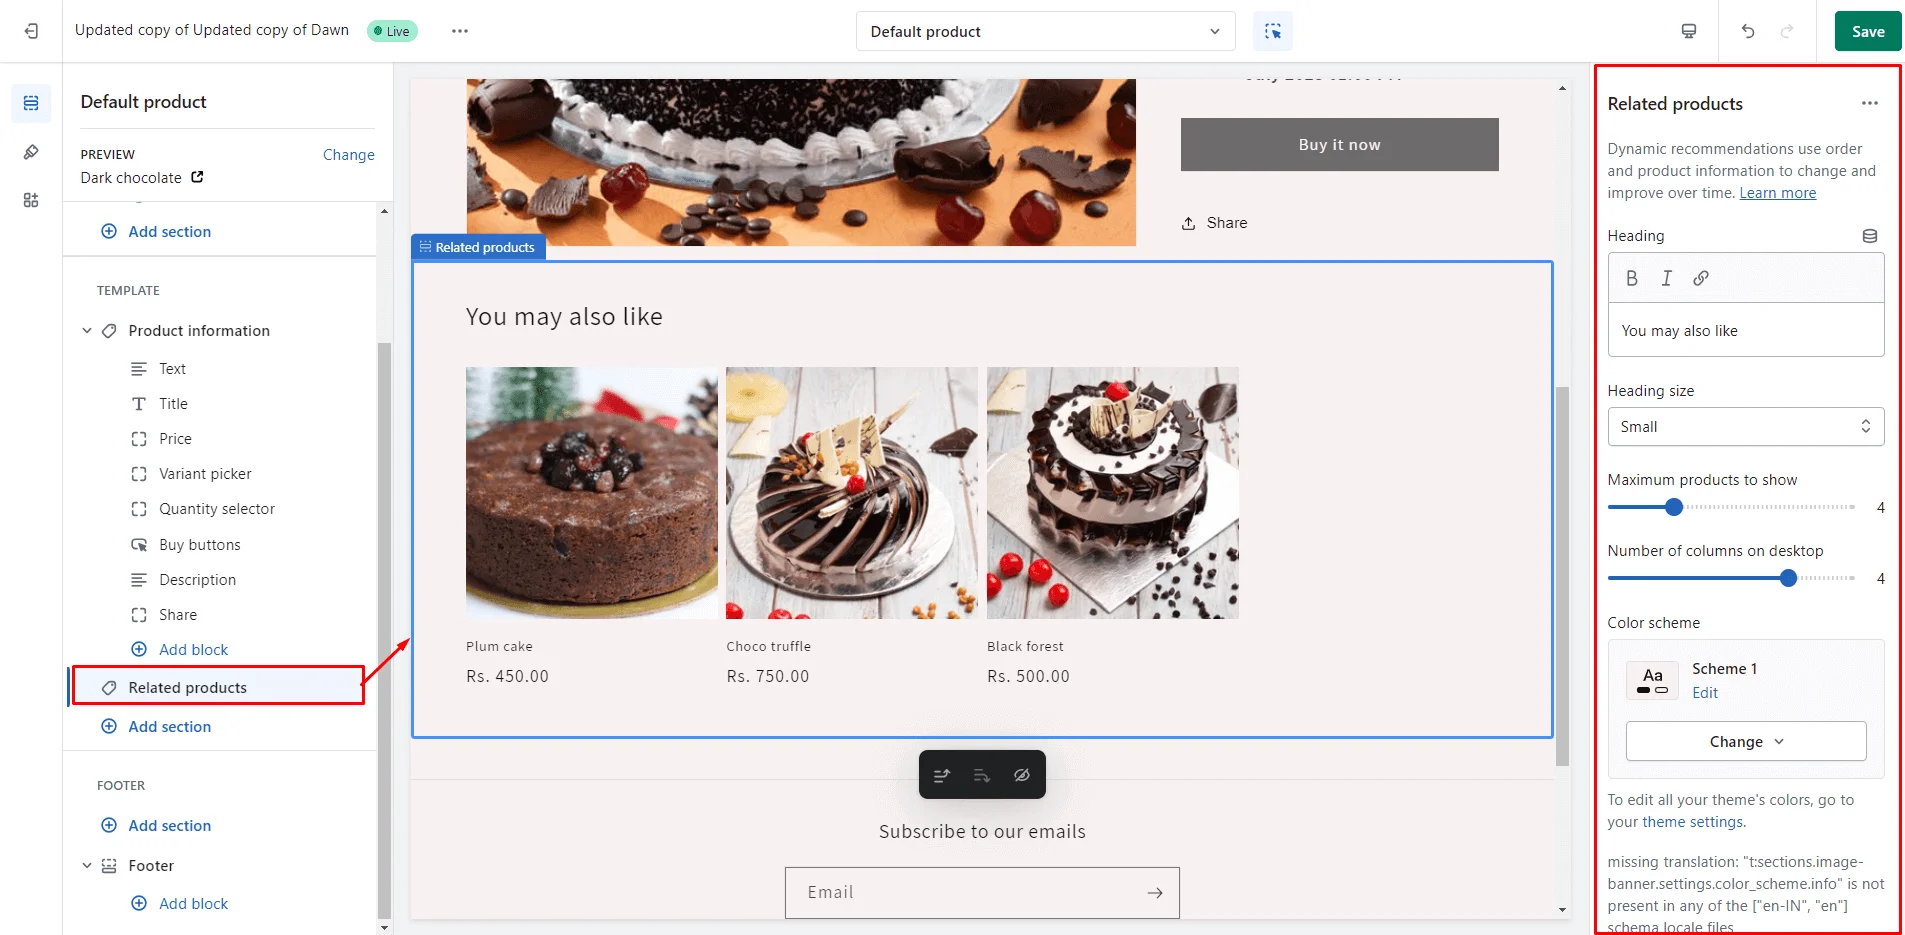
You can also customize the product details in the product recommendation section from the right panel.
Collection Page in Dawn theme Shopify
The collection page displays all products within a particular collection. This template includes two additional sections beyond those found on the Home page. Let’s explore these sections in detail below:
Collection Banner
The image you uploaded while creating the collection will be displayed as the collection banner.
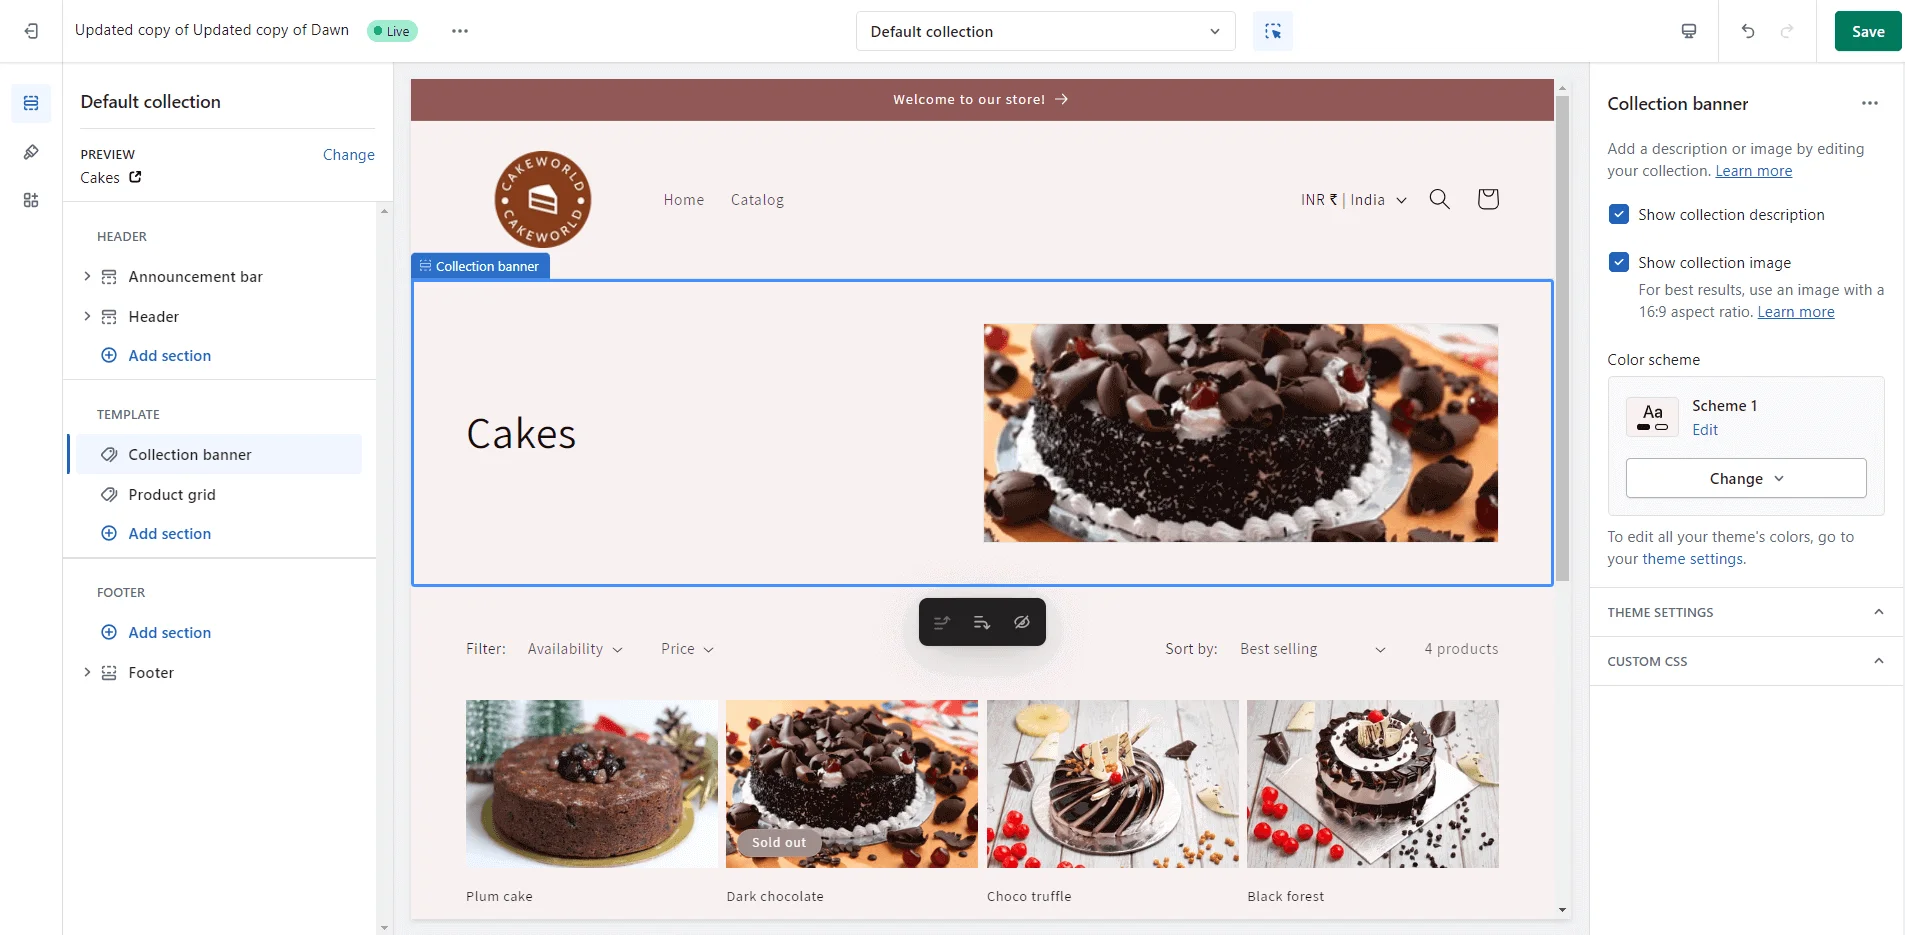
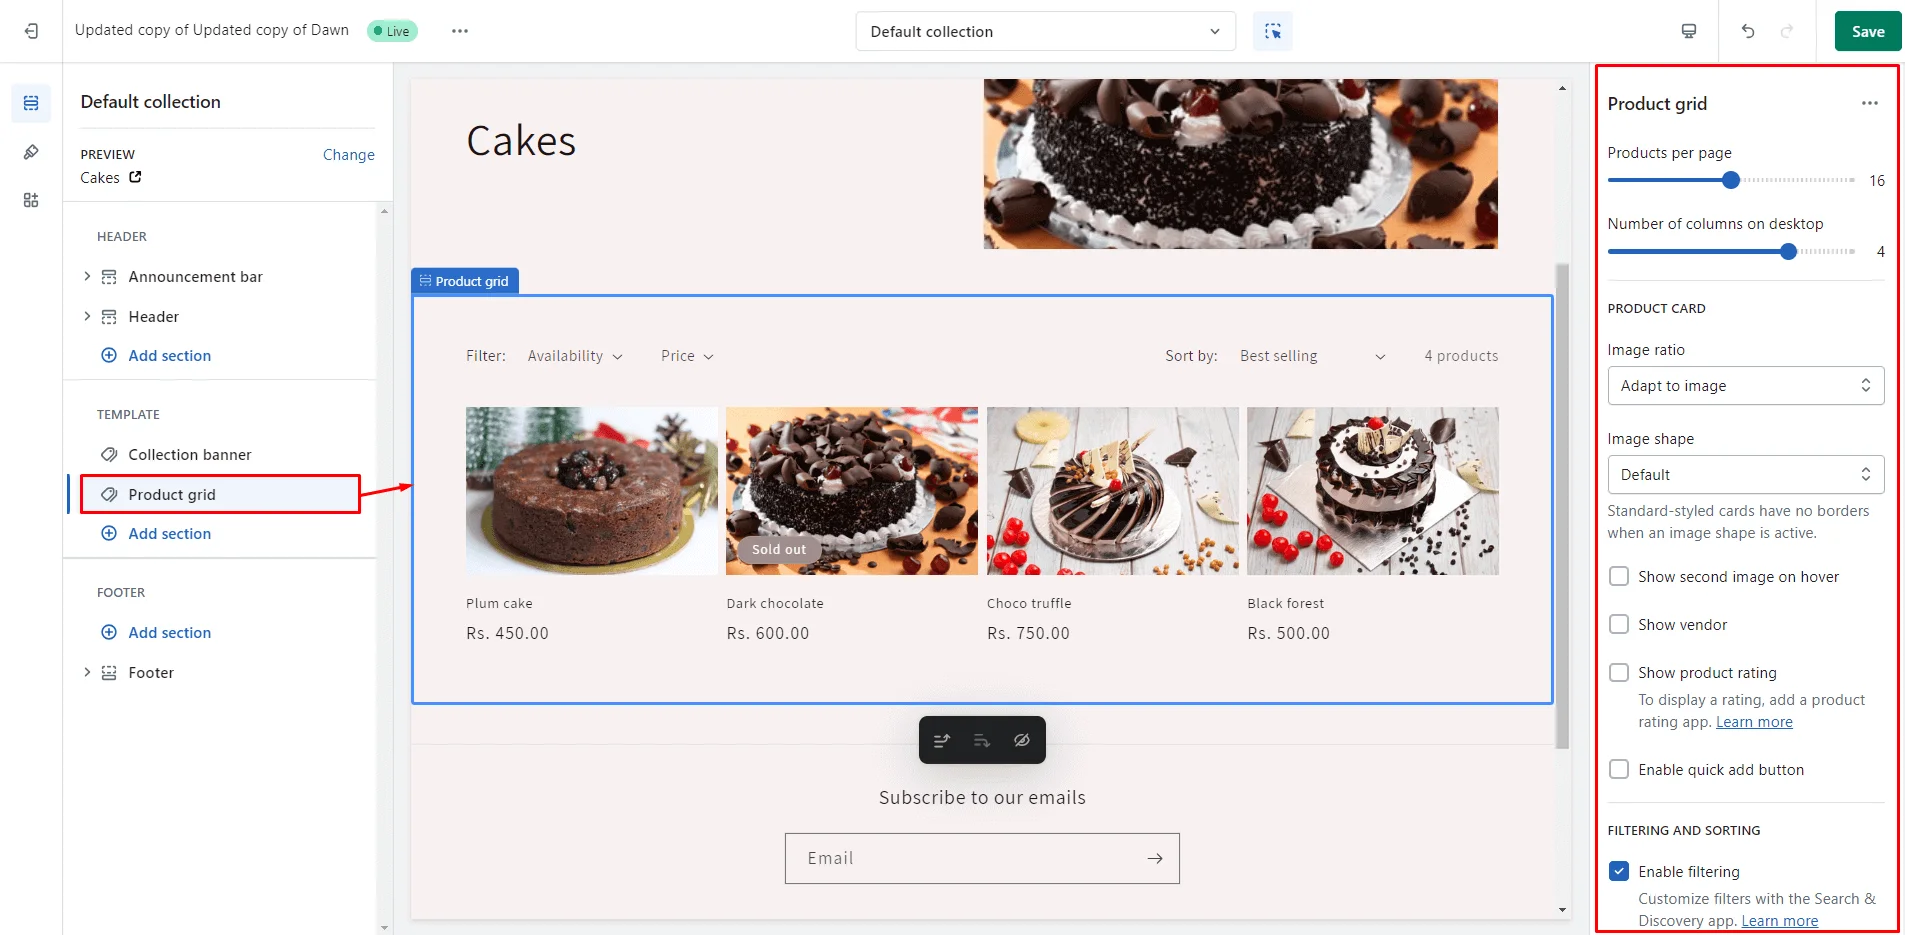
Product Grid
The product grid section offers various options for customizing the product list. You can adjust the settings according to your requirements to enhance the display and functionality of your product grid.
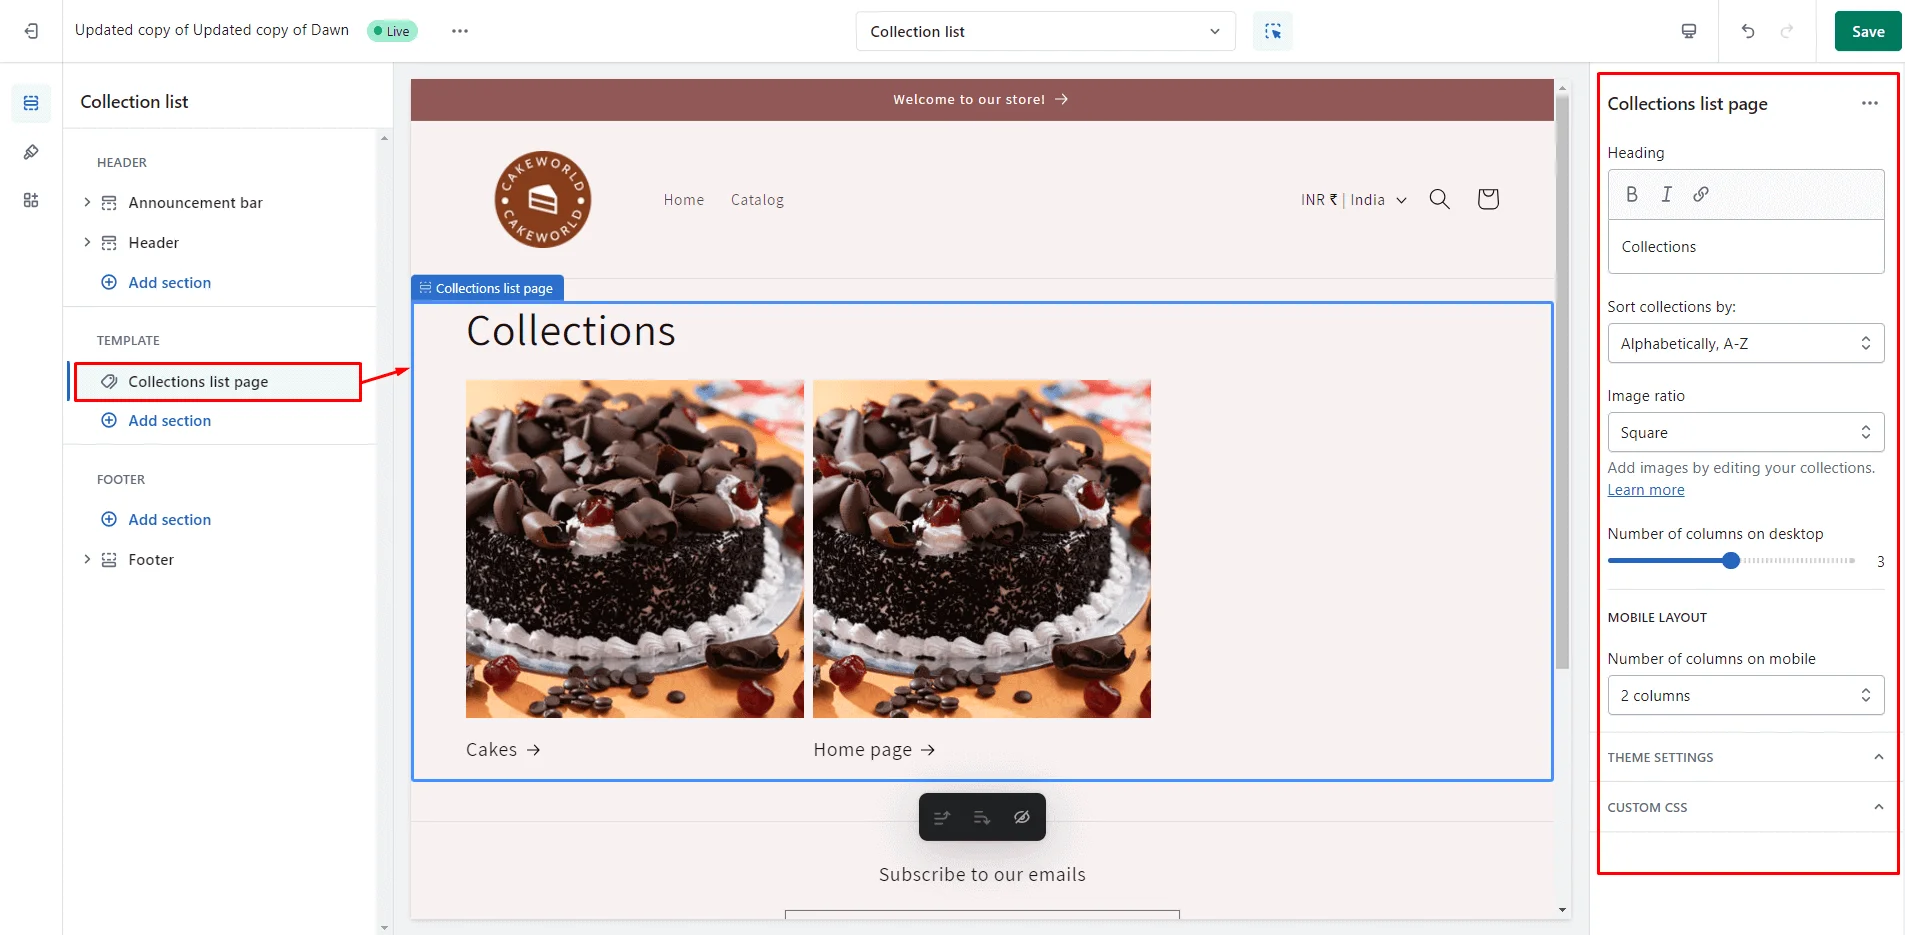
Collection List in Dawn theme Shopify
This page displays all the collections you have created in your store in a grid layout. On the right panel, you will find options to customize the collection list page to fit your store's needs and design preferences.
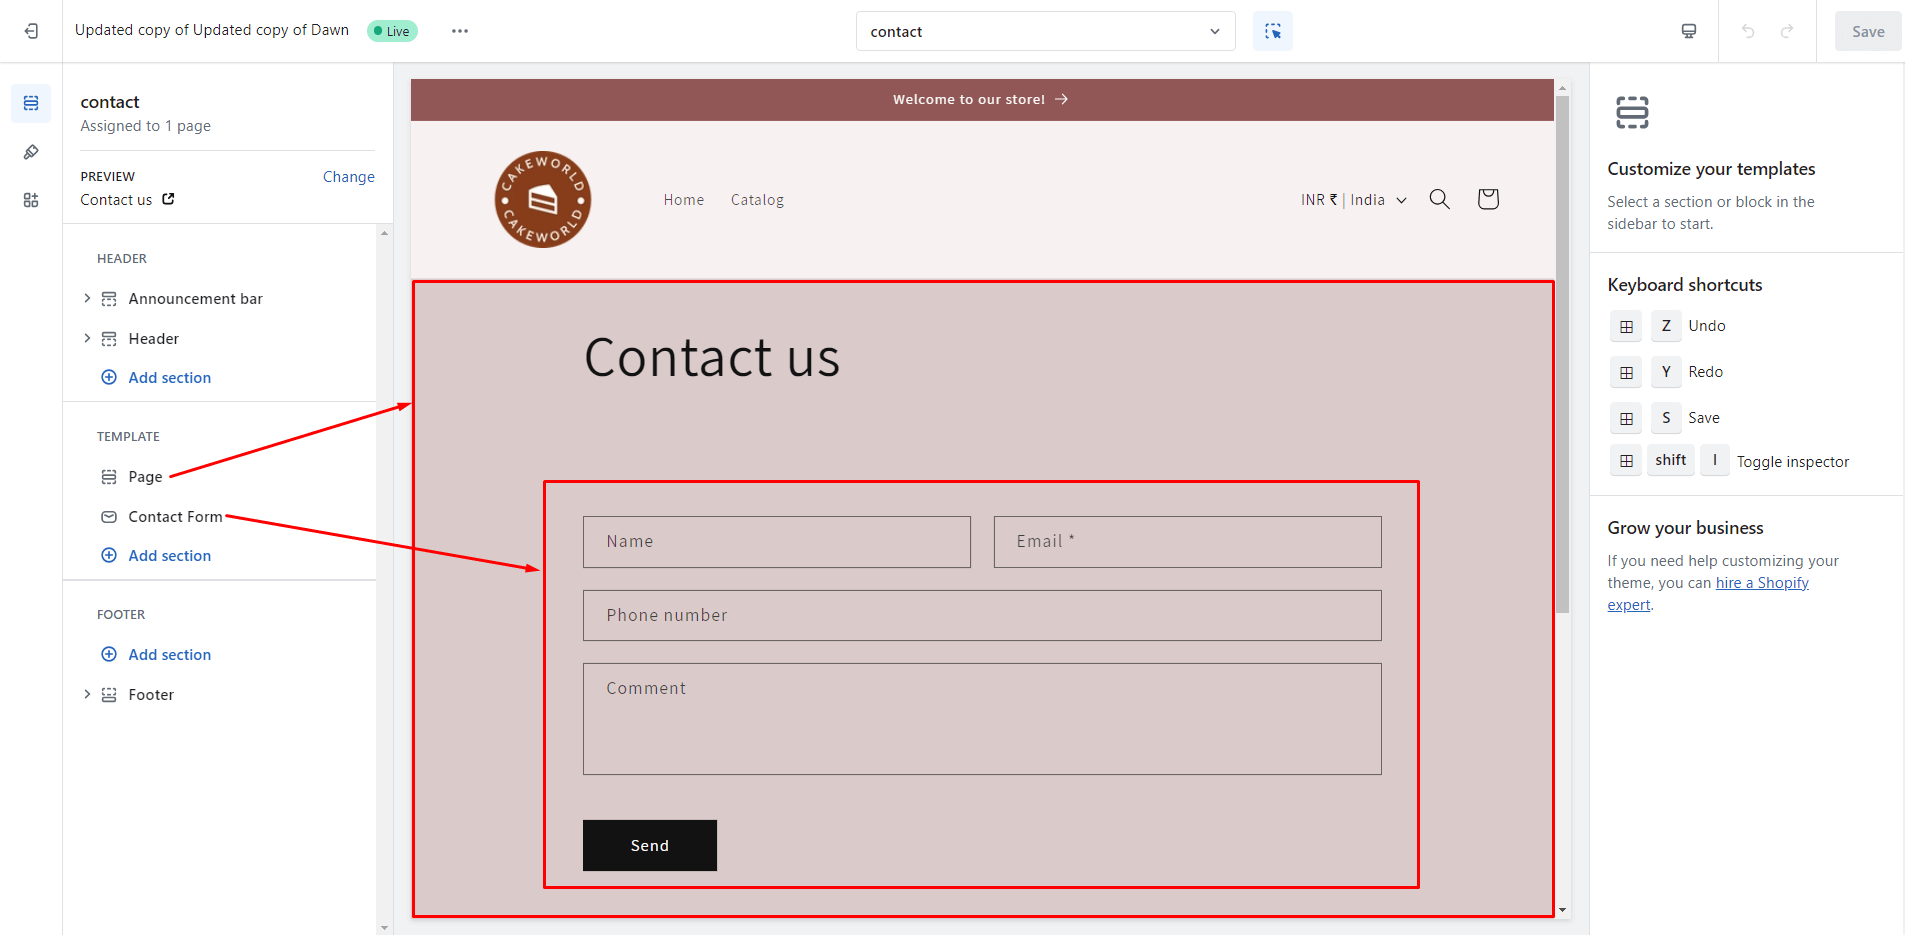
Contact Page
The contact page has two sections by default: Page and Contact Form. You can add other sections to this page based on your store's requirements.
Blogs Page
The blog page on your online store is the perfect place to showcase all your blog posts to visitors who enjoy reading. This page automatically organizes the blog posts, making it easy for readers to browse the content based on the number of blogs you have published.
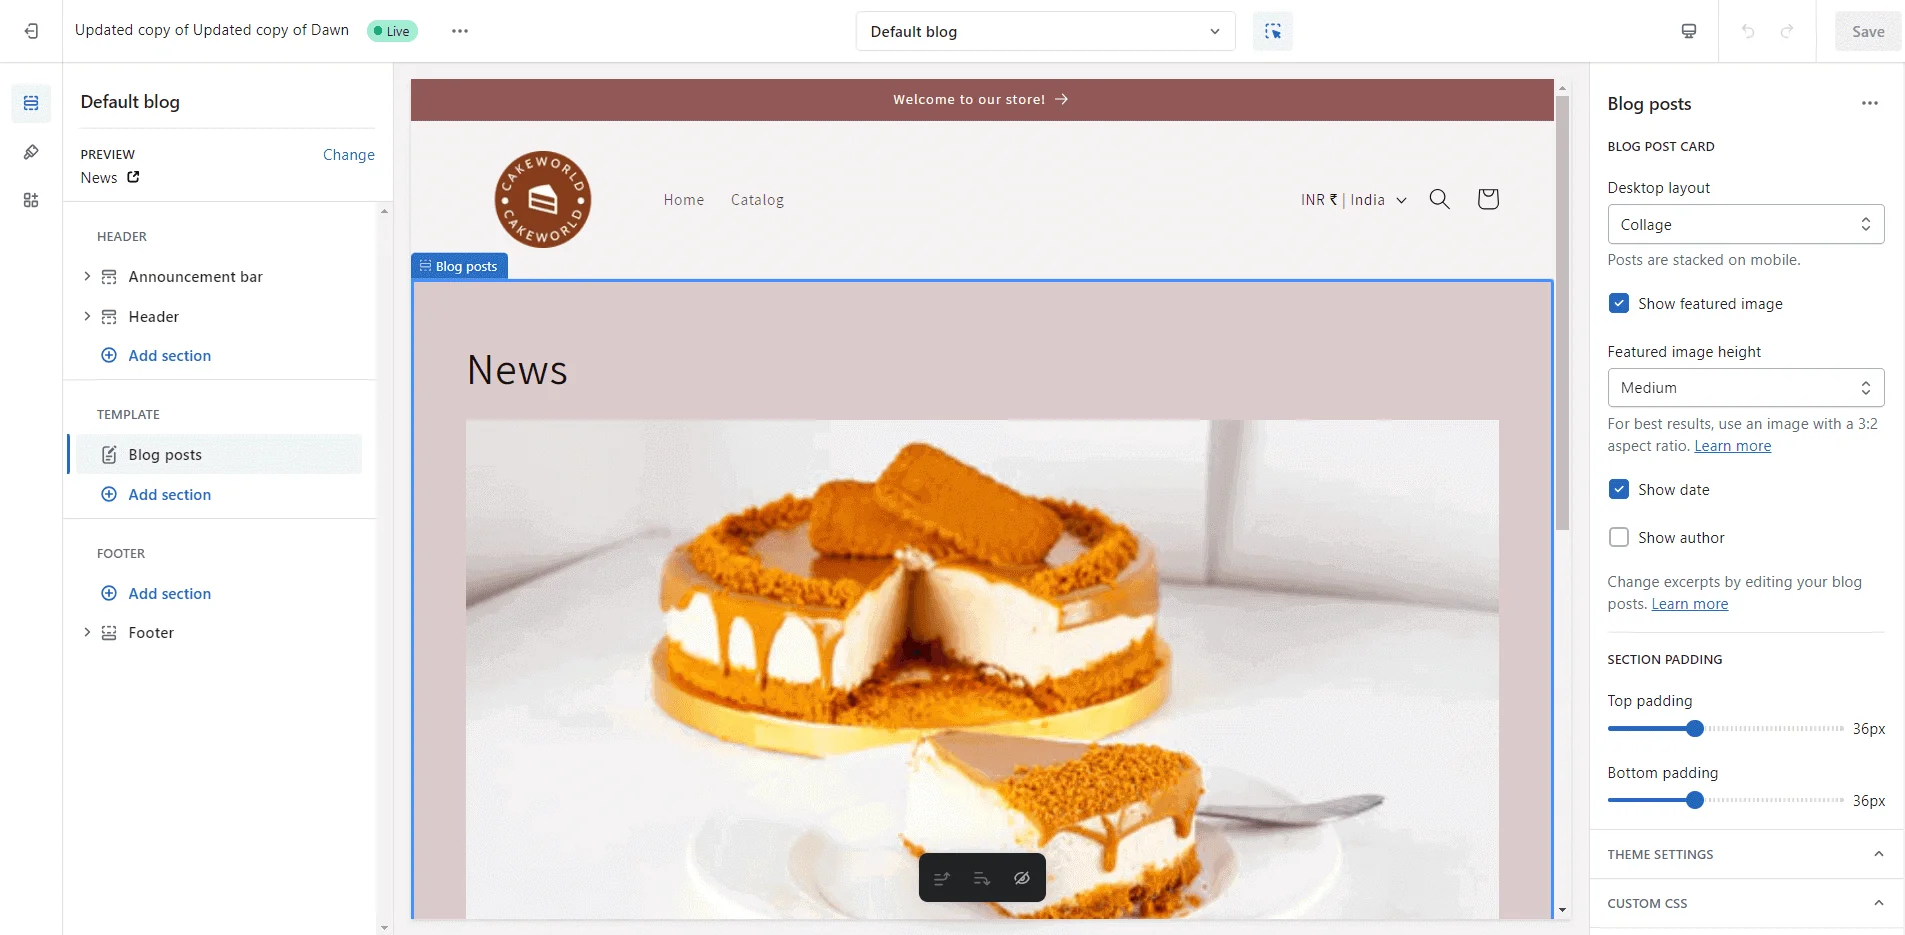
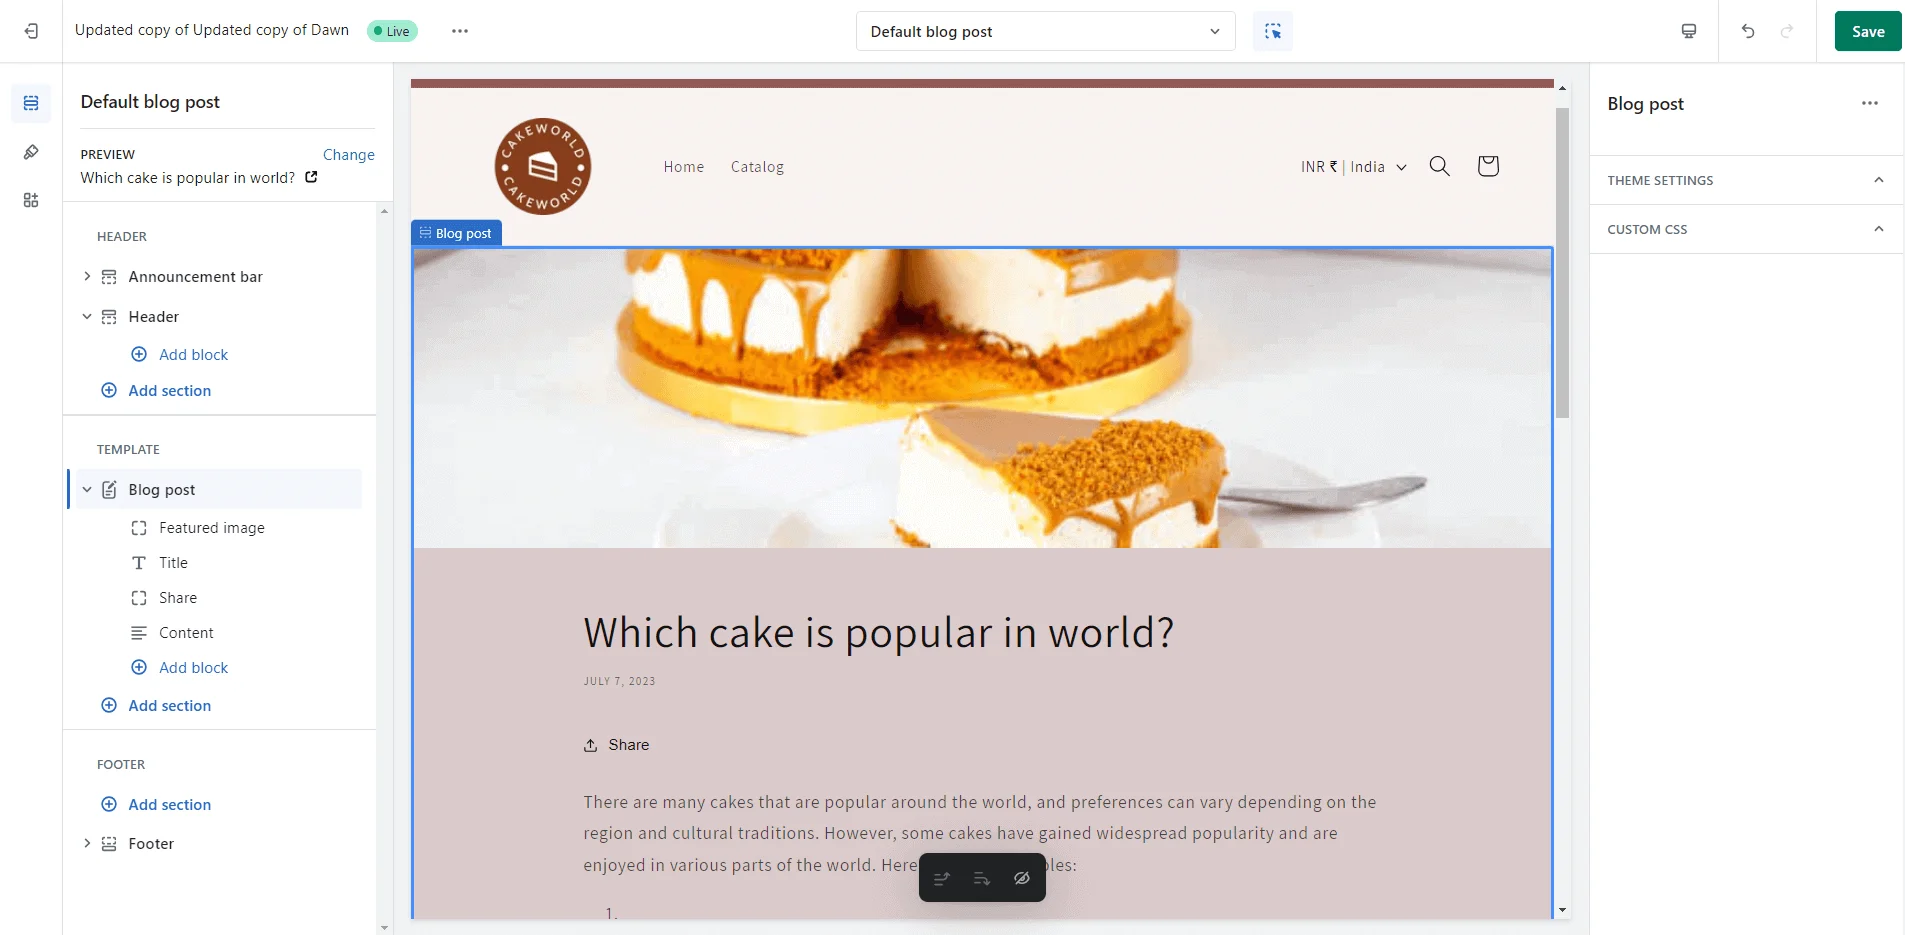
Blog Posts
Users will be redirected to the designated blog post page when they open any blog post. This page is specifically designed to display the content of individual blog posts in an organized and reader-friendly manner.
Cart Page
The cart page displays the products users have added to their shopping cart. This page is a step in the online shopping experience, allowing customers to review their selected items before checkout. Users can view detailed information about each product on the cart page, including the name, price, quantity, and any chosen options, such as size or color.
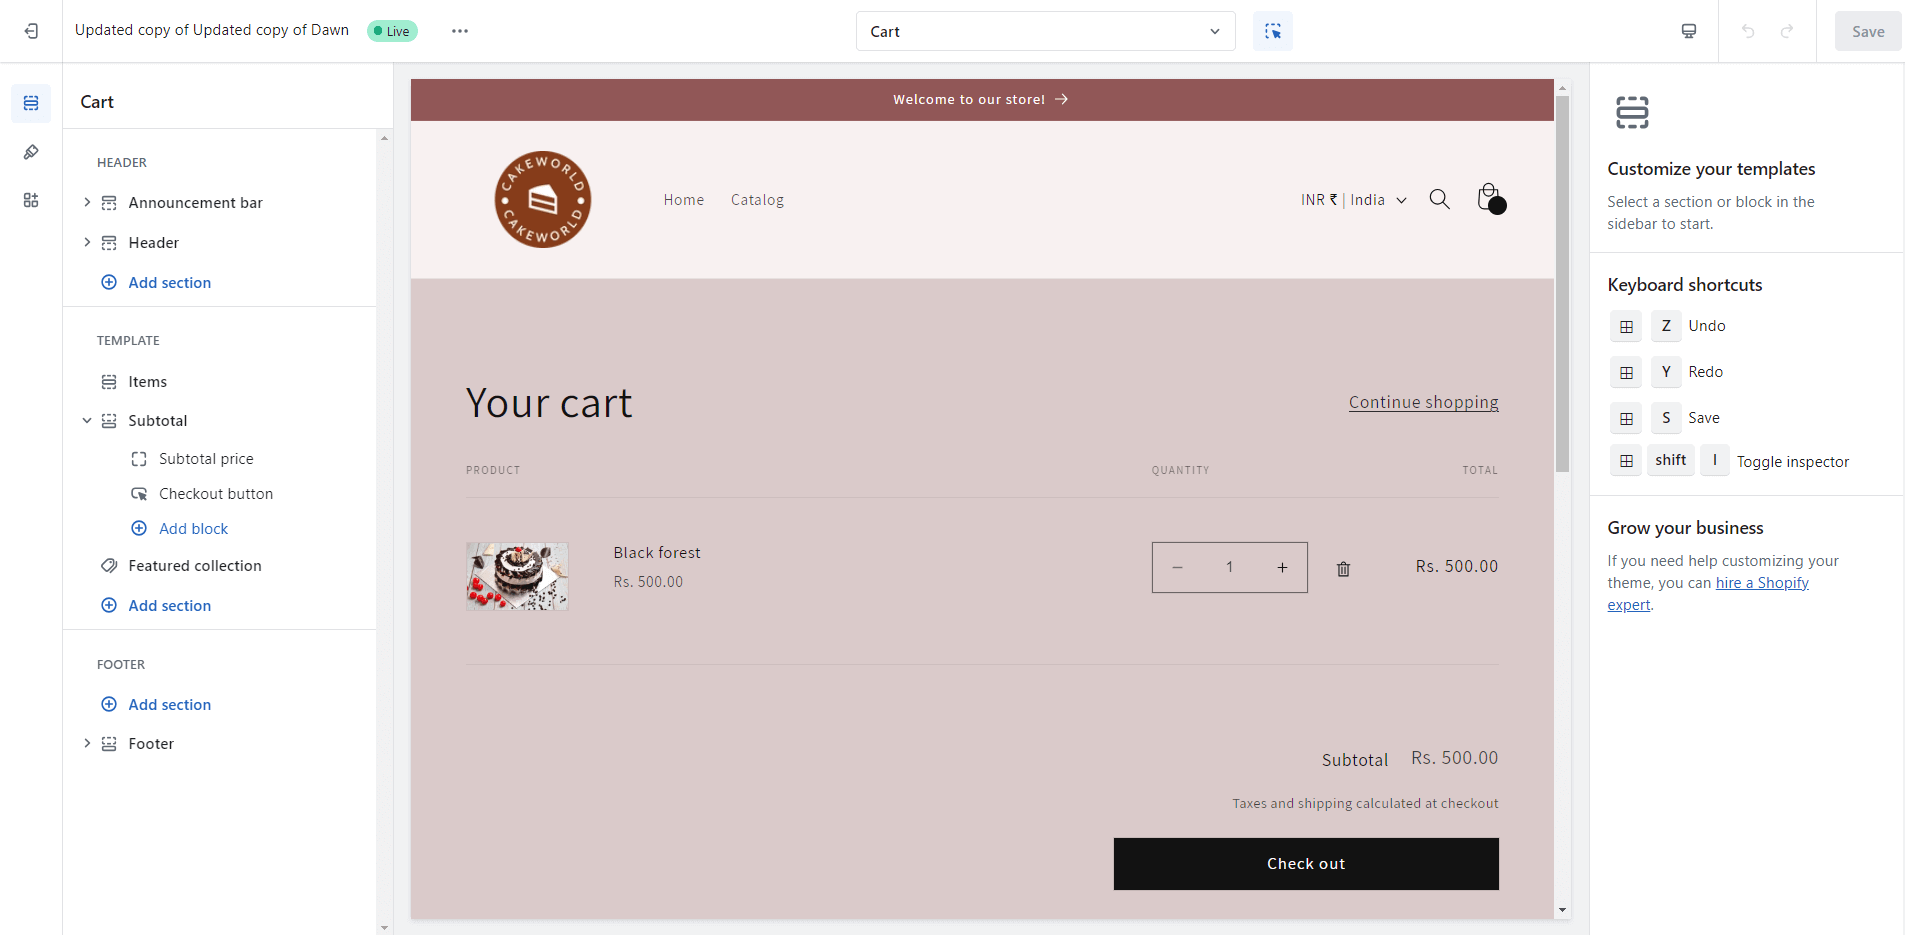
In the Shopify Dawn theme, you can modify the cart page where you can add featured collections as product recommendations or upsell at the bottom of the Subtotal section. It saves you from spending on apps.
Are you looking for more upselling or cross-selling options to increase your store revenue? Then, you should add the iCart Shopify app to your store. The iCart Upsell app has many unique features, including product upsells, cross-sells, discount tiers, time-sensitive offers, product bundles, and much more!
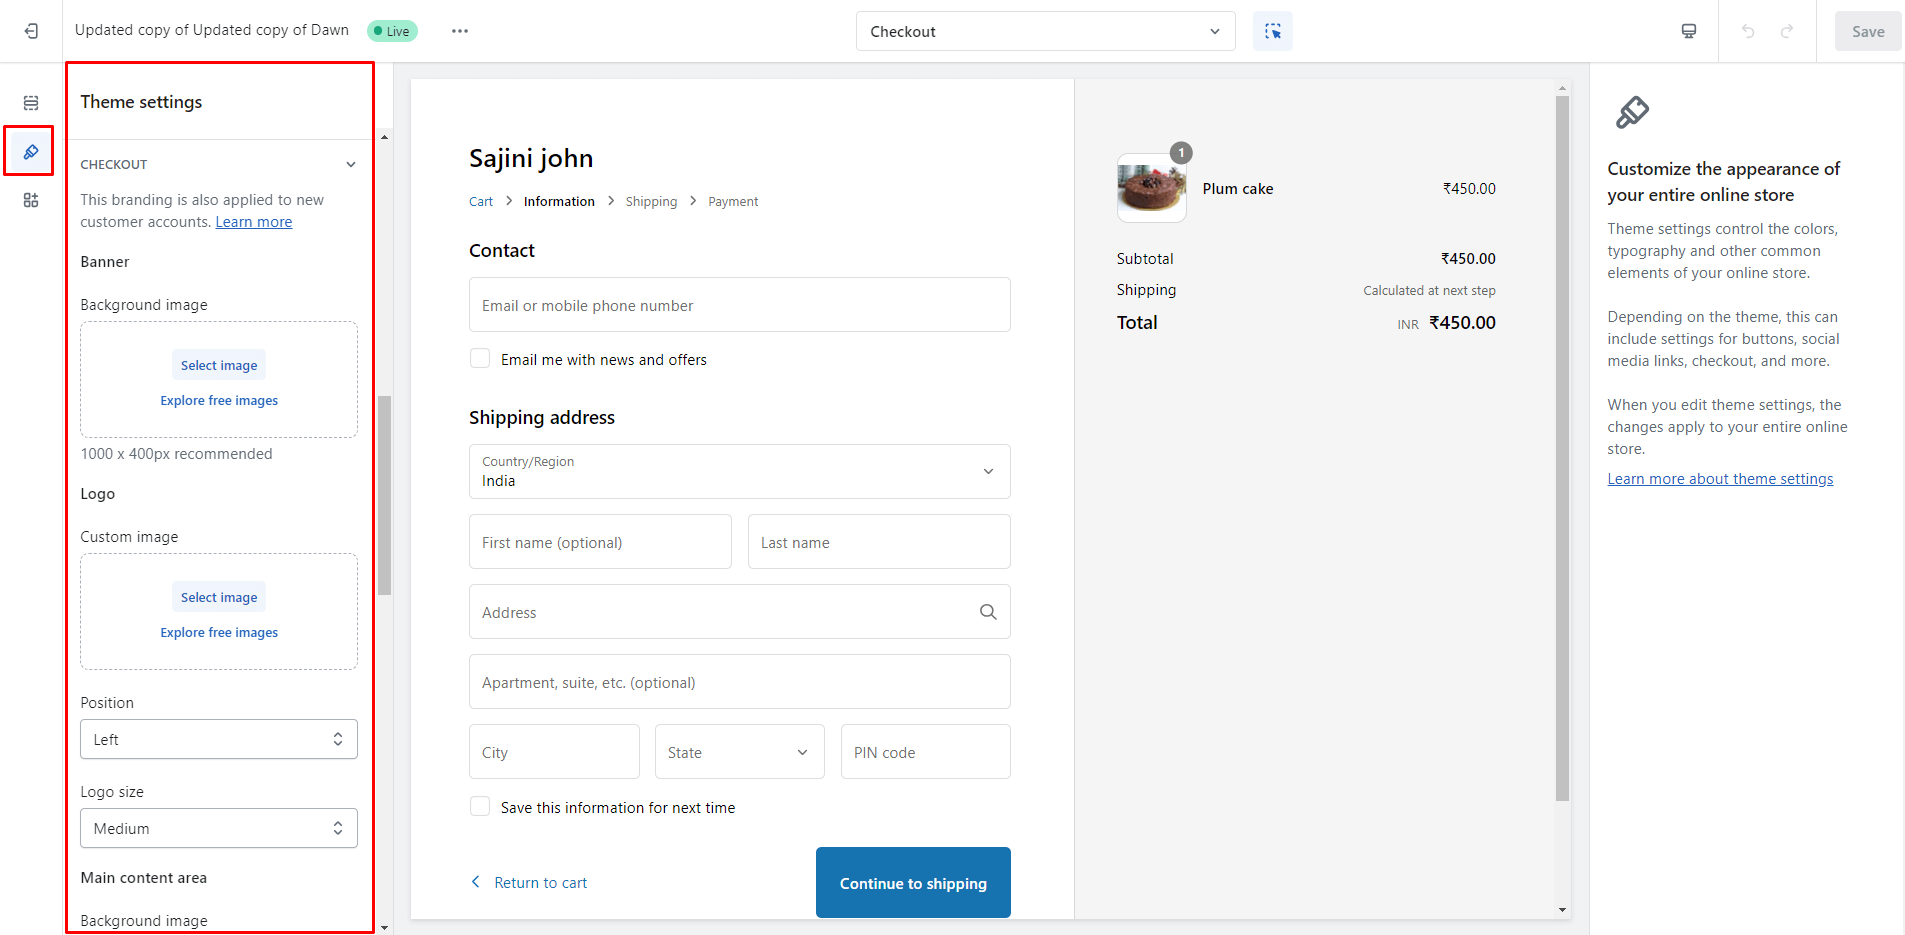
Checkout Page
The checkout page offers no sections, but you can customize it at Theme Settings > Checkout.
Classic customer accounts
Here, you get the page templates related to Customer accounts, such as customer account, customer activated account, customer address, customer login, customer order, customer register, and customer reset password.
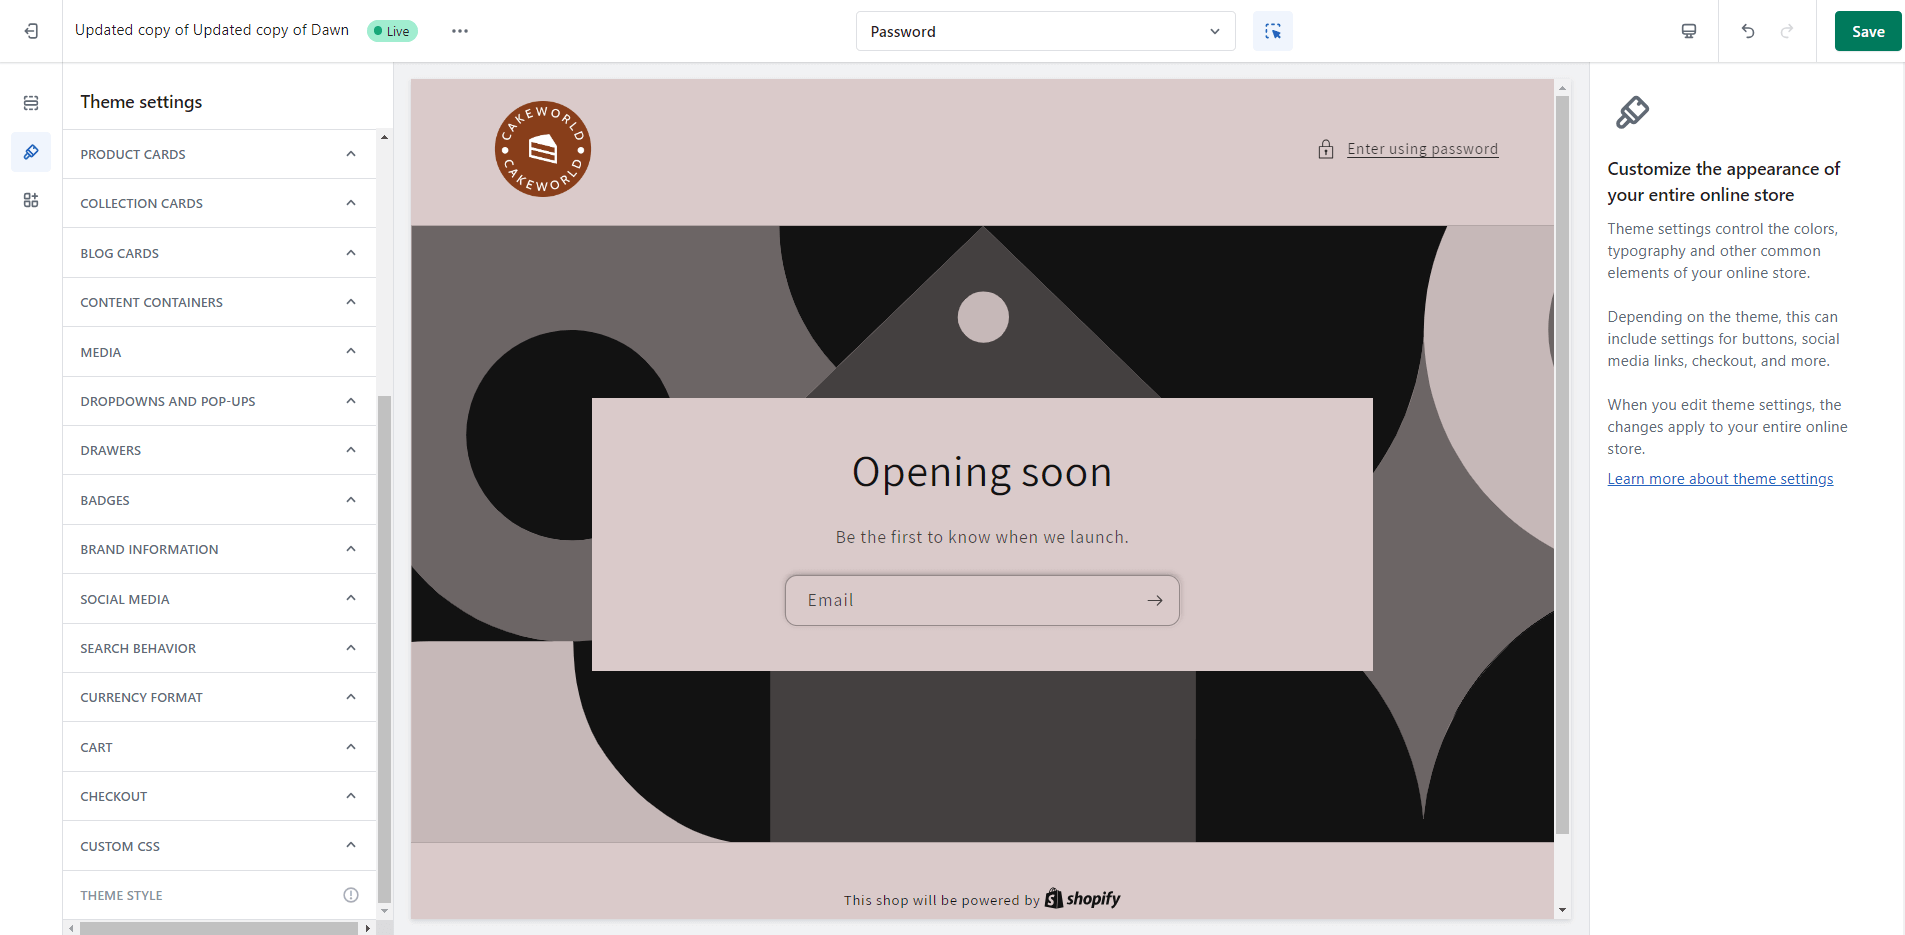
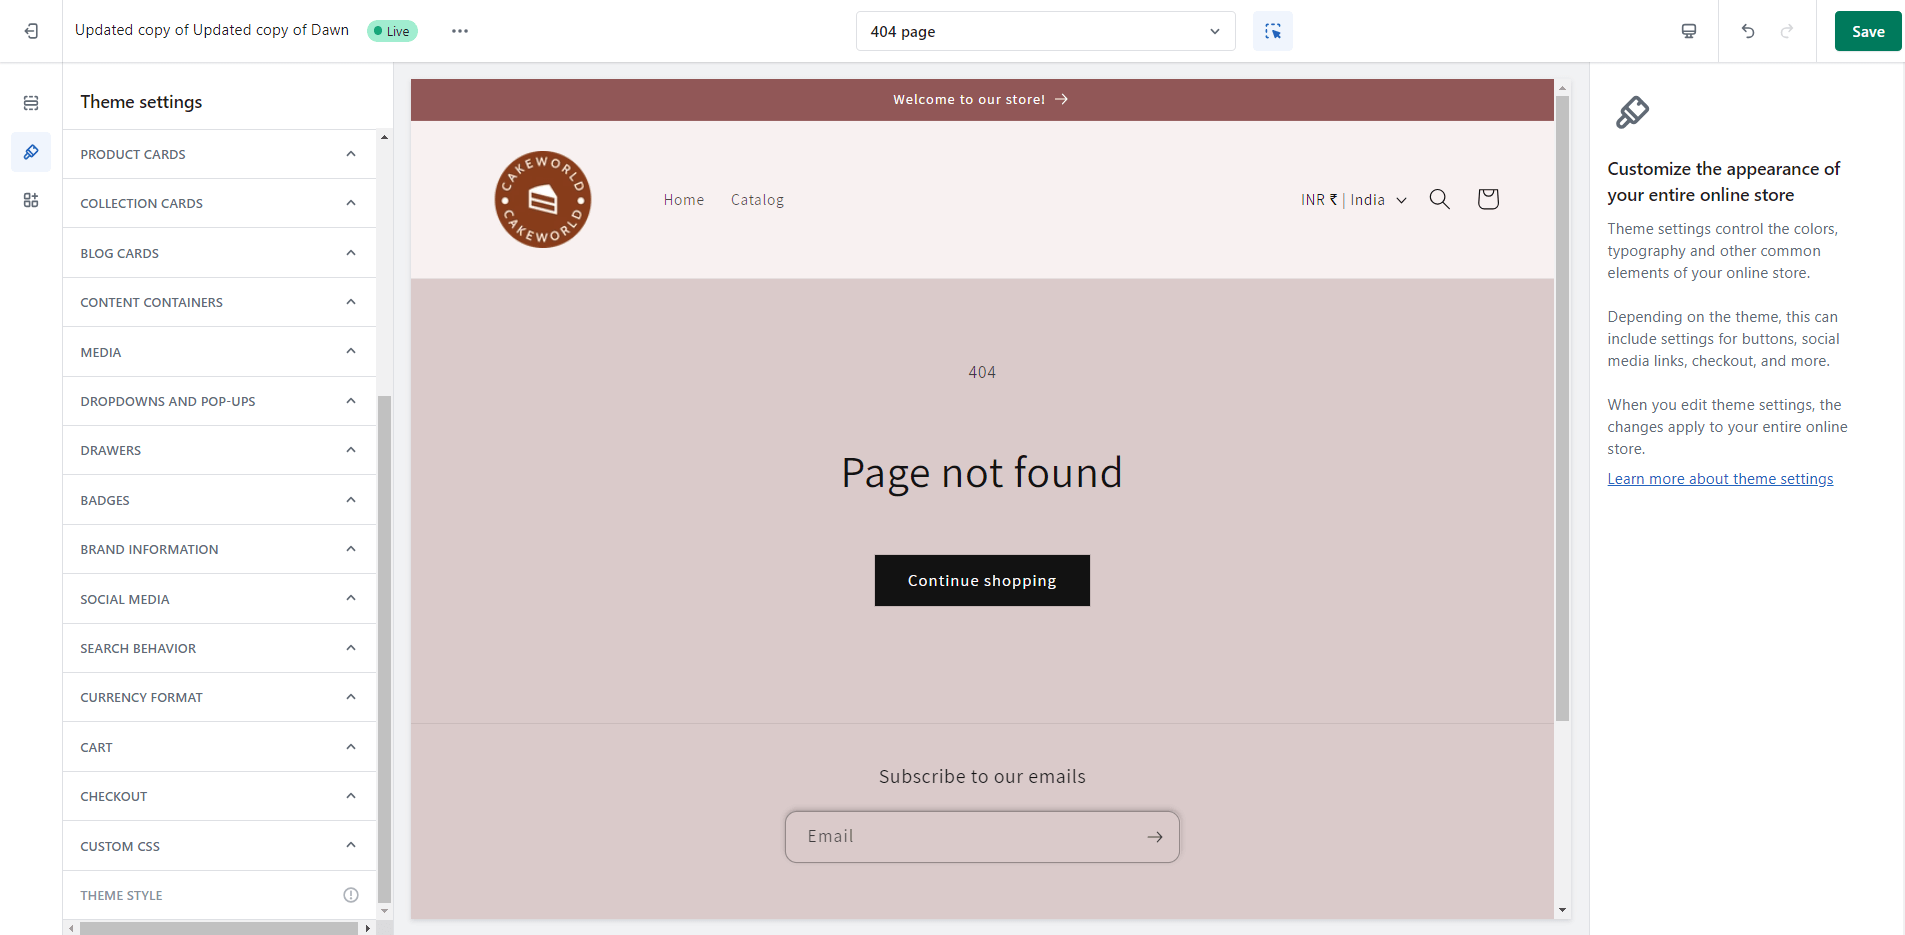
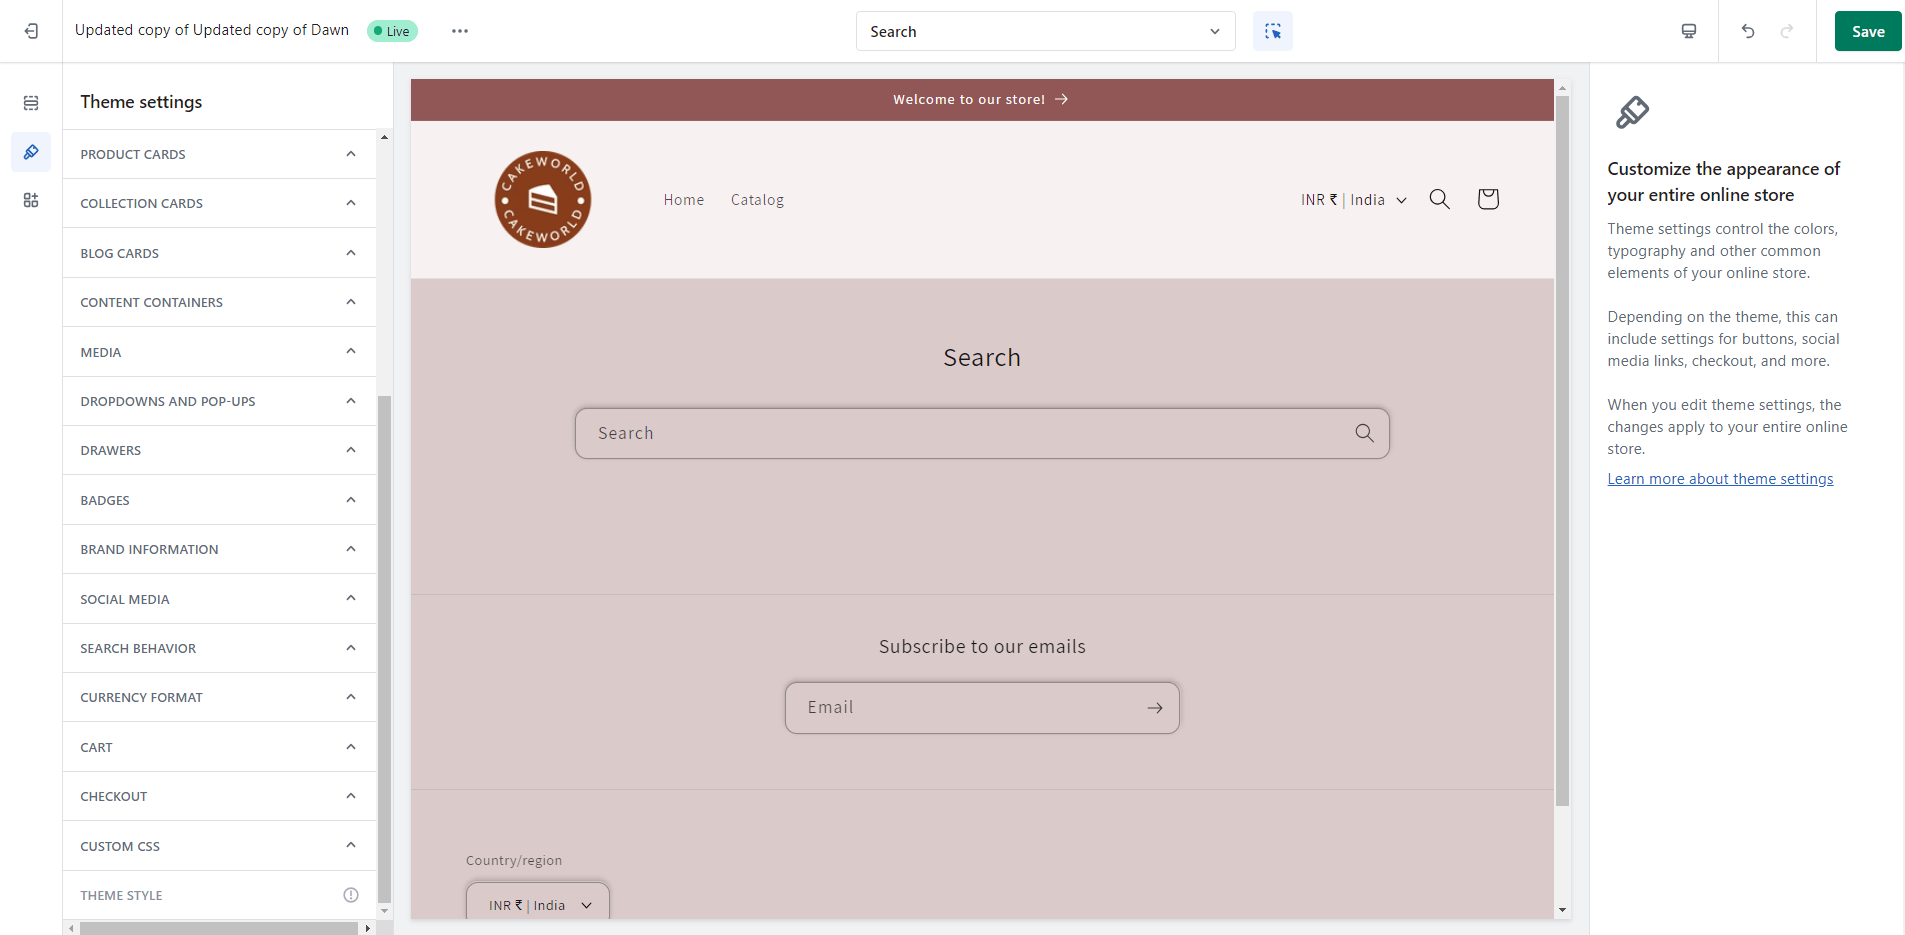
Others Page templates
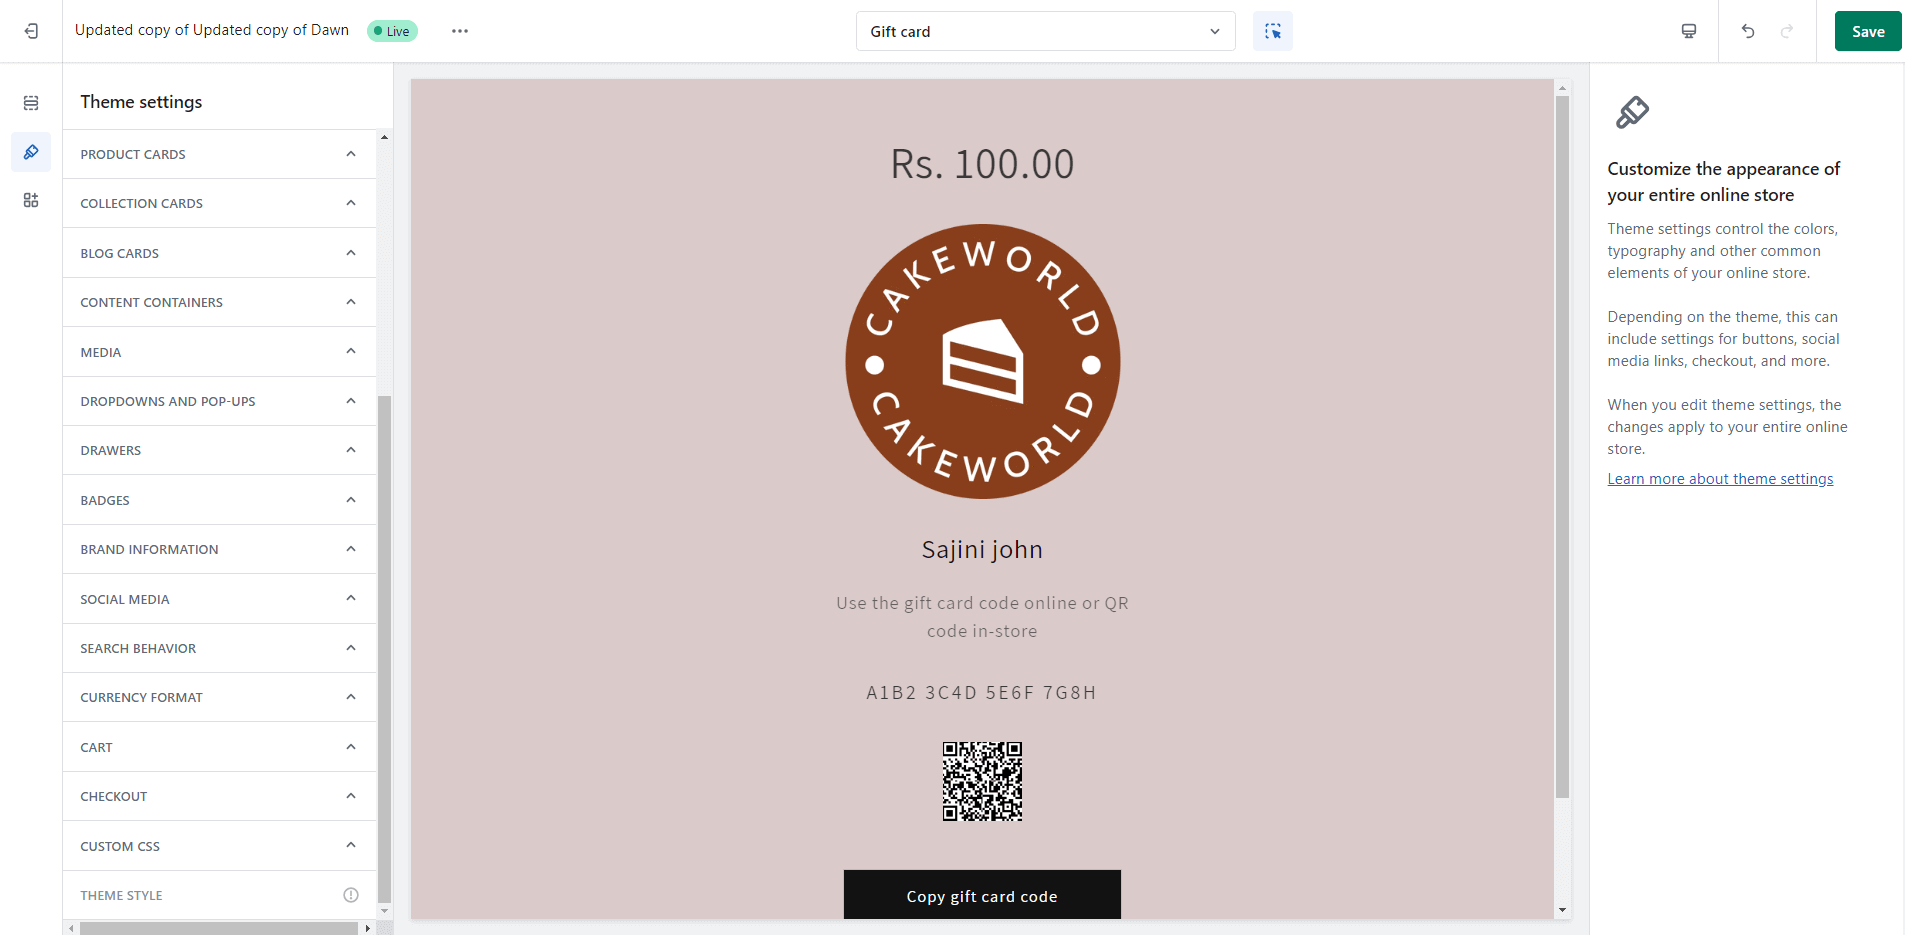
Here, you get the page templates for Password, 404 Page, Search, and Gift Card, along with the default layout and theme template customizing options available for each page.
Password
404 Page
Search
Gift Card
Theme Settings
If you have built your online store with Shopify before, you might be familiar with the Theme Settings available in Shopify’s theme template editor. Shopify allows you to customize the theme template from one place: Theme Settings. You can find all the controls for your theme template here.
Logo: This section allows you to add the logo and favicon image.
Buttons: From this section, you can change the border and shadow of the buttons in your theme.
Variant pills: This section provides options to display your product variants.
Inputs: You can set the border and shadow of the inputs from this section.
Product cards: This section allows you to change the style, alignment, and color scheme of the product cards.
Collection cards: This section allows you to change the style, alignment, and color scheme of the collection cards.
Blog cards: This section allows you to change the style, alignment, and color scheme of the blog cards.
Content containers: This section allows you to change and customize the content containers.
Media: This option allows you to change the appearance of media.
Dropdowns and pop-ups: This option allows you to change the look of dropdowns. Affects areas like navigation dropdowns, pop-up modals, and cart pop-ups.
Drawers: This section gives you customization options for the drawers.
Badges: This section lets you change the position and color scheme of badges.
Brand information: You can add a brand description to your store’s footer with an image.
Cart: This section allows you to change the type of the cart.
Custom CSS: This option allows you to add custom styles to your entire online store.
This guide concludes here. I hope you’ve found some valuable insights to enhance your store. For more in-depth information and tips, explore our blog section.


")

About the author
Sagarika Das
Sagarika Das is a content writer with a passion for the ecommerce world. She crafts engaging, SEO-friendly content that helps online businesses connect with customers and grow.