


Do you have large number of products in your store collection? If yes, then it can be difficult for customers to pick the right product. To make it easy for customers, Shopify filters are available. Yes, you can create Shopify custom filters on conditions. It will help your customers to find the products they are looking for.
This guide will help you to add different filters like Shopify search filters, Shopify collection filter, Shopify color filter and many more.
Overview on Shopify Filters
Shopify filters helps customers to narrow down products in your store based on specific conditions. The conditions are basically product price range, color, size, availability, etc. But you can show the filter in Shopify store only if you are using Shopify 2.0 themes.
You can locate the filter options in your store: Online Store > Navigation in your Shopify admin. The main benefit of Shopify filters is to improve the user experience and making navigation easier for them if you have large product inventory.
There are two types of Shopify Filters which you can add to your collections: (1) Default Filters, and (2) Custom Filters.
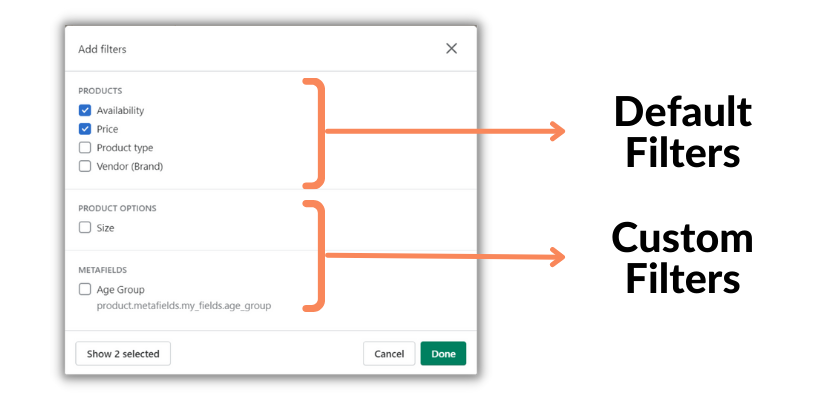
Default Filters in Shopify
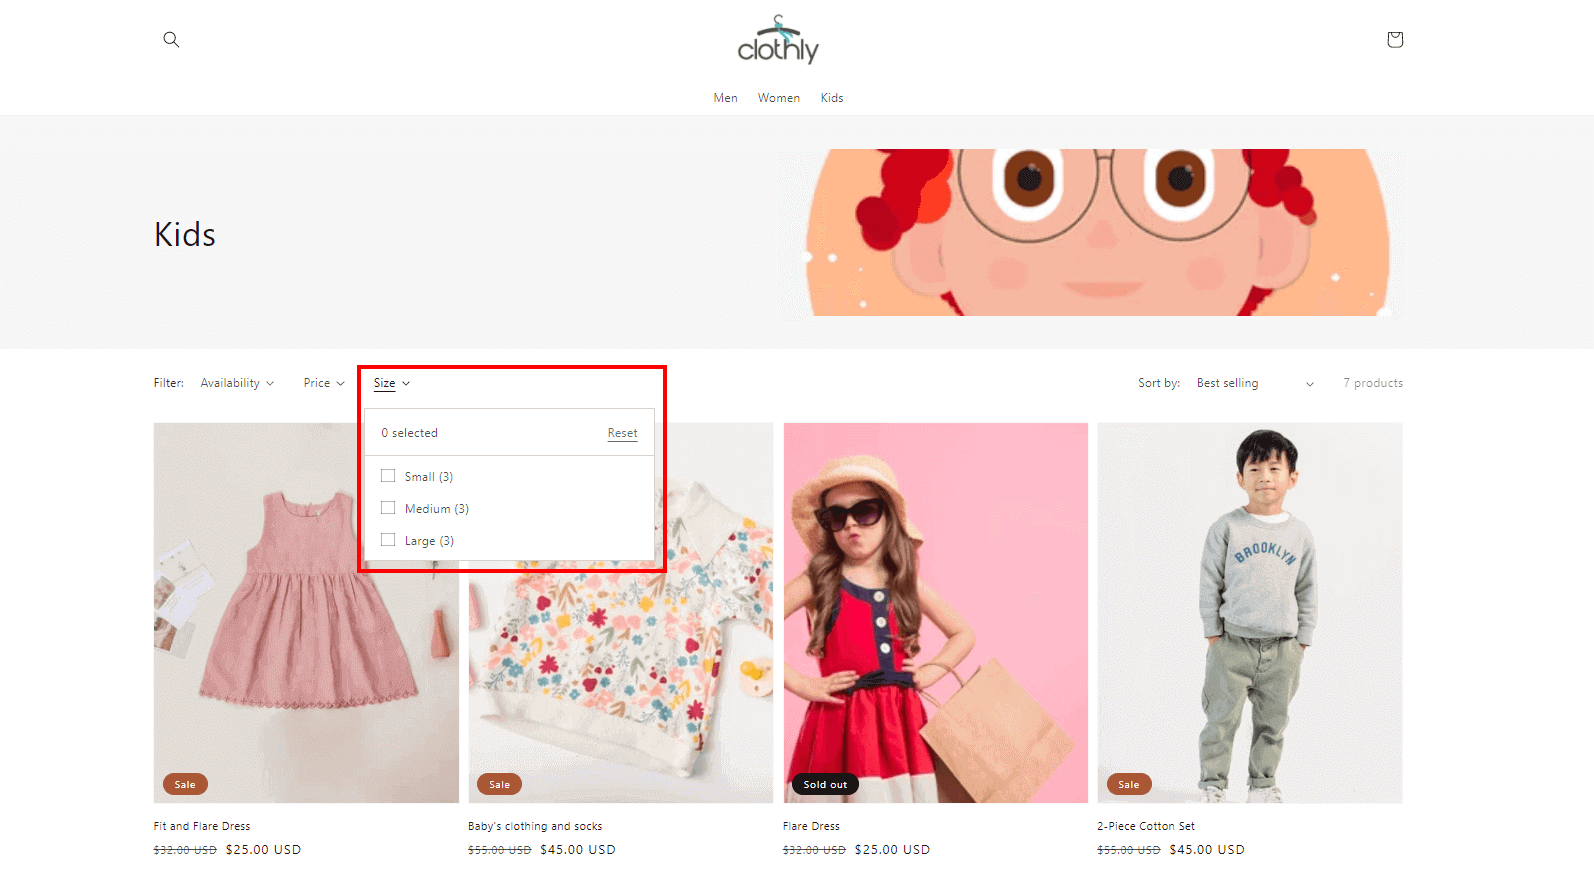
By default, 4 product filter Shopify provides in your store as shown in the above image. When you enable these default Shopify search filters, your customers can search products by availability, primary price, product type, and vendor (brand).
Shopify custom filters
If you are having large inventory of products in your store, the default filter of Shopify will not be enough for your customers to refine products. In this scenario, Shopify custom filters are useful for merchants and are created based on product options, metafields or metaobjects.
You can enable Shopify custom filters based on product size, color, rating, etc. These custom filters help customers to sort out products based on their required specific conditions.
How to Create Custom Filters in Shopify
Apart from the 4 default filter in Shopify, you can add up to 20 custom filters. These filters can be added to your collection. You can use product variants or metafields to create these custom filters.
Basically, product variants and metafields help decide which filter options appear on your storefront. Let’s learn how to create custom filters in both ways.
Creating Custom Filter via Product Variants
In Shopify, for each product you can have up to 100 variants and 3 options. To create a custom filter in Shopify via Product Variants, you need to add variants to your product. Follow these steps to add variants:
Follow these steps to add variants to a product:
- Go to Products > All products from your Shopify store admin.
- If you already have a product, edit the product, otherwise, create it by clicking on the Add product button.
- In the Options section, select the This product has options, like size or color checkbox.
- In Option name, enter a name for the option, such as "Size".
- In Option values, enter each option value in a separate field.
- Click the Done button.
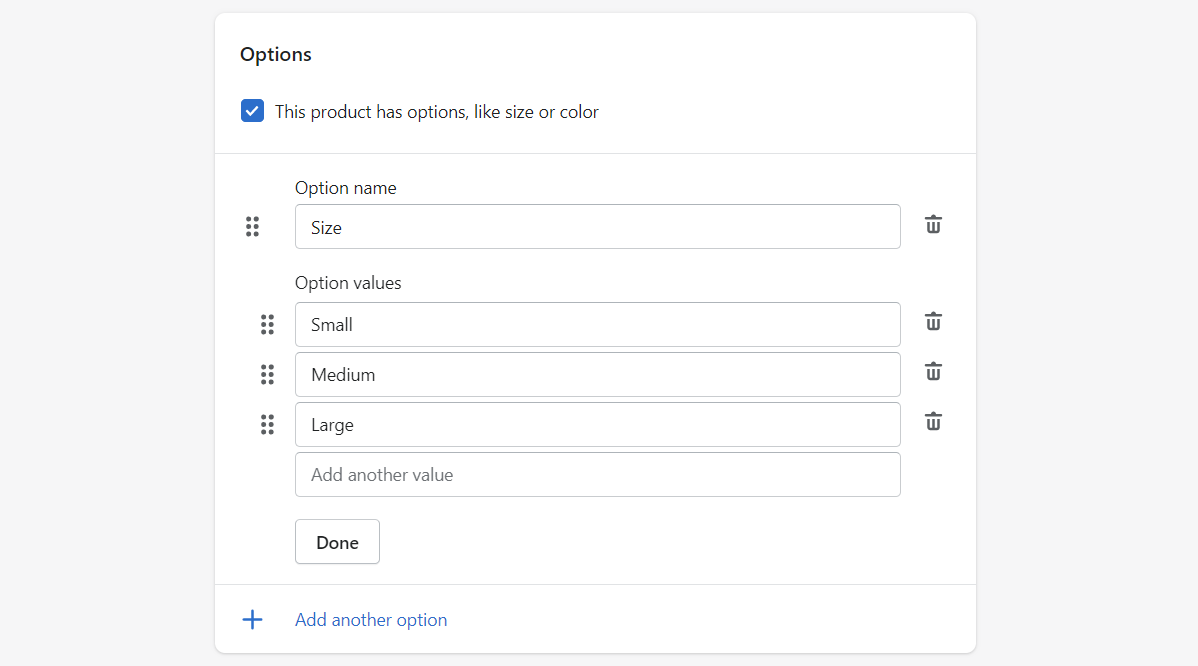
If you want to add more variant options for your product, click the Add another option and repeat step 4 to step 6.
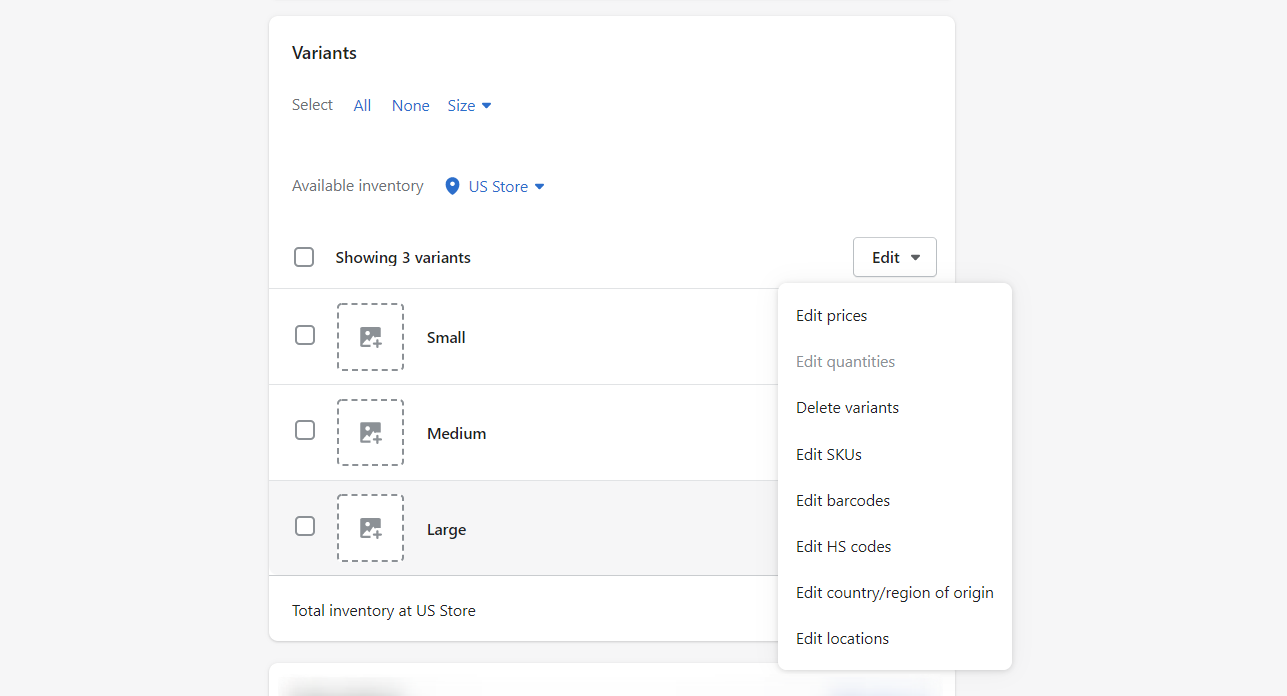
Once you are done with creating the variant options, you can see the product variants are automatically created under the Variants section. All you need to do is add images, set the prices, quantity (stock based on location), SKUs, barcodes, etc. for each variant. You can also use the Bulk edit option to fill the product variants faster.
Next, save the changes by clicking the Save button.
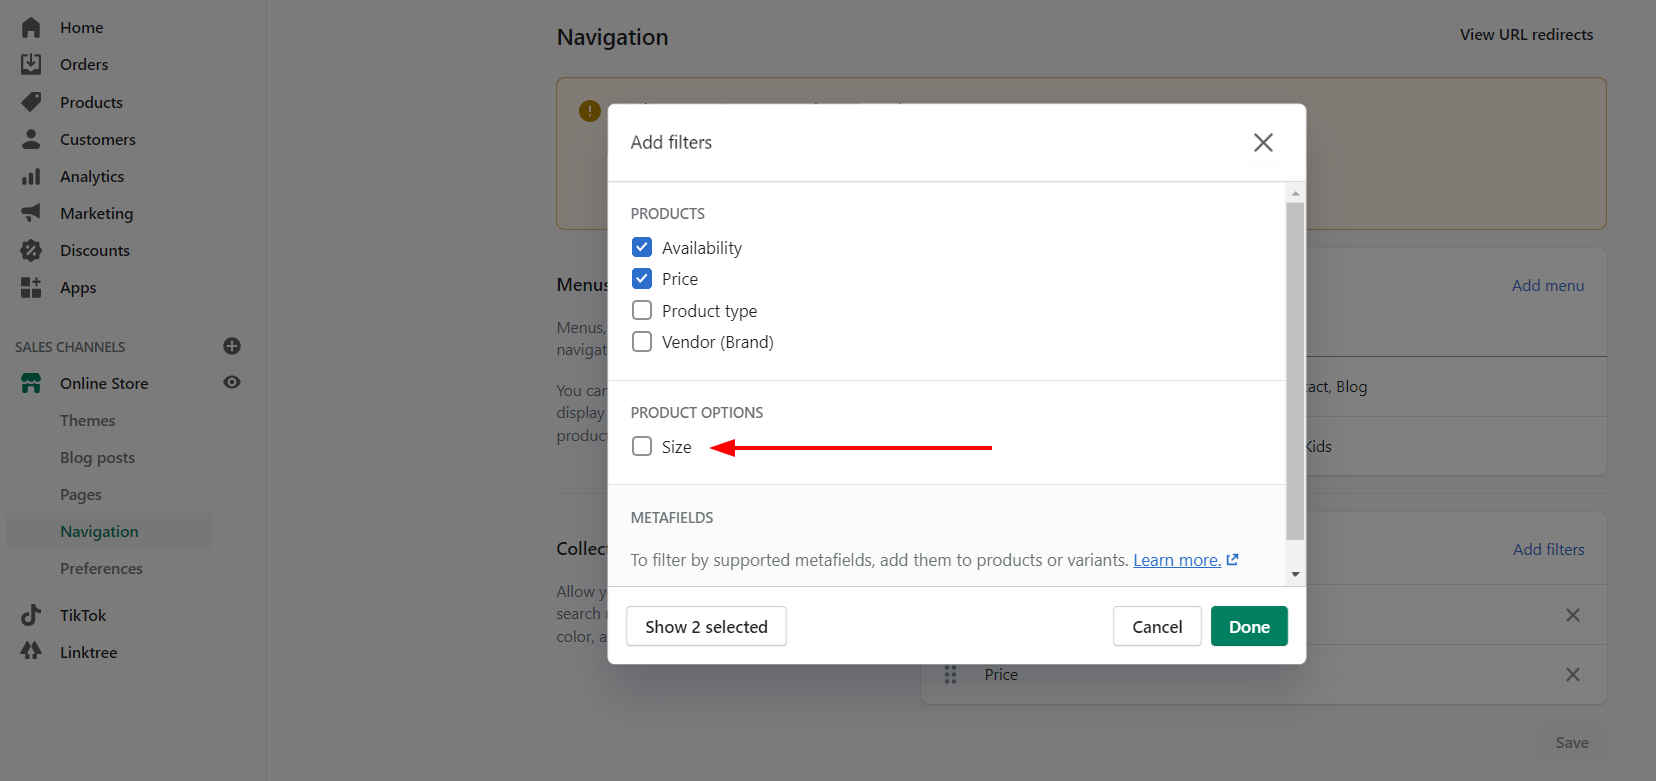
Now, you can check whether this product variant is visible as a filter option in your store. Also, you can add it to show on your collection page by following the below steps:
- Go to Online Store > Navigation from Shopify store admin.
- Click on Add filters.
- In Product options, select the recently created product variant, i.e. "Size".
- Click Done.
Result: Showing the Custom Filter on the Storefront
Creating Custom Filter via Shopify Metafields
Similar to the product variant, you can create custom filters by creating metafields either for product or variant. While adding a metafield for custom filter use, you need to make sure the content type should be one of the following:
- Single-Line Text
- Integer or Decimal Number
Follow these steps to create a metafield definition:
- Go to Settings > Metafields from your Shopify store admin.
- Select the type of metafield you want to create. Let's say, Products.
- Click the Add definition button.
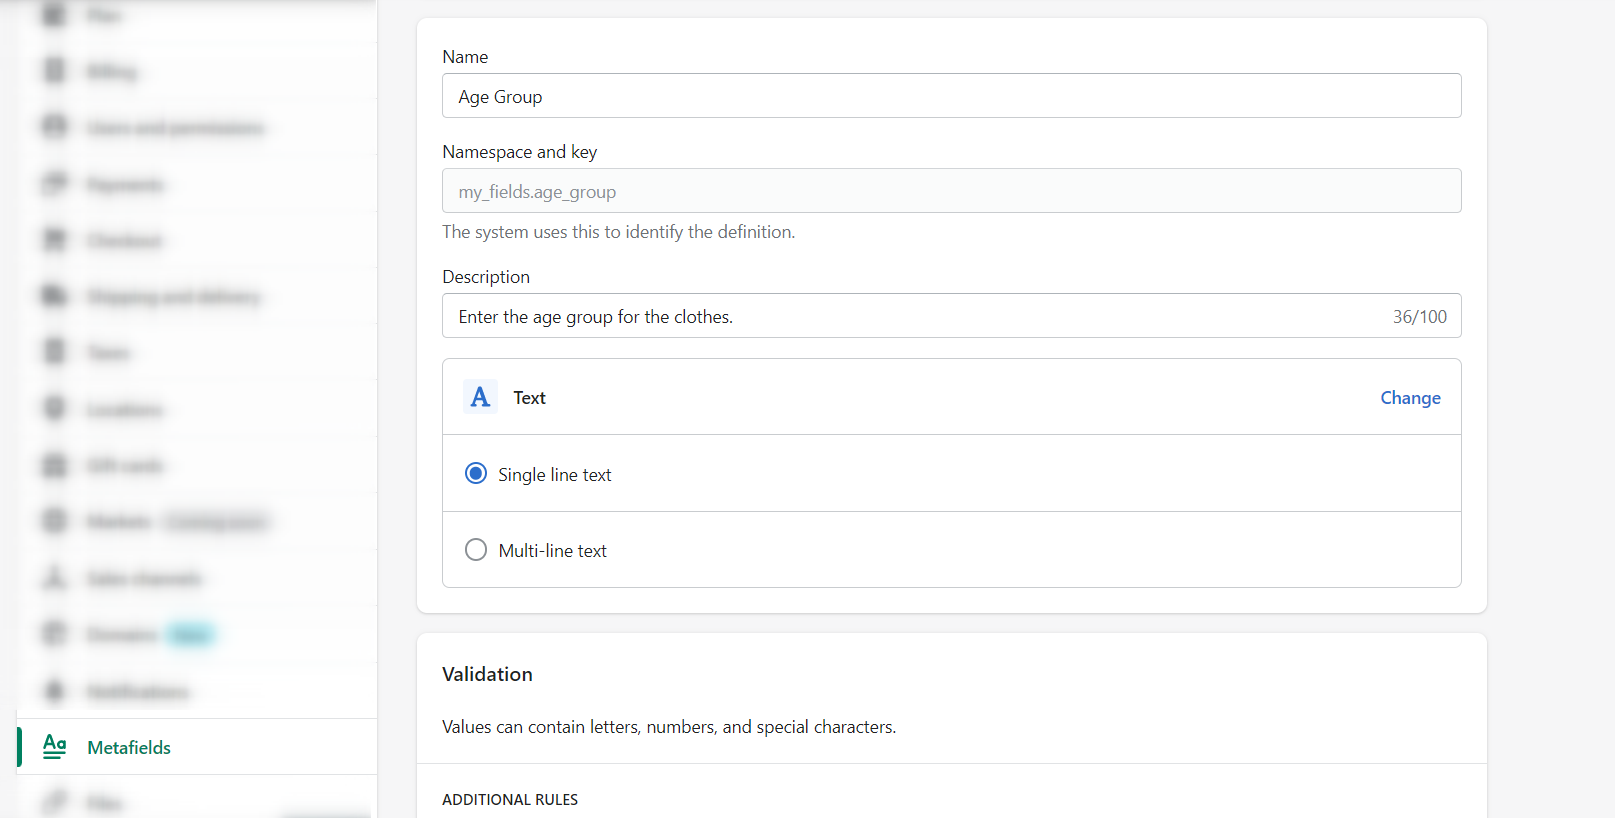
- In the Name field, enter a name for your definition, such as "Age Group".
- Next, enter a description for your metafield values (optional).
- Click Select content type, and then select the content type (Text or Number).
- If the Content type is Text, select "Single line text". And for Number content type, select either Integer or Decimal.
- In the Validation section, configure the Additional rules to limit the range of accepted values (optional).
- Save the changes.
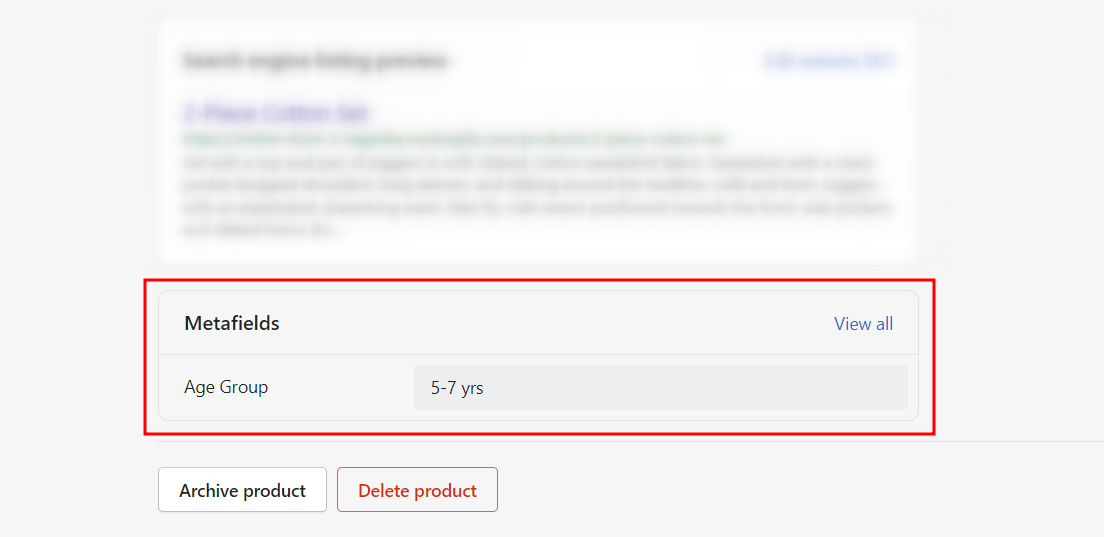
After creating a metafield definition, you need to add values to this metafield. Follow the steps to add values to the product metafield definition:
- Go to Products > All products from your Shopify store admin.
- Click on any product.
- Scroll down to the metafields section, enter the value for the recently created metafield, i.e. Age Group.
- Save the changes.
Horray!! You've successfully created a custom filter by creating a metafield. Now, you can check whether your recently created metafield is present in the filter options or not. Also, you can add it to show on your collection page by following the below steps:
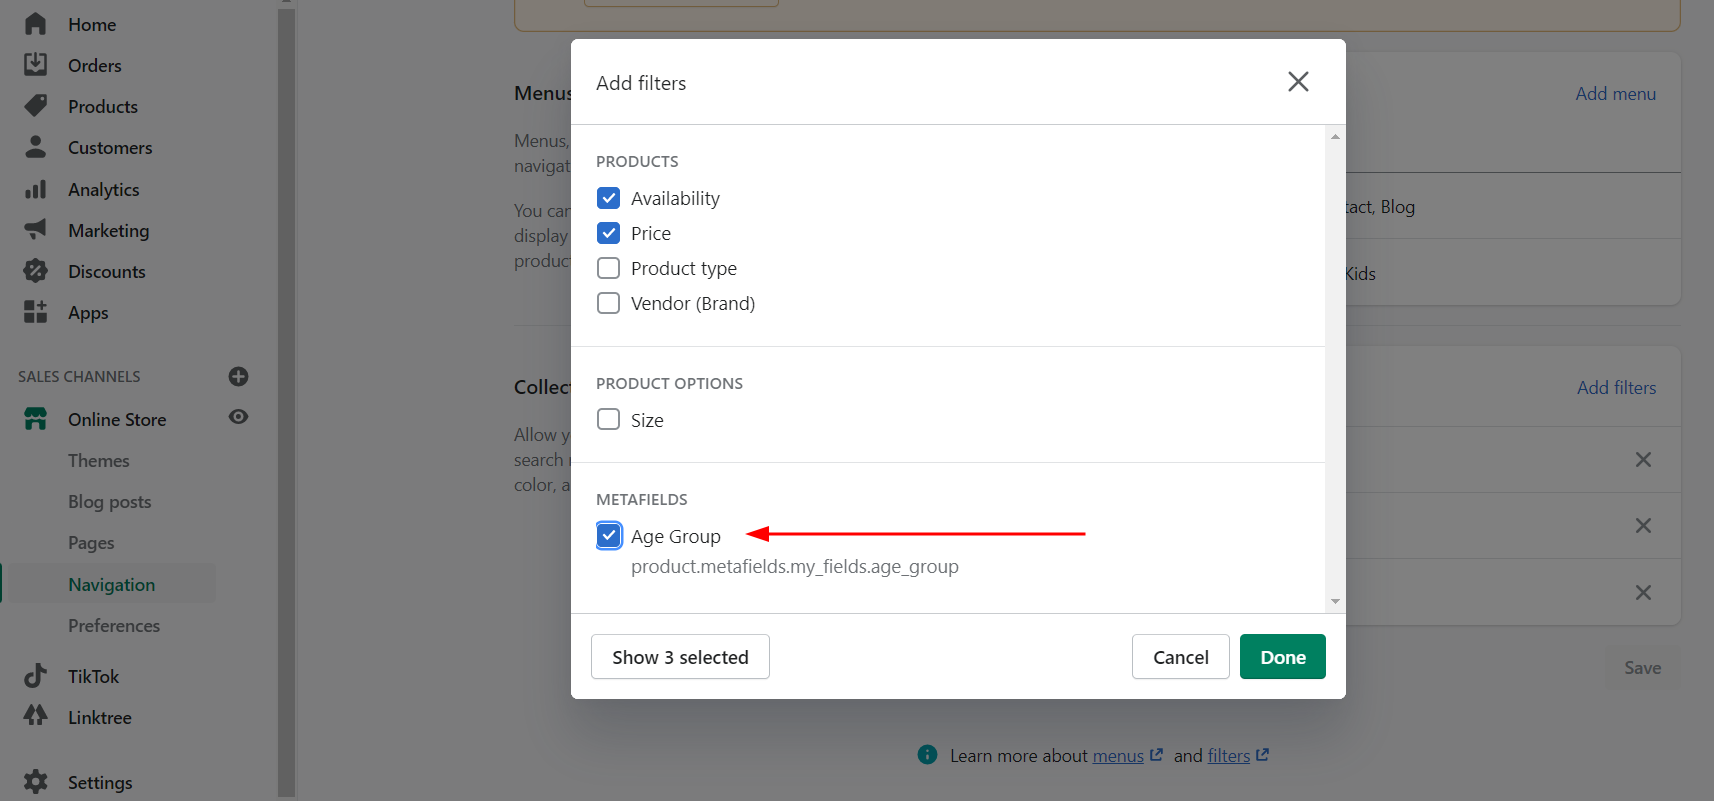
- Go to Online Store > Navigation from Shopify store admin.
- Click on Add filters.
- In Metafields options, select the recently created metafield, i.e. "Age Group".
- Click Done.
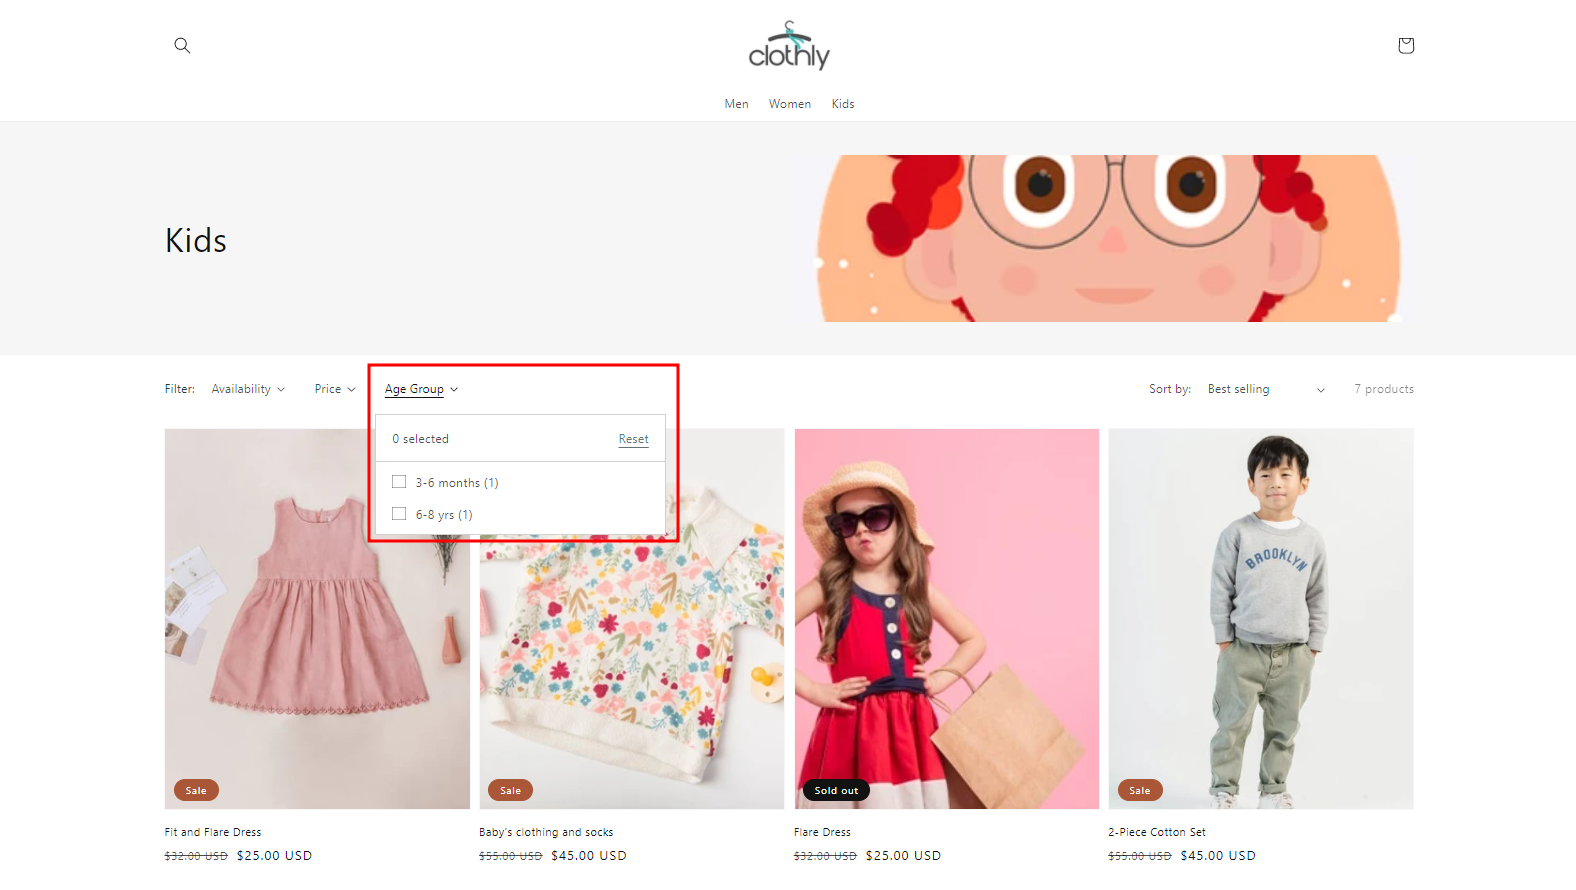
Result: Showing the Custom Filter on the Storefront
Common questions about Shopify Filters
Here are a few commonly asked questions related to Shopify filters. Have a question that's not mentioned below? Feel free to write in the comment box. I would love to find the answers and add them below.
How to add size filter in shopify?
Do you want to know the steps for how to add size filter in Shopify?
First of all, add a product variant option as “Size”. Now, go to Online Store > Navigation, and click on Add filter. Check the “Size” option in the product options section to add the Filter by Size variant. Find the step-by-step instruction.
After saving the changes, you can check the collection page on your online store.
How do I add Shopify color filter?
Add a product variant option as “Color”. Now, go to Online Store > Navigation, and click on Add filter. Check the “Color” option in the product options section to add the Shopify color filter by Color variant. Find the step-by-step instruction.
After saving the changes, you can check the collection page on your online store.
Why are the filters not visible on my storefront?
The reason can be one for the following:
- Using a theme that's not a Shopify 2.0 theme. Filters can only be used if you have the Online Store 2.0 theme installed. You can still view and set up filtering options for your store if your Online Store 2.0 theme is installed but not in use, but customers will not be able to see them.
- The Product collection contains above 1000 products. If your collection has more than 1000 products, then the filters will not be visible on your online store.
How many filters I can add to my collection?
You can add a maximum of 4 default filters and up to 20 custom filters to your store.
How can I customize the Shopify collection filter?
Follow the below steps if you want to display different filters on specific collections.
1. Login to your Shopify store and go to the "Products" tab.
2. To add specific filters, click on "Collections" and select the collection.
3. To edit the collection click on "Edit".
4. From the "Conditions" section, select the specific conditions which you want to apply for the collection.
5. In the "Filters" section, select the specific filters that you want to show on the collection page.
6. Save your changes and preview the collection page to ensure that the filters are showing up correctly.
7. Repeat these steps for any other collections if you want to add specific filters to.
Wrapping Up!
Hope this guide helped you to know about Shopify custom filters. If you have any queries regarding this topic or any other, don’t forget to comment below. We would be happy to help you out!
Post Tags


")


About the author
Sagarika Das
Sagarika Das is a content writer with a passion for the ecommerce world. She crafts engaging, SEO-friendly content that helps online businesses connect with customers and grow.