

To change all products to physical products in Shopify, you need to update the “This is a physical product” setting across your catalog either manually, in bulk using Shopify’s bulk editor, or through a CSV file update.
Are you a Shopify store owner selling handmade items, clothing, accessories or packaged goods? If so, changing your product type to physical products can make a bigger difference. If you want Shopify to calculate shipping, manage inventory accurately, and integrate smoothly with fulfillment apps, every product must be set as a physical product.
Many merchants face this issue when they migrate their stores to Shopify, update inventory, or install third-party apps that automatically mark all products as non-physical. In this guide, you will learn exactly how to change all products to physical products in Shopify, step by step.
Why All Products Should Be Set as Physical Products
Setting all products as physical products in Shopify ensures your store functions correctly across shipping, inventory, taxes, and fulfillment workflows. When a product is marked as non-physical, Shopify assumes it does not require shipping, which can lead to operational and revenue-impacting issues.
Here are the key reasons why all products should be set as physical products:
1. Enables Shipping Rates at Checkout
Shopify only calculates and displays shipping rates for physical products. If products are marked as non-physical, customers may see free shipping by default or no shipping options at checkout, which can result in undercharging or order fulfillment problems.
2. Activates Inventory Tracking
Physical products allow Shopify to track stock levels accurately. Non-physical products bypass inventory rules, increasing the risk of overselling, stock discrepancies, and fulfillment delays.
3. Ensures Compatibility with Fulfillment and Dropshipping Apps
Most fulfillment, dropshipping, and print-on-demand apps require products to be marked as physical. Incorrect product settings can prevent orders from syncing properly with third-party services.
4. Improves Tax and Shipping Rule Accuracy
Physical products follow standard shipping and tax logic in Shopify. Marking products as non-physical can cause incorrect tax calculations or prevent location-based shipping rules from applying.
5. Prevents Checkout and Order Processing Errors
Products incorrectly set as non-physical may skip shipping address collection or cause incomplete order data, leading to manual fixes and poor customer experience.
How to Change All Products to Physical Products in Shopify
Method 1: Change products one by one
Step 1: From your Shopify admin go to Products.
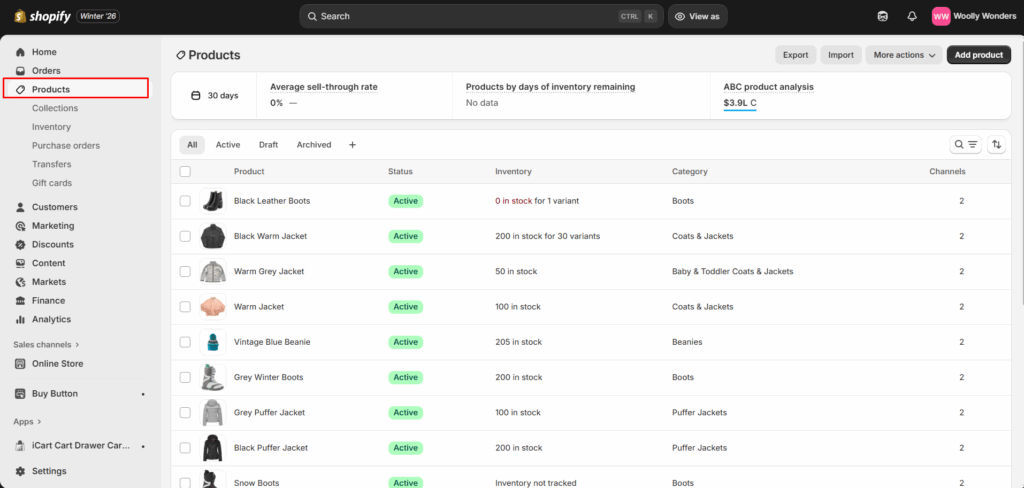
Step 2: Click a product and open its detail page.
Step 3: Scroll to the Shipping section and enable the box that says “Physical product” and save the changes.

Method 2: Use Shopify’s Bulk Editor
Using Shopify’s Bulk Editor is the fastest way to change multiple products to physical products without exporting or importing files. This method is ideal if you want a quick, in-dashboard solution and are working with a manageable number of products.
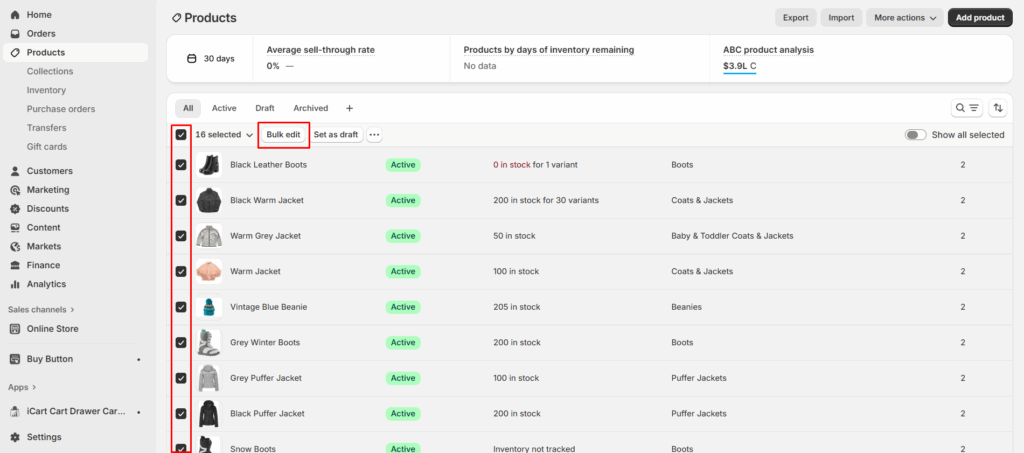
Step 1: Log in to your Shopify Admin and click on Products.
Step 2: Select the products that you want to update using the checkbox and click on “Bulk Edit”.
Step 3: Open the Bulk Editor and find the “physical product” column. If you couldn’t find it, add it using the column, seen on the top right corner.
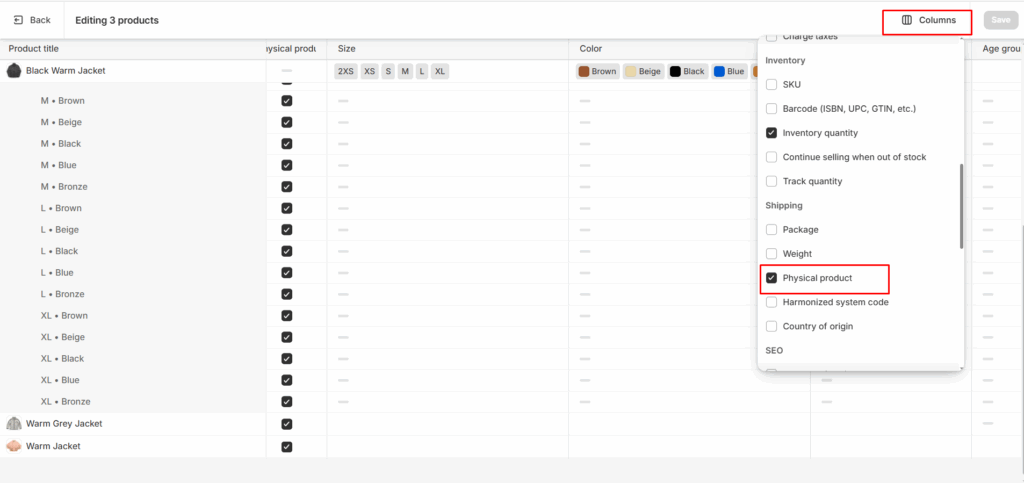
Step 4: You can check/uncheck the checkbox on products that you want to add as physical product and save the changes.

Method 3: Update Using CSV Export & Import
Using a CSV export and import is the most scalable way to change all products to physical products in Shopify. This method is best for stores with large catalogs or when you want a repeatable, bulk solution that updates every product at once.
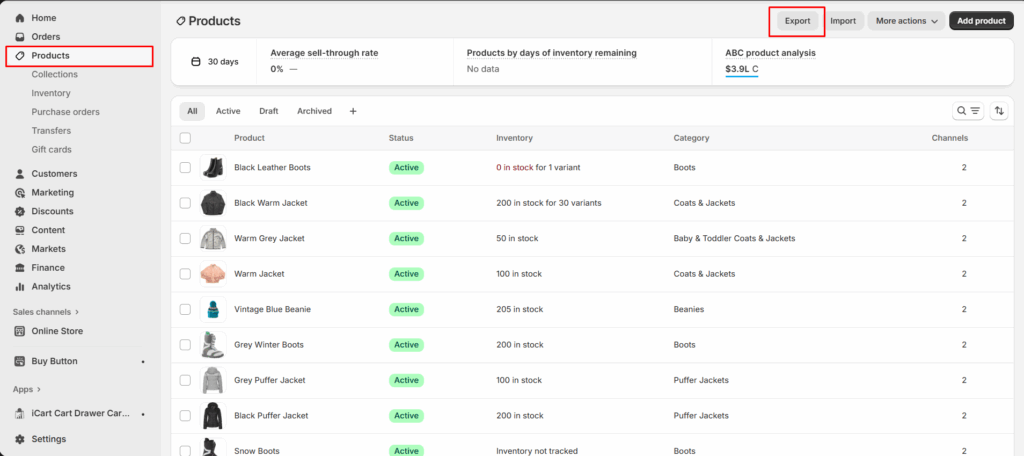
Step 1: From your Shopify admin go to Products.
Step 2: Click on Export.
Step 3: Open the CSV file and find for “Requires Shipping” and change the value to TRUE.
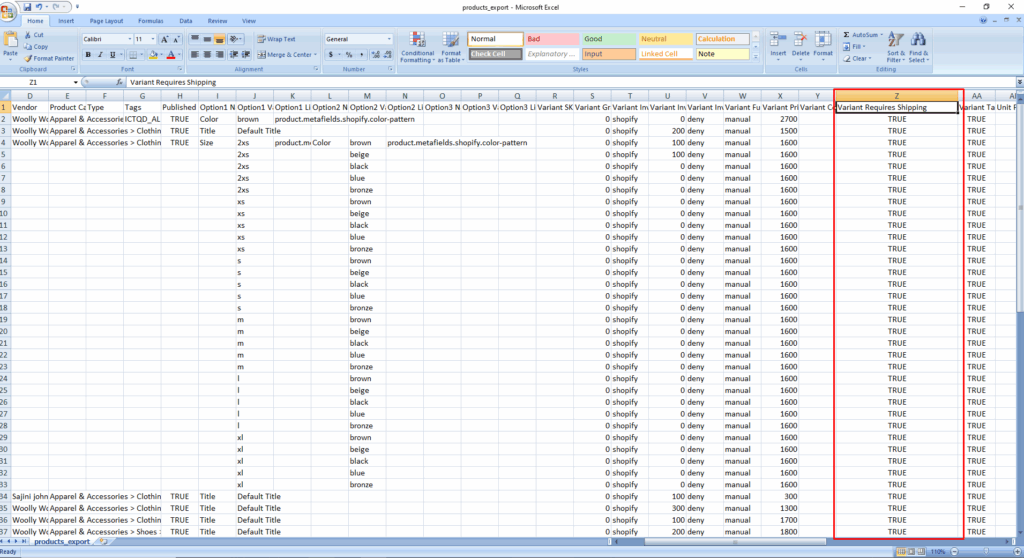
Step 4: Save the CSV file.
Step 5: Go back to Shopify admin, click Import, and upload the updated CSV file.
Shopify will update the products with the new settings. Go to Products in your Shopify admin
Common Errors When Changing Products to Physical in Shopify
- Forgetting to Enable “Requires Shipping”
- Updating Only Some Variants
- Using Incorrect CSV Values
- Renaming or Deleting CSV Column Headers
- Not Selecting All Products in the Bulk Editor
- Assuming Changes Apply Automatically to New Products
- Shipping Rates Still Not Showing After Update
- Not Testing Checkout After Changes
People Also Ask
1. How do I change all products to physical products in Shopify?
You can change all products to physical products in Shopify by enabling Requires shipping for every product using the Bulk Editor or by exporting your products to a CSV file, setting Requires shipping to TRUE, and re-importing the file.
2. What happens if a product is not marked as physical in Shopify?
If a product is not marked as physical, Shopify will not calculate shipping for it, inventory tracking may be disabled, and fulfillment apps may not process the order correctly.
3. Is “Requires shipping” the same as a physical product in Shopify?
Yes. In Shopify, a product is considered physical when the Requires shipping option is enabled. This setting tells Shopify the product needs shipping and delivery.
4. Can I bulk change product type to physical in Shopify?
Yes. Shopify allows bulk changes using the Bulk Editor for smaller catalogs and CSV import/export for large product inventories.
5. Should all Shopify products be physical products?
Only tangible items should be marked as physical. Digital products, services, and memberships should remain non-physical to avoid incorrect shipping charges.


![The Only Easter Marketing Ideas for Shopify Stores [Proven Strategies]](https://www.identixweb.com/wp-content/uploads/2026/02/24-02-Tue-Blog-Tips-Tools-for-Shopify-Stores-to-Boost-Easter-Sales.webp "The Only Easter Marketing Ideas for Shopify Stores [Proven Strategies]")


About the author
Sajini Annie John
Meet Sajini, a seasoned technical content writer with a passion for e-commerce and expertise in Shopify. She is committed to helping online businesses to thrive through the power of well-crafted content.