


As a Shopify merchant, the major concern would be about your audience/customers, right? And even if you know your audience, you need to get the roadmap to gain more traffic. Here comes Shopify analytics and Google analytics for your online store. You can’t neglect analytics because eCommerce stores completely thrive on data insights. Take your store to another level with Shopify analytics Shopify Google analytics. Using analytics you can analyze the complete performance of your Shopify store in great depth by which you can create new strategies to grow your store. But both these tools would be only useful if you know how to use them. So yeah, this blog is for you.
To know about Shopify analytics you can refer to this link.
What is Google analytics?
Google Analytics is an amazing tool to track your store’s data in one place, so you can make smarter decisions to grow your business. Google Analytics will let you track your traffic, where your visitors are coming from, and customer behavior, etc of your online store.
Is Google analytics free?
Well, you can use Google analytics for free if you are running a small business. But if you need more advanced features then there is a recurring fee.
Steps to add Google Analytics to Shopify
Step 1: Check whether you’ve already enabled Google analytics
Enabling Google Analytics more than once can result in inaccurate data for your store. So before starting the setup make sure that you’ve never enabled Google Analytics before on your store.
To verify that you have never enabled Google Analytics on Shopify before, then follow these steps:
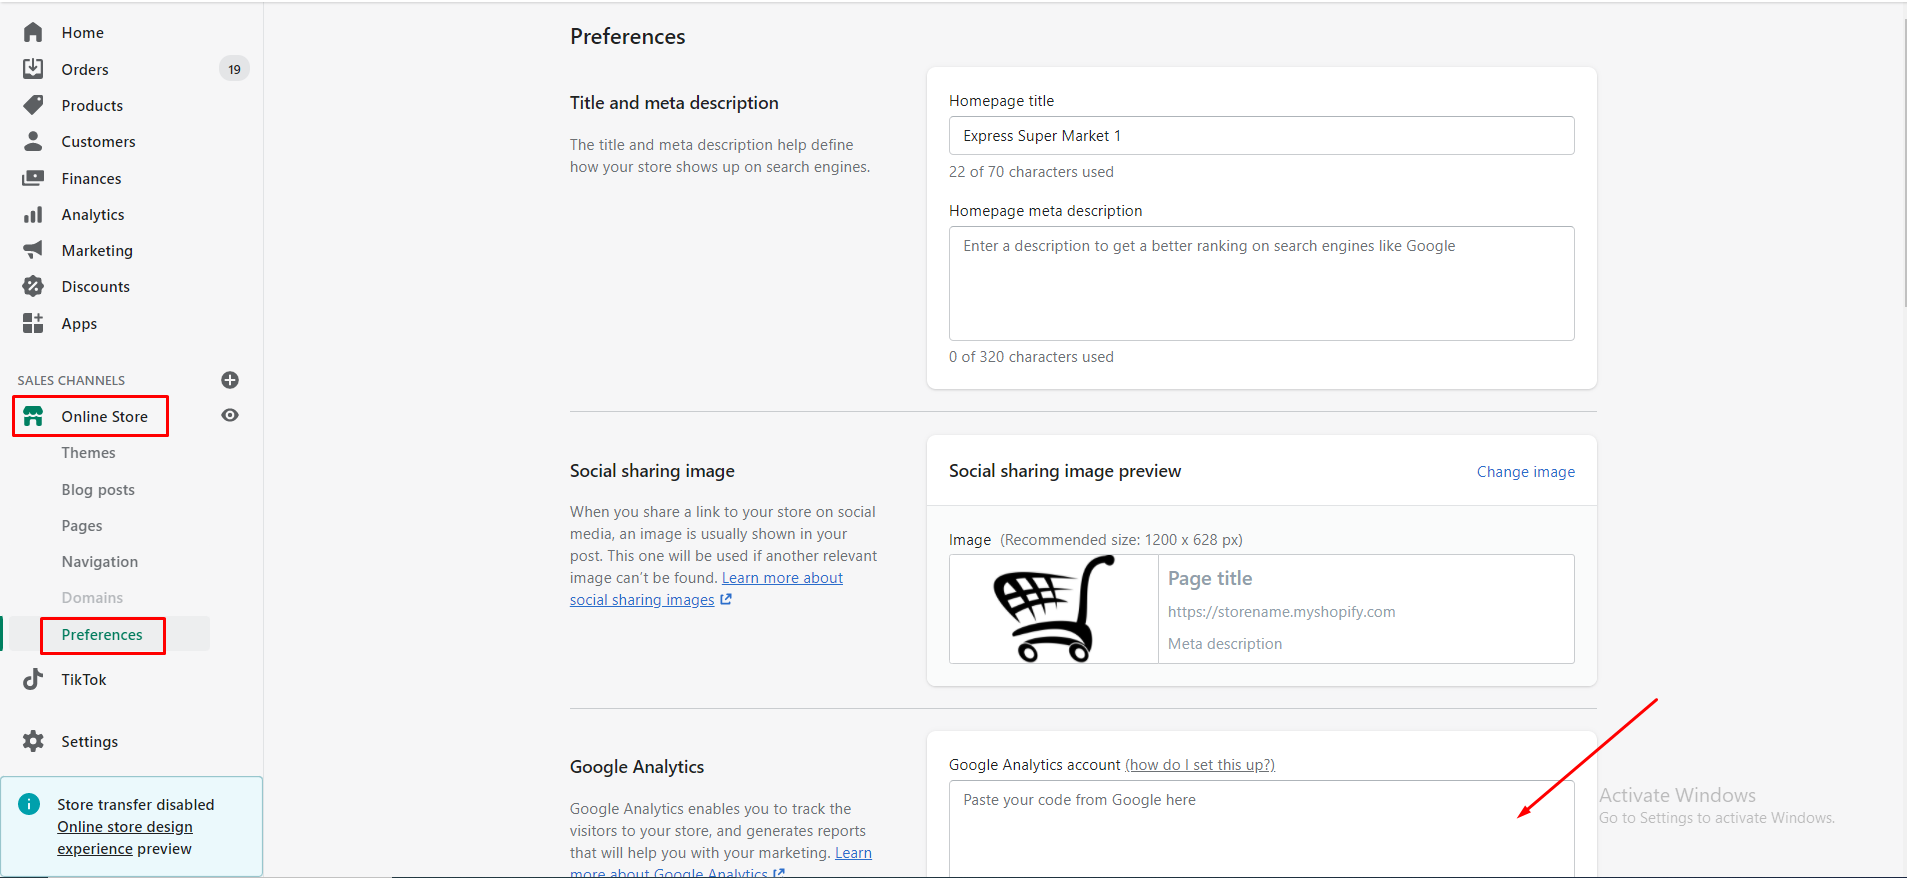
- Open your Shopify admin and go to Online Store > Preferences.
- In the Google Analytics section, check that the field is blank and the box has only the text Paste your code from Google here as shown below. If you see this then follow the next step.
- Click Themes
- Click Actions > Edit code
- Click {/} theme.liquid in the layout section. Now search for any of the Google Analytics tracking tags like: ga.js, dc.js, gtag.js, or analytics.js. So if you find any of these tags in the file, or a code beginning with UA- instead, then you have already added Google Analytics to your store and can skip to Step 4: Turning on e-commerce tracking
If you don’t see a tracking code in the Google Analytics field and theme. liquid file, then continue to Step 2: Create a Google account.
Step 2: Create a Google account
To use the Google Analytics account, you must need a Google account. If you don’t have a Google account, then create a Google account from here.
Now you can create a Google Analytics account.
Step 3: Enable Google Analytics in your Shopify store
- Open your web browser and visit Google Analytics.
- Click Admin
- From the Account column choose the right account.
- From the Property column, click Create Property.
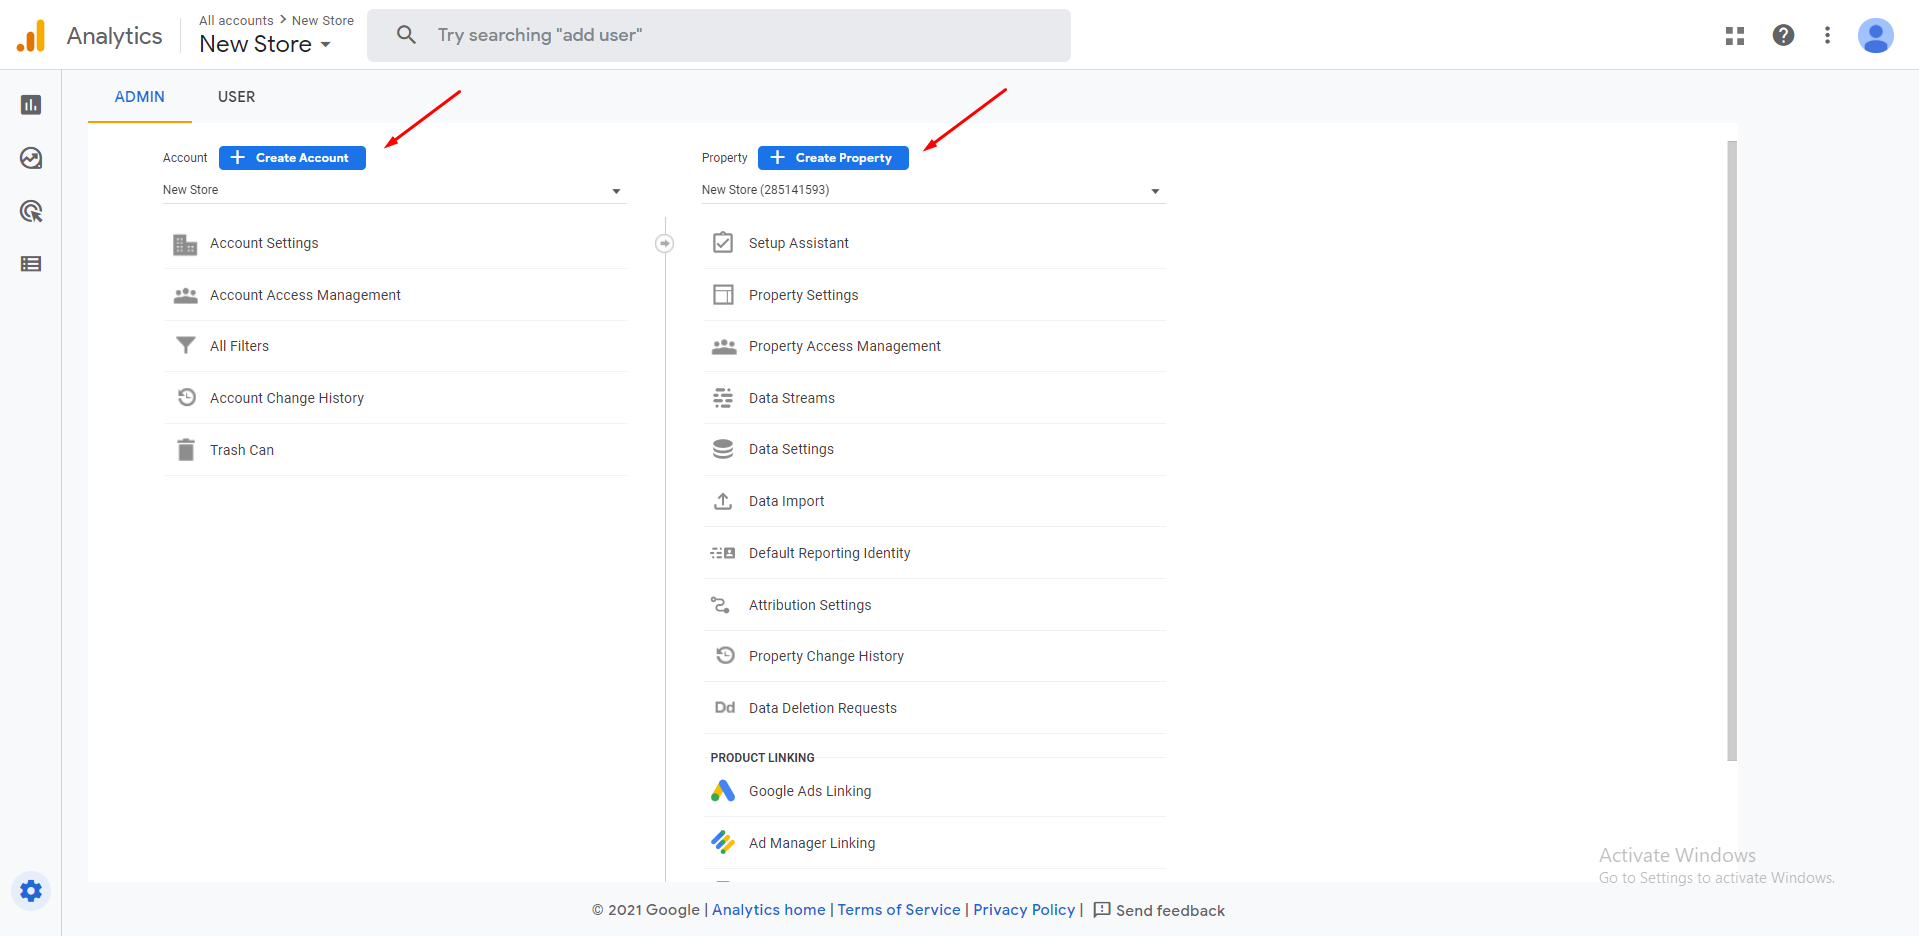
- Give a name for the property.
- Add all the information and get the Google Analytics tracking id. Copy that tracking ID.
- Open your Shopify admin and go to Online store > Preferences.
- Go to the Google Analytics section and paste the Tracking ID there as shown below.
Step 4: Turning on e-commerce tracking
You can track your analytics in 2 ways: Basic e-commerce tracking and Enhanced e-commerce tracking.
How to turn on basic e-commerce tracking
- Login to your Google Analytics account and click on Admin.
- Click on Ecommerce Settings from the View column.
- Click the Enable Ecommerce to turn tracking for your IP address ON or OFF.
How to turn on enhanced e-commerce tracking
- Open your Shopify admin and go to Online store > Preferences.
- Use Enhanced Ecommerce in the Google Analytics section and click Save.
- Now go to your Google Analytics and click Admin.
- Click on Ecommerce Settings from the View column.
- Click the Enable Enhanced Ecommerce Reporting to turn to track for your IP address ON or OFF and Save.
So congratulations, your Shopify Google Analytics account is now added to your Shopify store. Now you can track your store’s performance and boost sales by generating new strategies. If you have any questions regarding this article then you can comment here or reach our support team using the live chat button.
Post Tags


About the author
Sajini Annie John
Meet Sajini, a seasoned technical content writer with a passion for e-commerce and expertise in Shopify. She is committed to helping online businesses to thrive through the power of well-crafted content.