


If you are looking for a complete guide that walks you through how to get started with the Under Construction Coming Soon app, you are absolutely in the right place. This guide will help you with step-by-step instructions that make it easy to install the app and customize your landing page with the Under Construction Coming Soon app. So stay tuned till the end of this guide.
Installing Under Construction Coming Soon app
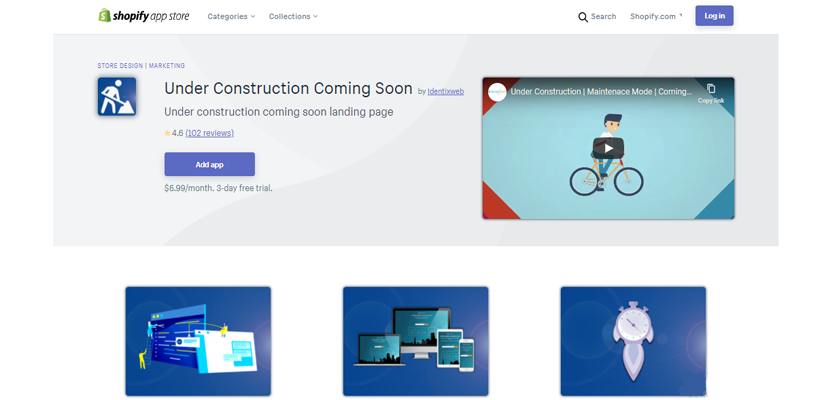
Step 1: Go to the Shopify app store and browse the name of the app. After opening the app page you can find a button called “Add app” as shown in the screenshot below. Click on it.
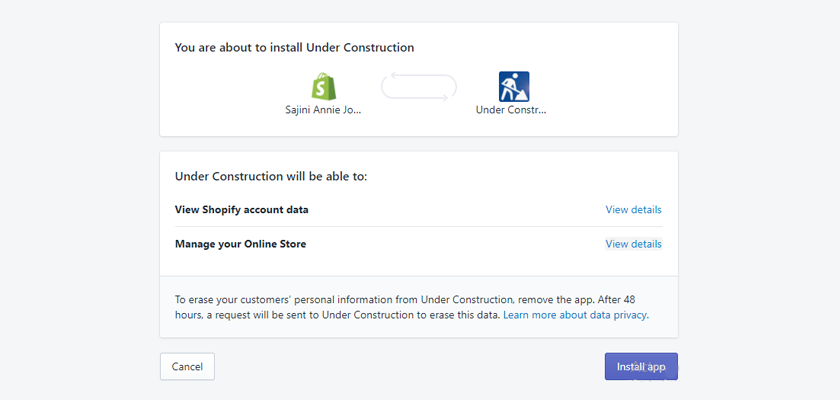
Step 2: After the above step, you will get a popup textbox to enter your store URL in which you want to install the app. Enter your store URL and you will be redirected to a page as shown in the screenshot below. Read the lines detailing the access you will grant from the Under Construction Coming Soon app. After reading the details click on the “Install app” button.
Step 3: Now you can start your free trial by clicking on the “Start free trial” button.
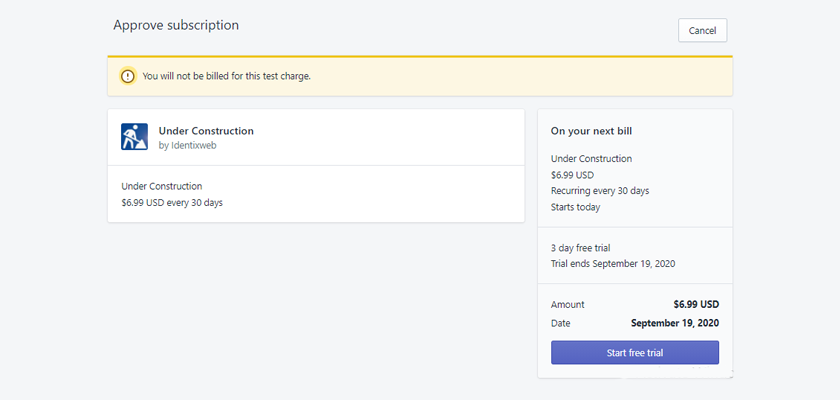
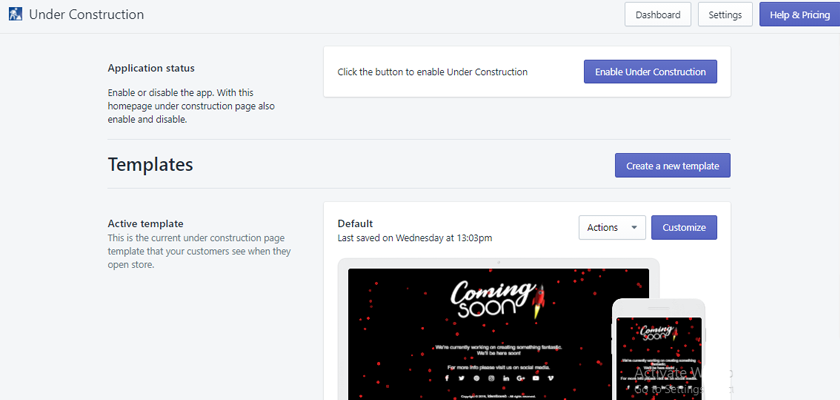
Step 4: Now you can start your free trial by clicking on the “Start free trial” button. After this step, to make the Under construction app active on your store click the “Enable Under Construction” button as shown below.
So congratulations you have successfully installed the Under Construction Coming Soon app in your store.
While clicking on the dashboard you will get 2 templates i.e Under Construction and Age Verification. Now you can play with templates. Yes, it’s time for customization. You will get a page as shown in the screenshot below from where you can create a new template or use the free templates and start customization.
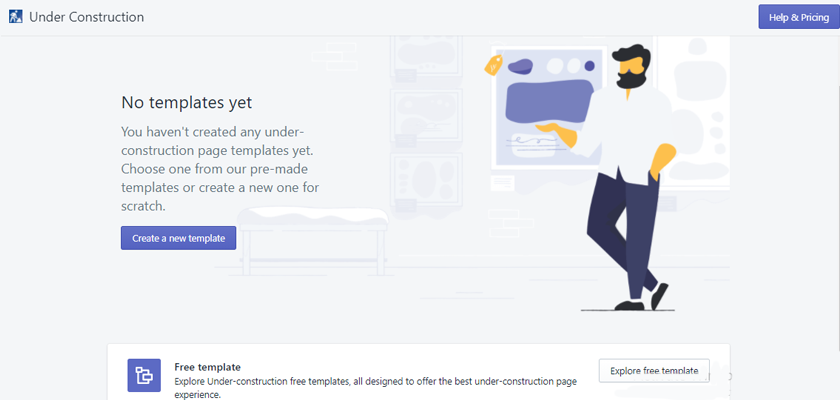
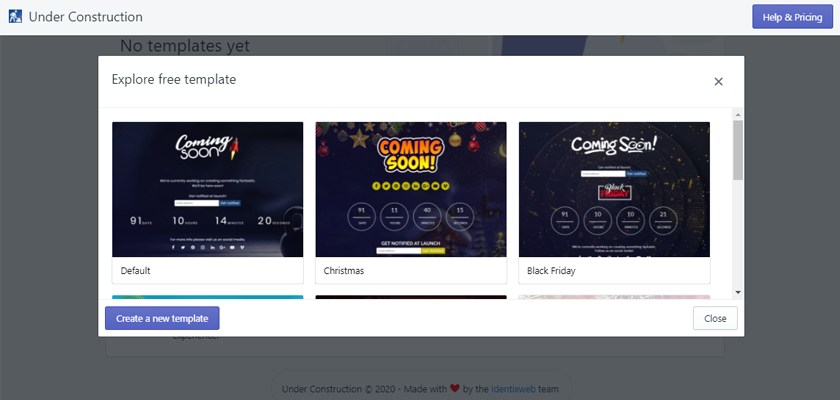
So if you are clicking on “Explore free template” you can explore free templates that you can use in your store or can customize according to your need. By selecting any of the templates you can see the details of the template. After selecting the template click on “Add”.
Customizing Under Construction Template
Now you will get a page of the selected template from where you can customize it as shown in the screenshot below.
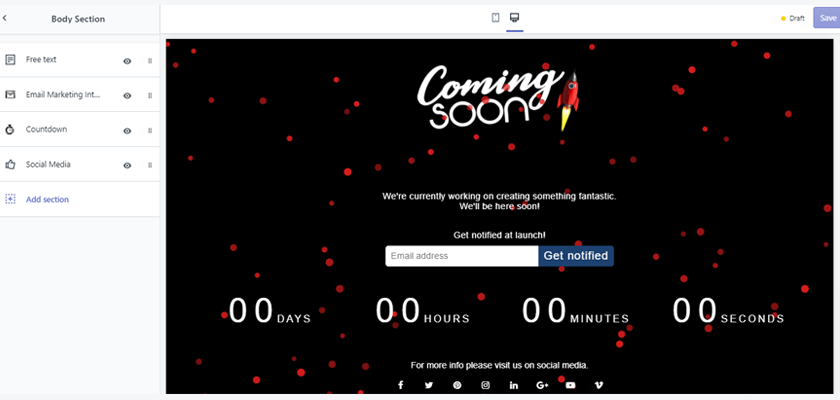
As seen in the screenshot above you can customize the template with the help of the given widgets. There are 2 main options that are settings and general settings. Each of these options may contain several sub options.
While clicking on Sections you will get 3 options. Let’s see them one by one.
Header
With this option, you can customize the header section like you can change or delete the logo image of the business, change the logo alignment, and edit the logo text.
Body Section
The body section contains a group of editable content like:
- Free text: Here you can write and edit the free text in the body section and if not needed you can delete this text section too.
- Email Marketing Integration: Here you can edit the email address-related section like the title, button, and email message settings.
- Countdown: You can edit the countdown portion like the countdown type, text color, etc.
- Social Media: In this section, you can edit the social media section by adding the social media links, icon style, free text.
Copyright
Copyright is the default which cannot be edited. You can only show/hide by clicking on the EYE icon.
Now next is the general settings in which there are again 3 sections i.e general, password, favicon icon, and search engine.
General
This option contains sections like font family, desktop background image/color, video background, mobile background image/color, snow effect settings, preloader settings, and additional CSS.
- Font family: You will get a dropdown list of the font family that you can select for the Under Construction content.
- Desktop background: You can select the background, image, and color that you want to show your Under Construction page in the desktop view.
- Mobile background: You can add a custom background image or add the background color which you want to show in the mobile view for your Under Construction page.
- Snow effect settings: With this option, you can set the snow effect.
- Preloader settings: Here you can change the preloader color and can select the preloader that you want.
- Additional CSS: Here you can add a custom CSS code for style and text or section.
Password
This section contains the below things:
- Settings: This option contains a popup box background, popup button background, and popup button text color.
- Show password field link text: Button/link to open password field.
- Title: You can add a title above the password field from here.
- Whitelist pages URL (Like “/cart”): You can add page titles here for access directly without Under Construction.
- Password: Password to access the website.
Favicon and Search Engine
This option contains a favicon image, search engine title, keywords, meta description, Google analytics settings, Google Analytics tracking code, and Facebook pixel.
Apart from the above options, you may find settings in which you will get the following options:
Third-party integration
From this option, you can connect your website with MailChimp and Klaviyo email marketing to collect users’ emails and send them some updates about the website news. Select the email marketing platform from the settings and collect users over the website, email marketing platform is either MailChimp or Klaviyo.
Auto-schedule under construction page
You can set it manually under construction, enable/disable it, and automatically setup based on your date and time schedule. Also, you can select the timezone and mode i.e manually or auto.
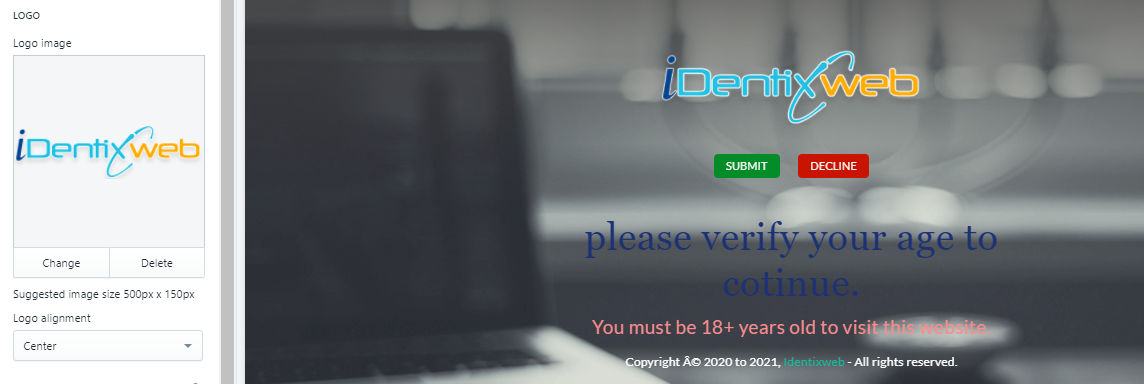
Customizing Age Verification Template
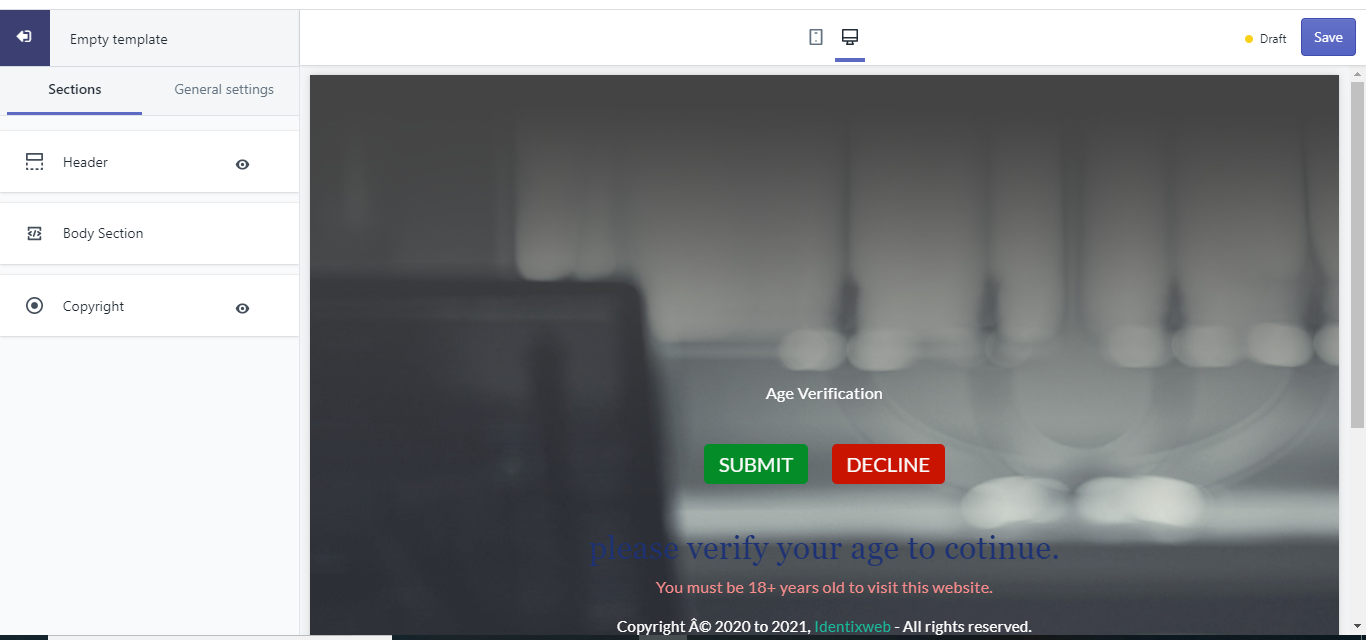
Once you click the Customize button, an empty age verification template displays on the screen. You can see the interface as shown below:
Here, there are two tabs available: (1) Sections and (2) General Settings.
Let’s explore the Section tab and learn more about editing age verification templates. As you can see, there are three sections Header, Body Section, and Copyright.
Header
Let’s customize the Header section.
LOGO
This allows you to set the Logo at the top of the page. You can add only one from both the logo image and the logo text.
- Logo Image: To add a logo image, click on the select image button and select the image if the image is already in the media list. If it’s unavailable, then simply upload the image and select it as your logo.
- Logo alignment: This allows you to set the logo alignment to either left or center or right.
- Logo Text: If you want to add text in place of the logo image, you can add it here. You can add it here with many formatting options.
Body Section
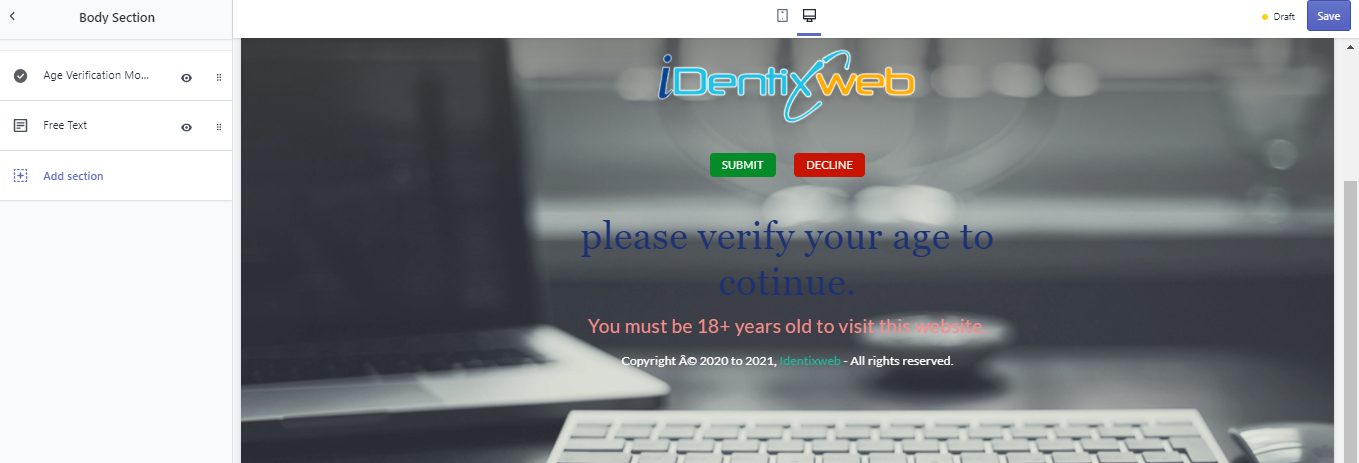
Once you enter this section, you can see the interface as shown below:
Age Verification Mode
- Age Limit: Here you can set the age in the number below which the individual cannot be entered in your site.
- Verification Mode: You can set the verification mode to either Date Of Birth or Self. The date of the birth option will allow your visitors to enter their date of birth for age verification. The Date Option helps you to specify the format in which you want the user to enter their age. The Month (MM) and Day (DD) are optional. You can disable it for the user by clicking on it.
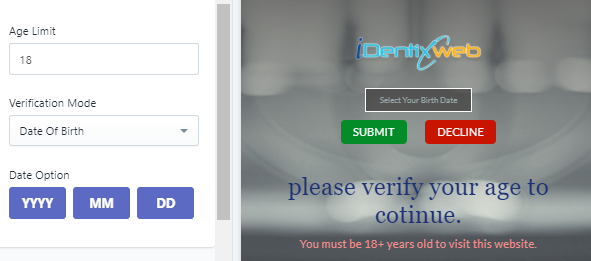
If the entered date is above the age limit you have set, the user will be allowed to visit your website, else he/she will not be able to visit the website.
By selecting the Self option in the verification mode, you can allow the users to self-verification. It will ask the user to confirm or decline if his/her age is above or the below age limit you’ve set.
- Submit Button Setting: Here you can set the Submit Button text and also format the button text size, color, and style. Not only this, but you can also change the button color.
- Decline Button Setting: Like the submit button, you can set the Decline Button text and also format the button text size, color, and style. You can change the button color as well.
- Message Setting: Here you can change the success message and the error message (that are already available) with the formatting options.
- Delete section: Simply click the button if you want to remove the age verification mode section from the template.
Free Text
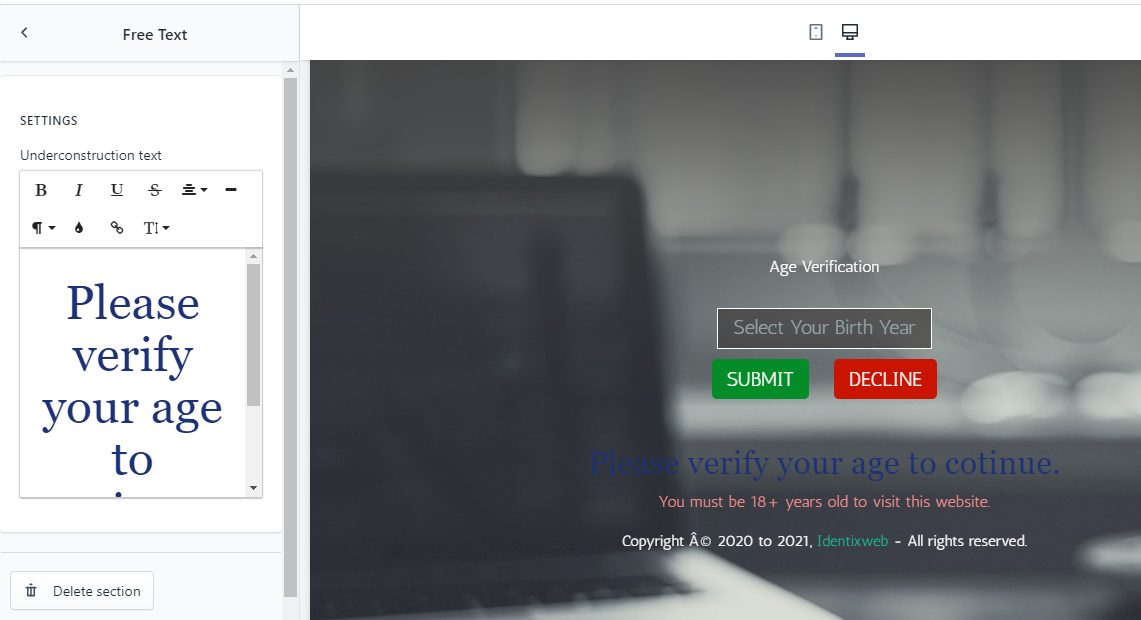
This option allows you to add text to your age verification page.
Add section
By clicking on this button, you can add Free text sections to your age verification template.
Copyright
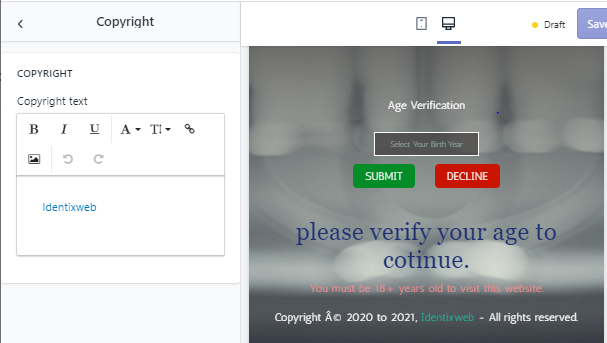
You can add the copyright text which will be visible in the footer of the age verification page. As you can see, text formatting is also available in the copyright text box.
General Settings
General
- Font Family: Here you can select any font from the given options.
- Desktop Background: There are two options available: (1) Background image will allow you to add image as the page background. (2) Background color will simply add a solid color to your page background.
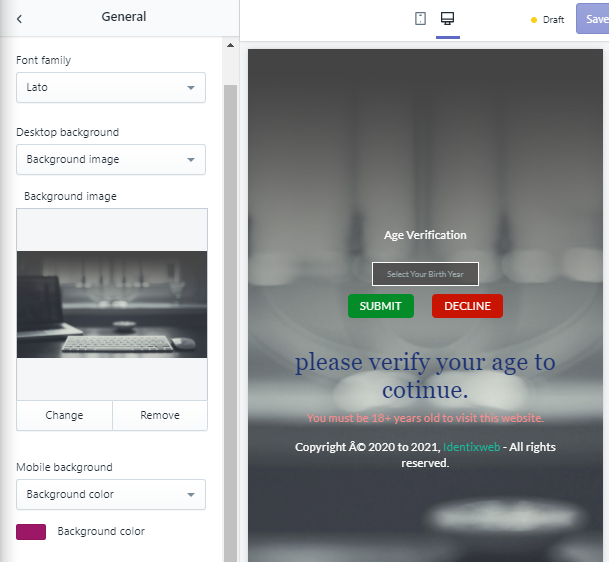
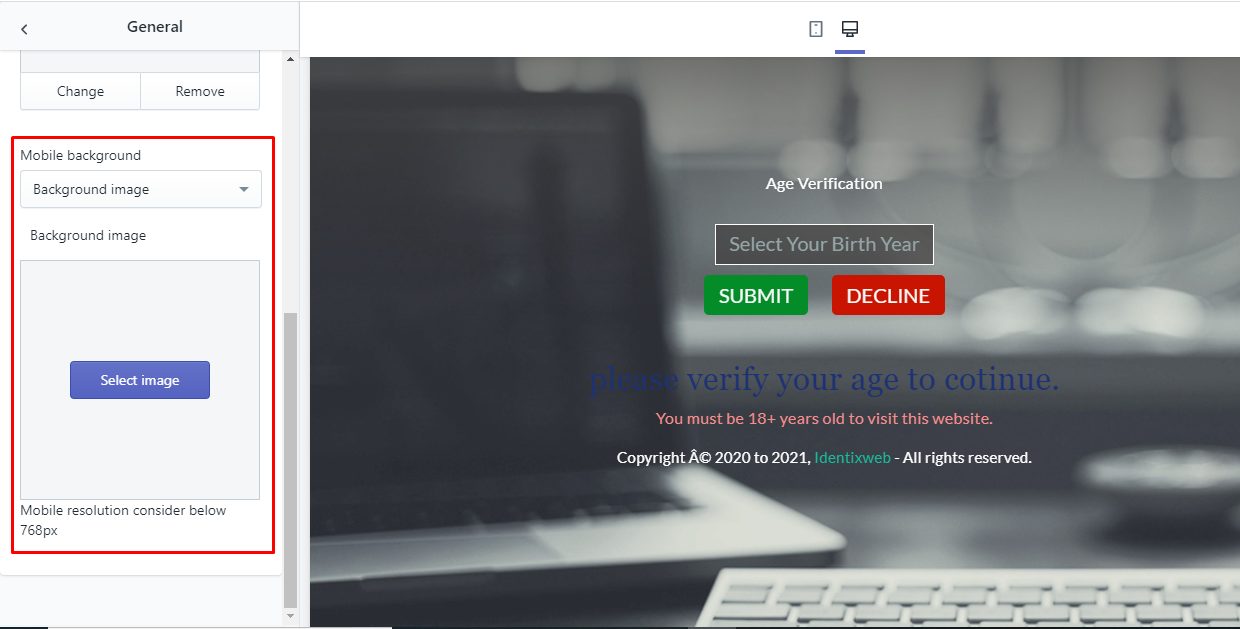
- Mobile Background: You can also customize the background of mobile using this option. If you want to keep the background the same as the desktop background, then select Desktop background.If you want to add a different background image in the mobile view, select the Background image option and upload the image you want. You can easily remove image background before uploading to maintain a clean design. You can also set the background color in the mobile background by selecting the background color option and changing the background color.
Favicon and Search engine
- Favicon image: Here you can set the favicon image that will be visible on the browser tab. Click on the Select favicon button and add the image by either uploading the image or selecting from the list.
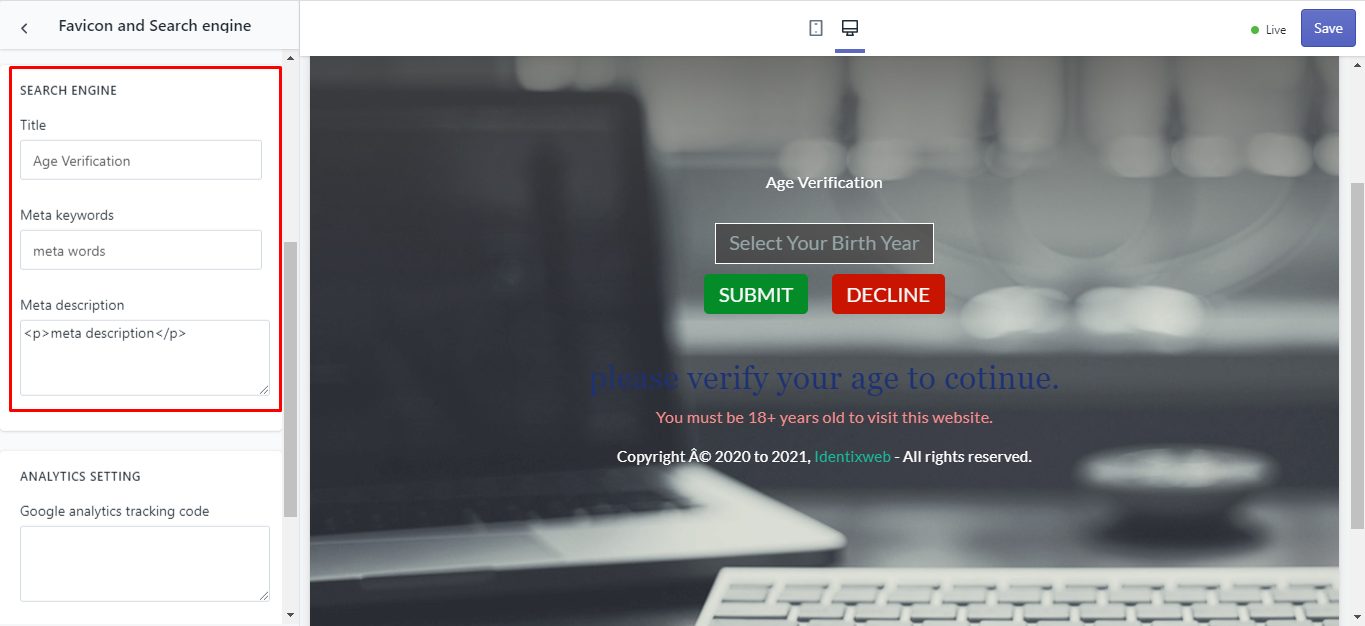
Search Engine
This section will help you to improve the search engine ranking of your age verification page.
- Title: You can add page title here.
- Meta keywords: Add the meta keywords of your age verification page here.
- Meta description: Here you can add a meta description of the page within the <p>...</p> tags.
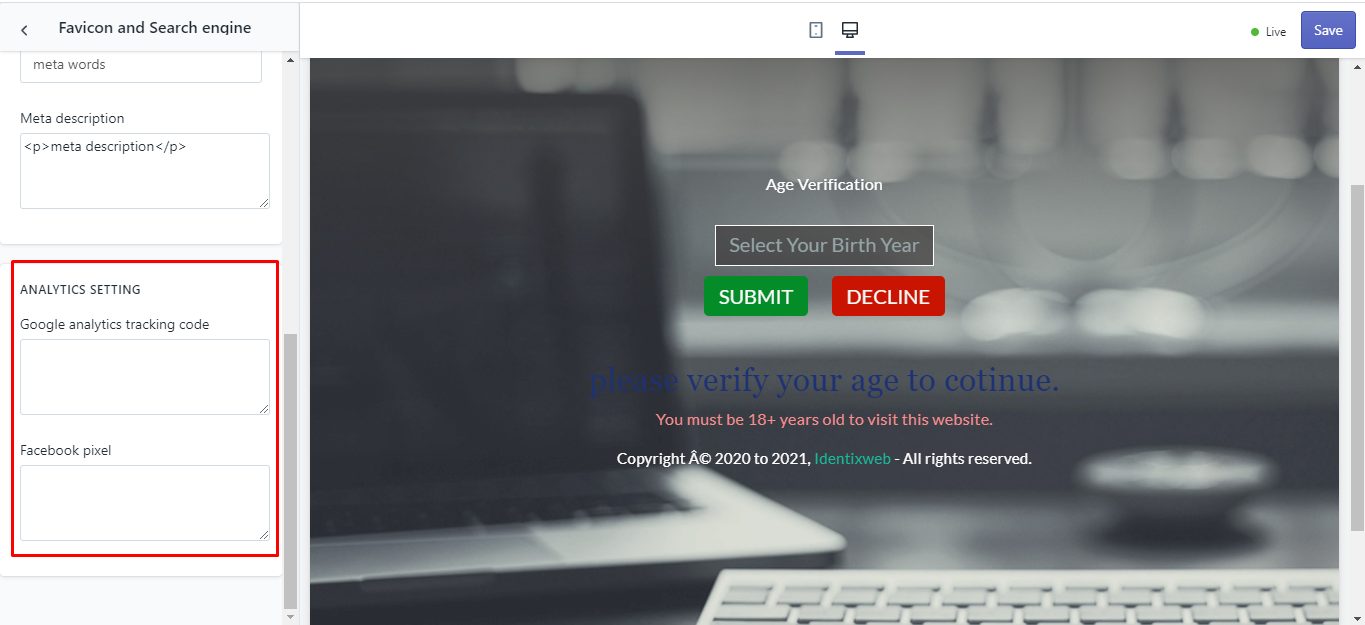
Analytics Setting
- Google Analytics tracking code: If you wish to analyze the traffic or the audience of your age verification page, then you can add the Google Analytics tracking code here.
- Facebook pixel: Here you can add Facebook pixel code which will help you to measure how effective your advertising campaigns are.
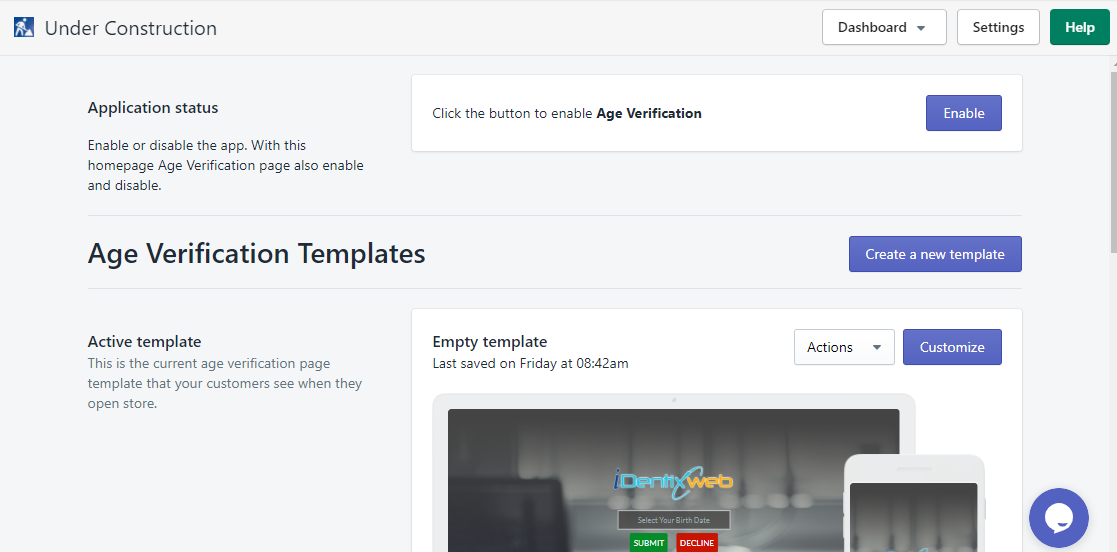
Make sure you have saved all the changes you have done in the template. Also, to make the age verification page visible on your website you have to activate the age verification by clicking on the Enable button.
I hope this guide might have helped you. For more detailed information and app functionality-related queries, you can refer to the FAQ of the app.


About the author
Sajini Annie John
Meet Sajini, a seasoned technical content writer with a passion for e-commerce and expertise in Shopify. She is committed to helping online businesses to thrive through the power of well-crafted content.