


Apart from the product quality, what customers are more concerned about when buying any product is the estimated delivery date and time of that product.
In this blog, we will learn how to display the estimated delivery date and time in your Shopify store.
You may have gone through the product reviews like:
“The product has been timely delivered”
“Excellent product, very good quality, and quick delivery”
“Good product with reliable delivery”
“Good service, don't have to wait too long for delivery”
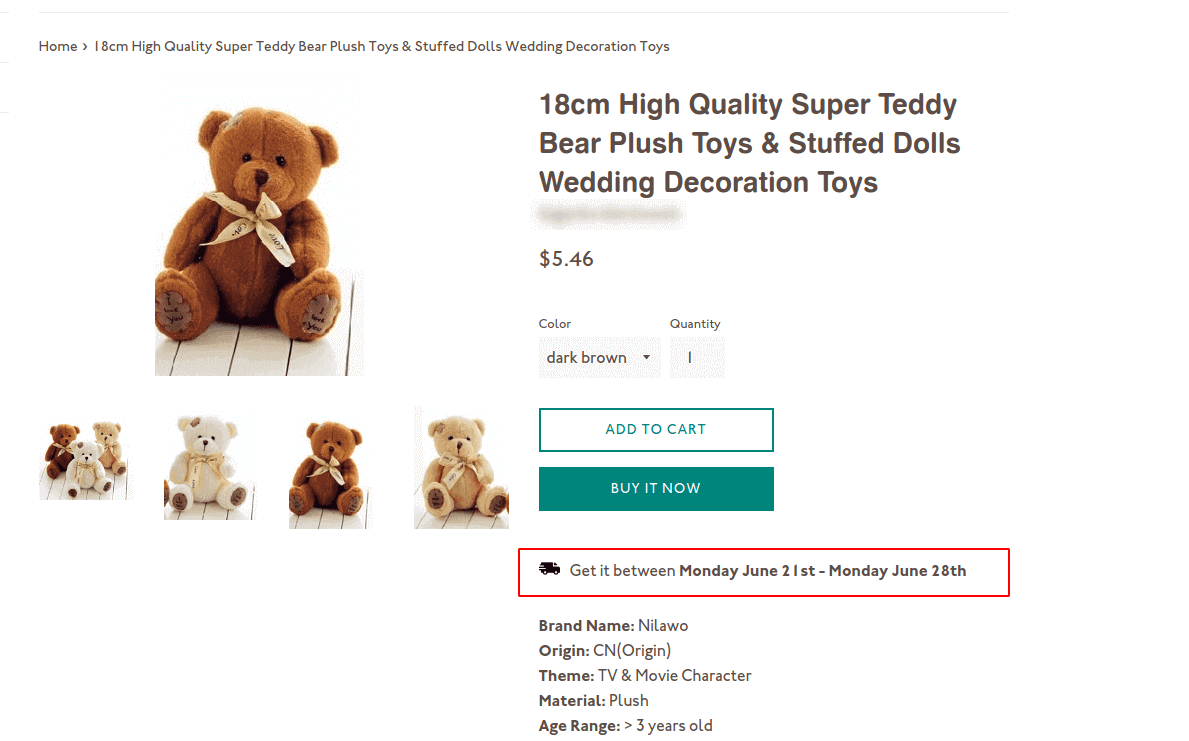
This is how an estimated time of arrival looks in your product page
When you commit to a more accurate delivery date and deliver the item or product on the same date or before, it proves that you care about your customers.
Benefits of Showing ETA in Shopify Store:
- Improve the customer experience
- Enhance the reputation of your store
- Increase your sales and store profit
- Raise in your customer’s faith
How to Add Estimated Delivery Date & Time in Shopify?
The best way to add an ETA in your Shopify store is by using apps like Stellar Delivery Date & Pickup.
You can use this app in two ways:
- Showing delivery date and time in the product page
- Letting the customer pick a convenient date and time with a calendar.
Showing estimated delivery date on the product pages
Step 1: Install the Stellar Delivery Date & Pickup App

Install Stellar from the Shopify app store.
Step 2: Go to Estimated Delivery Date section

Enable the application status. Then navigate to Settings > Estimated Delivery Date.
Step 3: Set the variabless
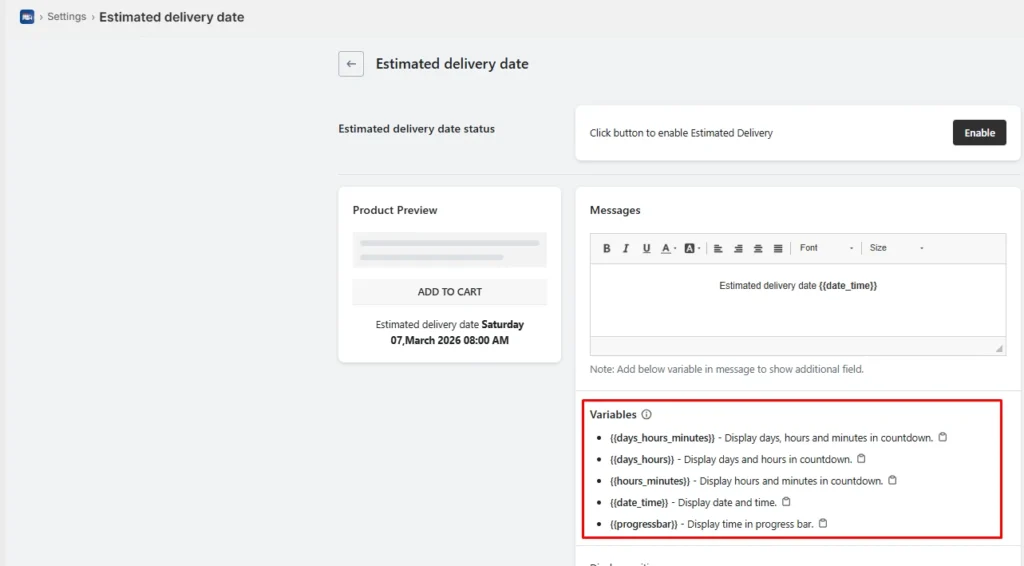
First, enable the estimated delivery features from the settings. Once enabled, you can use different variables to display days, hours, and minutes.
- {{days_hours_minutes}}
- {{days_hours}}
- {{hours_minutes}}
- {{date_time}}
- {{progressbar}}
You can also choose display position and customize countdown timer and progress bar in the settings.
Once you have set the date, hours, and minutes, save the changes and look at the product page of the item you have selected.
Allow customers to pick their convenient order delivery date and time

Stellar allows customers to schedule local delivery, store pickup, and shipping using a delivery date calendar, which improves convenience and customer satisfaction.
The calendar gives you more control over how orders are scheduled. Stellar supports features like:
- Date picker
- Time slots
- Cutoff times
- Block dates
- Preparation times
- Order limits
- Multi-location setup
Wrapping Up!
Showing a delivery date estimator on your Shopify store helps set clear expectations. It also builds trust faster and gives shoppers more confidence to complete their purchase.
When customers know when to expect their order, they feel more comfortable buying from you.
The best way to add this to the product page is to use apps like Stellar Delivery Date & Pickup. It gives you features like delivery date selection, time slots, cut-off times, holiday control, and post-purchase rescheduling.
This gives your store a smoother buying experience and helps you manage delivery operations with less confusion.
FAQs
1. How do I add an estimated delivery date & time on Shopify?
You can add it in two main ways: either show a delivery estimate automatically on the store, or use a delivery date app that lets shoppers choose their preferred date and time. For stores that need more control over delivery slots, pickup, blackout dates, cut-off times, or rescheduling, an app-based setup is usually the better option.
2. Which is the best estimated delivery date app on Shopify?
Stellar Delivery Date & Pickup is a strong choice because it does more than just show an ETA. It lets customers select delivery dates and time slots for shipping, local delivery, and store pickup. It also supports features like rescheduling and checkout-page display for Shopify Plus stores.
3. Which page should I add the ETA in my Shopify store?
The best place to start is the product page, because shoppers can see delivery expectations before they add the item to the cart.
")


About the author
Sagarika Das
Sagarika Das is a content writer with a passion for the ecommerce world. She crafts engaging, SEO-friendly content that helps online businesses connect with customers and grow.