


When it comes to running a successful e-commerce business, providing a seamless and visually appealing checkout experience is crucial. The checkout process is where customers make their final decision to purchase, and it's important to make this stage as visually appealing, user-friendly, and brand-consistent as possible. As a Shopify store owner, you have the power to customize the Shopify checkout style to align with your brand.
"By investing time and effort into optimizing the design, layout, and overall aesthetics of your checkout, you can greatly enhance user experience and increase conversions. This will give your customers the best shopping experience from your online store. "
In this blog, we will guide you through the process of Shopify checkout customization. By the end of this guide, you will have the knowledge and tools to transform your Shopify checkout page into a visually captivating and user-friendly experience that resonates with your target audience. So, let's dive in and discover how you can create a checkout process that not only reflects your brand's personality but also maximizes conversions and leaves a lasting impression on your customers.
Importance of Customizing Checkout Style
The Shopify checkout page is where customers make the final decision to complete their purchase. It’s a critical stage in the customer journey, and the design of your checkout can significantly impact their overall experience. By customizing the style of your checkout, you can create a consistent and engaging brand presence, build trust, and increase conversions.
How to Edit Checkout Page in Shopify
Add a background image for the banner
- Log in to your Shopify admin, and go to Settings > Checkout.
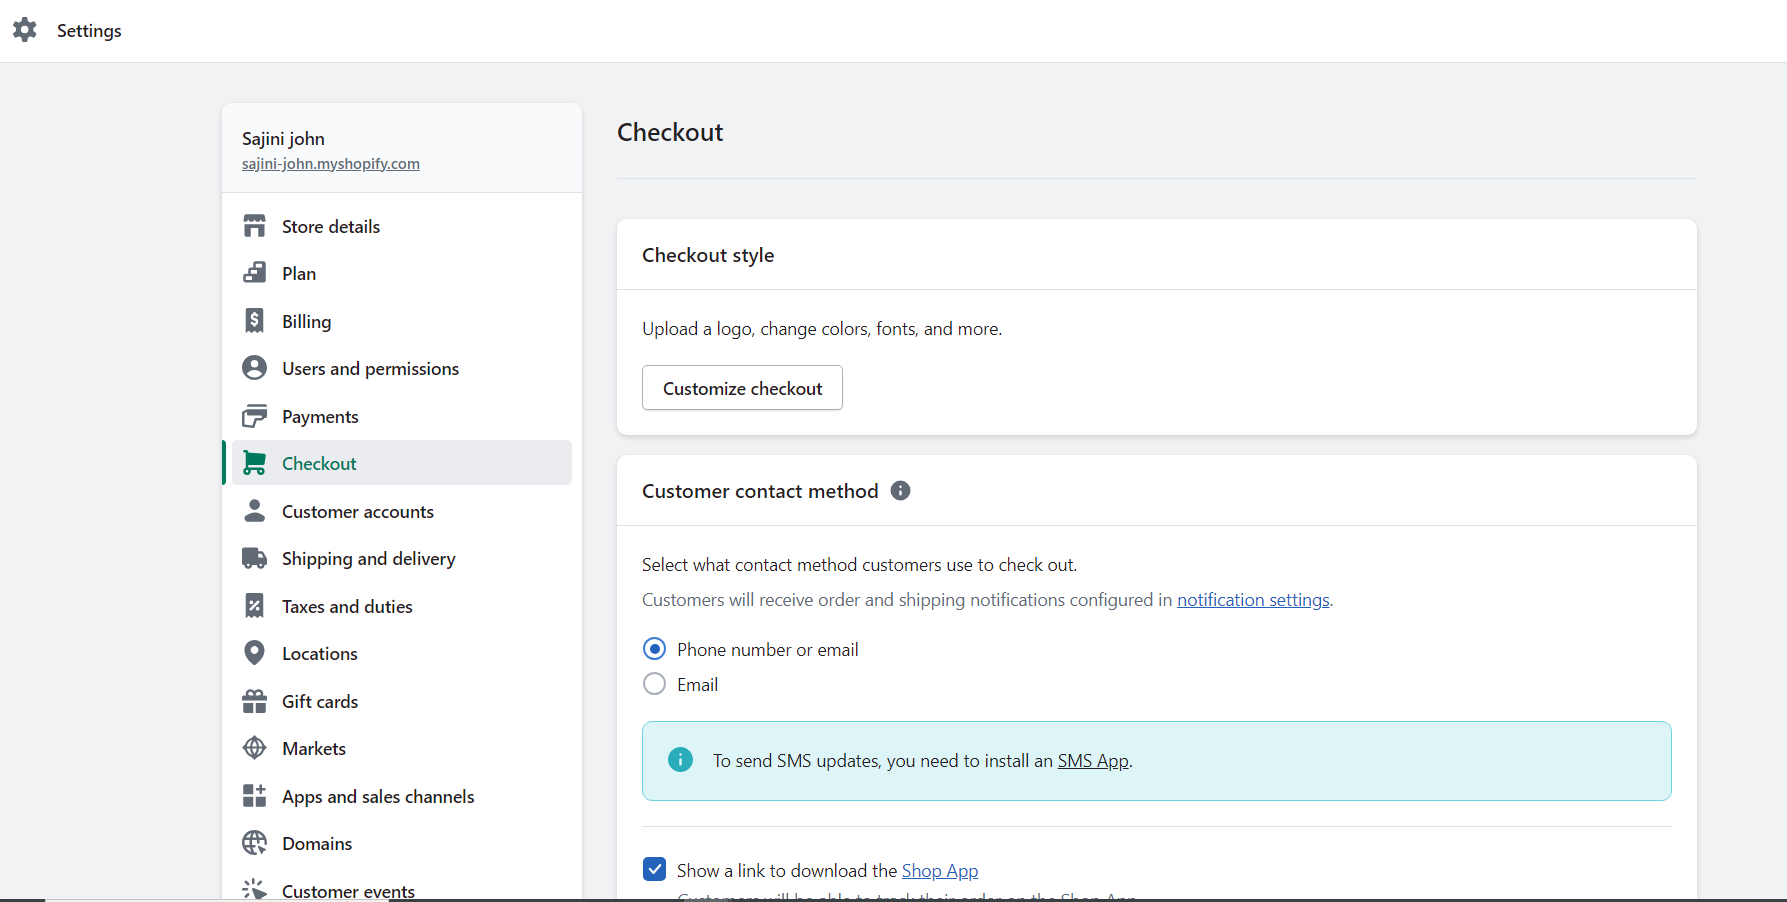
- From the Checkout style section, click customize checkout to open the theme editor.
- Now from the theme editor, to access the theme settings click on the wet paintbrush icon.
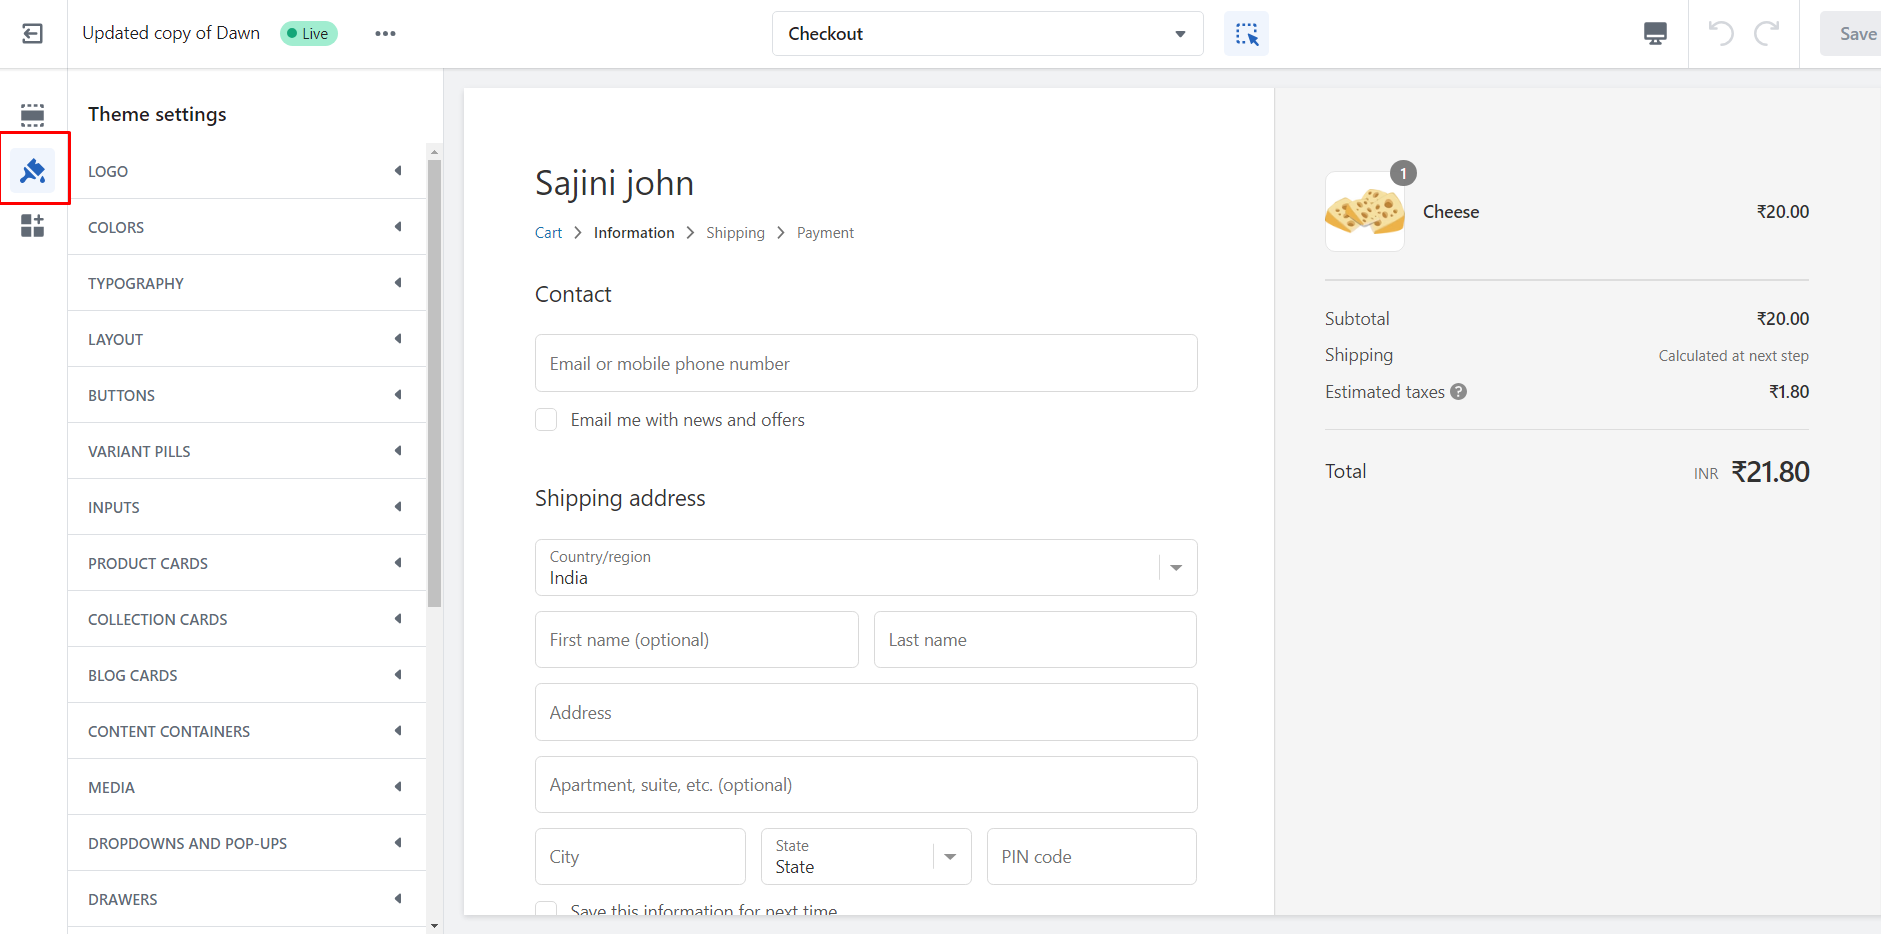
- Click on CHECKOUT.
- In the Banner section, click on Upload image or you can select any image which was already uploaded earlier to your library.
Hit the Save button.
Add a logo to your Shopify checkout page
- Open your Shopify admin and go to Settings > Checkout.
- In the Checkout style section, click on Customize checkout to open the theme editor.
- Now from the theme editor, to access the theme settings click on the wet paintbrush icon.
- Click on CHECKOUT.
- From the Logo section, click on Upload image, or select an image that you already uploaded to your library.
- Choose a position and size for the logo.
- Click on the Save button.
Add background image or color
You can add a background image or color to the main content area of your checkout page. You can choose a color scheme that reflects your brand identity and complements your overall website design. Remember you can’t add both image and color together.
- Open your Shopify admin and go to Settings > Checkout.
- To open the theme editor, go to the Checkout style section and click on Customize checkout.
- From the theme editor, click the wet paintbrush icon to access the Theme settings.
- Click CHECKOUT.
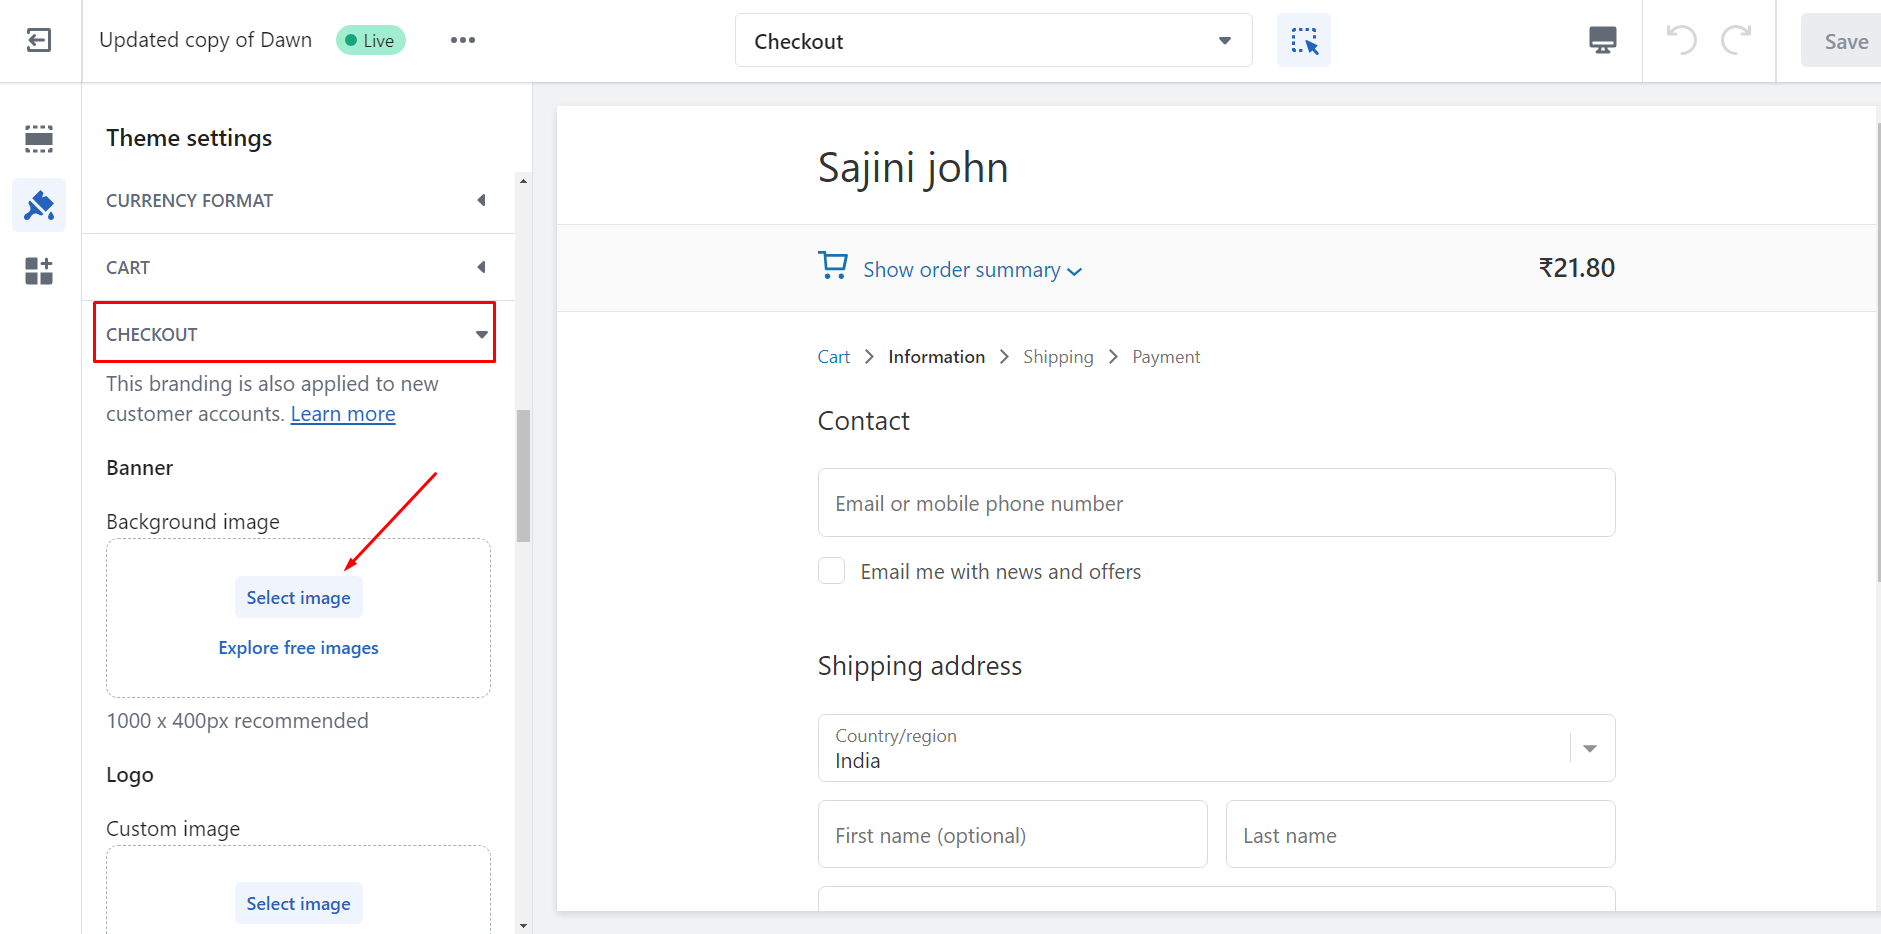
- To add color click on the box beside Background color to open a color picker.
- And if you want to add an image, then click on Upload image or you can select the image from the library if you have already added it.
- Lastly, click on Save.
Change the color of form fields
- Open your Shopify admin and go to Settings > Checkout.
- To open the theme editor, go to Checkout style section and click on Customize checkout.
- Now, to access the Theme settings click on the wet paintbrush icon.
- Click on CHECKOUT.
- From the main area section, click on the Form fields drop-down to select your desired color.
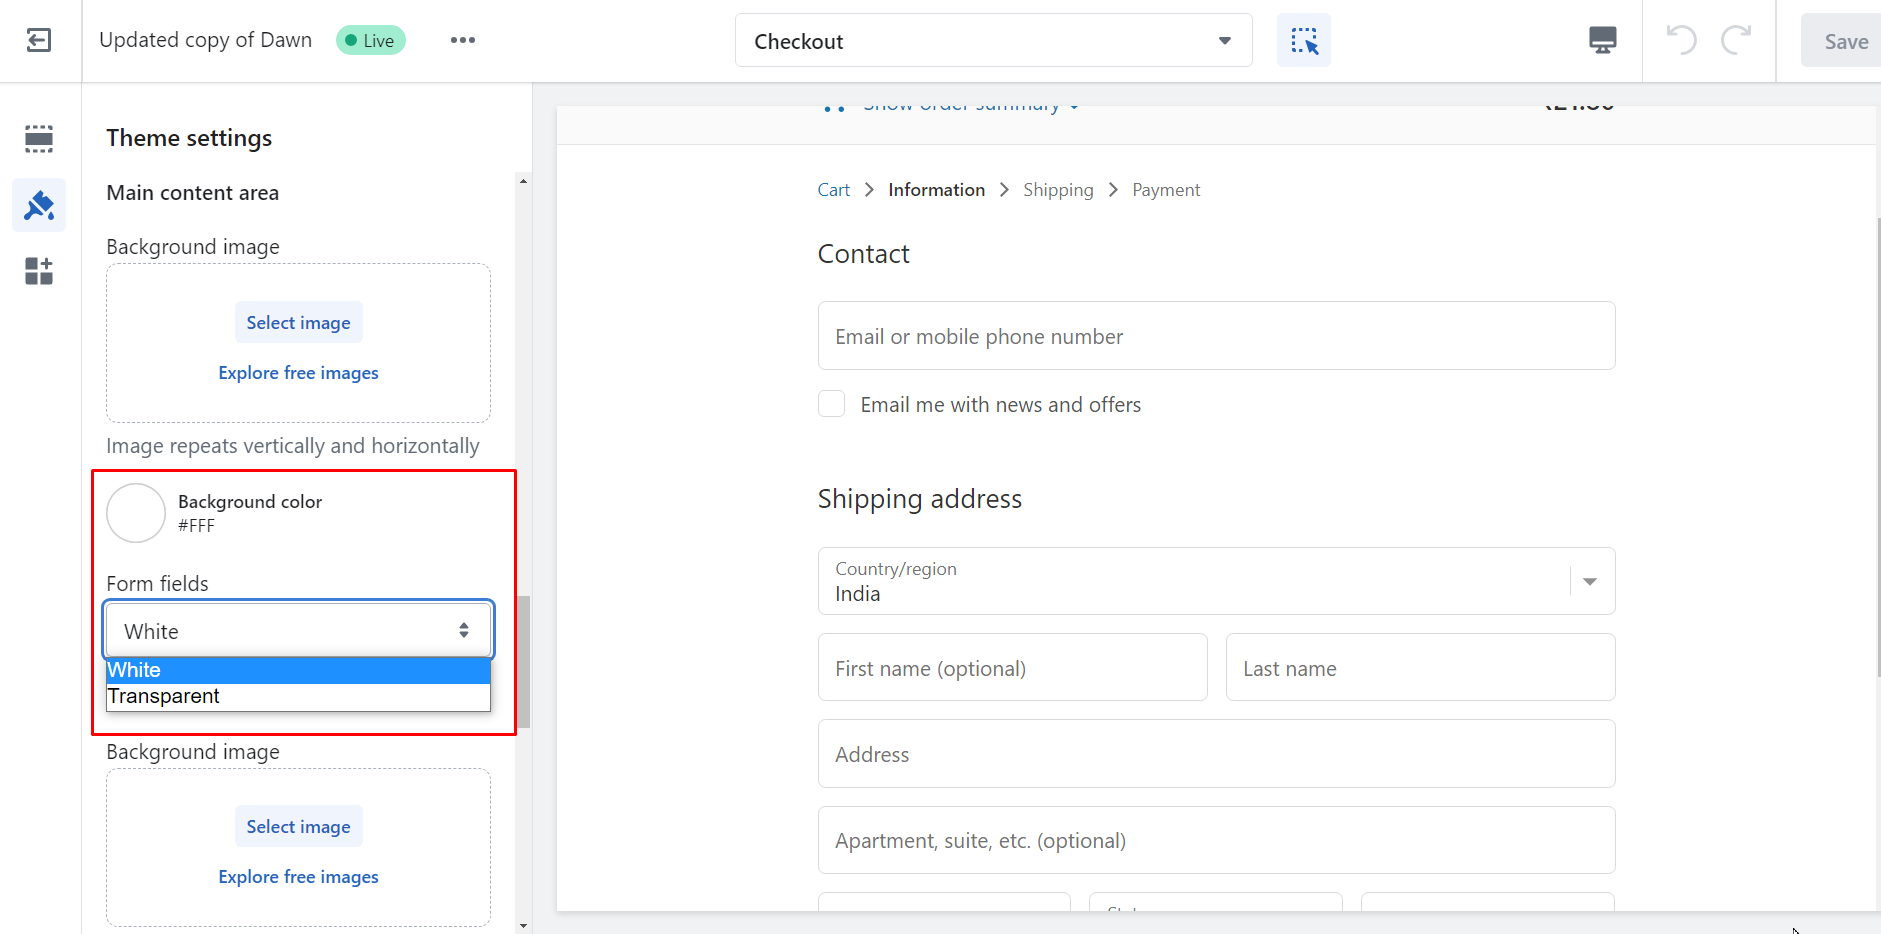
- Click on the Save button.
Add a background image or color to the order summary
When a customer clicks on Show order summary from the checkout page, a list of the products they are buying appears.
- Open your Shopify admin and go to Settings > Checkout.
- To open the theme editor, click on Customize checkout from the Checkout style section.
- To access the theme settings, click the wet paintbrush icon in the theme editor.
- Click CHECKOUT.
- To add color click on the box beside Background color to open a color picker.
- And if you want to add an image, then click on Upload image or you can select the image from the library if you have already added it.
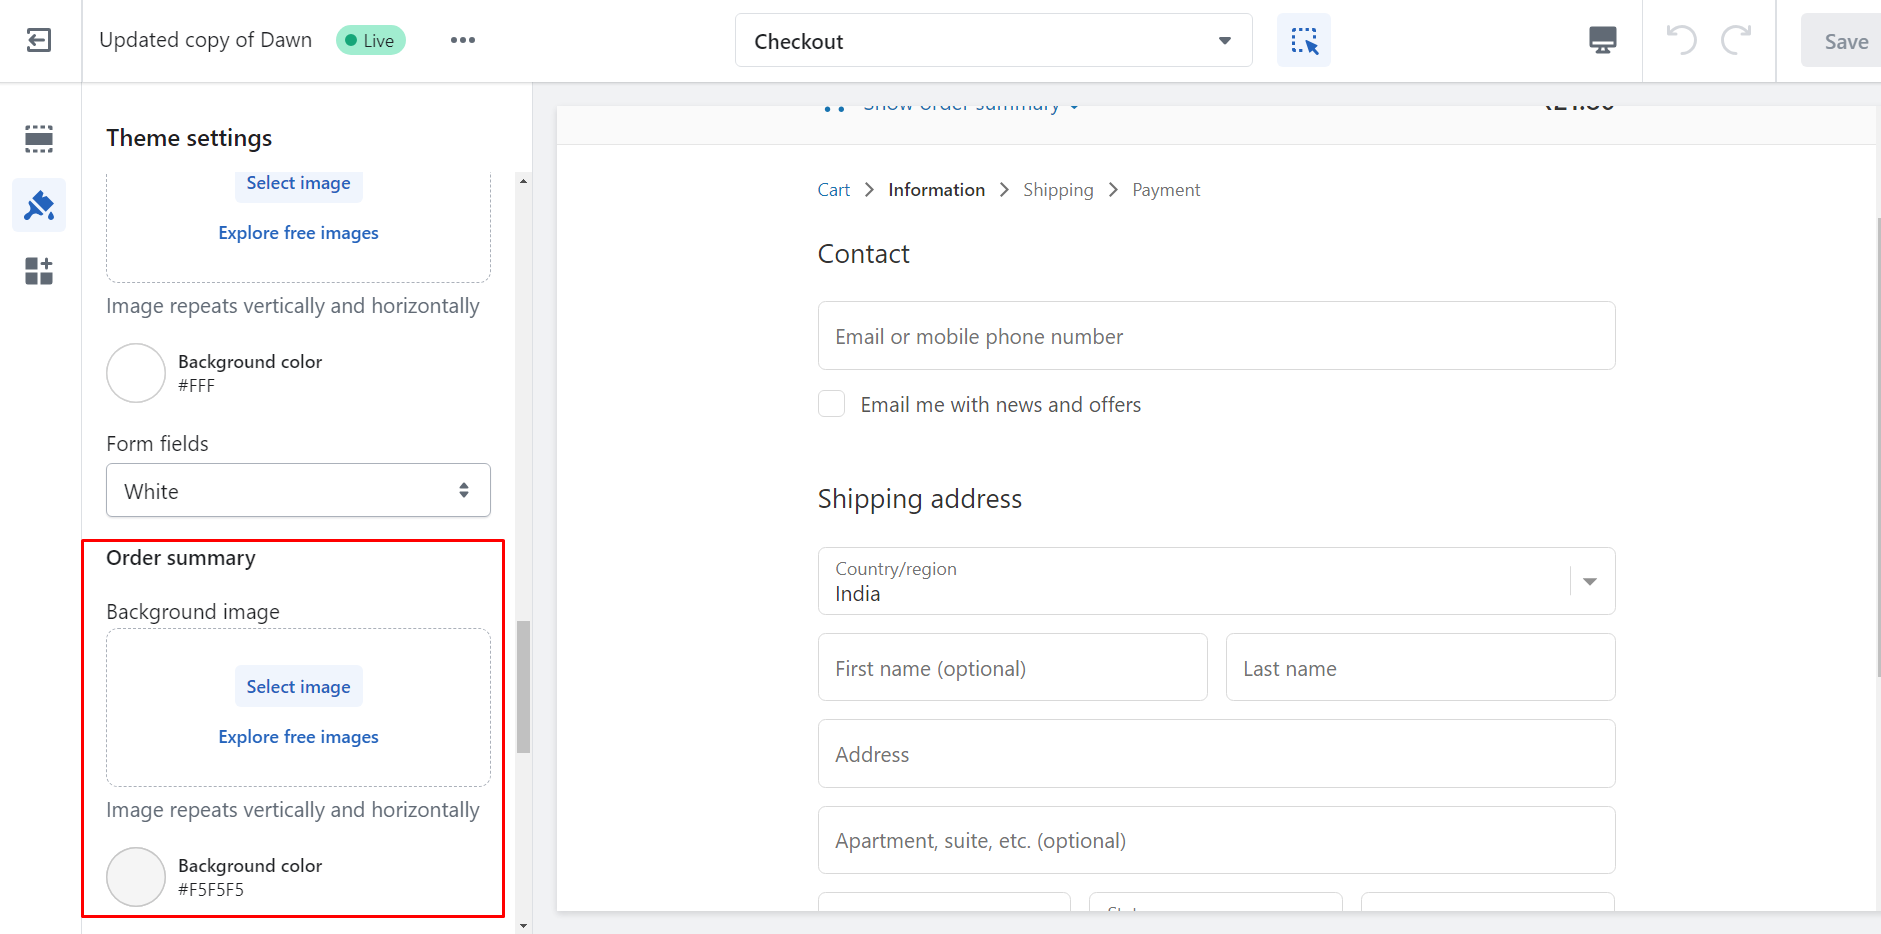
- Lastly, click on Save.
Change the fonts on the checkout page
- Open your Shopify admin and go to Settings > Checkout.
- To open the theme editor click Customize checkout from the Checkout style section.
- To access the theme settings, click the wet paintbrush icon from the theme editor.
- Click on CHECKOUT.
- From the Typography section, click the Headings drop-down or the Body drop-down, and then select a font.
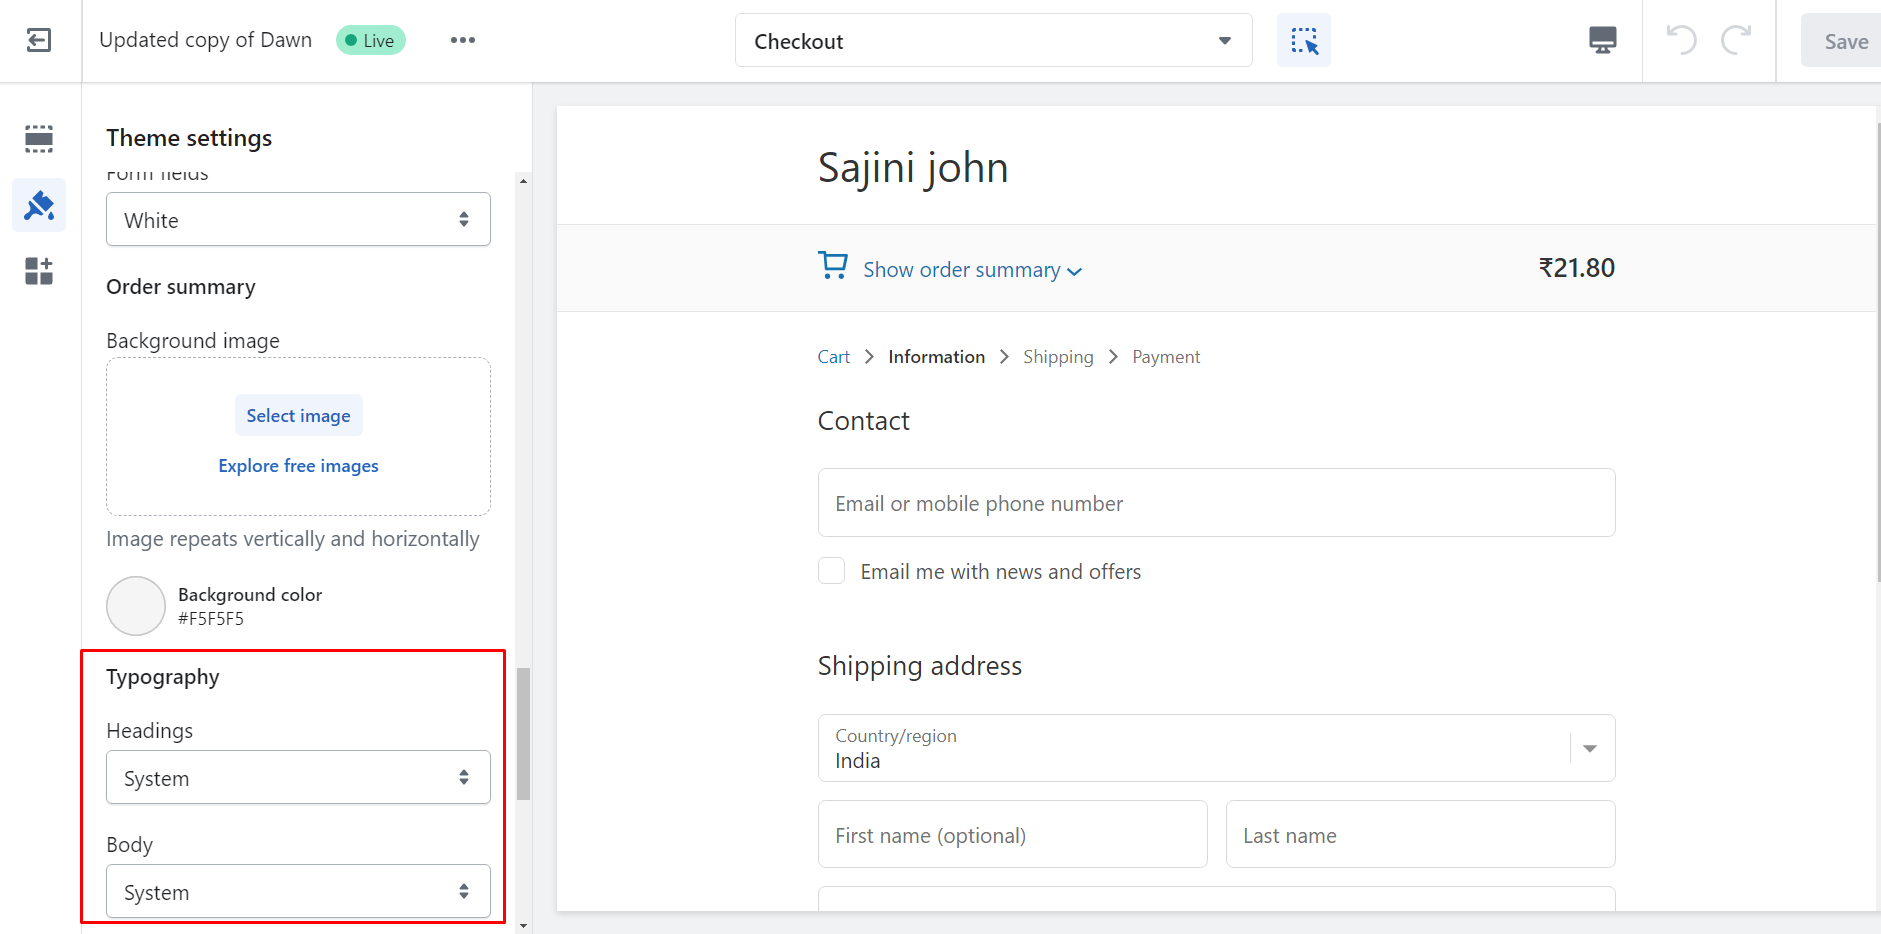
- Click the Save button.
Change button and accent colors
You can change the colors of buttons and accents on the checkout pages but make sure that all texts are visible against the backgrounds of the main content area and order summary.
Steps
- Go to your Shopify admin and click Settings > Checkout.
- To open the theme editor, click on the Customize checkout from the Checkout style section.
- To access the theme settings, click the wet paintbrush icon in the theme editor.
- Click CHECKOUT.
- From the Colors section, click the color box to pick a color from the color picker.
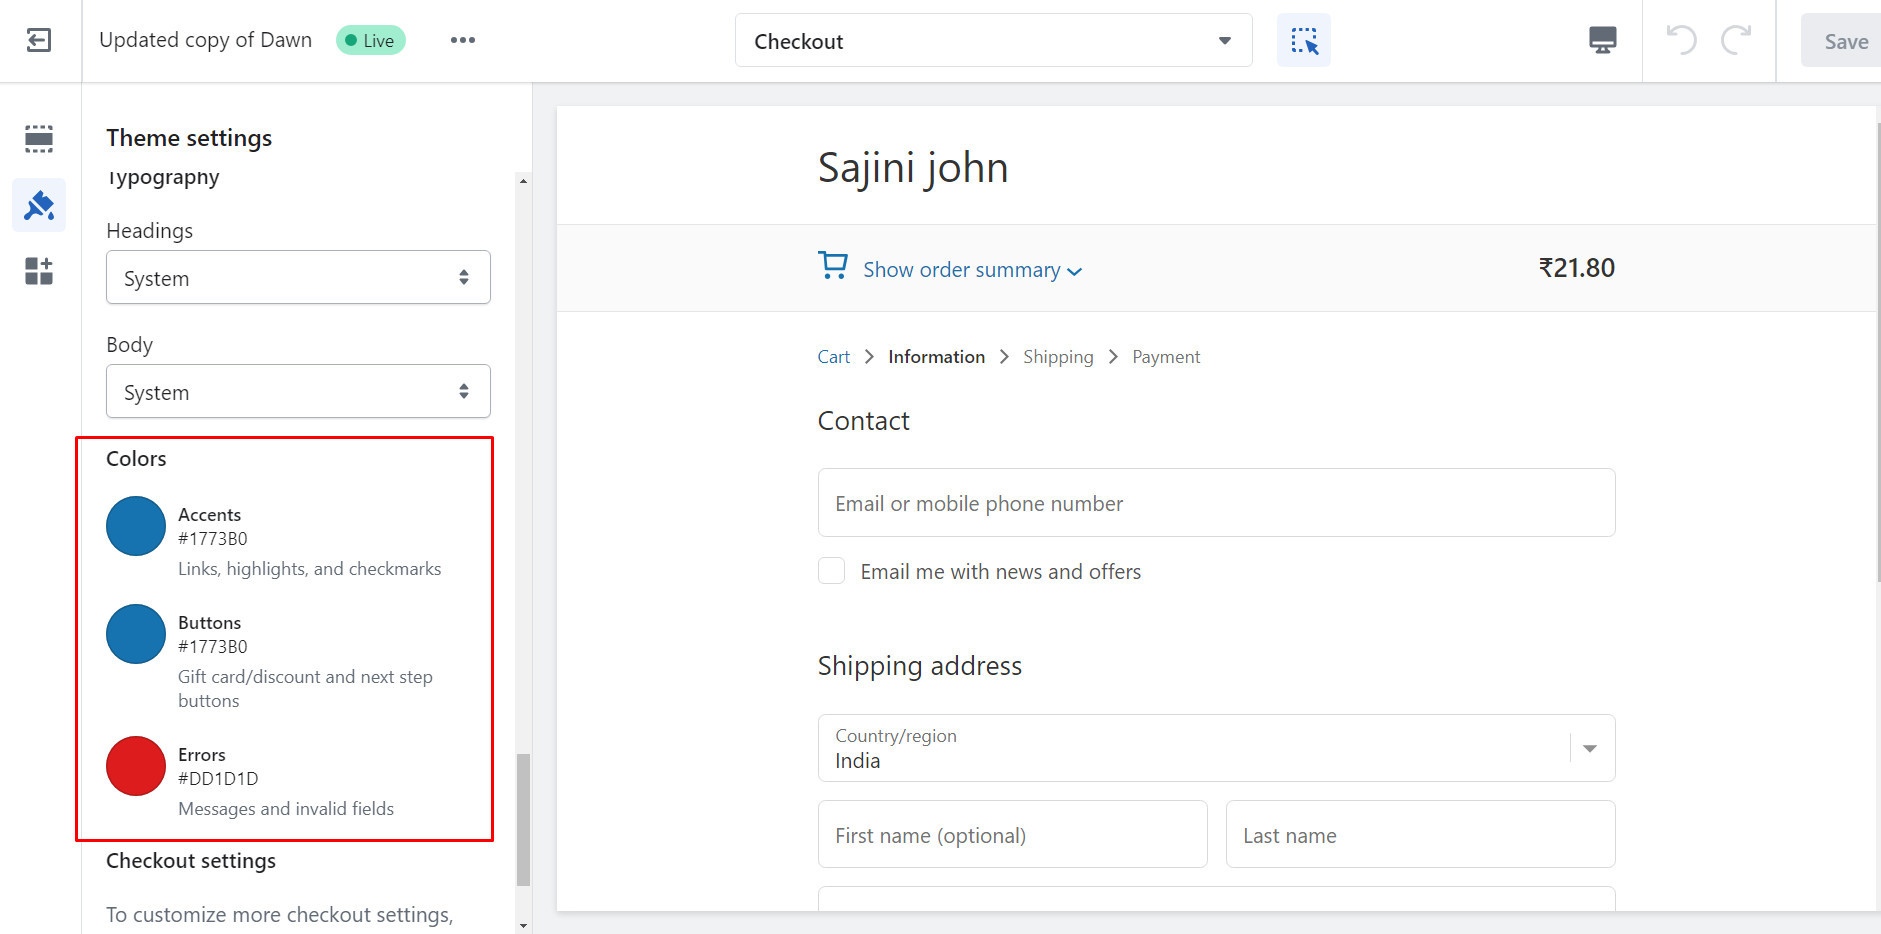
Click Save.
Conclusion
Customizing the style of checkout in your Shopify store is a powerful way to elevate your e-commerce business and create a memorable shopping experience for your customers. By following the step-by-step guide we've provided, you can transform your checkout process into a visually appealing and user-friendly stage that enhances conversions and builds brand trust.
Ensure that your checkout remains streamlined and free from unnecessary distractions, keeping the focus on completing the purchase smoothly. Testing your customized checkout across different devices and browsers is vital to guarantee a seamless experience for all users.
Ultimately, by investing time and effort into customizing the style of your checkout, you can make a lasting impression on your customers, improve conversions, and foster loyalty. So, go ahead and unleash your creativity to create a checkout experience that aligns with your brand and sets your Shopify store apart from the competition.


About the author
Sajini Annie John
Meet Sajini, a seasoned technical content writer with a passion for e-commerce and expertise in Shopify. She is committed to helping online businesses to thrive through the power of well-crafted content.